A hot oven, a preheated pizza stone or baking sheet and a well- floured wooden board for sliding the pizza dough into the oven, all help to produce an authentic, crisp-based pizza. To make a thicker, soft crust for a hearty pizza, use the entire 1 quantity pizza dough in the recipe below and spread it on to a baking sheet using greased hands. Try not to spread too much and keep the thickness of the dough to about 3/4th of an inch. If you want a thin crispy crust, just halve the 1 quantity pizza dough recipe and spread it a little thin about 1/4th of an inch or even less if possible. Load with your favorite toppings, also try not to overload with too many toppings. Keep it as minimal as possible.
Also the base for all the toppings, the chunky pizza sauce blends wonderfully with the other topping ingredients. You can even double the sauce recipe as it can be used along with spaghetti or noodles as well and it even stores well in an air tight container in the refrigerator for up to 3 to 4 days and even freezes well for up to a month.
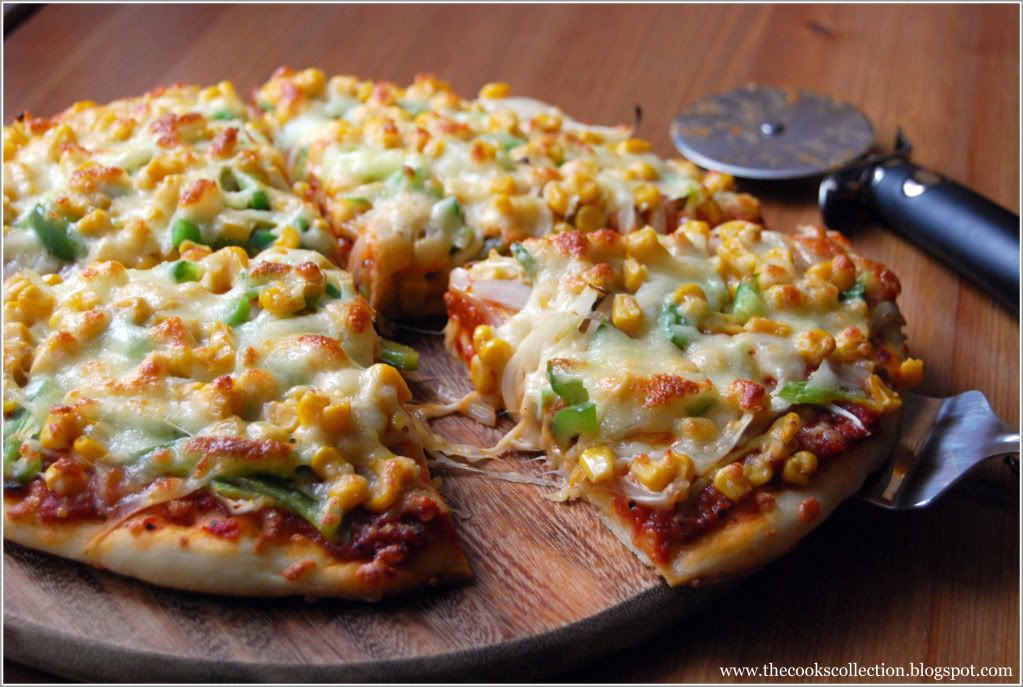
This is the best pizza recipe i have ever come across. Its got the perfect crust(i like a soft thick crust) just like the pan pizzas you get in pizza hut. And now lets go for the recipe..
Serves 2
Ingredients:
1 quantity basic pizza dough
For the pizza sauce:
400 g (13 oz) can chopped tomatoes or can use fresh tomatoes instead
1 garlic clove, crushed
2 tablespoons extra virgin olive oil, plus extra to drizzle
2 tablespoons chopped fresh basil or 1/2 tablespoon dried basil
1/2 teaspoon caster sugar
1/4 teaspoon dried red chilli flakes
1 teaspoons dried oregano
salt and pepper to taste
Other toppings: These are my favorite toppings but you can choose any of your favorites.
2 Capsicums, thinly sliced, any color of your choice
1 onion, thinly sliced
125 g canned sweet corn
150 g (5 oz) mozarella cheese, grated
Method:
Make the pizza dough
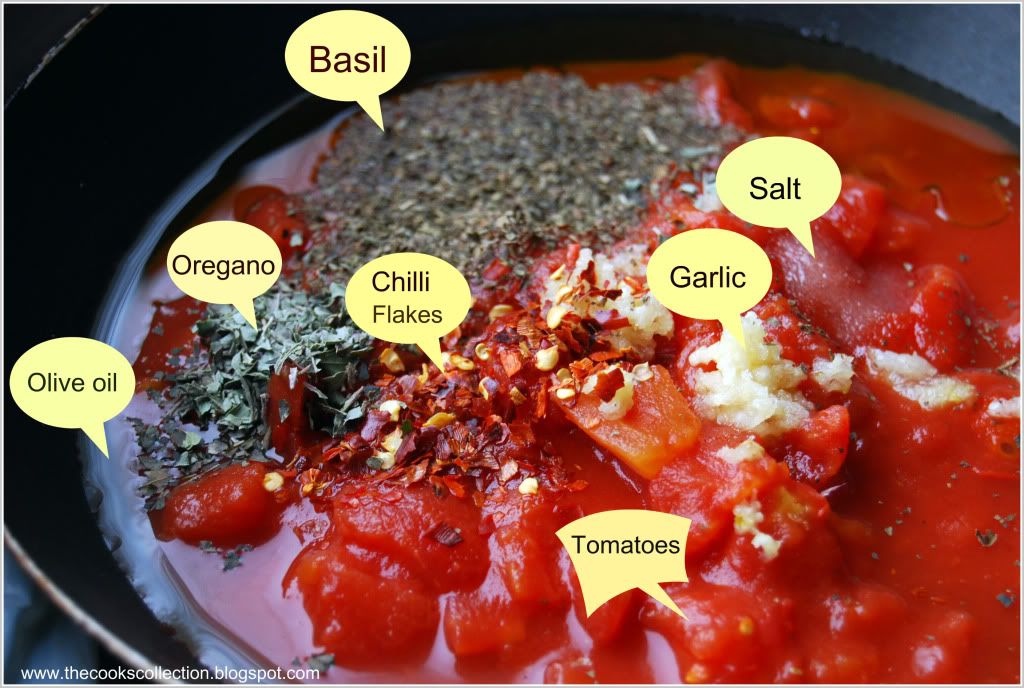
Meanwhile, make the pizza sauce. Put the tomatoes, garlic, oil, basil, sugar, chilli flakes and some salt and pepper in a saucepan. Bring to the boil and simmer gently for 25 - 30 minutes until thickened. Adjust the seasoning and transfer to a bowl to cool.
Turn out the risen dough on to a lightly floured surface. Divide the dough in half and roll out one piece thinly to a 30 cm (12 inch) round or make just one big pizza. Put it on a well-floured wooden board.
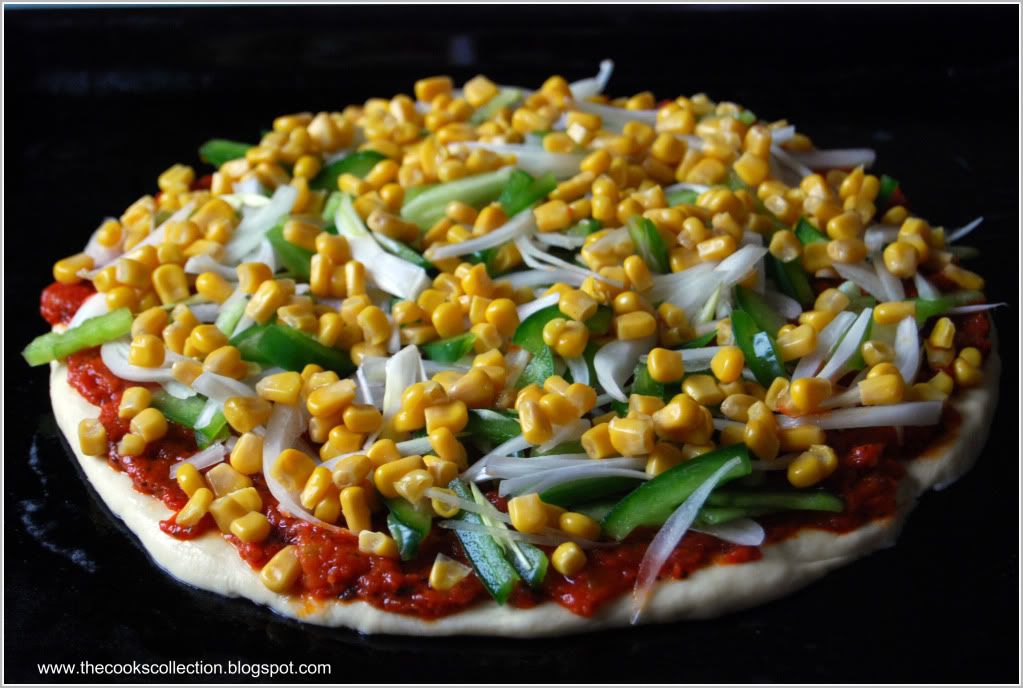
Top the dough with half the pizza sauce, capsicum, onion, corn and mozzarella. Drizzle with a little oil.
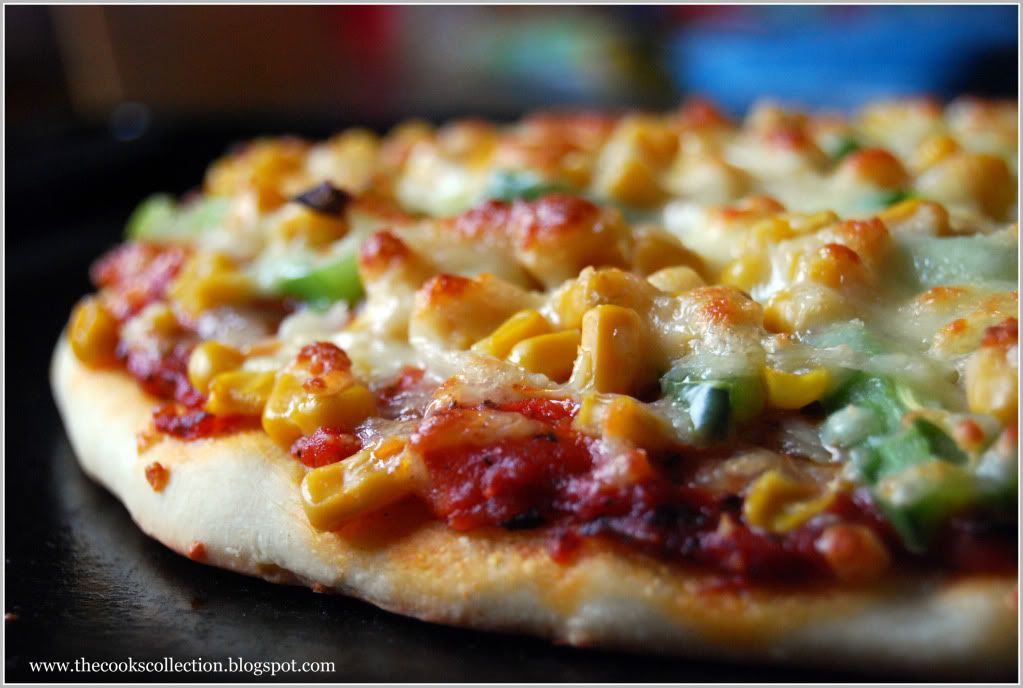
Carefully slide the pizza on to a preheated pizza stone or baking sheet and bake on the middle shelf of a preheated oven, at least 230 deg C (450 deg F), Gas mark 8 or hotter if possible, for 10 to 12 minutes until the base is crisp and the topping is bubbling and golden. Repeat to make a second pizza.
Serve hot. Enjoy!
Sunday, January 24, 2010
Vegetable Pizza


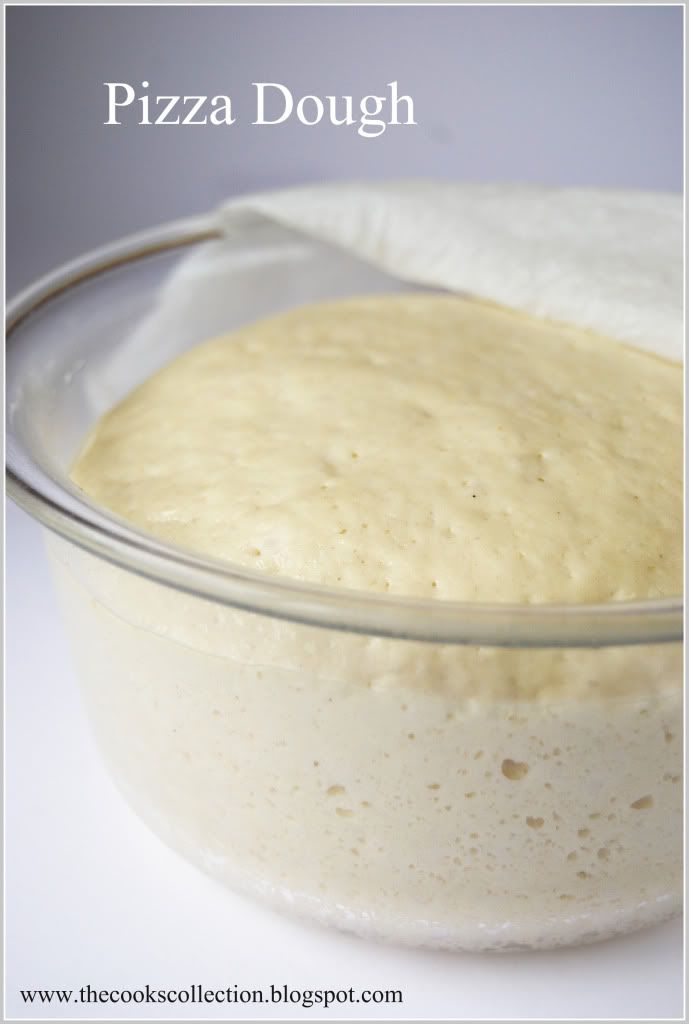
Basic pizza dough
This simple bread dough makes the perfect crust for pizzas, and this recipe is sufficient for 2 medium-sized pizzas.
Makes dough for 2 x 30 cm (12 inch) thin pizza bases or 1 (11 inch) thick pizza base
Ingredients
2 cups, 250 g (8oz) White bread flour or all purpose flour
1 teaspoon fast-acting yeast
1 teaspoon salt
1/2 teaspoon sugar
150 ml (1/4 pint) warm water
1 tablespoon extra virgin olive oil
Method
Sift the flour into the bowl of a food mixer and stir in the yeast, salt and sugar. Add the water and oil, set the mixer to low and work the ingredients until they just come together. Increase the speed and knead the dough for 8 - 10 minutes until smooth and elastic.
Shape the dough into a ball and put in a lightly oiled bowl. Cover with cling form and leave to rise in a warm place for 1 hour until the dough has doubled in size. Transfer the risen dough to a lightly floured surface and knock out the air. Use as required.
Note: To make the dough by hand sift the flour and salt into a bowl. Add the sugar then make a well in the center and add the frothed yeast, water and oil. Using your hands, gradually work the ingredients together to form a soft dough. Turn out the dough on to a lightly floured surface and knead for 8 - 10 minutes until it is smooth and elastic. Continue as above.
Wednesday, January 13, 2010
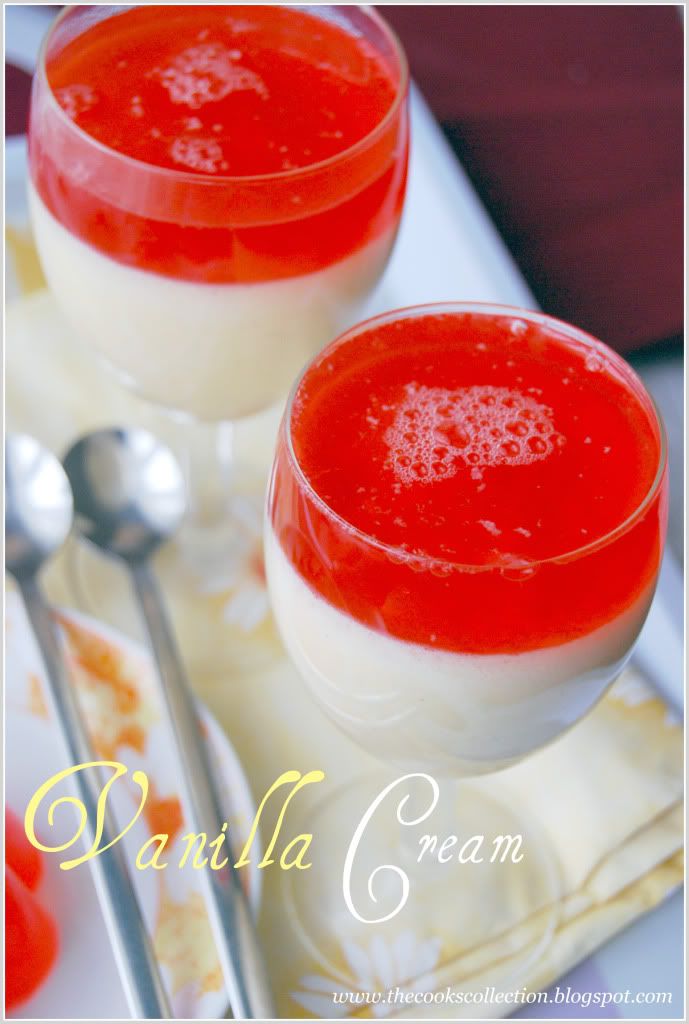
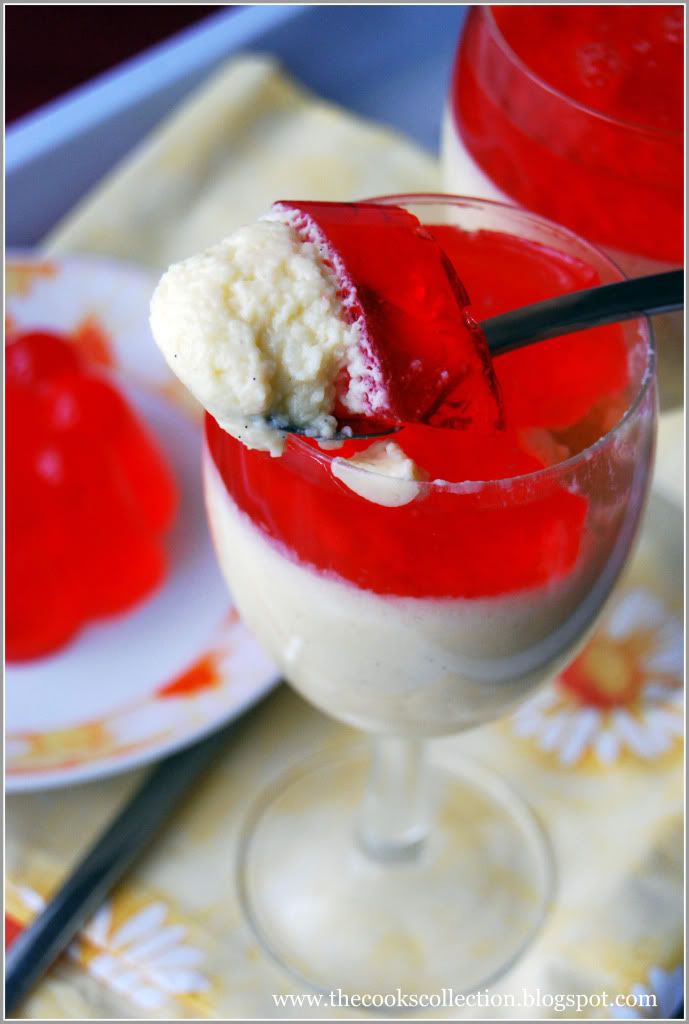
Bayerische Creme ( Bavarian cream with Raspberry jelly )
Bayerische Creme is a classic rich and creamy German dessert. It is basically vanilla cream, thickened with gelatine, whipped cream, and egg yolks. It is similar to flour or cornstarch thickened crème pâtissière but thickened with gelatin instead. It is lightened with whipped cream when on the edge of setting up, before being molded, for a true Bavarian cream is usually filled into a fluted mold chilled until firm, then turned out onto a serving plate.
Little about Vanilla : The name vanilla derives from the Spanish word "vainilla", little pod. Vanilla is an Evergreen annual creeper plant from genus of orchid plants which flourish in tropical and subtropical climate. Vanilla is the only type of Orchid which contributes to the human diet. The plant originally comes from Mexico and Central America. Today's areas of vanilla are situated in the tropical Island Madagascar, the Comoros, Reunion and other tropical areas along the Indian Ocean. From over one hundred Types of vanilla, only fifteen are interestingly aromatic and only three are suitable for the manufacture of vanilla. The special aroma of vanilla is formed from 35 other substances along with vanillin and glucose. This aroma is achieved only after a very intensive working process where a fermentation is achieved by drying and sweating. And finally, the pods contain a maximum of just 3 % of vanillin.
Vanilla is the second most expensive spice after saffron, due to the extensive labor required to grow the vanilla seed pods. Despite the expense, it is highly valued for its flavor, which author Frederic Rosengarten, Jr. described in The Book of Spices as "pure, spicy, and delicate" and its complex floral aroma depicted as a "peculiar bouquet." Despite its high cost, vanilla is widely used in both commercial and domestic baking, perfume manufacture and aromatherapy.
Now with the recipe..
Recipe Serves : 6
Ingredients Required:
500 ml milk
100 g sugar
6 egg yolks
1 vanilla pod
200 g whipping cream
4 gelatin sheets
1 packet raspberry jelly (optional)
Directions:
Soak the gelatin sheets in a bowl of cold water for 5 minutes and let it soften.
Cut the vanilla pod lengthwise and scrap the seeds using the sharp end of the knife. In a saucepan, combine milk and the pod along with the seeds and simmer them together over low-to-medium heat for about ten minutes. Don't allow to scald or boil!. Take the pan off the heat and let the vanilla get infused into the milk for a while.
Meanwhile, beat the yolks and sugar together using a hand mixer till pale and fluffy.
Slowly add warm vanilla-milk into the yolk mixture and combine using a whisk. Add this vanilla milk-yolk mixture back into the saucepan and simmer on low heat till the mixture thickens, and cook until the mixture is thick enough to coat the back of a spoon. Take it off the heat.
Now take the gelatin out of the cold water, squeeze and add it to the hot vanilla custard, whisking well to combine. And let this custard cool completely.
Beat the cream along with 3 tablespoons of sugar until stiff and fold this into the cooled custard. Pour this mixture into individual wine glasses and refrigerate until to set.
Use raspberry jelly according to the instructions on the packet and pour it on to the fully set vanilla cream. Or you can simply use any fruit purees on top of the cream.
The cream even tastes delicious with or without any fruits.
So enjoy this awesome dessert.
Tuesday, January 5, 2010
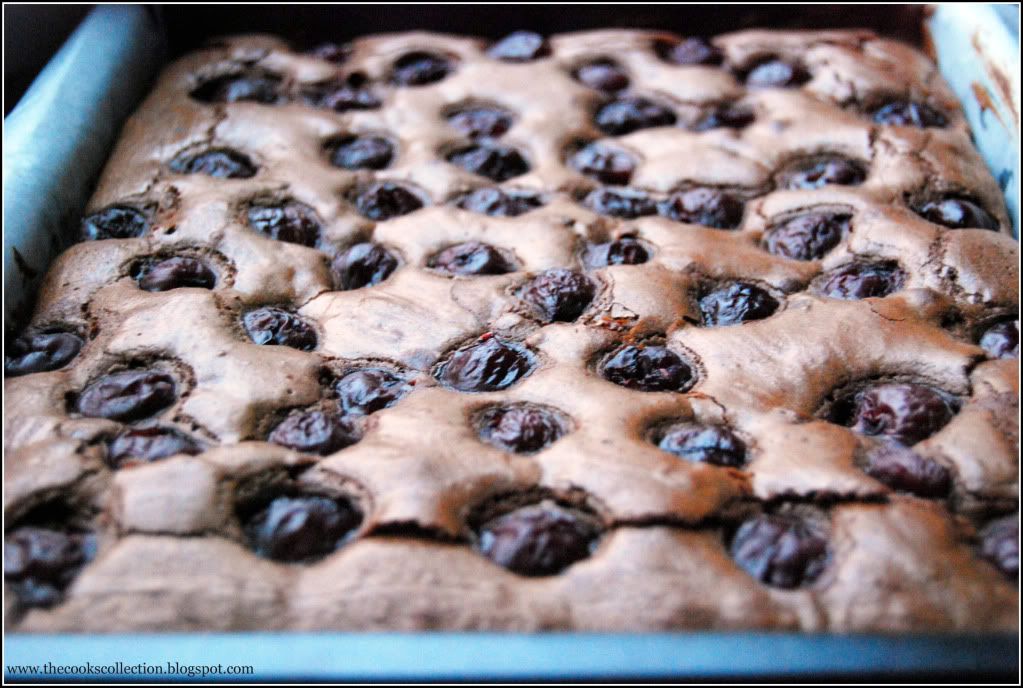
Black Forest Brownies
First and foremost, i wish all my readers a very happy and a prosperous new year 2010!! Hope you all had a great time spending long holidays with family and friends with loads of good food.. I hope to bring you all good food and some good photography this year..
My first post this year are one of my favorites "Brownies".
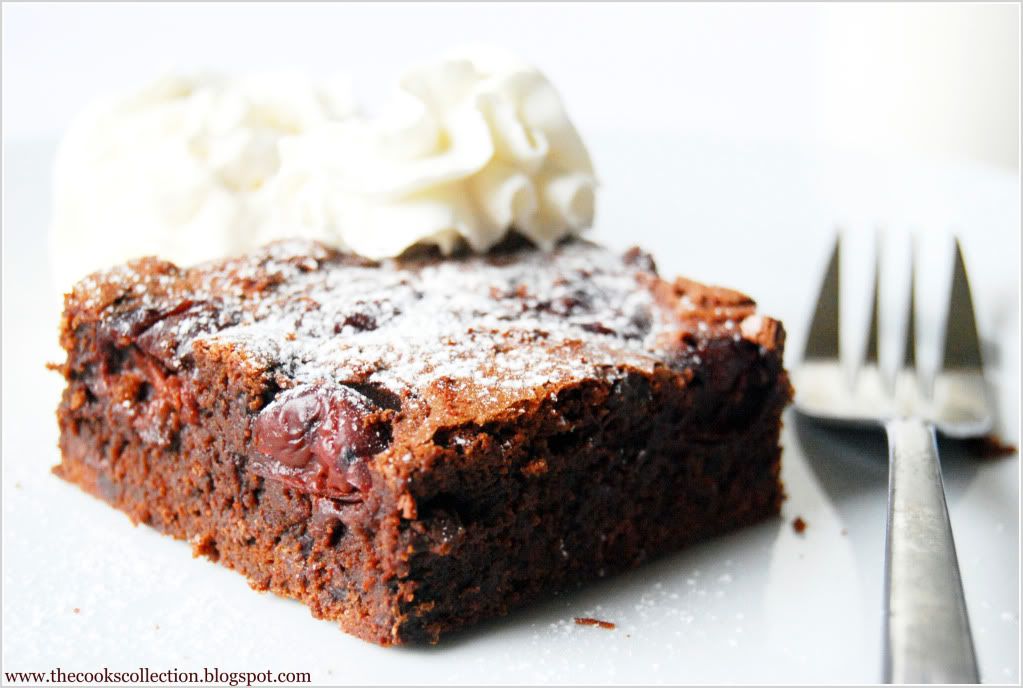
I remember i had a good large black forest cake last year in Black forest. It was filled with cherries and cream.. It was simply delicious. The black forest brownies here use the same ingredients that are used in the famous "black forest cake" , except that they turn fudgy and gooey instead of cakey and creamy. Sour cherries, kirsch and chocolate are a known tested and tried combination. But for this recipe they all combine together to give a wonderful tasting brownie, which serves as a great dessert for all the brownie lovers out there. To make this brownie alcohol free, you can add the canned cherry syrup instead of kirsch. This brownie tastes extra special with some sweetened whipped cream. So do try this yummy treat!!
Recipe adapted from Brownies, einfach schokoladig. This is a great book with wonderful Brownie and Blondie recipes. Simple, yet delicious recipes.
I got this book on my hubby's birthday. I know, i should be presenting him with something on his birthday but in turn i got this book from him that day. I'm so lucky.. ain't i?? I recommend this book for people who are crazy about trying different kinds of brownies and blondies.. Till now, i've tried 4 recipes from that book and not one have disappointed me. All were a hit! Its the best book of brownies i've got. And yes, fyi, its a German book.
Recipe gives 12 big or 24 small brownies.
Ingredients:
225 g milk chocolate, chopped (Use dark chocolate, if you like more intense chocolate flavor)
125 g butter, cut into cubes
3 tbsp cream
3 eggs, large
225 g fine sugar
2 tbsp kirsch or syrup from the canned cherries
160 g all purpose flour
100 g dark chocolate, chopped, or 100 g chocolate chips
465 g canned or glass sour cherries, (drained weight 175 g)[Can add more, as per your taste]
powdered sugar to sprinkle
1 Brownie form (20 x 25 cm) greased and lined with a baking paper
Directions:
Preheat the oven to 180 deg C.
Combine milk chocolate, butter and cream in a small bowl and melt using a double boiler (place the bowl over another bowl with a simmering water). See that the bowl with the chocolate doesn't touch the water. Once everything melts together, take it out and let cool.
Beat the eggs in another bowl using a wooden spoon or a hand mixer until combined. Add in the sugar and kirsch and beat together until the mixture thickens a little bit.
Add in the melted chocolate-butter mixture.
Add flour in small batches and combine with a wooden spoon. Add the chocolate chips or chopped chocolate. Combine well.
Spread the batter evenly into the prepared pan and place the cherries on the batter evenly.
Cut the brownie into 12 equal portions.
Serve the brownies with some powdered sugar sprinkled on it.
Storage: The brownie stays well in an air tight container at room temperature for up to 4 days.