Monday, September 27, 2010
Daring Bakers Challenge - Sugar Cookies
The September 2010 Daring Bakers’ challenge was hosted by Mandy of “What the Fruitcake?!” Mandy challenged everyone to make Decorated Sugar Cookies based on recipes from Peggy Porschen and The Joy of Baking.

Preparation Time
30 minutes: Making dough & rolling
1 hour min: Refrigeration
8-15 minutes: Baking per tray depending on size of cookies
Equipment Required
- Parchment paper
- Rolling pin
- 5mm guide sticks (optional)
- Cookie cutters or sharp knife
- Baking trays
- Wire cooling rack
- Spatulas
- Mixing bowls
- Measuring cups/spoons or weighing scale
- Sieve
- Icing bags / Parchment Cones
- Sizes 1 to 5 plain icing tips (2 and 4 being the most common to use)
- Star icing tips (optional)
- Couplers (optional)
- Toothpicks
- Elastic bands
Basic Sugar Cookies:
Makes Approximately 36x 10cm / 4" Cookies
200g / 7oz / ½ cup + 6 Tbsp Unsalted Butter, at room temperature
400g / 14oz / 3 cups + 3 Tbsp All Purpose / Plain Flour
200g / 7oz / 1 cup Caster Sugar / Superfine Sugar
1 Large Egg, lightly beaten
5ml / 1 tsp Vanilla Extract / Or seeds from 1 vanilla bean
Directions
• Cream together the butter, sugar and any flavourings you’re using. Beat until just becoming
creamy in texture.
• Tip: Don’t over mix otherwise you’ll incorporate too much air and the cookies will spread during
baking, losing their shape.
• Beat in the egg until well combined, make sure to scrape down the sides of the bowl.
Add the sifted flour and mix on low until a non sticky dough forms.
• Knead into a ball and divide into 2 or 3 pieces.
• Roll out each portion between parchment paper to a thickness of about 5mm/1/5 inch (0.2 inch)
• Refrigerate for a minimum of 30mins.
• Tip: Recipes commonly just wrap the whole ball of dough in clingwrap and then refrigerate it for an
hour or overnight, but by rolling the dough between parchment, this shortens the chilling time and
then it’s also been rolled out while still soft making it easier and quicker.
• Once chilled, peel off parchment and place dough on a lightly floured surface.
• Cut out shapes with cookie cutters or a sharp knife.
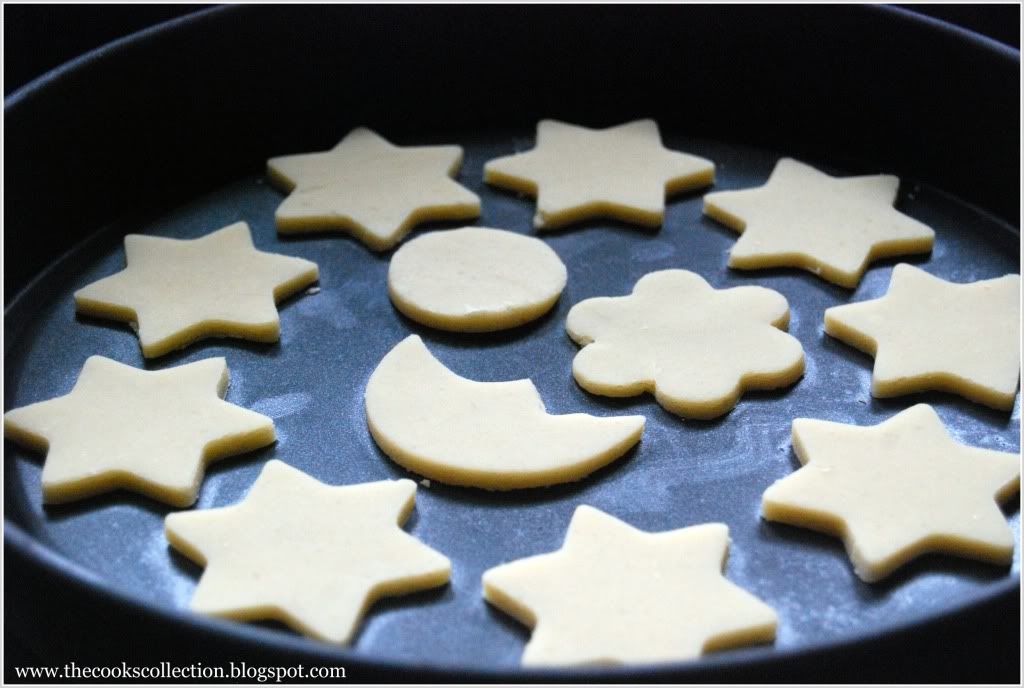
• Arrange shapes on parchment lined baking sheets and refrigerate for another 30mins to an hour.
• Tip: It’s very important you chill them again otherwise they’ll spread while baking.
• Re-roll scraps and follow the above process until all scraps are used up.
• Preheat oven to 180°C (160°C Fan Assisted) / 350°F / Gas Mark 4.
• Bake until golden around the edges, about 8-15mins depending on the size of the cookies.(I baked in a convection oven for 15 minutes on a non-stick baking pan)
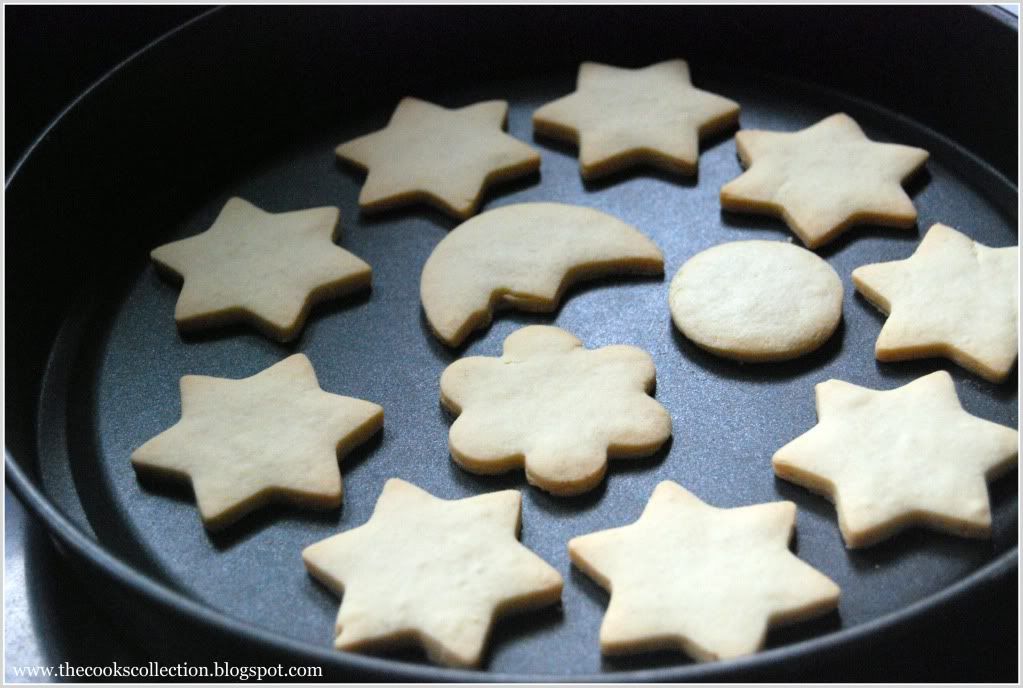
• Tip: Bake same sized cookies together otherwise mixing smaller with larger cookies could result in
some cookies being baked before others are done.
• Tip: Rotate baking sheets half way through baking if your oven bakes unevenly.
• Leave to cool on cooling racks.
• Once completely cooled, decorate as desired.
• Tip: If wrapped in tinfoil/cling wrap or kept in airtight containers in a cool place, un-decorated
cookies can last up to a month.
Royal Icing:
315g – 375g / 11oz – 13oz / 2½ - 3 cups Icing / Confectioner’s / Powdered Sugar, unsifted
2 Large Egg Whites
10ml / 2 tsp Lemon Juice
5ml / 1 tsp Almond Extract, optional
Directions:
• Beat egg whites with lemon juice until combined.
• Tip: It’s important that the bowls/spoons/spatulas and beaters you use are thoroughly cleaned and
grease free.
• Sift the icing sugar to remove lumps and add it to the egg whites.
• Tip: There are 2 amounts of icing sugar listed, the lesser amount is good for a flooding consistency, and the larger amount is for outlining, but you can add even more for a much thicker consistency good for writing. If you add too much icing sugar or would like to make a thinner consistency, add very small amounts of water, a few drops at a time, until you reach the consistency you need.
• Beat on low until combined and smooth.
• Use immediately or keep in an airtight container.
• Tip: Royal Icing starts to harden as soon as it’s in contact with air so make sure to cover containers with plastic wrap while not in use.

General Baking Tips
• When measuring by volume (cup) always shift/aerate your flour/icing sugar in the container/bag before measuring because it settles as it sits and so you end up with more flour/icing sugar in your cup. I do this by moving the ingredient around with a spoon, whisk or fork.
• When measuring flour or icing sugar by volume (cup) never scoop the flour/icing sugar up with the cup otherwise you compress the contents and this can make a big difference in the amount you’re using. Rather, spoon the ingredient into the cup until level with the top.
• When measuring baking powder or baking soda, always level off the top of the measuring spoon with something flat (like the back of a knife) as these ingredients need to be accurately measured.
• When mixing your ingredients, always follow the recipe instructions, especially when it comes to beating in eggs and flour, so if it specifies to mix until just combined or to beat for 4 minutes, follow the instructions to get best results.
• Unless otherwise specified, always have your ingredients at room temperature.
• It’s always best to invest in an oven thermometer so that you know exactly the temperature you’re baking at then you can also find out if you have cold or hot spots in your oven.
• If you need to rotate your trays midst baking, always allow at least half the baking time to lapse before opening your oven to move baking trays around, this allows time for your baked goods to form a good structure so that they won’t flop.
General Royal Icing Tips
• Keep a damp cloth handy while decorating your cookies so that if you’re switching between different icing bags, you can keep the tips covered with the damp cloth so that the icing doesn’t dry and clog them.
• If your icing tips do clog, use a toothpick or pin to unclog them.
• Always pipe a little bit of royal icing onto a board/paper towel before you begin to make sure there are no air bubbles.
• Remember to always cover bowls containing royal icing wither cling wrap, a damp cloth or sealable lid so that the surface doesn’t dry.
• Don’t store anything decorated with royal icing in the fridge otherwise the royal icing will
become tacky.
VERDICT:
1.The cookies tasted great as it is without the icing. With icing, i felt the cookies tasted more sweet.
2. As a whole, it was a lovely challenge. My daughter (3 years old) assisted me in making the cookies and decorating it. It was a lovely experience.
3. I will surely be making it again.
Posted by Ramya Kiran at 3:53 PM 10 comments
Labels: Cookies, Daring Bakers
Tuesday, November 24, 2009
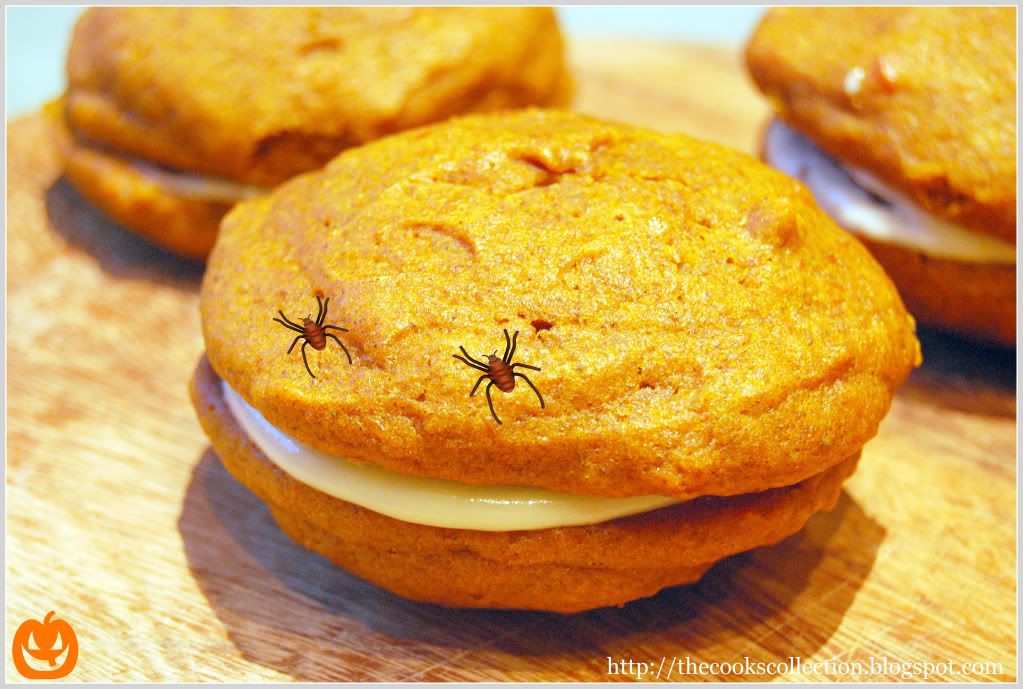
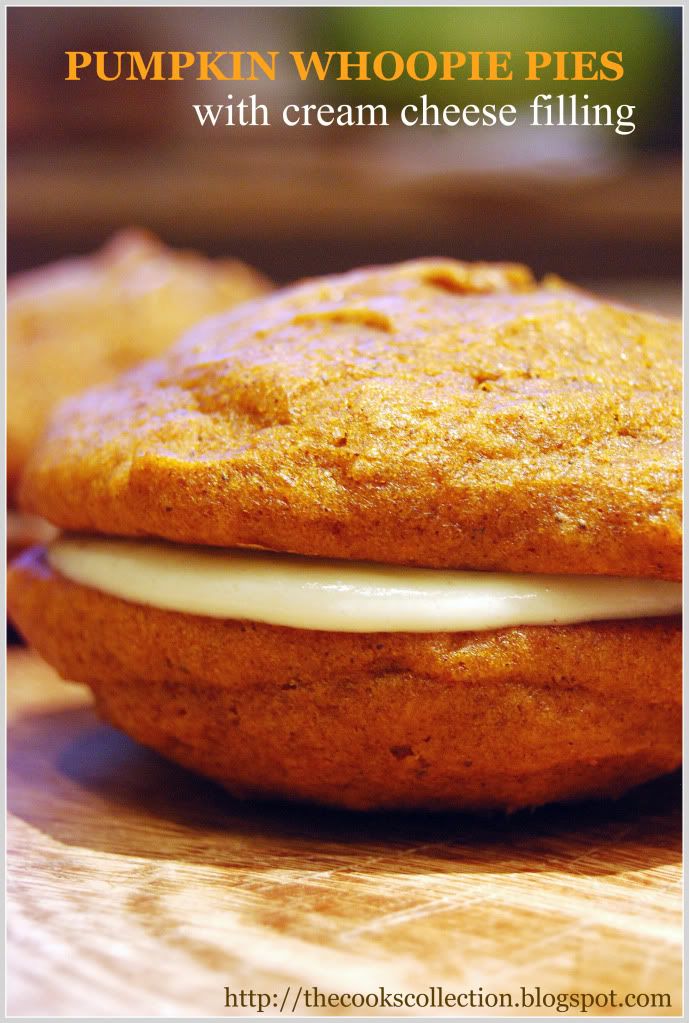
Pumpkin Whoopie Pies
These whoopies pies are two soft, spiced cakey cookies with a fair amount of cream sandwiched between them. These cookies are so much full of flavor, the spices and the pumpkin flavor blend beautifully together. They taste great with the vanilla flavored cream cheese filling and these cookies are so good and moist, that they are delicious and can be had even without the cream cheese filling. One change i made with the recipe was that i reduced the recipe by half and made 6 sandwiched whoopie pies which was good enough for just 2 of us (me and my hubby) and i also reduced the quantity of confectioners' sugar in the filling. It was little too sweet for my taste bud. Altogether this is a great recipe for people with sweet tooth.
Recipe adapted from Baked, new frontiers in baking.
Yield : 12 WHOOPIE PIES
Ingredients for the pumpkin whoopie cookies:
3 cups all-purpose flour
1 teaspoon salt
1 teaspoon baking powder
1 teaspoon baking soda
2 tablespoons cinnamon powder
1 tablespoon ginger powder
1 tablespoon cloves powder
2 cups firmly packed dark brown sugar (i used light brown sugar)
1 cup vegetable oil (i used sunflower oil)
3 cups chilled pumpkin puree
2 large eggs
1 teaspoon pure vanilla extract
For the cream cheese frosting:
3 cups confectioners sugar (powdered sugar) You can reduce the amount according to your taste
1/2 cup (1 stick) unsalted butter, softened
8 ounces cream cheese, softened
1 teaspoon pure vanilla extract
Directions:
Preheat the oven to 350 deg F(180 deg C). Line two baking sheets with parchment paper.
In a large bowl, whisk the flour, salt, baking powder, baking soda, cinnamon, ginger and cloves together and set aside.
In a separate bowl, whisk the brown sugar and oil together until combined. Add the pumpkin puree and whisk to combine thoroughly. Add the eggs and vanilla and whisk until combined.
Sprinkle the flour mixture over the pumpkin mixture and whisk until completely combined.
Use a small ice cream scoop with release mechanism to drop heaping tablespoons of the dough on to the prepared baking sheets, about 1 inch apart. Bake for 10 to 12 minutes, until the cookies are just starting to crack on top and the toothpick inserted into the center of the cookie comes out clean. Remove from the oven and let the cookies cool completely on the pan while you make the filling.
Make the cream cheese filling
Sift the confectioners' sugar into a medium bowl and set aside.
In the bowl of an electric mixer fitted with the paddle attachment(you can even use medium sized bowl and a hand beater), beat the butter until it is completely smooth, with no visible lumps. Add the cream cheese and beat until combined.
Add the confectioners' sugar and vanilla and beat until smooth. Be careful not to overeat the filling, or it will loose structure. (The filling can be made 1 day ahead. Cover the bowl tightly and put it in the refrigerator. Let the filling soften at room temperature before filling.)
Assemble the whoopie pies
Turn half of the cooled cookies upside down (flat side facing up).
Use an ice cream scoop or a tablespoon to drop a large dollop of filling onto the flat side of the cookie. Place another cookie, flat side down, on top of the filling. Press down slightly so that the filling spreads to the edges of the cookie. Repeat until all the cookies are used. Put the whoopie pies in the refrigerator for about 30 minutes to firm up before serving.
Storing:
The whoopie pies will keep for up to 3 days, on a parchment-lined baking sheet covered with plastic wrap, in the refrigerator.
Note:
Make sure you chill the pumpkin puree thoroughly before making this recipe. The chilled puree will make your whoopies easier to scoop and give them a domed top.
Posted by Ramya Kiran at 1:30 AM 2 comments
Labels: Baking, Cakes, Cookies, Dessert, Pies and Tarts
Wednesday, September 30, 2009
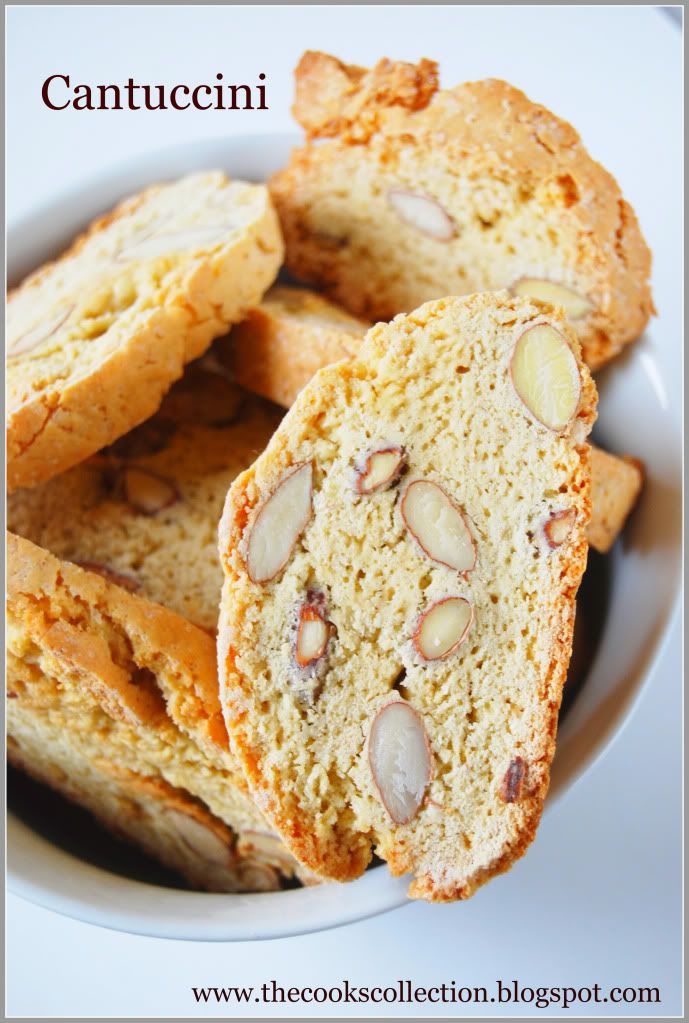
Cantuccini
All Italian cookies are called biscotti, but these are what we think of as classic biscotti. Twice baked cookies, they are first baked in a log shape, then sliced and baked again until they are very dry and crunchy. (Because they contain no butter or other fat, except that contained in the eggs, they can bake to a formidable state of crunchiness.) The techniques used to make can't-stop-eating-them biscotti are, like the cookies themselves, classic.
Recipe from Nick Malgiri. Adapted from the book "Baking with Julia".
Ingredients:
2 cups all-purpose flour
3/4 cup sugar
2 tsps baking powder
1/2 tsp cinnamon
1/4 tsp salt
1 1/2 cups unblanched whole almonds
3 large eggs
2 tsps pure vanilla extract
Directions:
Position a rack in the center of the oven and preheat the oven to 350 deg F(180 deg C). Line a baking sheet with parchment and keep aside.
Put the sugar, flour, baking powder, cinnamon and salt in a large bowl and stir with a rubber spatula to mix. Stir in the almonds.
Whisk the eggs and vanilla together in a small bowl, then stir them into the flour mixture. The dough may seem dry at this point but it will come together as it is kneaded.
Turn the dough out onto a lightly floured work surface and knead, folding it over onto itself until it is smooth, 1 to 2 minutes. Divide the dough in half and shape each half into 12-inch-long log. Gently press down on the logs to flatten them until they are about 2 inches wide and 1 inch high. Transfer them to the prepared pan.
First baking
Bake the logs for about 30 minutes, or until they are slightly risen and firm to touch. Slide the logs, parchment paper and all, off the baking sheet and onto a cooling rack. The logs must be completely cool before you continue with the recipe. Since they will take about 30 minutes to cool, you can either turn the oven off or leave it on for the next step. You can bake the biscotti up to this point several days ahead. Wrap the logs well in plastic and continue when its convenient.
Second baking
When the logs have cooled completely, preheat the oven to 350 deg F(180 deg C), if necessary. Line 2 baking sheets with parchment paper.
Working with a sharp serrated knife, cut the cooked logs diagonally into 1/4-inch-thick slices. Place the sliced cookies cut side down on the pans and bake for 10 -15 minutes, or until the biscotti are crisp and golden. Cool on the pans.
Storing
These biscotti will keep for up to a month in an airtight tin or plastic container.
Posted by Ramya Kiran at 12:30 PM 15 comments
Labels: Baking, Baking with JULIA, Cookies
Tuesday, August 11, 2009
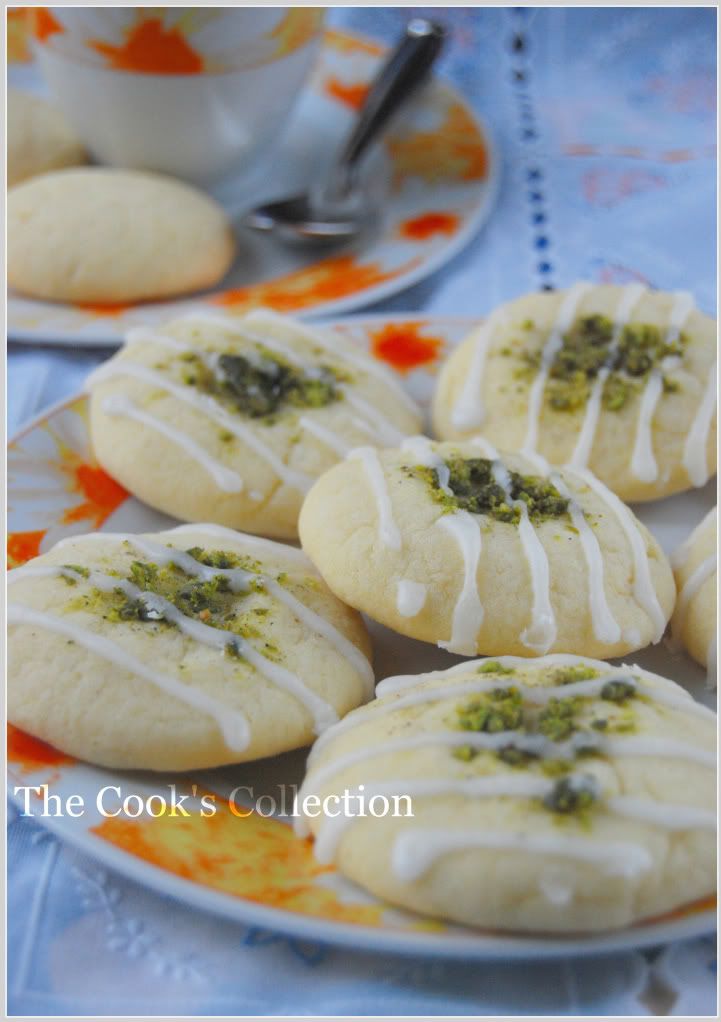
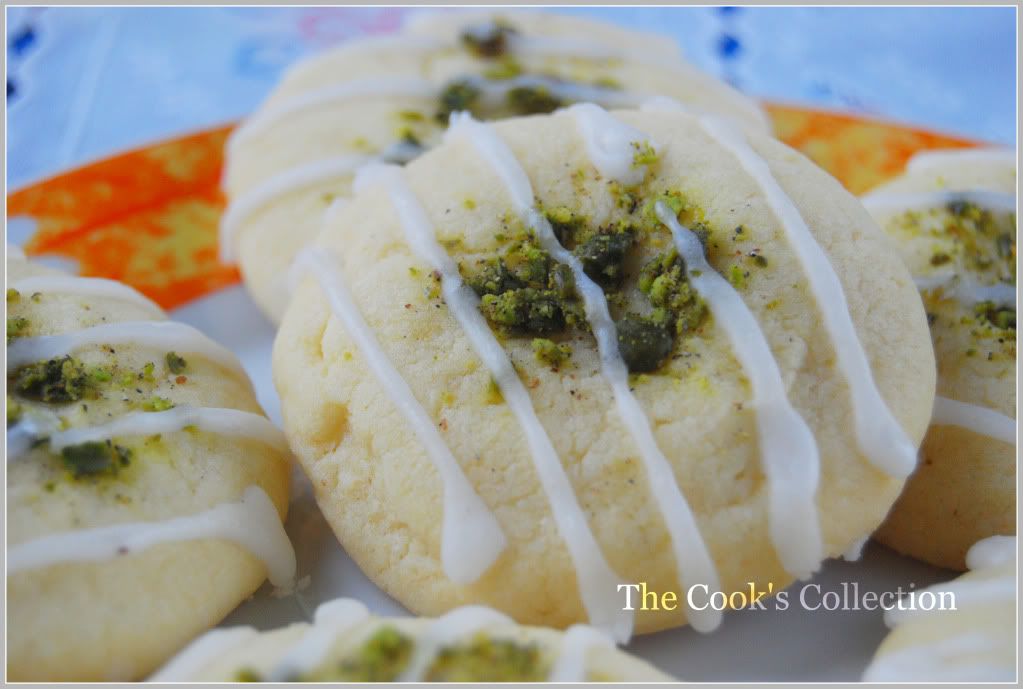
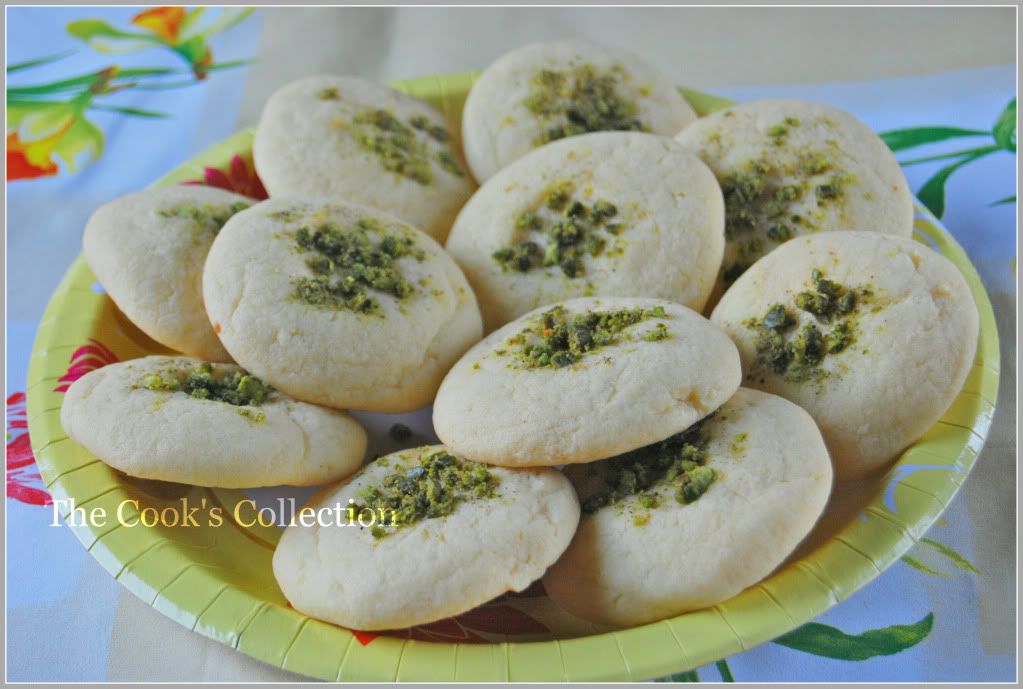
Nan Khatai ( Eggless Cookies)
Famous tea time Indian cookies. Egg-less, light and melting in the mouth-its texture is simply irresistible. These cookies traditionally use "Ghee" or "Clarified butter" but using butter or oil would do just fine.Serves: 20
Ingredients:
200 gms, 2 cups All purpose flour(maida)
100 gms, 1/2 cup Semolina(very fine quality)
150 gms, 3/4th cup cooking oil/ghee/unsalted butter
150 gms, 1 cup + 1/3 cup Powdered sugar
2 tbsp Curd(Yogurt)
1 tsp Cardamom powder
1/4 tsp Soda bi-carbonate
2 tbsps Pistachios(chopped finely)
4-5 tbsp Milk (optional)
Directions:
Beat oil/ghee/butter, sugar and curd together using a hand mixer or a whisk till well combined.
Sieve flour, semolina and soda in a bowl. Add the dry ingredients to the curd mixture. Mix them well using your hands to form a soft dough. Add milk little by little if the dough seems hard otherwise just leave it as it is.
Preheat the oven to 180 deg C. Divide the dough into 20 small balls.
Place the balls 5 cms apart on a baking sheet lined with a baking paper. Press each ball in the center with your thumb and garnish with pista and cardamom powder(You can even use a mortar and pestle to chop and mix pistachio and cardamom powder together).
Place the baking sheet at the lower third rack of the oven and bake at 180 deg C for 15-20 minutes.
Serve hot with coffee or tea.
Posted by Ramya Kiran at 12:30 PM 21 comments
Monday, July 27, 2009
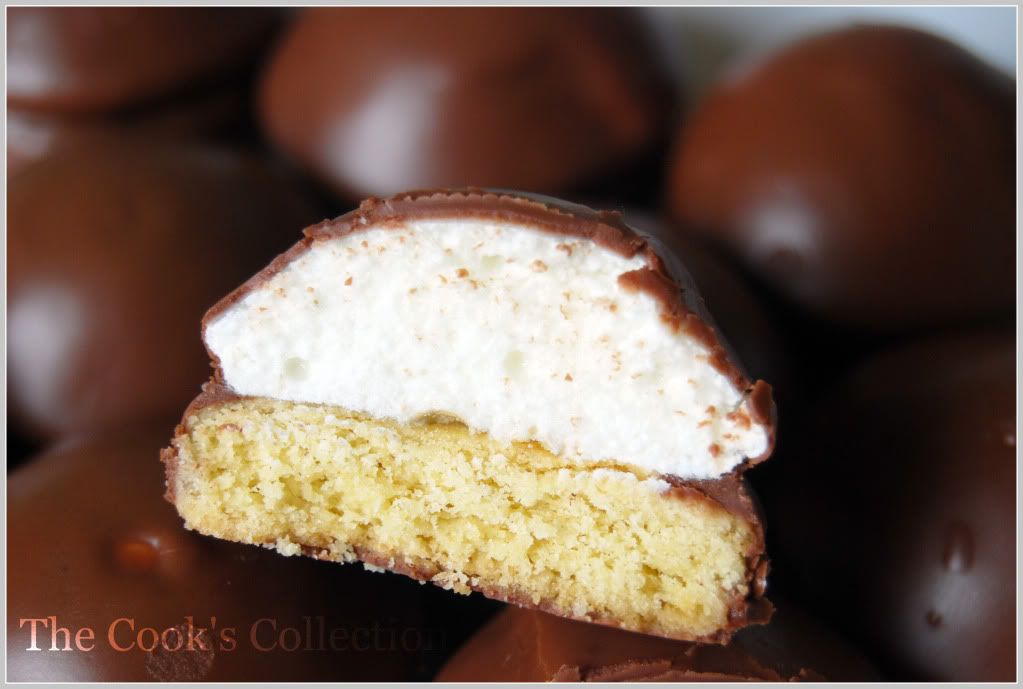
Mallows - Chocolate Covered Marshmallow Cookies
Daring Bakers July 2009 Challenge
The July Daring Bakers' challenge was hosted by Nicole at Sweet Tooth. She chose Chocolate Covered Marshmallow Cookies and Milan Cookies from pastry chef Gale Gand of the Food Network.
Mallows(Chocolate Covered Marshmallow Cookies)
Recipe courtesy Gale Gand, from Food Network website
Prep Time: 10 min
Inactive Prep Time: 5 min
Cook Time: 10 min
Serves: about 2 dozen cookies
Ingredients for the cookies:
- 3 cups (375grams/13.23oz) all purpose flour
- 1/2 cup (112.5grams/3.97oz) white sugar
- 1/2 teaspoon salt
- 3/4 teaspoon baking powder
- 3/8 teaspoon baking soda
- 1/2 teaspoon ground cinnamon
- 12 tablespoons (170grams/ 6 oz) unsalted butter
- 3 eggs, whisked together
- Homemade marshmallows, recipe follows
- Chocolate glaze, recipe follows
- 2 cups sugar
- 3/4 cup water
- 2 tbsp. powdered gelatin
- 1/2 cup cold water
- pinch of cream of tartar
- 1 tsp. vanilla extract
- 1/2 tsp. salt
- 1 cup cornstarch
- 12 ounces (340 gms) semisweet chocolate
- 2 ounces (1/4 cup)cocoa butter or vegetable oil
For the Cookie: In a mixer with the paddle attachment, blend the dry ingredients.
On low speed, add the butter and mix until sandy.
Add the eggs and mix until combine.
Form the dough into a disk, wrap with clingfilm or parchment and refrigerate at least 1 hour and up to 3 days.
When ready to bake, grease a cookie sheet or line it with parchment paper or a silicon mat.
Preheat the oven to 375 degrees F.
Roll out the dough to 1/8-inch thickness, on a lightly floured surface. Use a 1 to 1 1/2 inches cookie cutter to cut out small rounds of dough.
Transfer to the prepared pan and bake for 10 minutes or until light golden brown. Let cool to room temperature.
Pour the cooked sugar over bloomed gelatin in thin steam while the hand mixer is on high speed.
Change to medium speed and add cream of tartar, continue to whip until the mixture hold its shape. Add vanilla extract and salt and continue whipping until stiff.
Transfer to a pastry bag.
Sprinkle cornstarch onto a large baking pan and push it in with the object of your favorite shape and pipe in the marshmallow mixture.
OR Pipe a “kiss” of marshmallow onto each cookie directly. Let set at room temperature for 2 hours.
One at a time, gently drop the marshmallow-topped cookies into the hot chocolate glaze.
Lift out with a fork and let excess chocolate drip back into the bowl.
Place on the prepared pan and let set at room temperature until the coating is firm, about 1 to 2 hours.
Note: if you don’t want to make your own marshmallows, you can cut a large marshmallow in half and place on the cookie base. Heat in a preheated 350-degree oven to slump the marshmallow slightly, it will expand and brown a little. Let cool, then proceed with the chocolate dipping.
Posted by Ramya Kiran at 3:30 PM 18 comments
Labels: Baking, Cookies, Daring Bakers
Tuesday, February 24, 2009
Baked nippat (Sweet and Salty Onion Crackers)
After too many chocolatty and sweet desserts, i thought i would try some snack this week, "Baked Nippat". This is a known snack in all the South Indian bakeries. Its an all time favourite snack for most of the south indians. It tastes both sweet and salty with the presence of onion which gives a distinct sweetness and a touch of sesame gives a lovely crunchy and nutty flavour.
In India, the dough used to make "nippat" is usually deep fried in oil, but here i'm presenting you with the healthy baked version which tastes as good as the deep fried. Its a great snack to be taken along with your evening coffee. Its a must try recipe..
So here goes the recipe..
Ingredients:
250 gms( 2 cups) All purpose flour(maida)
50 ml(a little less than 1/4 cup) Water
5 tsp Sugar
2 tsp Salt
50 ml Oil
50 gm Butter
2 Onions[big, finely chopped]
3 green chillies ,finely chopped
few coriander leaves ,chopped (optional)
2 tsp White sesame seeds and a little more for sprinkling on top
Method:
Mix in all the ingredients in a large bowl either by your hands or using a stand mixer with the dough attachment. Add water little by little and keep mixing the ingredients with your hands till you get a soft and pliable dough.
Rest the dough covered with a cloth for 30 minutes.
Preheat the oven to 160 deg C. And line a baking sheet with a parchment paper.
Divide the dough in equal portions of a tablespoon and a little more. Flatten each divided portion in between your hands and arrange them on the baking sheet.[Or you can even flatten them by placing them directly on the baking sheet and pressing them with your fingers.]
To get a very crisp and crunchy nippat, flatten the dough very thin and bake till the onions have turned brown in colour.

Sprinkle some White sesame on the flattened dough and press lightly.
Bake in a preheated 160 deg C oven for 20 to 25 minutes or till the nippats turn slightly pink in colour.

Remove and cool completely.
Storage: You can store these nippat in an air tight container for upto a week..
Enjoy with a cup of coffee!!
Posted by Ramya Kiran at 1:30 PM 14 comments