
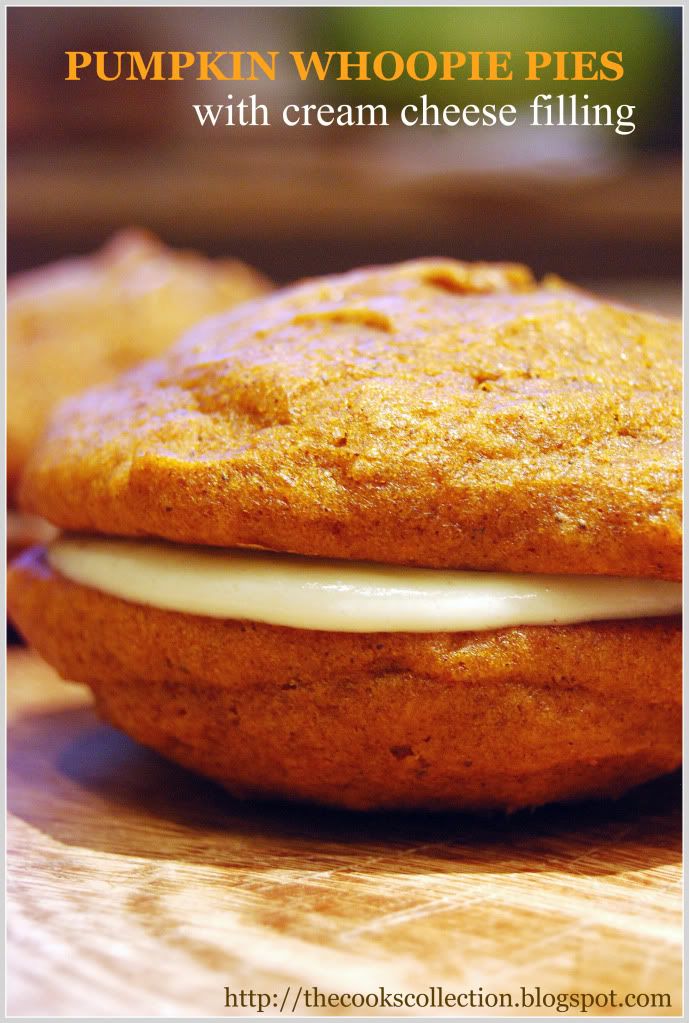
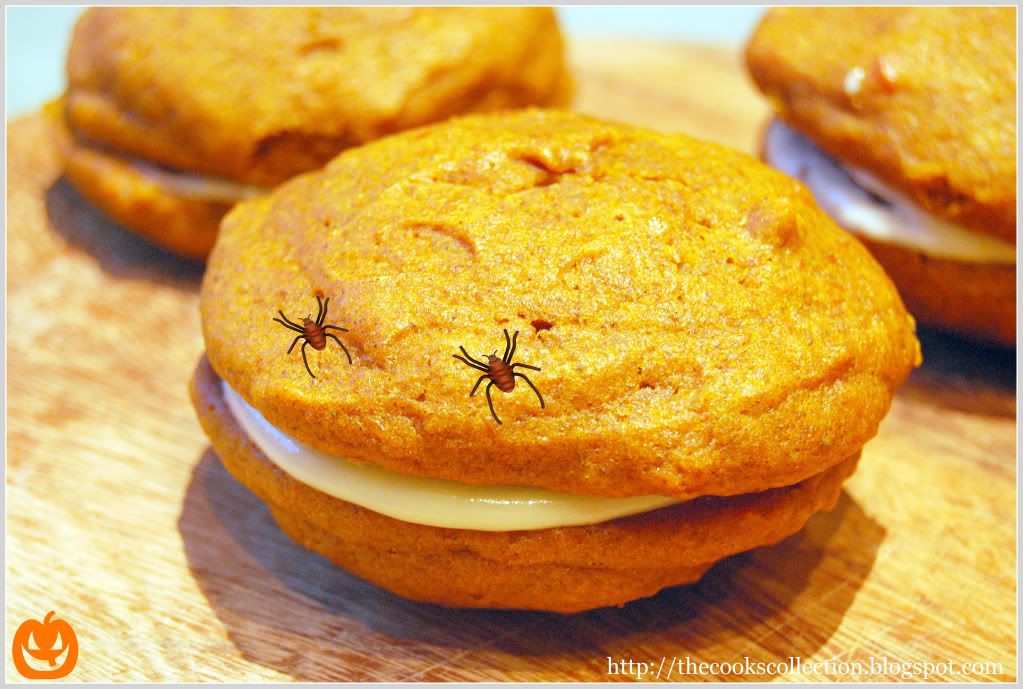
These whoopies pies are two soft, spiced cakey cookies with a fair amount of cream sandwiched between them. These cookies are so much full of flavor, the spices and the pumpkin flavor blend beautifully together. They taste great with the vanilla flavored cream cheese filling and these cookies are so good and moist, that they are delicious and can be had even without the cream cheese filling. One change i made with the recipe was that i reduced the recipe by half and made 6 sandwiched whoopie pies which was good enough for just 2 of us (me and my hubby) and i also reduced the quantity of confectioners' sugar in the filling. It was little too sweet for my taste bud. Altogether this is a great recipe for people with sweet tooth.
Recipe adapted from Baked, new frontiers in baking.
Yield : 12 WHOOPIE PIES
Ingredients for the pumpkin whoopie cookies:
3 cups all-purpose flour
1 teaspoon salt
1 teaspoon baking powder
1 teaspoon baking soda
2 tablespoons cinnamon powder
1 tablespoon ginger powder
1 tablespoon cloves powder
2 cups firmly packed dark brown sugar (i used light brown sugar)
1 cup vegetable oil (i used sunflower oil)
3 cups chilled pumpkin puree
2 large eggs
1 teaspoon pure vanilla extract
For the cream cheese frosting:
3 cups confectioners sugar (powdered sugar) You can reduce the amount according to your taste
1/2 cup (1 stick) unsalted butter, softened
8 ounces cream cheese, softened
1 teaspoon pure vanilla extract
Directions:
Preheat the oven to 350 deg F(180 deg C). Line two baking sheets with parchment paper.
In a large bowl, whisk the flour, salt, baking powder, baking soda, cinnamon, ginger and cloves together and set aside.
In a separate bowl, whisk the brown sugar and oil together until combined. Add the pumpkin puree and whisk to combine thoroughly. Add the eggs and vanilla and whisk until combined.
Sprinkle the flour mixture over the pumpkin mixture and whisk until completely combined.
Use a small ice cream scoop with release mechanism to drop heaping tablespoons of the dough on to the prepared baking sheets, about 1 inch apart. Bake for 10 to 12 minutes, until the cookies are just starting to crack on top and the toothpick inserted into the center of the cookie comes out clean. Remove from the oven and let the cookies cool completely on the pan while you make the filling.
Make the cream cheese filling
Sift the confectioners' sugar into a medium bowl and set aside.
In the bowl of an electric mixer fitted with the paddle attachment(you can even use medium sized bowl and a hand beater), beat the butter until it is completely smooth, with no visible lumps. Add the cream cheese and beat until combined.
Add the confectioners' sugar and vanilla and beat until smooth. Be careful not to overeat the filling, or it will loose structure. (The filling can be made 1 day ahead. Cover the bowl tightly and put it in the refrigerator. Let the filling soften at room temperature before filling.)
Assemble the whoopie pies
Turn half of the cooled cookies upside down (flat side facing up).
Use an ice cream scoop or a tablespoon to drop a large dollop of filling onto the flat side of the cookie. Place another cookie, flat side down, on top of the filling. Press down slightly so that the filling spreads to the edges of the cookie. Repeat until all the cookies are used. Put the whoopie pies in the refrigerator for about 30 minutes to firm up before serving.
Storing:
The whoopie pies will keep for up to 3 days, on a parchment-lined baking sheet covered with plastic wrap, in the refrigerator.
Note:
Make sure you chill the pumpkin puree thoroughly before making this recipe. The chilled puree will make your whoopies easier to scoop and give them a domed top.
Tuesday, November 24, 2009
Pumpkin Whoopie Pies
Saturday, June 27, 2009
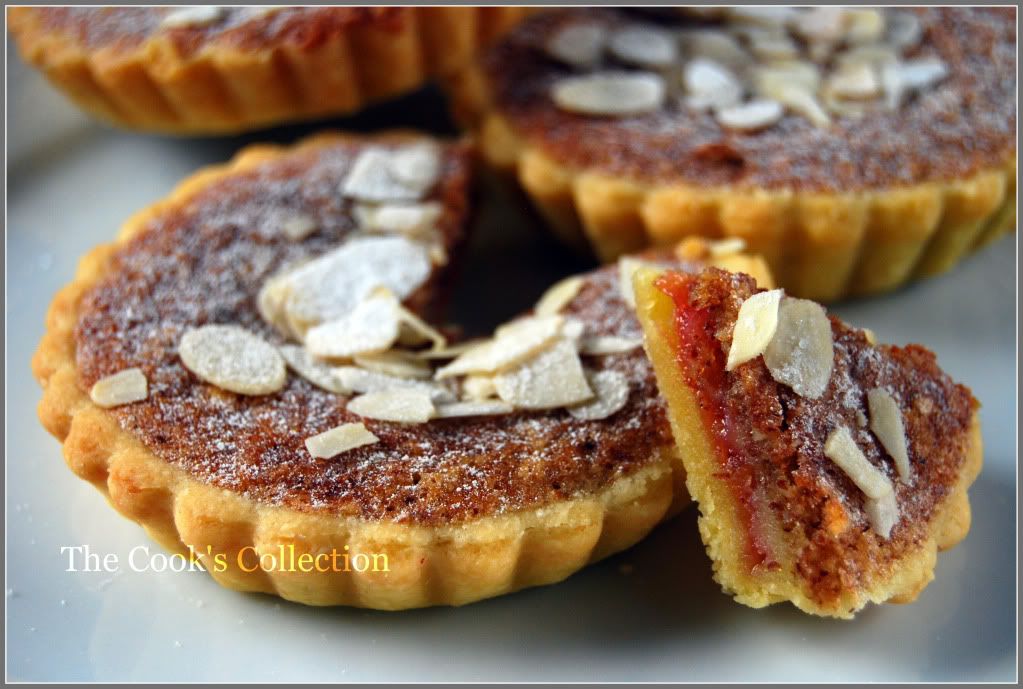
Bakewell Tart…er…pudding
Daring Bakers June 2009 Challenge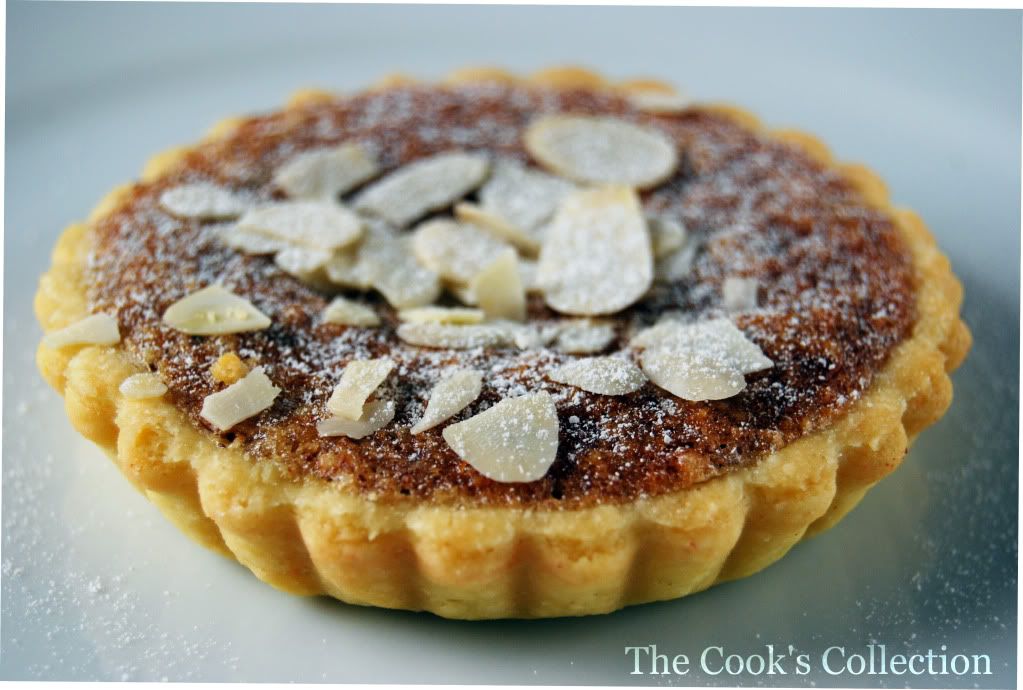
Prep time: less than 10 minutes (plus time for the individual elements)
Resting time: 15 minutes
Baking time: 30 minutes
Equipment needed: 23cm (9”) tart pan or pie tin (preferably with ridged edges), rolling pin
One quantity sweet shortcrust pastry (recipe follows)
Bench flour
250ml (1cup (8 US fl. oz)) Strawberry jam (can use any jam or curd, warmed for spreadability)
One quantity frangipane (recipe follows)
One handful blanched, flaked almonds
Sweet shortcrust pastry
Prep time: 15-20 minutes
Resting time: 30 minutes (minimum)
Equipment needed: bowls, box grater, cling film
Ingredients: (I used half the recipe, which fits 6 small 4" tartletts + 10 small cookies,which can be taken along with jam)
225g (8oz, 2cups) all purpose flour
30g (1oz, 2 tbsp) sugar
2.5ml (½ tsp) salt
110g (4oz) unsalted butter, cold (frozen is better)
2 egg yolks
2.5ml (½ tsp) almond extract (optional)
15-30ml (1-2 Tbsp) cold water
Directions:
Sift together flour, sugar and salt. Grate butter into the flour mixture, using the large hole-side of a box grater. Using your finger tips only, and working very quickly, rub the fat into the flour until the mixture resembles bread crumbs. Set aside.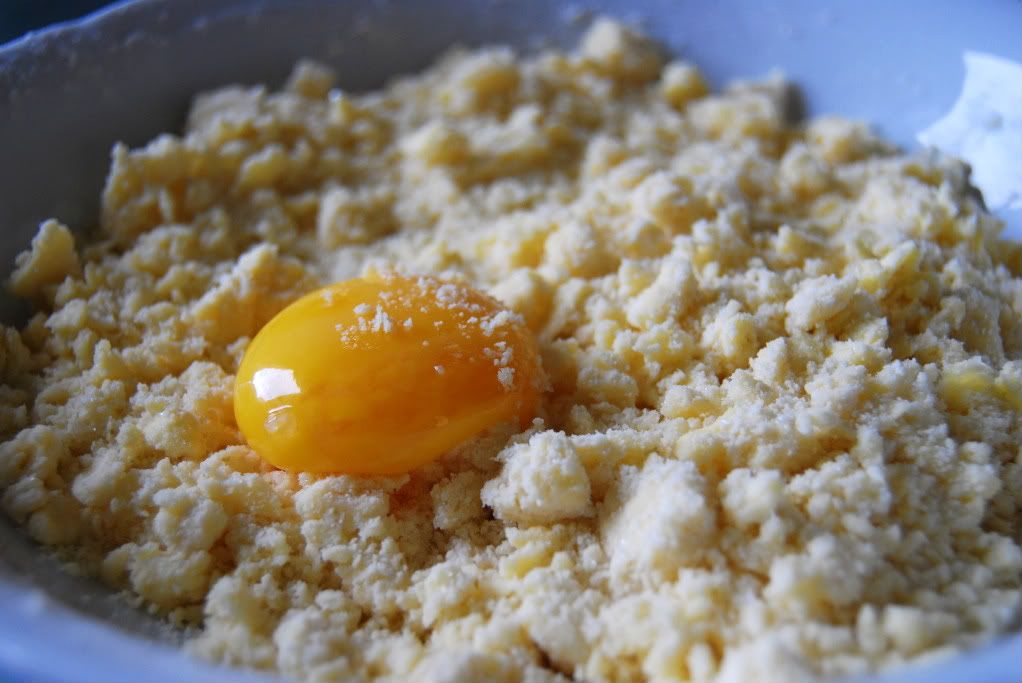
Form the dough into a disc, wrap in cling and refrigerate for at least 30 minutes
Homemade Strawberry Jam
1 Kilo Strawberries
500 gms Gelierzucker (Pectin based Sugar)
Sterilized glass bottles
Directions:
Place the strawberries in a colander and rinse them under cold running water. Drain and hull the strawberries. Cut the larger berries in half or quarters and leave the small berries whole. Place the strawberries in a deep, heavy-bottomed pan. Add sugar and gently mix. Once the strawberries start leaving out its juice, switch on the heat on medium. Wit till the mixture comes to a boil. Once it starts boiling, let it boil for another 5 minutes.
To test if the jam has reached its final stage, take a spoon of the mixture on place it on a plate and let cool. Once it cools, the mixture would have turned thick.
Take the mixture off heat and immediately pour it into sterilized glass bottles. Close the lid and keep the bottle upside down for 5 minutes. After that cool the bottle and the bottle can be kept at room temperature. Once the bottle is opened and use, place the bottle in the refrigerator.
I used just a tablespoon of this jam for each tart.
Frangipane
Prep time: 10-15 minutes
Equipment needed: bowls, hand mixer, rubber spatula
Ingredients:
125g (4.5oz) unsalted butter, softened
125g (4.5oz) icing sugar
3 (3) eggs
2.5ml (½ tsp) almond extract
125g (4.5oz) ground almonds
30g (1oz) all purpose flour
Directions:
Cream butter and sugar together for about a minute or until the mixture is primrose in colour and very fluffy. Scrape down the side of the bowl and add the eggs, one at a time, beating well after each addition. The batter may appear to curdle. In the words of Douglas Adams: Don’t panic. Really. It’ll be fine. After all three are in, pour in the almond extract and mix for about another 30 seconds and scrape down the sides again. With the beaters on, spoon in the ground nuts and the flour. Mix well using a spatula. The mixture will be soft, keep its slightly curdled look (mostly from the almonds) and retain its pallid yellow colour.
Assembling the tart
Place the chilled dough disc on a lightly floured surface. If it's overly cold, you will need to let it become acclimatised for about 15 minutes before you roll it out. Flour the rolling pin and roll the pastry to 5mm (1/4”) thickness, by rolling in one direction only (start from the centre and roll away from you), and turning the disc a quarter turn after each roll. When the pastry is to the desired size and thickness, transfer it to the tart pan, press in and trim the excess dough. Patch any holes, fissures or tears with trimmed bits. Chill in the freezer for 15 minutes.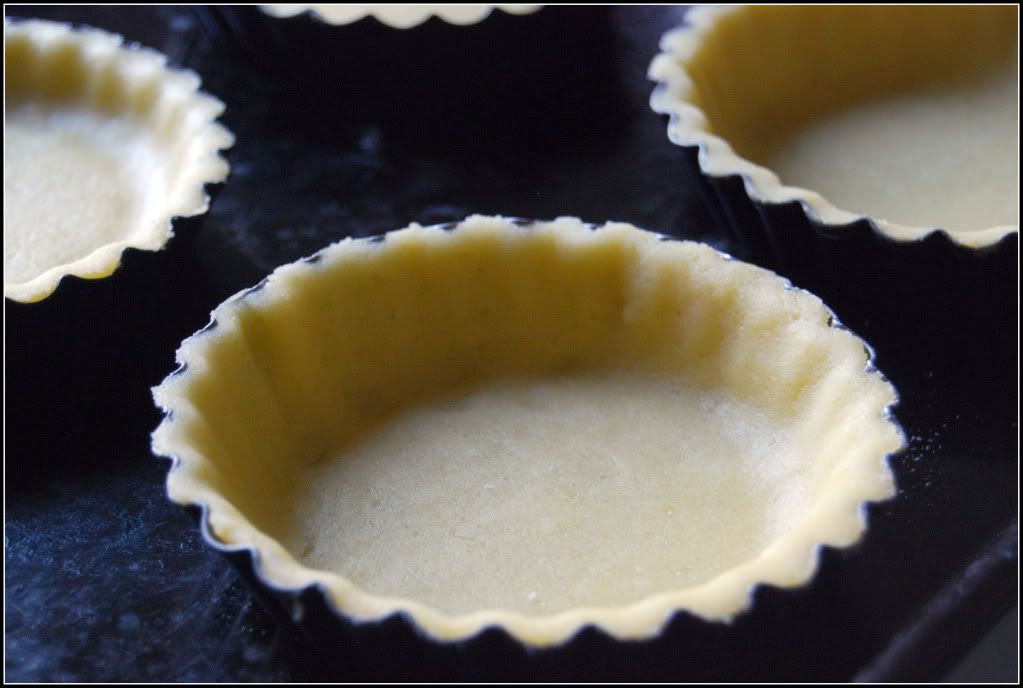
Remove shell from freezer, spread as even a layer as you can of jam onto the pastry base.
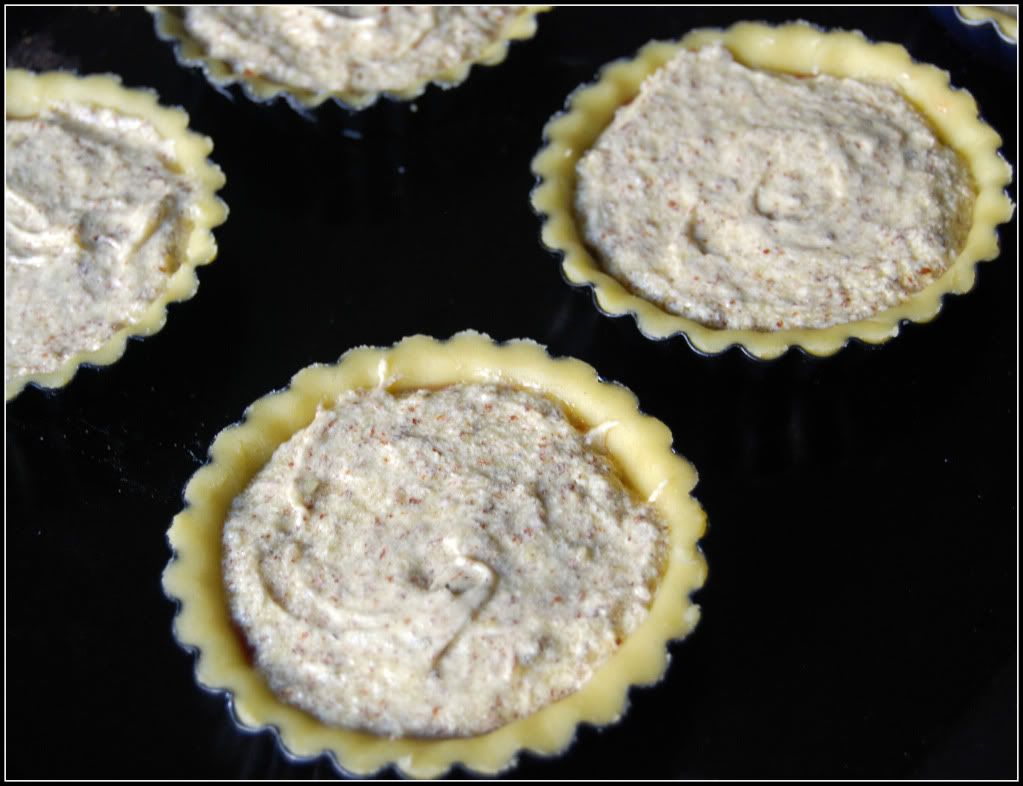

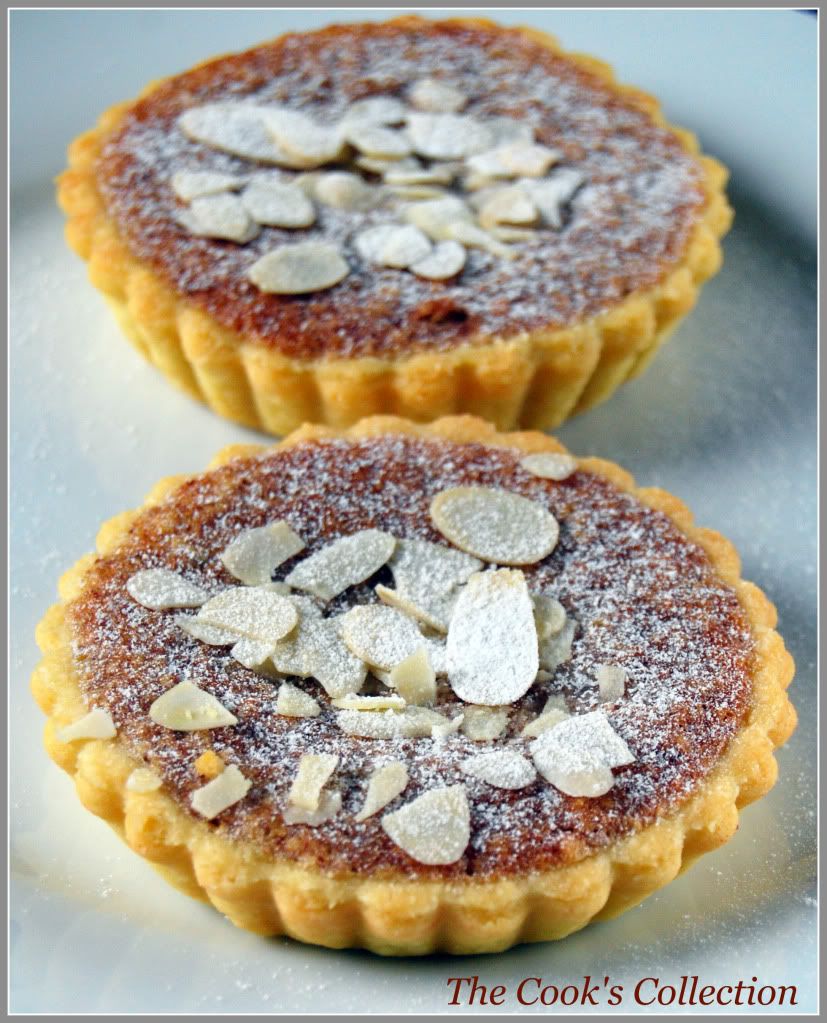
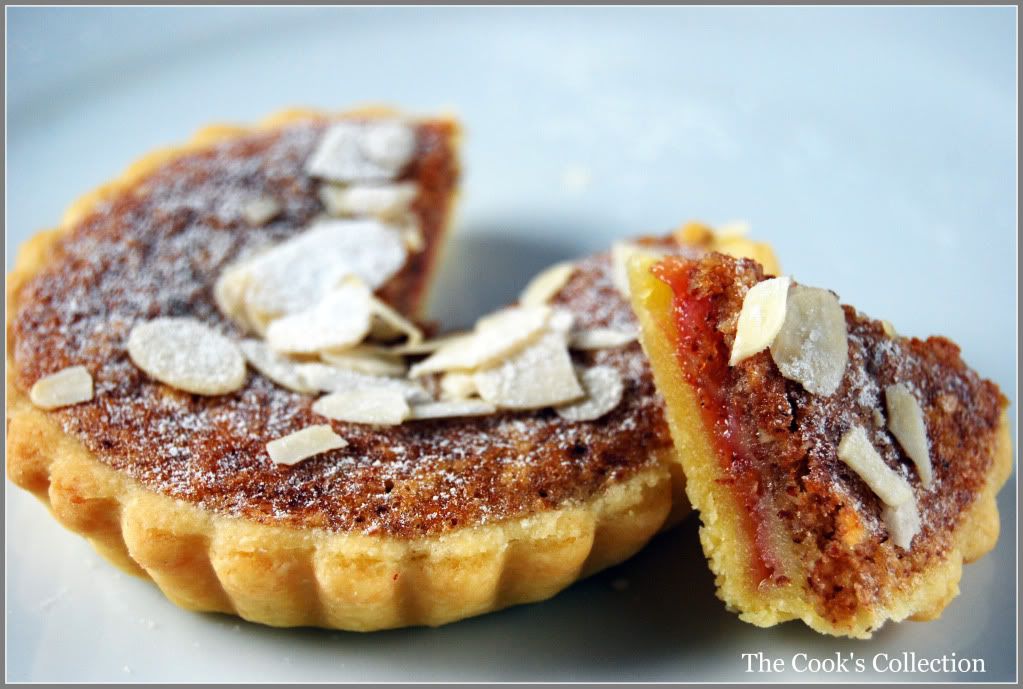 Enjoy with just a dusting a icing sugar. Its yum!!
Tuesday, June 16, 2009
Apple Marzipan Galette
This one's for the marzipan(sweetened almond paste) lovers. The recipe for the galette dough is adapted from Dorie Greenspans "Baking with Julia". The presence of Cornmeal in the dough is one of the ingredient which gives a wonderful crunchy feel and makes the dough easy to work with. Apples are one of my favourite and it when paired with almonds give a heavenly feeling. This galette is worth any special occasion.
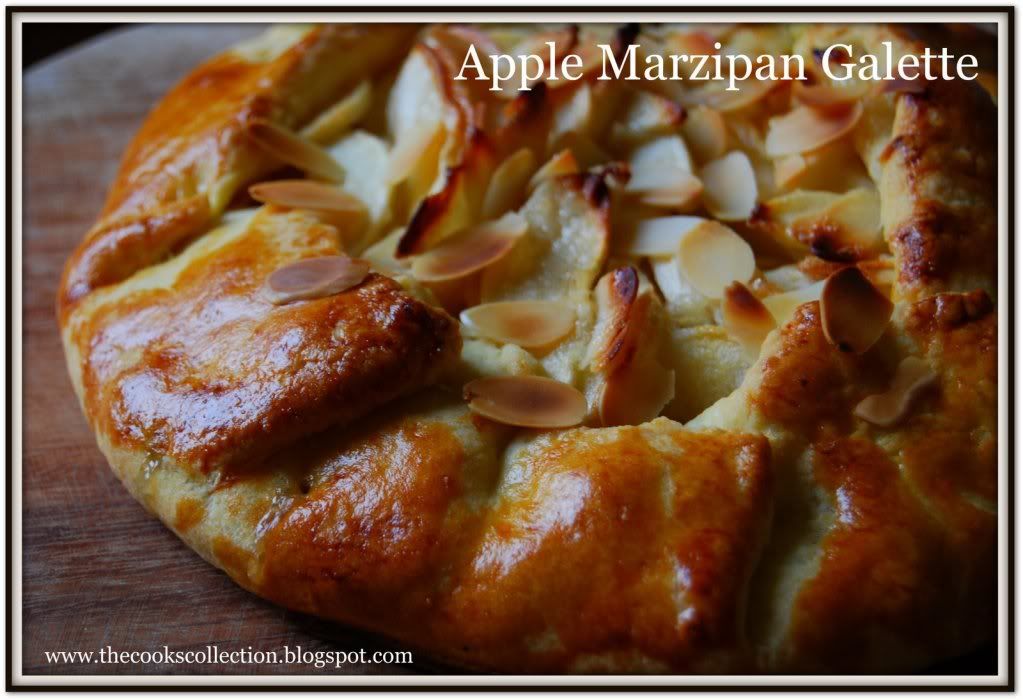

This recipe is partially adapted from myrecipes.com.
Ingredients:
1 Recipe Galette dough
1/4 cup marzipan, softened
4 medium sized apples. sliced
1/2 cup sugar
1 tablespoon all-purpose flour
1 teaspoon almond extract
2 teaspoons lemon juice
Dash of salt
1/4 cup Sliced almonds, some to drizzle on top
Method:
Preheat oven to 425°F (220° C) .
Roll the galette dough to a 14-inch circle on a lightly floured surface. Place dough on prepared pan. Roll marzipan to a 9-inch circle on a lightly floured surface. Place marzipan on top of dough.
Combine apple, sugar, flour, almond extract, sliced almonds, lemon juice, and salt in a large bowl; toss well. Spoon apple mixture over marzipan. Fold 2-inch dough border over the apple mixture, pressing gently to seal (dough will only partially cover apple mixture). Drizzle sliced almonds on top and bake at 425°F (220°C) for 30 minutes or until lightly browned. (apple filling may leak slightly during cooking).
Have a great week!
Tuesday, April 14, 2009
Sweet Ricotta Pie
This dessert uses pasta frolla, a sweet Italian pie dough for the base and lattice. The filling used here in this recipe can be made in minutes. It uses just 5 ingredients and Anisette, a licorice-flavoured liqueur, is the traditional flavouring for this type of cheese cake, but you can use anise extract or alter the flavour completely by substituting vanilla or almond extract, using brandy, or mixing in a little fruit-flavoured liqueur, such as Grand Marnier. I made a mini version of this recipe as i had to serve just 2 people. I reduced the recipe into half (reduced all the ingredients for filling by half and used just 1 large egg) and used 4 mini tart molds instead of a large one. I loved this dessert as it has a light cheese filling and a crisp cookie feel base. I freezed half the recipe of pasta frolla and will be using it for other recipes.
Recipe adapted from "Baking With Julia"
Ingredients required;
1 pound, OR 450 gms whole milk ricotta
1/3 cup sugar, ( i added a little extra for the sweetness)
1 tbsp anisette or 1 tbsp vanilla extract
3 large eggs, beaten
1/2 tsp cinnamon
1 recipe Pasta Frolla
Method;
Stir in ricotta, sugar, anisette, and eggs together in a bowl until smooth; set aside.
Position a rack in the lower third of the oven and preheat the oven to 350 deg F. Butter a 9-inch glass pie plate. (If you dont have a glass pie plate, use metal, but increase the oven temperature to 375 deg F.) (I used mini tart molds)
Working with 2/3 rd of the dough, knead it into a disc and roll it on a lightly floured work surface into a 12 inch circle. Transfer the dough to the pie plate and press it gently against the bottom and up the sides of the plate. Dont worry if the dough tears-just press it back together. Use the dull side of the knife to trim the excess dough even with the rim. Srape the filling into the pie shell, smooth the top, and dust with cinnamon.
Forming the lattice
Knead and shape the remaining piece of dough into a block and roll it on a lightly floured surface into a 9-inch square. Using a pizza or pastry cutter ( a ruffle-edged pastry wheel is nice) or a thin sharp knife, cut the dough into 12 even strips. To form the lattice top, lay 6 of the strips across the pie at 1 1/4 inch intervals, then crisscross with the remaining strips, placing them diagonally across the first strips. Trim the ends of the lattice even with the edge of the pan.
Baking the Pie
Bake for 35 to 40 minutes, or until the crust is golden and the filling is firm and slightly puffed. Transfer the pie to a rack and cool completely before serving. Storing ;
Leftovers can be kept, well covered in the refrigerator, for up to 3 days. Serve slightly chilled or at room temperature.
Pasta Frolla
Pasta frolla - pasta means "paste" or "dough" amd frolla means "tender" - is a sweet Italian pie dough. It is indeed tender, light and crumbly too, and a crust as commendable with savory fillings as with sweet such as Sweet Ricotta Pie. Its a made-in-the-food-processor dough thats's almost indestructable. And because of relatively large amount of sugar, you dont have to worry about overworking it, nor do you need to be concerned if it cracks as it goes into the pie plate - everything is fixable. Makes enough for a 9-inch lattice -topped pie
You'll need the following Ingredients...
2 cups all-purpose flour
1/3 cup sugar
1/2 tsp baking powder
1/4 tsp salt
1 stick (4 ounces) cold unsalted butter or 4 ounces cold lard, cut into 8 pieces
2 large eggs, lightly beaten
Method
Put the flour, sugar, baking powder, and salt into the work bowl of a food processor fitted with metal blade; pulse a few time just to mix the ingredients. Add the butter and pulse 15 to 20 minutes, or until the mixture resembles fine cornmeal. With the machine running, add the eggs and process until the dough forms a ball on the blade, about a minute or so. Remove the dough from the food processor and knead it, folding it over on itself, until it is smooth, 1 to 2 minutes. Wrap the dough in plastic and set aside for up to 30 minutes, or chill until needed.
Storing
The dough can be made up to 3 days ahead, wrapped well, and refrigerated, or frozen, tightly wrapped, for up to a month. Thaw , still wrapped, in the refrigerator.
Try this recipe with Sweet Ricotta Pie.
Tuesday, March 17, 2009
French Apple flan
This tart is one of the easiest and delicious tart i have ever made. It takes just few ingredients and can be made in minutes. Can be a great treat for your guests. It can be served as a starter as well as a dessert.
When cutting a round from puff pastry make a number of short cuts around the plate rather than drawing the knife around, as this can stretch the pastry.
Serves : 4
Ingredients required:
350gm puff pastry sheets
2 apples, peeled, cored and seeded
1 tbsp caster sugar
25 gm chilled unsalted butter
Apricot glaze, to decorate (any fruit glaze can be used)
2 tbsp apricot jam
4tbsp water
Method:
First of all, lets make the apricot glaze. Put the jam in a small saucepan with water and heat gently until the jam melts. Increse the heat and boil for a minute, remove from the heat and press through a fine sieve. Keep warm until it is needed.
Take the puff pastry sheets on a lightly floured surface and roll out a little bit. Using a 14cm (5 1/2 inch) plate as a guide, cut out four rounds and put each one on a baking sheet. Place a slightly smaller plate on each pastry and score around the edge to form a 1cm (1/2 inch) border. Prick the centers with a fork and chill for 30 minutes. Arrange the apple slices in a circle over the pastry and scatter over the sugar. Grate over the butter and bake in a preheated oven, 220 deg C (425 deg F), for 20 to 25 minutes or until the pastry and apples are golden.
 Reheat the apricot glaze until it is warm and brush over each tart while still warm.
Serve with vanilla ice cream.
Tuesday, February 17, 2009
Chocolate Pear Tart
This is a recipe taken from the "Chocolate" cookbook. This tart is one way of giving treat to your tastebuds as well as getting fruits in you.. Its a delicious combination of pears and chocolate with a drizzle of sugar on top...
.jpg)
.jpg)
Ingredients:
For the Base
120 gm all purpose flour
pinch of salt
2 tablespoons sugar
120 gm butter, cut into cubes
1 egg white
1 tbsp lemon juice
For the Filling
120 gm Chocolate (grated, 60gm dark chocolate plus 60 gm milk chocolate)
4 pears , cut lengthwise [I used the canned one]
125 gm whipping cream
1 egg plus 1 egg yolk
2 drops of Vanilla aroma
3 tablespoons sugar
Method:
Sieve flour and salt in a bowl. Add in the Sugar and butter and start kneading. Add the Yolk and lemon juice. Knead well to from a stiff. Wrap the dough in a plastic wrap and set it to cool for 30min.
Preheat the oven to 200 ° C.
Take out the dough and place it on a lightly floured work surface. Roll the dough such that it could be lined into a spring form of approximately 25cm diameter.


Peel pears, halve and seed. Cut each pear several times half lengthwise and place them one by one on the grated chocolate.

Whip the cream, egg yolk and vanilla aroma together and pour over the pears. Finally sprinkle the tart with sugar.

Bake the tart in the pregeated oven for 10 minutes, then reduce the temperature to 180 ° C and bake for another 20 minutes until the pears begin to brown and the filling looks stiff.

Cool and serve.

.jpg)
Tuesday, January 27, 2009
Onion-Tomato-Cheese Galette
This rustic tart has the look of a mediteranean pizza. The crust is a wonderful cornmeal-crunchy dough, rolled into a thin circle and drawn up in pleats and rufles over the filling, caramalised onions and a blend of cheeses topped with sliced garden tomatoes, red and juicy. Because of the cornmeal in the dough, the crust will stay crisp enough for this galette to be served either warm or at room temperature. It will travel, so think of it when you're headed off on a picnic or want to bring friends a lovely something to have with drinks.

For this recipe you'll need..
1/4 recipe Galette Dough, chilled
1/2 cup Ementaler Cheese, shredded
1/2 cup Mozzarella, shredded
Few basil leaves, fresh or frozen
1 or 2 firm but ripe plum tomatoes, cut into 1/4-inch-thick slices
1 Onion, medium sized, cut into slices, lengthwise
1 tbsp Olive oil
1 Egg
1 tbsp Milk
Here you start Position a rack in the lower third of the ovan and preheat the oven to 200 deg C. Line a baking sheet with parchment paper.
Put the dough on a lightly floured surface and roll in into an 9-inch circle. Since the dough is soft,you'll need to lift it now and then and toss some flour under it and over the top. Roll the dough up around your rolling pin and unroll onto the prepared baking sheet.
Making the filling Put the onions and olive oil in a skillet over medium heat. Add a pinch of salt and keep stirring till the onions turn translucent and soft. Set aside and let cool.
Toss the cheeses and basil together in a small bowl and set aside.
Spread the onions on the rolled-out dough, leaving an inch order. Place the tomatoes in concentric circles, one slice slightly overlapping the last, on top of the onions.
Scatter the cheeses and basil mixture over the tomatoes.
Fold the uncovered border of dough up over the filling, allowing the dough to pleat as you lift it up and work your way around the galette. (Because you're folding a wide edge of dough over a smaller part of the circle, it will pleat naturally- just go with it.) Combine the egg and a tbsp of milk together. Brush on top of the pleated galette.
Baking the galette Bake the galette for 35 to 40 minutes, or until the pastry is golden and crisp and the cheese is bubbly. Transfer the baking sheet to a cooling rack and let the galette rest on the sheet for 10 miutes. Servve warm or at room temperature, garnish with fresh basil leaves.

Storing The galette can be kept at room temperatute for several hours, but it is best served the day it is made.
Tuesday, December 16, 2008
Plum Galette
The simplest most rustic tarts are baked free form, without a tart pan. Called Galettes in France. Its called a Galette because its flat, open-faced and free form-- the crust is rolled into a circle, the filling is piled in the center, and the edges of the crust are turned in and ruffled over the filling. The cornmeal in this wonderfully buttery dough gives it a bit of crunch, it makes it crisp enough to stand up to soft and syrupy fillings and sturdy enough to be rolled to extreme thinness. This galette can be served either warm or at room temperature.

I was wanting to bake a galette from a very long time. And finally i made it. This galette can be served as a wonderfully sophisticated dessert. I'll assure you, it wont disappoint you or your guests.
Choose tart plums for a less-sweet galette, or very ripe plums for a sugary result. The filling used in this recipe is very dry and perfect because of the flour and ground almond used in it. Ground Almond gives a very distinct flavour to the filling. The filling is so simple and so much tasty. So here is the recipe..
Makes 1 Small Galette. Serves 2.
You'll need..
Ingredients
1/4 recipe Galette Dough, chilled
(You can use 1/2 recipe of the galette dough and double the quantities of the filling for a bigger galette)
For the Plum filling
4 Plums, halved, deseeded and cut into several thin slices
4 tbsp Ground Almond
2 tbsp All purpose flour
1/4 cup sugar
Topping
Few Sliced Almonds
1 tsp Sugar
For Brushing
1 egg
1 tbsp milk
Here you start; Position a rack in the middle of the oven and preheat the oven to 400 deg F (200 deg C). Line a baking sheet with parchment paper.
Rolling the dough; Take one quarter of the dough on a lightly floured surface and roll it into a 9 inch circle. Since the dough is soft, you'll need to lift it now and then and toss some more flour under it and over the top. Roll up the dough around your rolling pin and transfer it to the prepared baking sheet.
Filling; Mix in all the ingredients for the filling. Spread the filling over the dough leaving an inch border.
Fold the uncovered border of dough up over the filling, allowing the dough to pleat as you lift it up and work your way around the galette.
Combine the ingredients for brushing. Dip a pastry brush in the egg and milk mixture and giv the edge of the crust a light coating and then sprinkle the sliced almonds and sugar.
Baking the Galette; Bake the galette for 35 to 40 minutes, or until the pastry is golden and crisp. Transfer the baking heet to a cooling rack and let the galette rest on the sheet for 10 minutes. Serve warm or at room temperature, cutting the tart with a pizza wheel or a sharp knife.
Storing; The galette is best eaten the day it is made.
Galette Dough
The cornmeal in this dough makes the galette a crisp, crunchy and sturdy enough to be rolled to extreme thinness. You can use this dough to line tart pan, but it s particularly well suited to rustic tarts called galette- flat, free form tarts whose edges are folded over the filling like ruffled top of a drawstring purse.
The dough is made quickly either by hand or in a food processor and produces enough for two galettes. Adapted from Baking with Julia
Makes enough for two 8-inch galettes
Ingredients
3 tbsp sour cream (or yogurt or buttermilk)
1/3 cup (approximately) ice water
1 cup All purpose flour
1/4 cup Cornmeal
1 tsp Sugar
1/2 tsp Salt
7 tbsps cold unsalted butter, cut into 6 to 8 pieces
TO MAKE THIS DOUGH BY HAND, stir the sour cream and 1/3 cup ice water together in a small bowl and set aside. Pour the flour, cornmeal, sugar and salt in a large bowl and stir with a fork to mix. Drop the butter pieces into the bowl, tossing them just once or twice just to coat them with flour. With a pastry blender or using two knifes, work the butter into the flour, aiming for pieces of butter that range in size from bread crumbs to small peas. The smaller pieces will make the dough tender, the larger ones will make it flaky.
Sprinkle the cold sour mixture over the dough, 1 tablespoon at a time, tossing with a fork to evenly distribute it. After you've added all of your sour cream, the dough should be moist enough to stick together when pressed; if its not, add additional cold water, 1 teaspoon at a time. With your hands gather the curds of dough together. (You'll have a soft, malleable dough, the kind you might want to overwork.)
Chilling the dough; Turn the dough out of the bowl and divide it in half. I made 4 parts so that i could try 4 different galettes. Press each piece of dough into a disc, wrap in plastic and refrigerate for at least 2 hours.
TO MAKE THE DOUGH IN A FOOD PROCESSOR, stir the sour cream and 1/3 cup ice water together in a small bowl; set aside. Put the flour, cornmeal, sugar, and salt in a work bowl of a food processor fitted with the metal blade; pulse to combine. Drop the butter pieces into the bowl and pulse 8 to 10 times, or until the mixture is speckled with pieces of butter that vary in size from bread crumbs to peas. With the machine running, add the sour cream mixture and process just until the dough forms soft, moist curds.
Chilling the dough Remove the dough from the processor, divide it in half and press wach half into a disk. Wrap in plastic and chill for atleast 2 hours.
Storing; The dough can be kept in a refrigerator for a day or two, or it can be wrapped airtight and frozen for a month. Thaw, still wrapped, in a refrigerator. It is convenient to roll the dough into rounds, place parchment between each round, and freeze them wrapped in plastic; this way, you'll need only about 20 minutes to defrost a round of dough at room temperature before it can be filled, folded into a galette, and baked.
Tuesday, November 11, 2008
Mini-Torteletts
These Torteletts have a great combination of the crispy crust and ineffable light filling. Tastes great when warm. Its a lovely dessert to be opted during parties.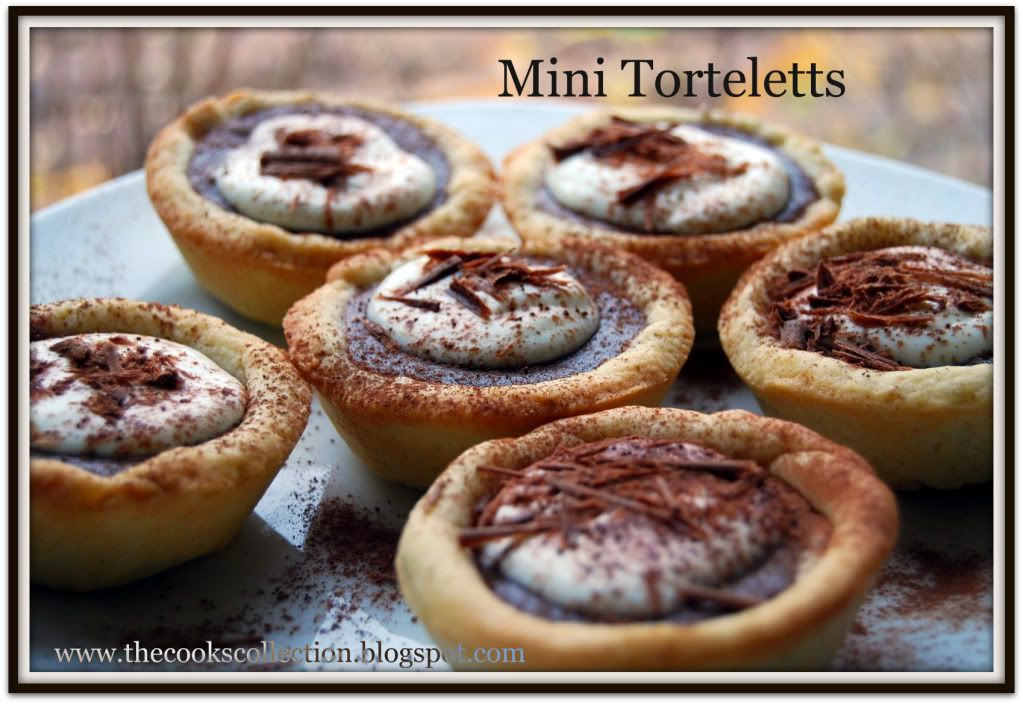
You'll need the following ingredients
175 gm All purpose flour
80 gm Butter
20 gm Sugar
1 tbsp Water
For the Filling
100gm Cream cheese
25 gm Sugar
1 small egg, lightly beaten
50 gm Dark bitter chocolate , melted
For Decorating
100 gm Whipped cream
Chocalte Shavings
Coco powder, to sprinkle
Mehod
Sieve the flour. Cut the butter into small pieces and rub it into the flour till you get a crumble texture. Add the sugar and water to form a soft dough. Wrap the dough ina plastic wrap and refrigerate for 15 minutes.
Place the dough onto a lightly floured surface and roll it.
Cut the rolled dough into 18 small circles and place them onto a mini muffin tray. you can also make big Torteletts that can fit into your regular muffin tray.

Mix together the cream cheese and sugar. Add in the egg and the melted chocolate. Mix well till no lumps are formed.
Fill in the cream cheese and chocolate mixture into the muffin tray onto the dough.

Bake them in a preheated oven of 190 deg C for 15 minutes, till the base is crisp and the filling is firm. Cool on a wire rack.


Place the Torteletts in a cool place. Whip the cream till it holds stiff peaks. Place a spoon full of whipped cream onto the Torteletts. Decorate the Torteletts with few chocolate shavings and sprinkle some coco powder on top. Enjoy the lovely dessert :)


