Monday, June 29, 2009

Coconut creams with poached rhubarb & a "CLICK"

I was very new to this vegetable "Rhubarb" and wanted to try out few recipes using it. Then after a lot of search on the internet, i found this "Coconut Cream with Poached Rhubarb" recipe on bbc good food and i immediately decided to go with this recipe. Believe me, it dint disappoint me. Everybody in my house loved it. This dessert tastes awesome together with the combination of sweetened coconut cream with sweet and tangy rhubarb. Its a must try recipe in this season as you wont find Rhubarb in all the seasons.


Rhubarb looks like red celery, but don't let that fool you; beyond that and the strings that run its length, they have little in common. Usually used as a fruit in sweet preparations, rhubarb alone is actually extremely tart, and the roots and the leaves are poisonous (the leaves contain toxic level of oxalic acid). You can take advantages of its tartness or cook it with sugar or other sweet fruits, which is why we see it most often made into pies, preserves , and compotes, often paired with strawberries.

Buying and storing: Look for firm and crisp stalks. Store in the refeigerator and use it as quickly as possible.

Preparing: Rhubarb is best if you string it; grab one end between a paring knife and your thumb and pull straight down to remove the celerylike strings that run lengthwise through each stalk. Remember that rhubarb leaves are poisonous, though only mildly so.

Other fruits to substitute: Cranberries, tart cherries or fresh currants.

Recipe adapted from BBC Good Food

Ingredients:
2 sheets leaf gelatine
400ml can coconut milk
8 tbsp caster sugar
1 vanilla pod
300g rhubarb , cut into short lengths

Method:

Put the gelatine into a bowl and cover with cold water. Leave to soak for 5 mins until softened.

Heat the coconut milk with 4 tbsp sugar in a pan. Bring to a gentle simmer, then remove from the heat. Lift the gelatine from the water and stir into the coconut milk. Keep stirring until the gelatine has dissolved, then pour into four small glass dishes or dessert bowls (if using glass, leave the milk to cool a little first). When the creams are cool, transfer to the fridge and leave to set.

Split the vanilla pod down the centre and put into a pan with 2 tbsp water and the remaining 4 tbsp sugar. Bring slowly to the boil to dissolve the sugar, then add the rhubarb and poach gently until softened but not mushy, about 3-4 mins. Leave to cool.

Spoon the rhubarb over the coconut creams to serve.

This picture above also goes to the CLICK, a monthly food photography event. It is a theme-based contest. This is my first entry for this event and this month's theme is "STACKS" , where you are supposed to click STACKS of any vertical, horizontal, heaped, piled or many of the same or different food related items.
Saturday, June 27, 2009

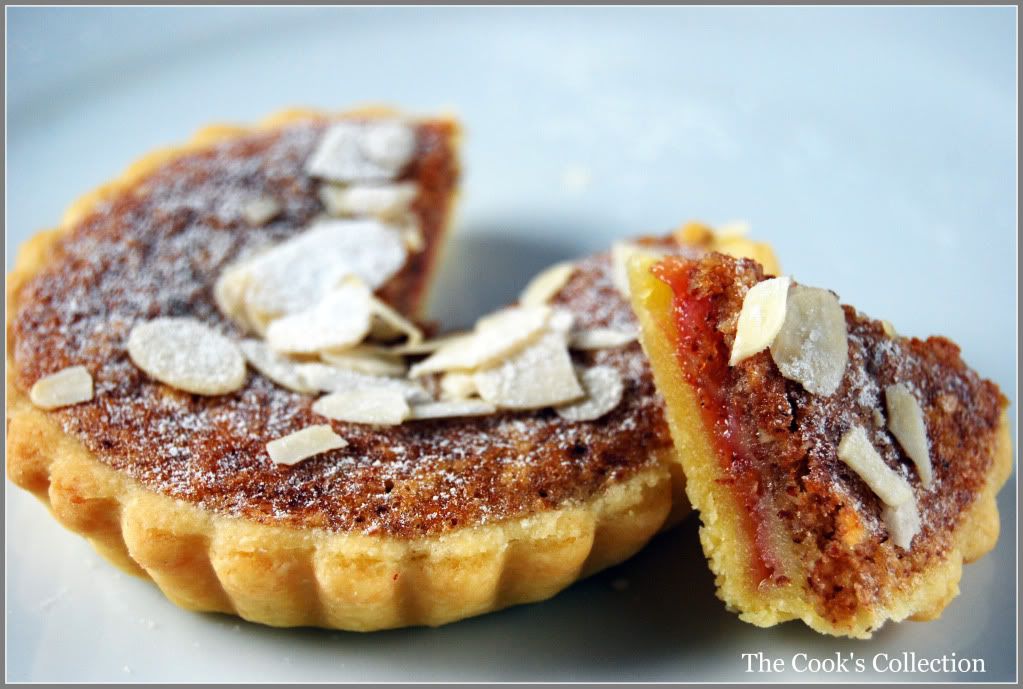
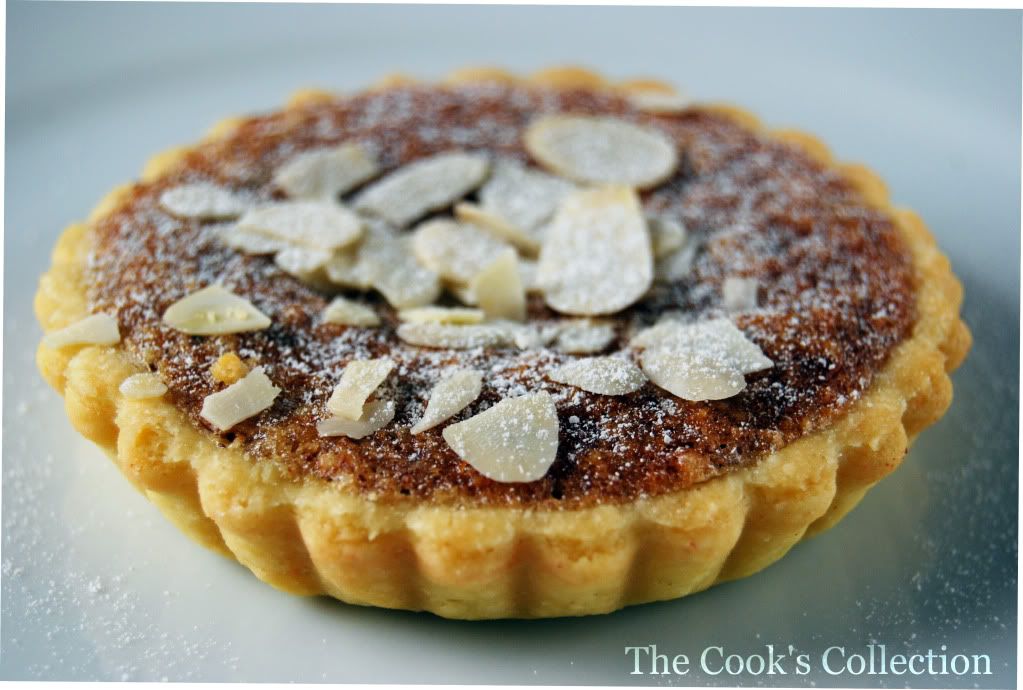
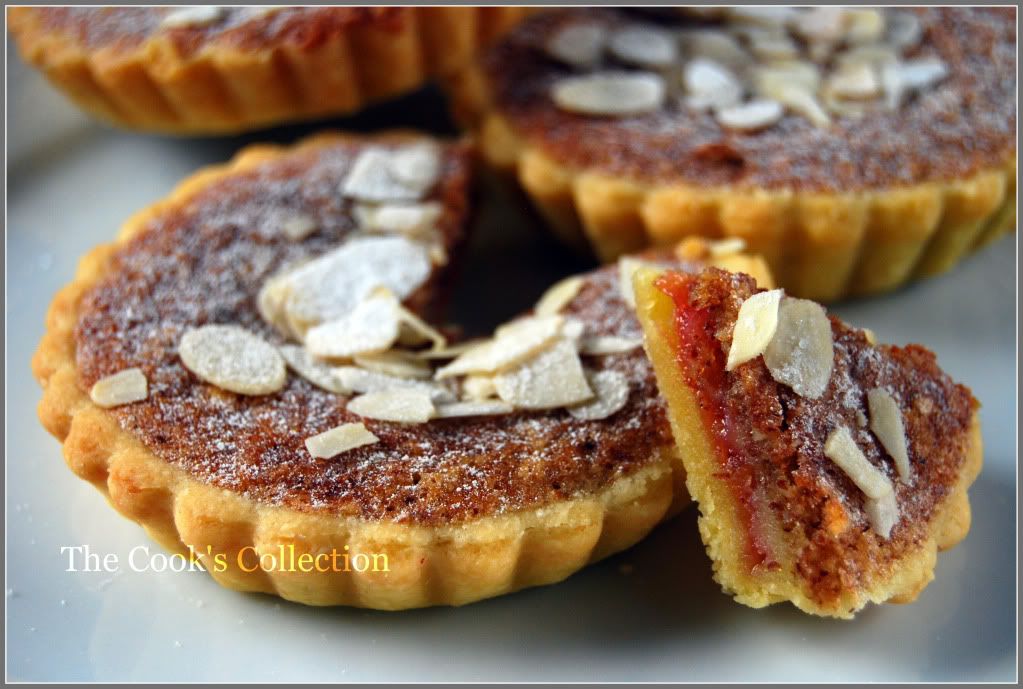
Bakewell Tart…er…pudding

Daring Bakers June 2009 Challenge

The June Daring Bakers' challenge was hosted by Jasmine of Confessions of a Cardamom Addict and Annemarie of Ambrosia and Nectar. They chose a Traditional (UK) Bakewell Tart... er... pudding that was inspired by a rich baking history dating back to the 1800's in England.

Makes one 23cm (9” tart)
Prep time: less than 10 minutes (plus time for the individual elements)
Resting time: 15 minutes
Baking time: 30 minutes
Equipment needed: 23cm (9”) tart pan or pie tin (preferably with ridged edges), rolling pin

One quantity sweet shortcrust pastry (recipe follows)
Bench flour
250ml (1cup (8 US fl. oz)) Strawberry jam (can use any jam or curd, warmed for spreadability)
One quantity frangipane (recipe follows)
One handful blanched, flaked almonds

Sweet shortcrust pastry

Prep time: 15-20 minutes
Resting time: 30 minutes (minimum)
Equipment needed: bowls, box grater, cling film

Ingredients: (I used half the recipe, which fits 6 small 4" tartletts + 10 small cookies,which can be taken along with jam)
225g (8oz, 2cups) all purpose flour
30g (1oz, 2 tbsp) sugar
2.5ml (½ tsp) salt
110g (4oz) unsalted butter, cold (frozen is better)
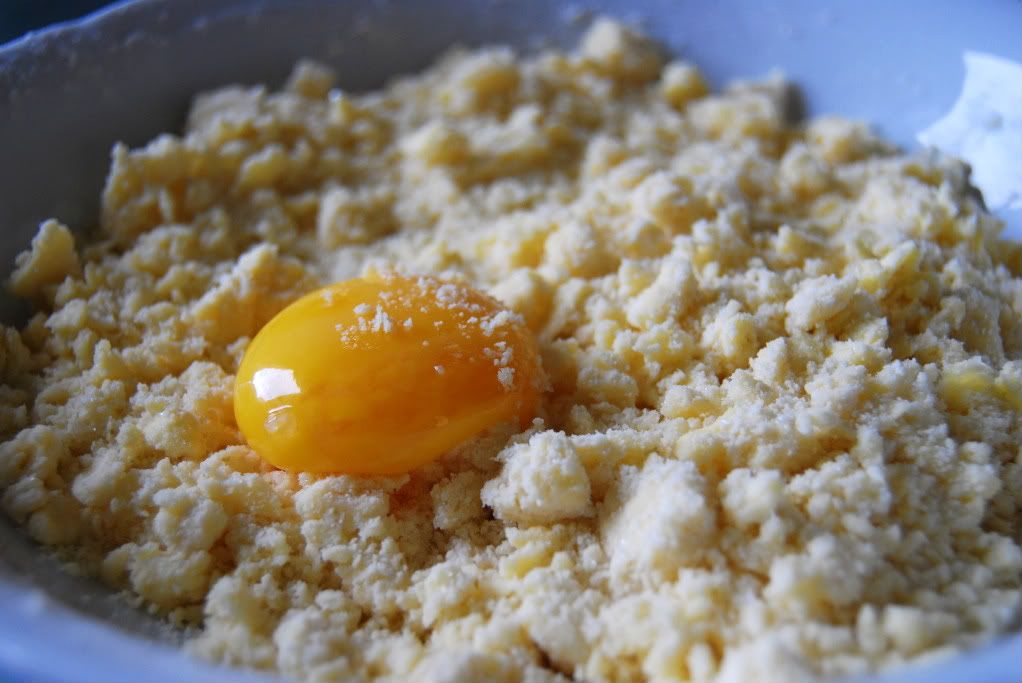
2 egg yolks
2.5ml (½ tsp) almond extract (optional)
15-30ml (1-2 Tbsp) cold water

Directions:
Sift together flour, sugar and salt. Grate butter into the flour mixture, using the large hole-side of a box grater. Using your finger tips only, and working very quickly, rub the fat into the flour until the mixture resembles bread crumbs. Set aside.

Add the egg yolks with the almond extract (if using) and quickly mix into the flour mixture. Keep mixing while dribbling in the water, only adding enough to form a cohesive and slightly sticky dough.

Form the dough into a disc, wrap in cling and refrigerate for at least 30 minutes

Homemade Strawberry Jam

Ingredients:
1 Kilo Strawberries
500 gms Gelierzucker (Pectin based Sugar)
Sterilized glass bottles

Directions:
Place the strawberries in a colander and rinse them under cold running water. Drain and hull the strawberries. Cut the larger berries in half or quarters and leave the small berries whole. Place the strawberries in a deep, heavy-bottomed pan. Add sugar and gently mix. Once the strawberries start leaving out its juice, switch on the heat on medium. Wit till the mixture comes to a boil. Once it starts boiling, let it boil for another 5 minutes.

To test if the jam has reached its final stage, take a spoon of the mixture on place it on a plate and let cool. Once it cools, the mixture would have turned thick.

Take the mixture off heat and immediately pour it into sterilized glass bottles. Close the lid and keep the bottle upside down for 5 minutes. After that cool the bottle and the bottle can be kept at room temperature. Once the bottle is opened and use, place the bottle in the refrigerator.

I used just a tablespoon of this jam for each tart.

Frangipane

Prep time: 10-15 minutes
Equipment needed: bowls, hand mixer, rubber spatula

Ingredients:
125g (4.5oz) unsalted butter, softened
125g (4.5oz) icing sugar
3 (3) eggs
2.5ml (½ tsp) almond extract
125g (4.5oz) ground almonds
30g (1oz) all purpose flour

Directions:
Cream butter and sugar together for about a minute or until the mixture is primrose in colour and very fluffy. Scrape down the side of the bowl and add the eggs, one at a time, beating well after each addition. The batter may appear to curdle. In the words of Douglas Adams: Don’t panic. Really. It’ll be fine. After all three are in, pour in the almond extract and mix for about another 30 seconds and scrape down the sides again. With the beaters on, spoon in the ground nuts and the flour. Mix well using a spatula. The mixture will be soft, keep its slightly curdled look (mostly from the almonds) and retain its pallid yellow colour.

Assembling the tart
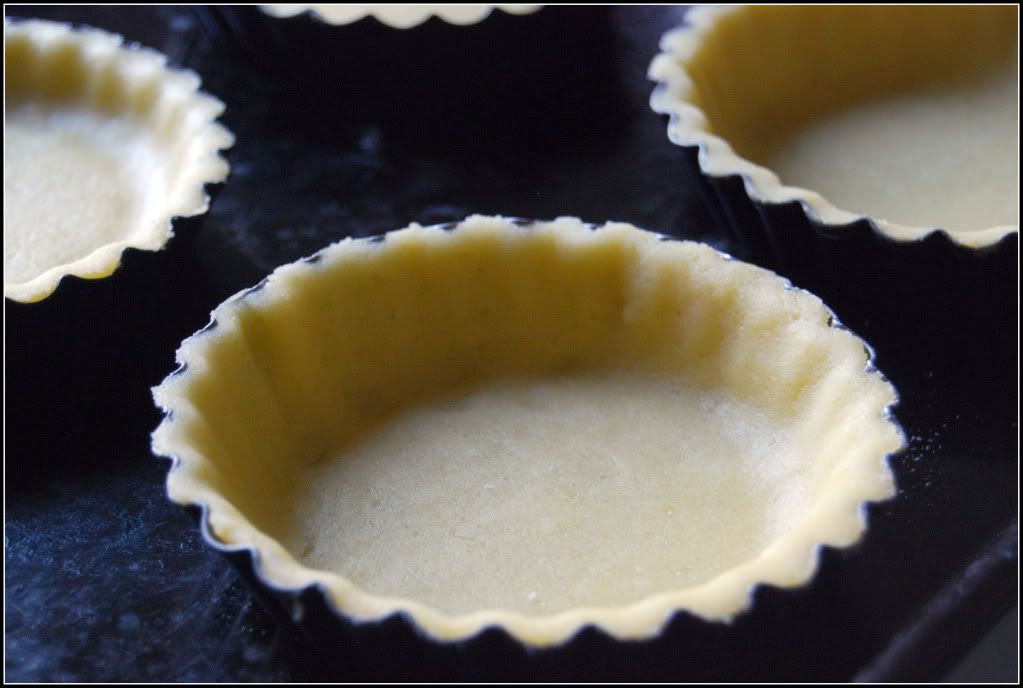
Place the chilled dough disc on a lightly floured surface. If it's overly cold, you will need to let it become acclimatised for about 15 minutes before you roll it out. Flour the rolling pin and roll the pastry to 5mm (1/4”) thickness, by rolling in one direction only (start from the centre and roll away from you), and turning the disc a quarter turn after each roll. When the pastry is to the desired size and thickness, transfer it to the tart pan, press in and trim the excess dough. Patch any holes, fissures or tears with trimmed bits. Chill in the freezer for 15 minutes.

Preheat oven to 200C/400F.

Remove shell from freezer, spread as even a layer as you can of jam onto the pastry base.

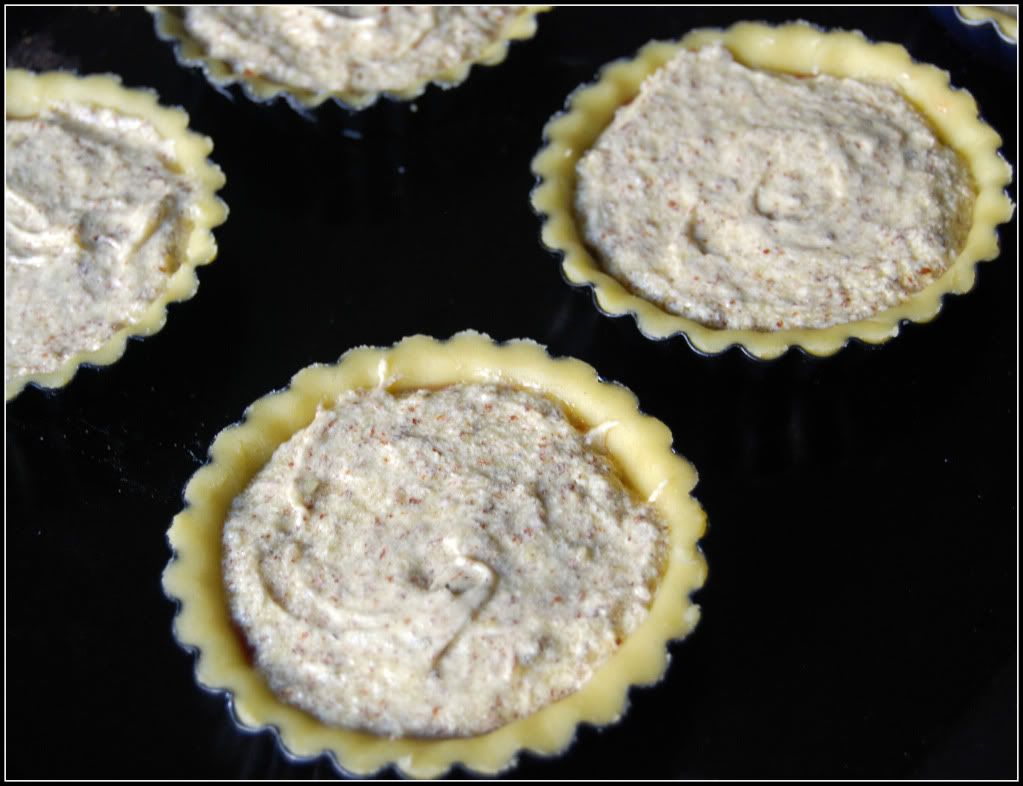
Top with frangipane, spreading to cover the entire surface of the tart. Smooth the top and pop into the oven for 30 minutes. (I baked 6 tartletts for 15-20 minutes)

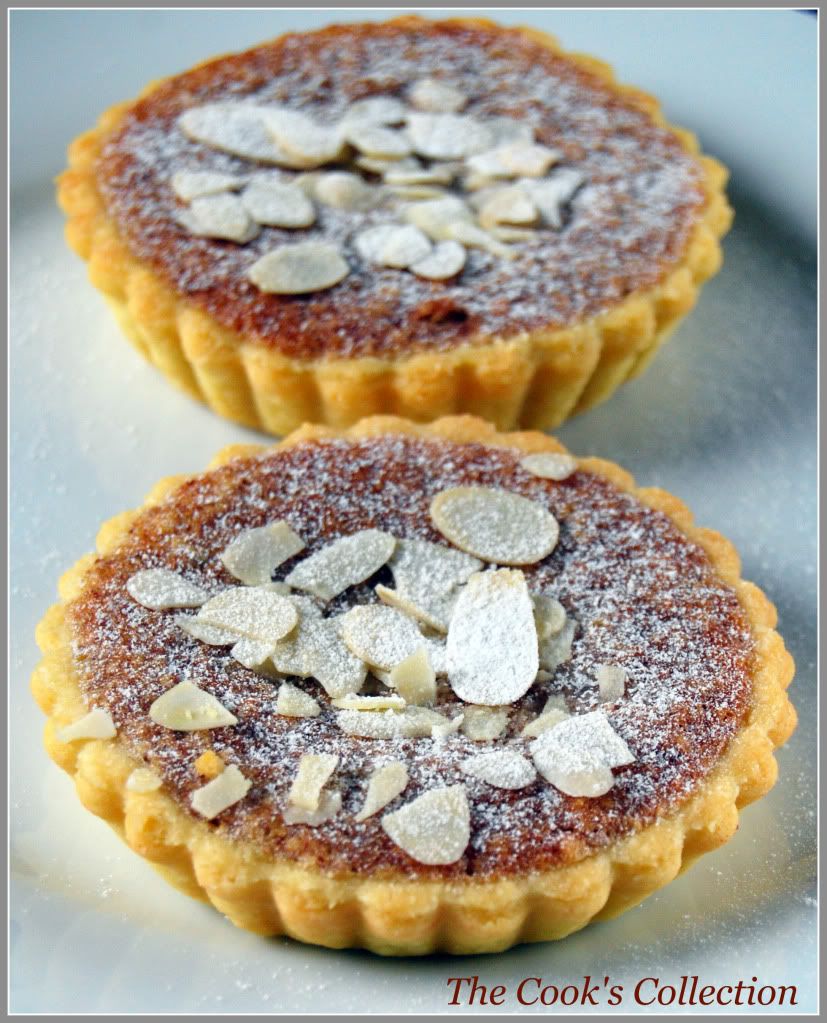
Five minutes before the tart is done, the top will be poofy and brownish. Remove from oven and strew flaked almonds on top and return to the heat for the last five minutes of baking.

The finished tart will have a golden crust and the frangipane will be tanned, poofy and a bit spongy-looking. Remove from the oven and cool on the counter. Serve warm, with crème fraîche, whipped cream or custard sauce if you wish.

When you slice into the tart, the almond paste will be firm, but slightly squidgy and the crust should be crisp but not tough.


Enjoy with just a dusting a icing sugar. Its yum!!

Tuesday, June 23, 2009

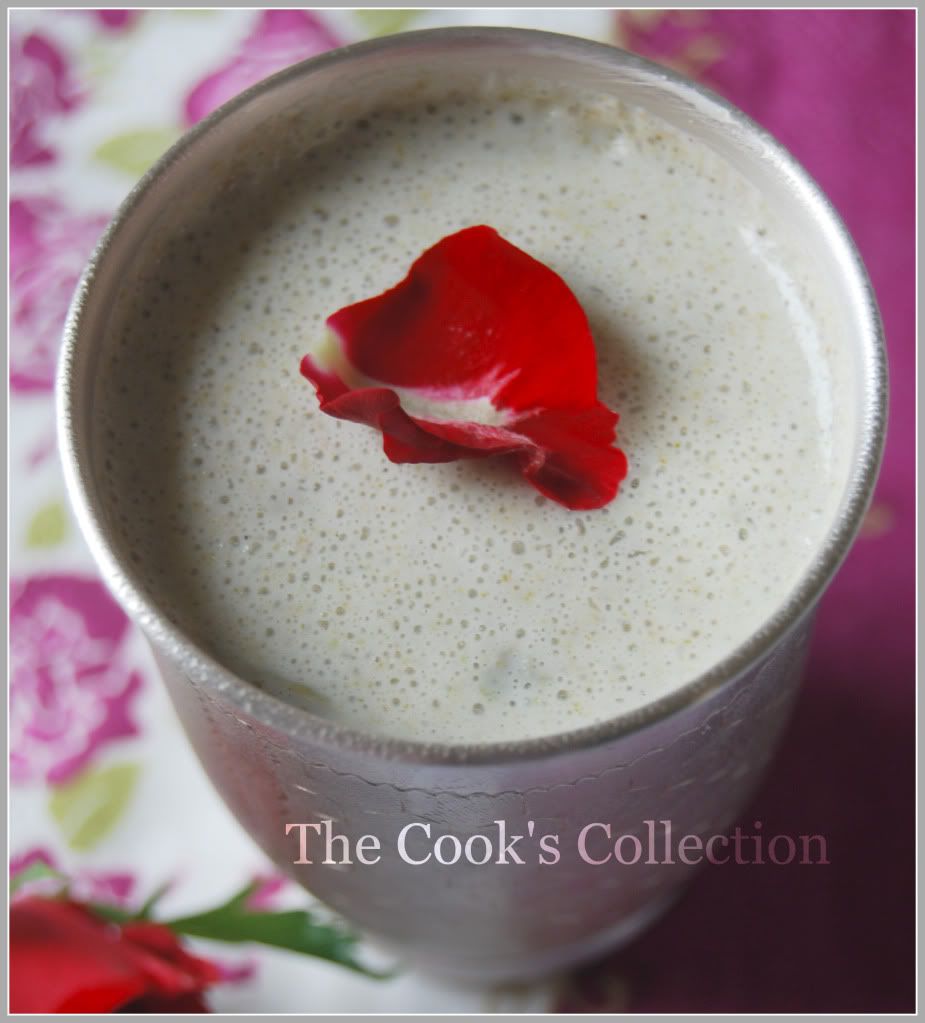
Thandai

Thandai is a wonderful cold refreshing and healthy flavoured milk that is traditionally prepared during the Holi festival(festival of colors). When people become a little exhausted throwing each other in the pool of coloured waters. A glass of Thandai offers instant energy and sets the mood for playing with colors.


Thandai when laced with the intoxicating bhang, make one sing, dance and go wild. Infact, bhang thandai is used as a mood setter for the festival of Holi. A wonderful and a distinct blend of spices to give ravishing drink. You should really taste it to see what it really is!!


Ingredients required..

1/2 tin, 200 gms Sweetened condensed milk (Milkmaid)
750ml Milk
8 - 10 Almonds, soaked and peeled
5-6 peppercorns
3-4 Cardamom or 1 tsp Cardamom powder
2 tsps Fennel seeds, saunf
2 tbsps Poppy seeds
Crushed ice
Rose petals for garnish

Method:

Grind the almonds, cardamom, and fennel seeds(saunf) to a fine paste. Blend with other ingredients till well mixed. Strain the blended mixture.

Half fill each glass with crushed ice and top up with the above mixture.

Serve garnished with rose petals.

Enjoy the lovely drink!

Tuesday, June 16, 2009

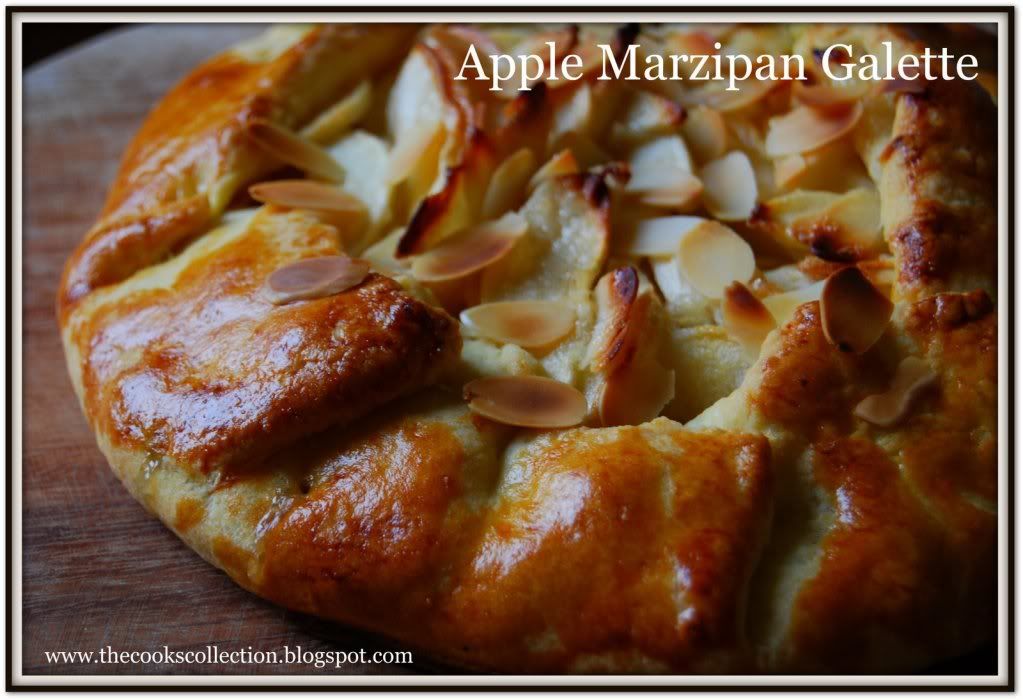
Apple Marzipan Galette

This one's for the marzipan(sweetened almond paste) lovers. The recipe for the galette dough is adapted from Dorie Greenspans "Baking with Julia". The presence of Cornmeal in the dough is one of the ingredient which gives a wonderful crunchy feel and makes the dough easy to work with. Apples are one of my favourite and it when paired with almonds give a heavenly feeling. This galette is worth any special occasion.

This post is my contribution to Sugar High Friday - Fruit & Nut, an event hosted by Mansi of Fun & Food Blog.


This recipe is partially adapted from myrecipes.com.

Ingredients:

1 Recipe Galette dough
1/4 cup marzipan, softened
4 medium sized apples. sliced
1/2 cup sugar
1 tablespoon all-purpose flour
1 teaspoon almond extract
2 teaspoons lemon juice
Dash of salt
1/4 cup Sliced almonds, some to drizzle on top

Method:
Preheat oven to 425°F (220° C) .

Roll the galette dough to a 14-inch circle on a lightly floured surface. Place dough on prepared pan. Roll marzipan to a 9-inch circle on a lightly floured surface. Place marzipan on top of dough.

Combine apple, sugar, flour, almond extract, sliced almonds, lemon juice, and salt in a large bowl; toss well. Spoon apple mixture over marzipan. Fold 2-inch dough border over the apple mixture, pressing gently to seal (dough will only partially cover apple mixture). Drizzle sliced almonds on top and bake at 425°F (220°C) for 30 minutes or until lightly browned. (apple filling may leak slightly during cooking).


Have a great week!

Tuesday, June 9, 2009

Strawberry Mousse & Blogs First Anniversary!

This is the most exciting moment to share with you all. Its been exactly a year since i started this blog, the day i posted my First post! Its my "Blog Anniversay". Wow, time has just flew! This one whole year has been such a wonderful year for me, got space for myself (Thanks to "Blogger") where i could share all my kitchen experiences, had a chance to join "The Daring Bakers" and learned so much from them ALL ABOUT BAKING, got to meet other friend food bloggers, made wonderful friends! I had never spent so much time for myself as much as i did for this blog. Changing the look, the templates, editing posts, adding new widgets.. Finally after one whole year of repair, i've settled with the present look! Guess many more changes to come in the coming years..
As such i've no cakes or candles to celebrate this day, but i've made this wonderful dessert to sweeten all your tastebuds. Thanks to my readers for being with me and for all your support. Love you all!
And now for the dessert i was talking about.. "Strawberry Mousse". This is a very simple yet delicious dessert. Egg less but no less flavorful and rich. Its made out of just few ingredients and the result is outstanding. Gelatin provides the base structure to hold the mousse; whipped cream provides the airiness. Its got the grainy and sandy texture and feel and i promise, it'll just melt in your mouth. This dessert will definitely tickle your taste buds!! Its Yummy!


This post is my contribution to Strawberry Feast, an event hosted by happy cook of My Kitchen Treasures.

Serves 4
Source: Diana's Desserts.

Ingredients:
1 small container (approximately 8 ounces/250 grams) fresh strawberries, rinsed and hulled and cut into halves
1/2 cup granulated sugar + more according to your taste
1 tablespoon water
2 teaspoon unflavored powdered gelatin
1 cups heavy cream, whipped

Garnish (optional):
Extra whole strawberries
Whipped cream or non-dairy whipped topping
Mint sprigs

Instructions:

Place the strawberries in a medium saucepan, add the sugar and water and cook over medium–low heat. Stir gently until the sugar has dissolved. Simmer for 10 minutes or until the strawberries are soft and the liquid syrupy. Process the strawberry mixture and gelatin in a food processor until smooth. Set aside to cool.

Fold through the cream. Pour into 4 (1/2 cup) serving glasses or cups and refrigerate for 30 minutes or until set.

Garnish each serving with a dollop of whipped cream or non-dairy whipped topping, a strawberry and a mint sprig, if desired.

Enjoy and have a great day!

Other Mousse Recipes; 3 layered Chocolate Mousse

Sunday, May 31, 2009

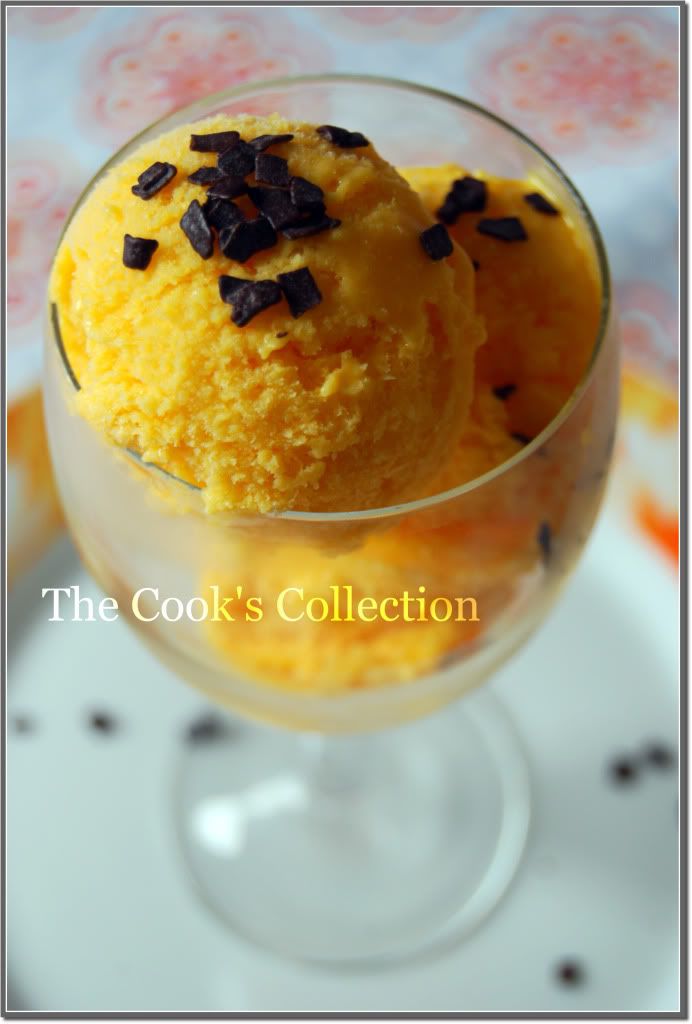
Mango Ice-cream

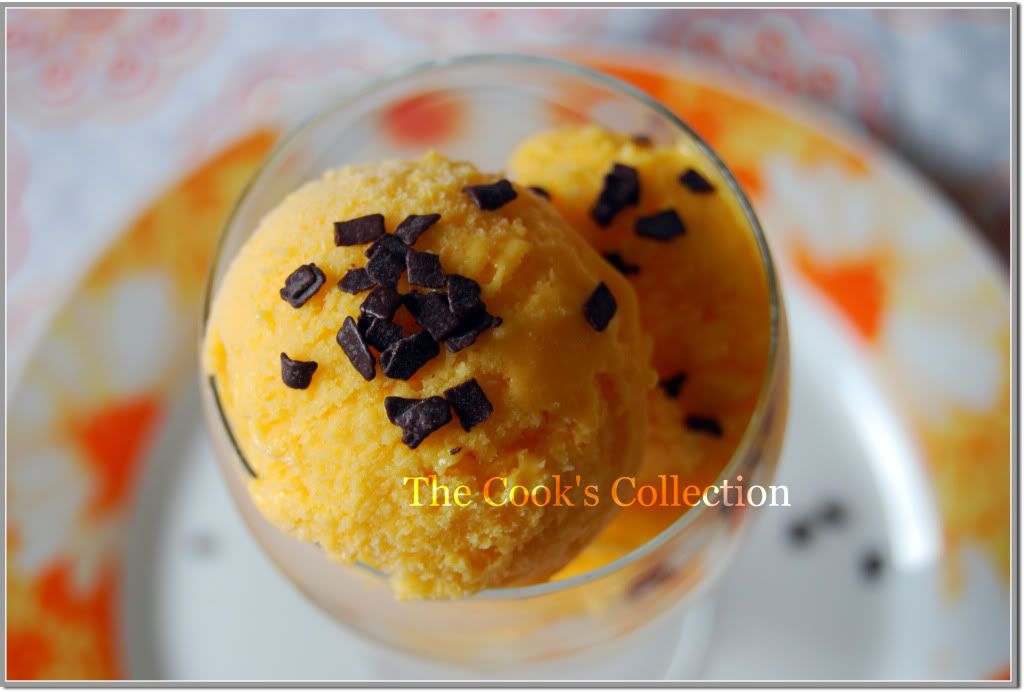
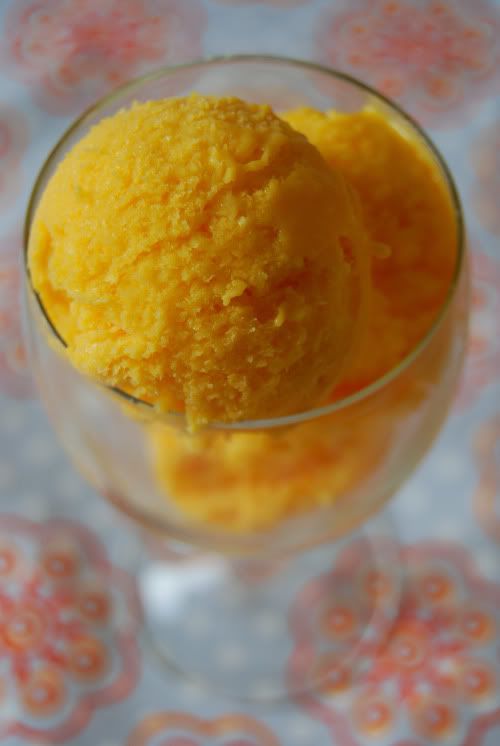
This light creamy ice-cream is deceptively easy to make. It uses no ice cream maker and yet you get a lovely soft creamy texture. There is something special about the king of fruits… sweet-scented and aromatic, it imparts a luscious creamy texture to this heavenly dessert. Serve it with chocolate shavings or chips as chocolate and mango are flavors that complement each other beautifully.

You need to plan ahead before you start with this recipe. If you start during the morning, you can have this ice cream as a dessert after your dinner.

This post is my contribution to the Mango Mela, an event hosted by Srivalli of Cooking for all Seasons.

Recipe adapted from tarladalal.com

Serves 4.

Here are the ingredients that are required for this delicious ice cream..
1½ cups ripe alphonso mangoes, around 2, peeled and chopped
2 to 3 tablespoons sugar
½ can sweetened condensed milk, 200 gms
2 cups full fat milk
1 teaspoon lemon juice

Method
Blend the mangoes with the sugar into a purée in a liquidiser.

Combine the condensed milk, milk, puréed mangoes, lemon juice and mix well.

Pour the mixture in a shallow freezer proof plastic container. Cover and freeze till slushy, for about 2 hours.

Pour the mixture into a deep vessel and blend using a hand mixer, or you can even use a whisk, but thats going to take lot of your time. Blend till it is smooth and creamy.

Transfer the blended mixture back to the plastic shallow container. Cover and freeze again till slushy and follow this step one more time and you're done.
Cover and freeze till it is firm. Shift it into the refrigerator 45 minutes before you serve.


Scoop and serve.


Tips
The lemon juice is added to enhance the flavour of the mangoes. If you find that the mangoes you're using are a little sharp,
Do not add the lemon juice.

Have a great week!

Wednesday, May 27, 2009

Daring Bakers: Apple Strudel

Daring Bakers May 2009 - Apple Strudel

The May Daring Bakers’ challenge was hosted by Linda of make life sweeter! and Courtney of Coco Cooks. They chose Apple Strudel from the recipe book Kaffeehaus: Exquisite Desserts from the Classic Cafés of Vienna, Budapest and Prague by Rick Rodgers.

This recipe has been chosen for its technique of making the strudel dough. Its simply easy to go buy a phyllo dough and stuff it with your stuffing and bake it. But making your own strudel dough is a challenge in this months Daring Bakers challenge. The dough needs to be paper thin to get a flaky, layered finished strudel.

Preparation time
Total: 2 hours 15 minutes – 3 hours 30 minutes

15-20 min to make dough
30-90 min to let dough rest/to prepare the filling
20-30 min to roll out and stretch dough
10 min to fill and roll dough
30 min to bake
30 min to cool


Apple strudel from “Kaffeehaus – Exquisite Desserts from the Classic Cafés of Vienna, Budapest and Prague” by Rick Rodgers

Strudel dough

The ingredients required for the strudel dough are..

1 1/3 cups (200 g) unbleached flour
1/8 teaspoon salt
7 tablespoons (105 ml) water, plus more if needed
2 tablespoons (30 ml) vegetable oil, plus additional for coating the dough
1/2 teaspoon cider vinegar

Instructions;
1. Combine the flour and salt in a stand-mixer fitted with the paddle attachment. Mix the water, oil and vinegar in a measuring cup. Add the water/oil mixture to the flour with the mixer on low speed. You will get a soft dough. Make sure it is not too dry, add a little more water if necessary.
Take the dough out of the mixer. Change to the dough hook. Put the dough ball back in the mixer. Let the dough knead on medium until you get a soft dough ball with a somewhat rough surface.

2. Take the dough out of the mixer and continue kneading by hand on an unfloured work surface. Knead for about 2 minutes. Pick up the dough and throw it down hard onto your working surface occasionally.
Shape the dough into a ball and transfer it to a plate. Oil the top of the dough ball lightly. Cover the ball tightly with plastic wrap. Allow to stand for 30-90 minutes (longer is better).

3. It would be best if you have a work area that you can walk around on all sides like a 36 inch (90 cm) round table or a work surface of 23 x 38 inches (60 x 100 cm). Cover your working area with table cloth, dust it with flour and rub it into the fabric. Put your dough ball in the middle and roll it out as much as you can.
Pick the dough up by holding it by an edge. This way the weight of the dough and gravity can help stretching it as it hangs. Using the back of your hands to gently stretch and pull the dough. You can use your forearms to support it.

4. The dough will become too large to hold. Put it on your work surface. Leave the thicker edge of the dough to hang over the edge of the table. Place your hands underneath the dough and stretch and pull the dough thinner using the backs of your hands. Stretch and pull the dough until it's about 2 feet (60 cm) wide and 3 feet (90 cm) long, it will be tissue-thin by this time. Cut away the thick dough around the edges with scissors. The dough is now ready to be filled.

Apple filling;
2 tablespoons (30 ml) golden rum
3 tablespoons (45 ml) raisins
1/4 teaspoon ground cinnamon
1/3 cup plus 1 tablespoon (80 g) sugar
1/2 cup (1 stick / 115 g) unsalted butter, melted, divided
1 1/2 cups (350 ml) fresh bread crumbs
strudel dough (recipe below)
1/2 cup (120 ml, about 60 g) coarsely chopped walnuts
2 pounds (900 g) tart cooking apples, peeled, cored and cut into ¼ inch-thick slices (use apples that hold their shape during baking)

Instructions;

1. Mix the rum and raisins in a bowl. Mix the cinnamon and sugar in another bowl.

2. Heat 3 tablespoons of the butter in a large skillet over medium-high. Add the breadcrumbs and cook whilst stirring until golden and toasted. This will take about 3 minutes. Let it cool completely.

3. Put the rack in the upper third of the oven and preheat the oven to 400°F (200°C). Line a large baking sheet with baking paper (parchment paper). Make the strudel dough as described below. Spread about 3 tablespoons of the remaining melted butter over the dough using your hands (a bristle brush could tear the dough, you could use a special feather pastry brush instead of your hands). Sprinkle the buttered dough with the bread crumbs. Spread the walnuts about 3 inches (8 cm) from the short edge of the dough in a 6-inch-(15cm)-wide strip. Mix the apples with the raisins (including the rum), and the cinnamon sugar. Spread the mixture over the walnuts.


4. Fold the short end of the dough onto the filling. Lift the tablecloth at the short end of the dough so that the strudel rolls onto itself. Transfer the strudel to the prepared baking sheet by lifting it. Curve it into a horseshoe to fit. Tuck the ends under the strudel. Brush the top with the remaining melted butter.


5. Bake the strudel for about 30 minutes or until it is deep golden brown. Cool for at least 30 minutes before slicing. Use a serrated knife and serve either warm or at room temperature.


It is best on the day it is baked.


I enjoyed this dessert topped with vanilla honey sauce (just melt few scoops of vanilla ice cream and combine with few teaspoons of honey).

Enjoy!

Tips
- Ingredients are cheap so we would recommend making a double batch of the dough, that way you can practice the pulling and stretching of the dough with the first batch and if it doesn't come out like it should you can use the second batch to give it another try;
- The tablecloth can be cotton or polyster;
- Before pulling and stretching the dough, remove your jewelry from hands and wrists, and wear short-sleeves;
- To make it easier to pull the dough, you can use your hip to secure the dough against the edge of the table;
- Few small holes in the dough is not a problem as the dough will be rolled, making (most of) the holes invisible.

Tuesday, May 26, 2009

Zucchini and walnut bread

A quintessential summer vegetable, Zucchini are tender and deliciously mild. Its flavor is so mild it picks up that of whatever you cook it with. It is low in calories and provides a bright green colour, moisture and nutrition to the cooked dish. Zucchini bread along with a glass of cold milk is a great way to start your day. This bread forms a thin soft outer crust and a very soft inner crumb. The presence of walnuts give a crunchy effect with every bite. Its not very sweet. Its a light bread which can be had without any extra accompaniment. This recipe is adapted from the culinary institute of America. Here goes the recipe..


Makes 2 loaves

Ingredients
flour less cooking spray for greasing
3 1/2 cups all-purpose flour plus extra for dusting
2 tsp baking powder
1/2 tsp baking soda
1 tsp salt
1 tsp ground cinnamon
1/2 tsp freshly grated nutmeg
1/4 tsp ground cloves
2 1/2 cups grated unpeeled zucchini
1 cup sugar
4 large eggs, lightly beaten
1/2 cup vegetable oil
2 tbsps grated orange zest
1 cup coarsely chopped toasted walnuts or pecans

Directions

Preheat the oven to 350°F(180°C).

Grease and flour two 8½-inch loaf pans.

Sift the flour, baking powder, baking soda, salt, cinnamon, nutmeg, and cloves into a bowl and set aside.


Combine the zucchini, sugar, eggs, oil, and orange zest in a large bowl and mix by hand until evenly blended.

Add the sifted dry ingredients to the zucchini mixture. Stir by hand just until the batter is evenly moistened and blended.


Fold in the nuts.

Divided the batter between the prepared loaf pans.

Bake until the edges are browned and starting to pull away from the pan and the bread springs back when lightly pressed with your fingertip, 50-55 minutes.


Remove the loaves from the pans and let cool on wire racks before serving.

Tuesday, May 19, 2009

Paneer Paratha (Flat indian bread stuffed with Indian Cheese)

Paneer also known as cottage cheese is used in a variety of dishes world over. It forms a part of salads, main course dishes and even desserts in the form of cream cheese. Known as the Indian Cheese, paneer is one of the most versatile ingredients available for cooking.

Women in India make their own paneer by adding curds to milk thus making it curdle. This paneer can then be grated or crumbled and combined with a blend of subtle masala's making it an ideal stuffing for a paratha. Make these delicious parathas for your family or guests and watch them disappear in a jiffy.

Makes 5 parathas

You'll need the following ingredients..

For the dough
3/4 cup All purpose flour (maida)
3/4 cup Whole wheat flour
2 tsp oil(any)
3/4 tsp Salt
1/2 cup + 1/8 cup Water

To be mixed into a stuffing
1 1/2 cups grated paneer (cottage cheese)
2 tbsp coriander leaves, finely chopped
1 tsp finely chopped green chillies
1 tsp chilli powder
1 tsp dry mango powder (amchur)
Salt to taste

Other ingredients
Whole wheat flour for dusting
Ghee or oil for cooking

Method

For the dough : Combine all the ingredients and knead well into a soft, smooth dough. Divide the dough into 5 equal portions. Keep aside.

How to proceed:
Divide the stuffing into 5 equal portions. Keep aside.

Roll out one portion of the dough into a circle of 3" diameter using whole wheat flour for rolling.

Place one portion of the stuffing in the centre of the circle. Bring together all sides in the center and seal tightly.(refer figure)


Roll out again into a square of 5" using whole wheat flour. Cook on a hot tava(griddle), using a little oil, until both sides are golden brown.

Repeat with the remaining dough and stuffing to make 4 more parathas.

Serve hot with any gravy you like. Try with Palak paneer.

Tuesday, May 12, 2009

Layered Strawberry Cake

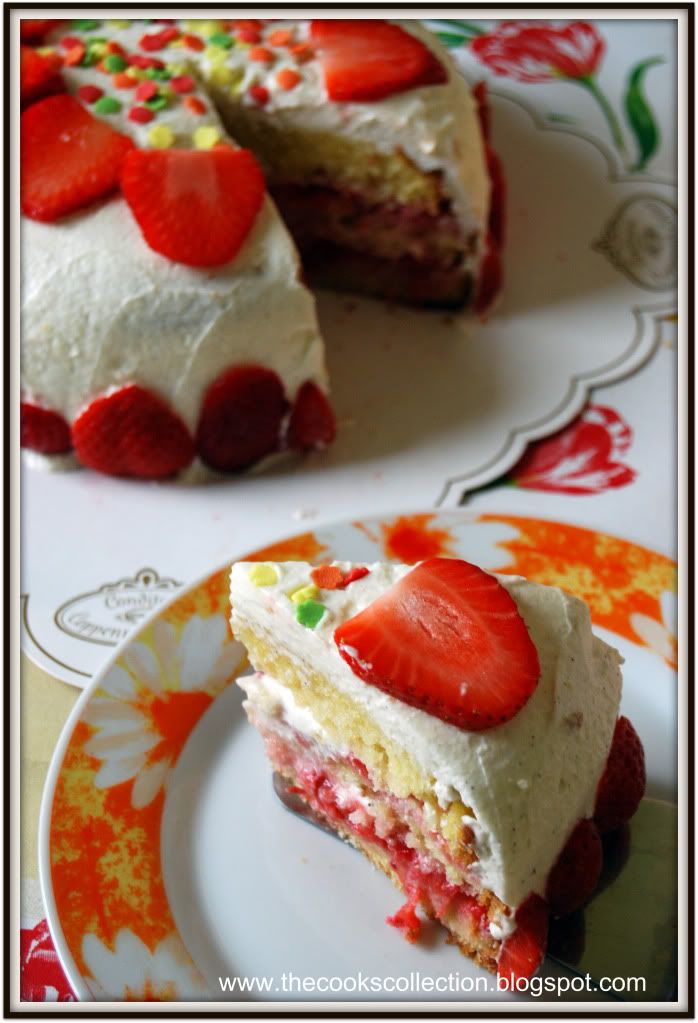
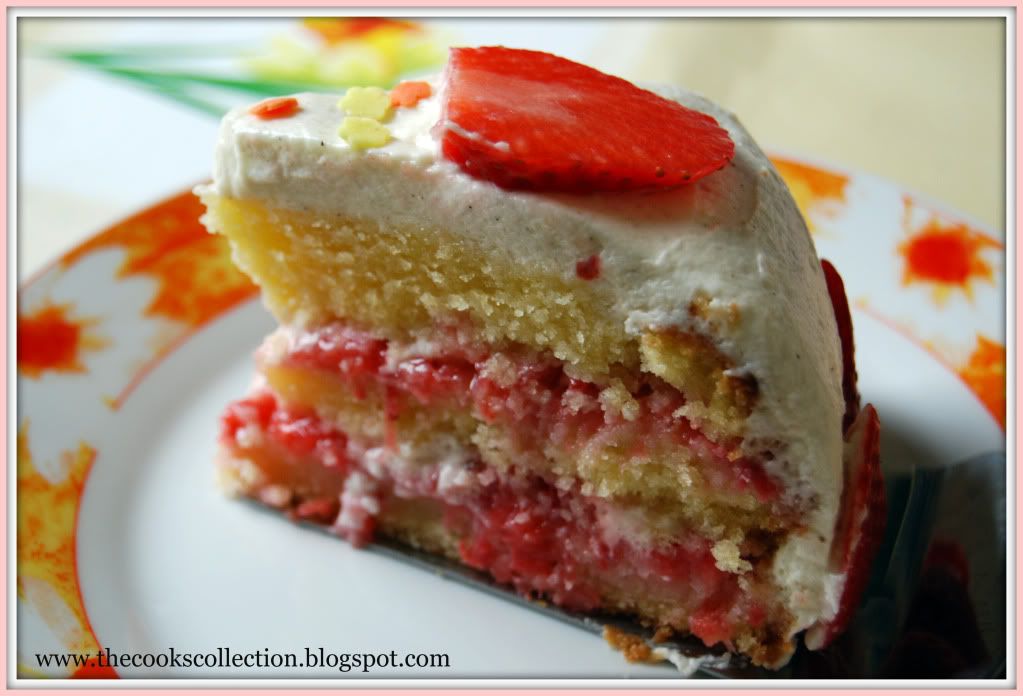
This Strawberry cake is basically a pound cake which is layered with sweet, tangy, juicy and colorful sugared berries and a velvety blend of whipped sweet cream, finished with the same cream and topped with fresh berries. The berry filling and the cream mixture can be used with any Genoise cake or any other plain vanilla cake.


I present this Strawberry cake to Meeta's Monthly Mingle - Spring Cakes!

This recipe is adapted and altered from "Baking With Julia".

The ingredients used for this recipe are:

For the cake
1 1/2 cups all-purpose flour
1 tsp baking powder
1/4 tsp salt
1 stick (4 ounce),115 gms butter, at room temperature
1 cup sugar
2 large eggs, at room temperature, whisked to blend
1/2 cup milk, at room temperature
1 tsp pure vanilla extract

For the Strawberry filling
1 pint (2 cups) ripe fresh strawberries, hulled and sliced
1/4 cup sugar (depending on the sweetness of the fruit)

For the cream
1 1/4 cups cold heavy cream
2 tbsps sour cream
2 tbsps sugar
1 tsp pure vanilla extract

Position a rack in the lower third of the oven and preheat the oven to 350 deg F(180 deg C). Butter and flour a 7 inch round pan.

For the cake Sift the flour, baking powder, and salt together onto a sheet of waxed or parchment paper. Reserve.
Put the butter into the bowl of a mixer fitted with the paddle attachment(or work with a hand-held mixer) and beat at medium speed until smooth. With the machine running, add the sugar in a steady steam. Stop the machine and scrap down the paddle and the sides of the bowl with a rubber spatula. Continue to beat at medium speed until the mixture is very light and fluffy, about 4 to 5 minutes.
With the mixer still at medium speed, begin to add the eggs in small addition, about a tablespoon at a time. If the mixture becomes watery or shiny, stop adding the eggs and beat at an increased speed just until it smooths out. When the batter has come together again, decrease the speed to medium and continue adding the eggs, scraping down the paddle and sides of the bowl from time to time; it will take 3 to 4 minutes to incorporate the eggs. The mixture is properly combined when it appears white, fluffy, and increased in volume.
Reduce the mixer speed to low and add the flour mixture and the milk alternately--4 additions of flour, 3 of milk-- scraping the paddle and bowl frequently and mixing until the batter is smooth after each addition. Add the vanilla and mix just to blend.

Baking the cake Spoon the batter into the prepared pan and smooth the top with a spatula. Bake for 55 to 65 minutes, or until a wooden toothpick inserted in the center of the cake comes out clean. Transfer the cake to a cooling rack and allow it to cool in the pan for 10 minutes. Invert the cake onto a rack, remove the pan, and cool to room temperature.

Preparing the Berries Toss the sliced berries with the sugar in a large bowl and leave them uncovered, at room temperature for at least 2 hours.
Coarsely mash the berries with the tines of the fork and toss them again; let them stand for 1 hour longer. You can do this the day before, but the berries should be refrigerated after they are mashed.

For the cream Using a mixer fitted with the whisk attachment or a hand held mixer, whip the heavy cream, sour cream, sugar and vanilla together until the mixture forms soft peaks. The cream is the proper consistency when the tracks made by the whisk close slowly and almost disappear. Cover and refrigerate the cream, give it a turn or two by hand with a whisk to bring the mixture together again.

Finishing the cake Using a serrated knife and a gentle sawing motion, cut the cake horizontally into 3 layers. Pace the bottom layer cut side up on a cardboard round and the removable bottom of a tart pan. Lifting the berries from the bowl with a slotted spoon so that most of the liquid drains of, spoon half of the mashed strawberries over the cake layer, then spread a thin layer of the whipped cream over the berries. Top with the middle layer, spoon on the rest of the strawberries, and spread another thin layer of the cream over the berries. Center the top layer over the filling.
Working with a flexible metal icing spatula, frost the top and sides of the cake with whipped cream and decorate as you wish with strawberries or with some icing left out. Refrigerate the cake for at least an hour before serving.

Storing The cake can be refrigerated for several hours before serving. Keep it away from the foods in the refrigerator with strong odors, as cream picks up odors quickly. It would be ideal if you could store this cake in a box.

About Us | Site Map | Privacy Policy | Contact Us | Blog Design | 2007 Company Name