
Daring Bakers August 2009 Challenge
The August 2009 Daring Bakers' challenge was hosted by Angela of A Spoonful of Sugar and Lorraine of Not Quite Nigella. They chose the spectacular Dobos Torte based on a recipe from Rick Rodgers' cookbook Kaffeehaus: Exquisite Desserts from the Classic Caffés of Vienna, Budapest, and Prague.
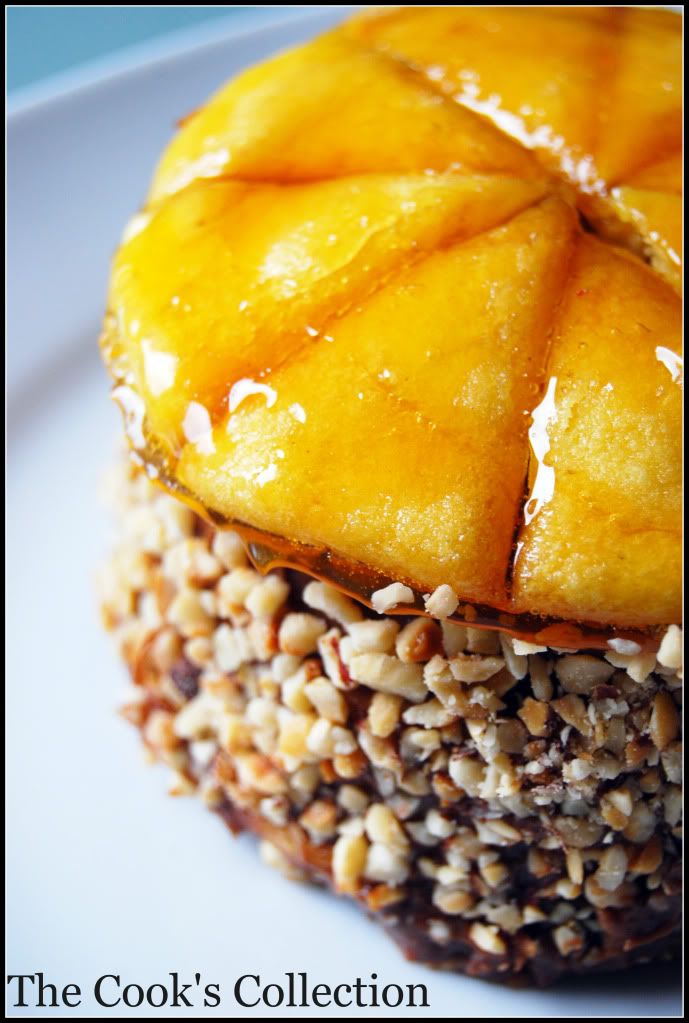
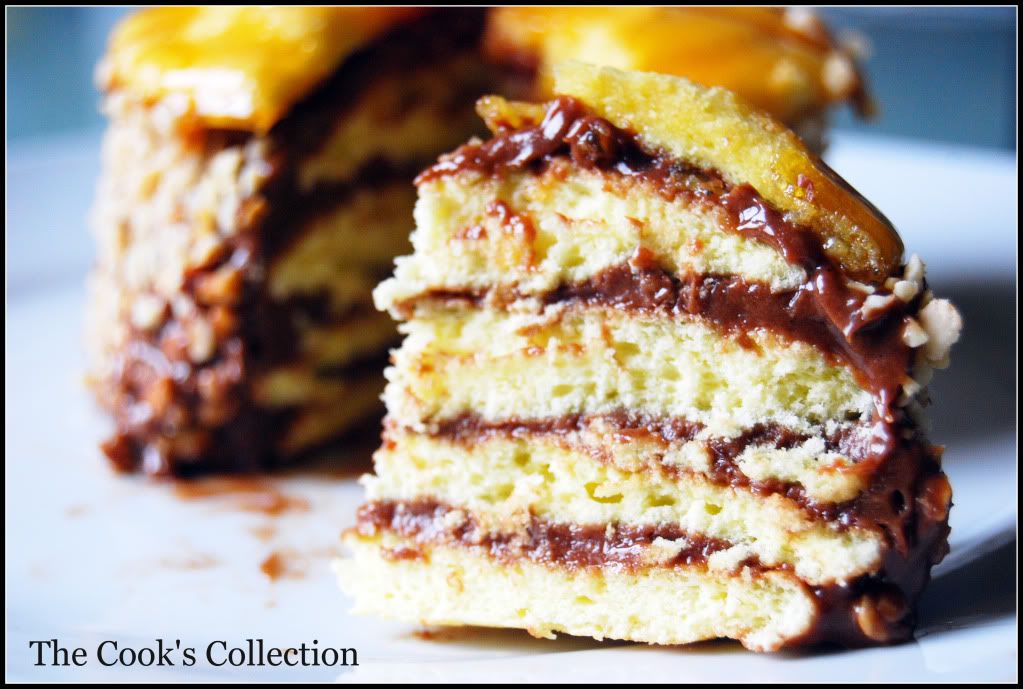
The Dobos Torta is a five-layer sponge cake, filled with a rich chocolate buttercream and topped with thin wedges of caramel. (You may come across recipes which have anywhere between six and 12 layers of cake; there are numerous family variations!) It was invented in 1885 by József C. Dobos, a Hungarian baker, and it rapidly became famous throughout Europe for both its extraordinary taste and its keeping properties. The recipe was a secret until Dobos retired in 1906 and gave the recipe to the Budapest Confectioners' and Gingerbread Makers' Chamber of Industry, providing that every member of the chamber can use it freely.
As i cook and bake only for two,i reduced the recipe by half and was able to get 2 4" diameter round cake, perfect for me. The cake turned out delicious especially when served chilled. Also i suggest not to add lemon juice to the caramel as it turns out bitter. Overall, a wonderful challenge.
Equipments required..
2 baking sheets
9” (23cm) springform tin and 8” cake tin, for templates
mixing bowls (1 medium, 1 large)
a sieve
a double boiler (a large saucepan plus a large heat-proof mixing bowl which fits snugly over the top of the pan)
a small saucepan
a whisk (you could use a balloon whisk for the entire cake, but an electric hand whisk or stand mixer will make life much easier)
metal offset spatula
sharp knife
a 7 1/2” cardboard cake round, or just build cake on the base of a sprinfrom tin.
piping bag and tip, optional
Preparation time:
Sponge layers 20 mins prep, 40 mins cooking total if baking each layer individually.
Buttercream: 20 mins cooking. Cooling time for buttercream: about 1 hour plus 10 minutes after this to beat and divide.
Caramel layer: 10-15 minutes.
Assembly of whole cake: 20 minutes
Ingredients for Sponge cake layers:
6 large eggs, separated, at room temperature
1 1/3 cups (162g) confectioner's (icing) sugar, divided
1 teaspoon (5ml) vanilla extract
1 cup plus 2 tablespoons (112g) sifted cake flour (SUBSTITUTE 95g plain flour + 17g cornflour (cornstarch) sifted together)
pinch of salt
Directions for the sponge layers:
NB. The sponge layers can be prepared in advance and stored interleaved with parchment and well-wrapped in the fridge overnight.
1.Position the racks in the top and centre thirds of the oven and heat to 400F (200C).
2.Cut six pieces of parchment paper to fit the baking sheets. Using the bottom of a 9" (23cm) springform tin as a template and a dark pencil or a pen, trace a circle on each of the papers, and turn them over (the circle should be visible from the other side, so that the graphite or ink doesn't touch the cake batter.)
3.Beat the egg yolks, 2/3 cup (81g) of the confectioner's (icing) sugar, and the vanilla in a medium bowl with a mixer on high speed until the mixture is thick, pale yellow and forms a thick ribbon when the beaters are lifted a few inches above the batter, about 3 minutes. (You can do this step with a balloon whisk if you don't have a mixer.)
4.In another bowl, using clean beaters, beat the egg whites until soft peaks form. Gradually beat in the remaining 2/3 cup (81g) of confectioner's (icing)sugar until the whites form stiff, shiny peaks. Using a large rubber spatula, stir about 1/4 of the beaten whites into the egg yolk mixture, then fold in the remainder, leaving a few wisps of white visible. Combine the flour and salt. Sift half the flour over the eggs, and fold in; repeat with the remaining flour.
5.Line one of the baking sheets with a circle-marked paper. Using a small offset spatula, spread about 3/4cup of the batter in an even layer, filling in the traced circle on one baking sheet.
Bake on the top rack for 5 minutes, until the cake springs back when pressed gently in the centre and the edges are lightly browned.
While this cake bakes, repeat the process on the other baking sheet, placing it on the centre rack. When the first cake is done, move the second cake to the top rack. Invert the first cake onto a flat surface and carefully peel off the paper. Slide the cake layer back onto the paper and let stand until cool. Rinse the baking sheet under cold running water to cool, and dry it before lining with another parchment. Continue with the remaining papers and batter to make a total of six layers. Completely cool the layers. Using an 8" springform pan bottom or plate as a template, trim each cake layer into a neat round. (A small serrated knife is best for this task.)
Ingredients for Chocolate Buttercream:
4 large eggs, at room temperature
1 cup (200g) caster (ultrafine or superfine white) sugar
4oz (110g) bakers chocolate or your favourite dark chocolate, finely chopped
2 sticks plus 2 tablespoons (250g) unsalted butter, at room temperature.
Directions for the chocolate buttercream:
NB. This can be prepared in advance and kept chilled until required.
1.Prepare a double-boiler: quarter-fill a large saucepan with water and bring it to a boil.
2.Meanwhile, whisk the eggs with the sugar until pale and thickened, about five minutes. You can use a balloon whisk or electric hand mixer for this.
3.Fit bowl over the boiling water in the saucepan (water should not touch bowl) and lower the heat to a brisk simmer. Cook the egg mixture, whisking constantly, for 2-3 minutes until you see it starting to thicken a bit. Whisk in the finely chopped chocolate and cook, stirring, for a further 2-3 minutes.
4.Scrape the chocolate mixture into a medium bowl and leave to cool to room temperature. It should be quite thick and sticky in consistency.
5.When cool, beat in the soft butter, a small piece (about 2 tablespoons/30g) at a time. An electric hand mixer is great here, but it is possible to beat the butter in with a spatula if it is soft enough. You should end up with a thick, velvety chocolate buttercream. Chill while you make the caramel topping.
Ingredients for Caramel topping:
1 cup (200g) caster (superfine or ultrafine white) sugar
12 tablespoons (180 ml) water
8 teaspoons (40 ml) lemon juice
1 tablespoon neutral oil (e.g. grapeseed, rice bran, sunflower)
Finishing touches
Directions for the caramel topping:
1.Choose the best-looking cake layer for the caramel top. To make the caramel topping: Line a jellyroll pan with parchment paper and butter the paper. Place the reserved cake layer on the paper. Score the cake into 12 equal wedges. Lightly oil a thin, sharp knife and an offset metal spatula.
2.Stir the sugar, water and lemon juice in a small saucepan. Bring to a boil over a medium heat, stirring often to dissolve the sugar. Once dissolved into a smooth syrup, turn the heat up to high and boil without stirring, swirling the pan by the handle occasionally and washing down any sugar crystals on the sides of the pan with a wet brush until the syrup has turned into an amber-coloured caramel.
3.The top layer is perhaps the hardest part of the whole cake so make sure you have a oiled, hot offset spatula ready. I also find it helps if the cake layer hasn't just been taken out of the refrigerator. I made mine ahead of time and the cake layer was cold and the toffee set very, very quickly—too quickly for me to spread it. Immediately pour all of the hot caramel over the cake layer. You will have some leftover most probably but more is better than less and you can always make nice toffee pattern using the extra to decorate. Using the offset spatula, quickly spread the caramel evenly to the edge of the cake layer. Let cool until beginning to set, about 30 seconds. Using the tip of the hot oiled knife (keep re-oiling this with a pastry brush between cutting), cut through the scored marks to divide the caramel layer into 12 equal wedges. Cool another minute or so, then use the edge of the knife to completely cut and separate the wedges using one firm slice movement (rather than rocking back and forth which may produce toffee strands). Cool completely.
You'll also need..
a 7” cardboard round
12 whole hazelnuts, peeled and toasted
½ cup (50g) peeled and finely chopped hazelnuts
Lorraine's note: If you're in Winter just now your butter might not soften enough at room temperature, which leads to lumps forming in the buttercream. Male sure the butter is of a very soft texture I.e. running a knife through it will provide little resistance, before you try to beat it into the chocolate mixture. Also, if you beat the butter in while the chocolate mixture is hot you'll end up with more of a ganache than a buttercream!
Angela's note: I recommend cutting, rather than scoring, the cake layer into wedges before covering in caramel (reform them into a round). If you have an 8” silicon round form, then I highly recommend placing the wedges in that for easy removal later and it also ensures that the caramel stays on the cake layer. Once set, use a very sharp knife to separate the wedges.
Assembling the Dobos
1.Divide the buttercream into six equal parts.
2.Place a dab of chocolate buttercream on the middle of a 7 1/2” cardboard round and top with one cake layer. Spread the layer with one part of the chocolate icing. Repeat with 4 more cake layers. Spread the remaining icing on the sides of the cake.
3.Optional: press the finely chopped hazelnuts onto the sides of the cake.
4.Propping a hazelnut under each wedge so that it sits at an angle, arrange the wedges on top of the cake in a spoke pattern. If you have any leftover buttercream, you can pipe rosettes under each hazelnut or a large rosette in the centre of the cake. Refrigerate the cake under a cake dome until the icing is set, about 2 hours. Let slices come to room temperature for the best possible flavour.
Storage
I (Angela) am quite happy to store this cake at room temperature under a glass dome, but your mileage may vary. If you do decide to chill it, then I would advise also using a glass dome if you have done. I should also note that the cake will cut more cleanly when chilled.
Variations
Shape: The traditional shape of a Dobos Torta is a circular cake, but you can vary the shape and size if you want. Sherry Yard in Desserts By The Yard makes a skyscraper Dobos by cutting a full-size cake into four wedges and stacking them to create a tall, sail-shaped cake. Mini Dobos would be very cute, and you could perch a little disc of caramel on top.
Flavour: While we both love the dark chocolate buttercream and this is traditional, we think it would be fun to see what fun buttercreams you all come up with! So, go wild! Or, you could brush each layer with a flavoured syrup if you just want a hint of a second flavour. Cointreau syrup would be divine!
Nuts: These are optional for decoration, so no worries if you're allergic to them. If you don't like hazelnuts, then substitute for another variety that you like.
Egg concerns
The cooking process for the buttercream will produce lightly cooked eggs. If you fall into a vulnerable health group then you may wish to use an egg-less buttercream.
Thursday, August 27, 2009
Daring Bakers Dobos Torte
Tuesday, August 25, 2009
Baingan Bharta (Eggplant Curry)
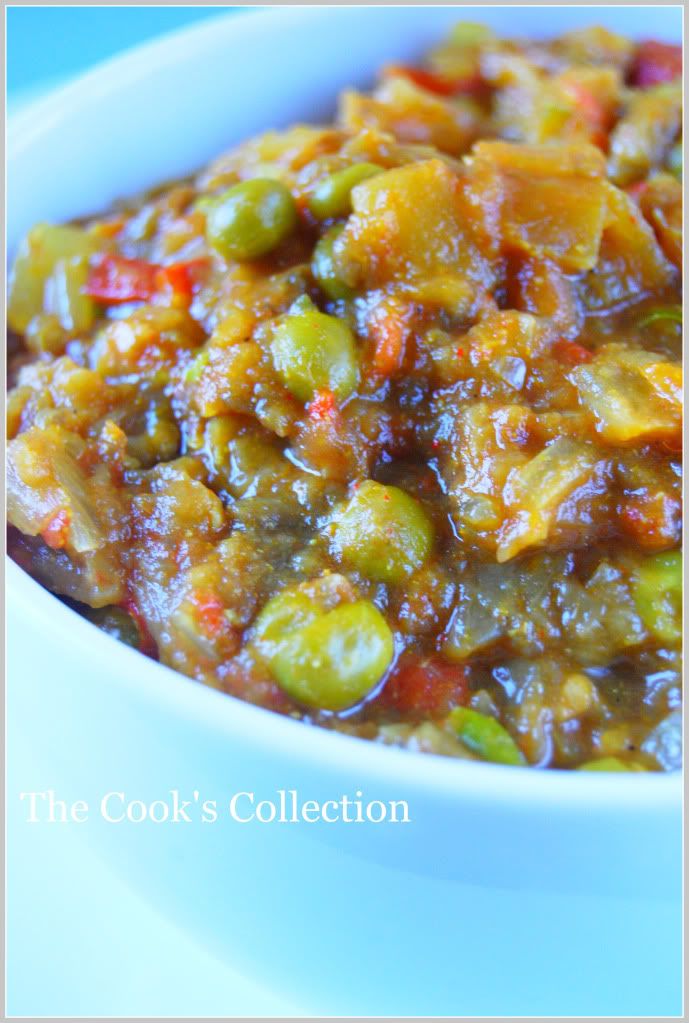
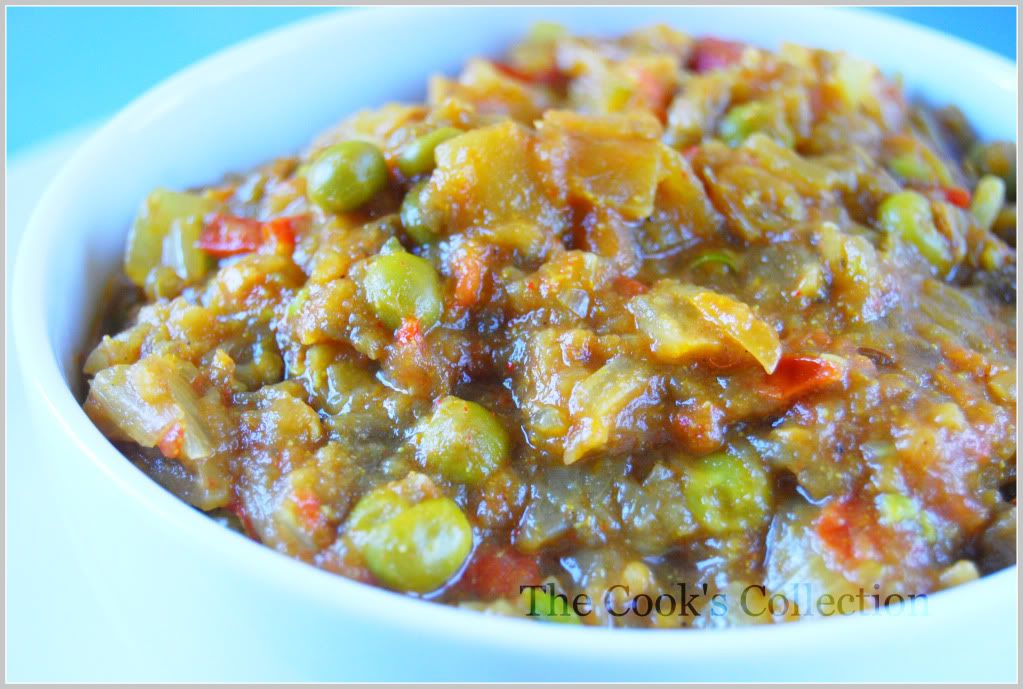
Indian food incorporates very innovative cooking methods, be it the use of the tandoor or the concept of cooking vegetables directly over the flame thus endowing the vegetable with a great smoky flavor. This particular dish Baingan Bharta has many fans all over the world. It goes wonderfully with any Indian flat bread or simply plain steamed rice.
Baingan or Brinjals are cooked directly over the flame till the skin is charred and can be peeled off combined with a fine blend of spices and some ghee makes up this brilliant creation. While selecting the brinjals for this recipe, be sure to choose one's that are large and with a shiny smooth surface as these are likely to have lower number of seeds. All in all this scrumptious dish is worth all the time and mess it may create!!
Ingredients required:
1 large (750gms) Brinjal (baingan / eggplant)
1/2 tsp for greasing
1 tbsp Ghee or oil(neutral)
1/4 tsp asafoetida (hing)
1 tsp cumin seeds (jeera)
1 onion(medium sized), chopped
1 1/2 tsp grated ginger
1 tsp grated garlic
1 tsp finely chopped green chilli + 1/2 tsp chilli powder(if you prefer more hot)
2 tomatoes(medium sized), chopped
1/2 tsp turmeric powder
1/2 tbsp coriander powder
1/2 tbsp cumin powder
1/2 tsp garam masala powder
Salt to taste
coriander leaves for garnish
Directions:
Grease the brinjal with oil and roast it over an open low flame till it is cooked. Keep turning the brinjal frequently so that all the sides are equally roasted(skin gets charred) and the inner flesh looks soft. OR you can use an oven which is a much easier option, as you wont have any mess around and you wont have to keep an eye on the brinjal. Just preheat the oven to 200 deg C and line a baking sheet or any other pan with aluminium foil and keep the greased brinjals as it is and bake for 1 hour. Take it out of the oven and let it cool completely. For this you'll need to plan ahead and start off.
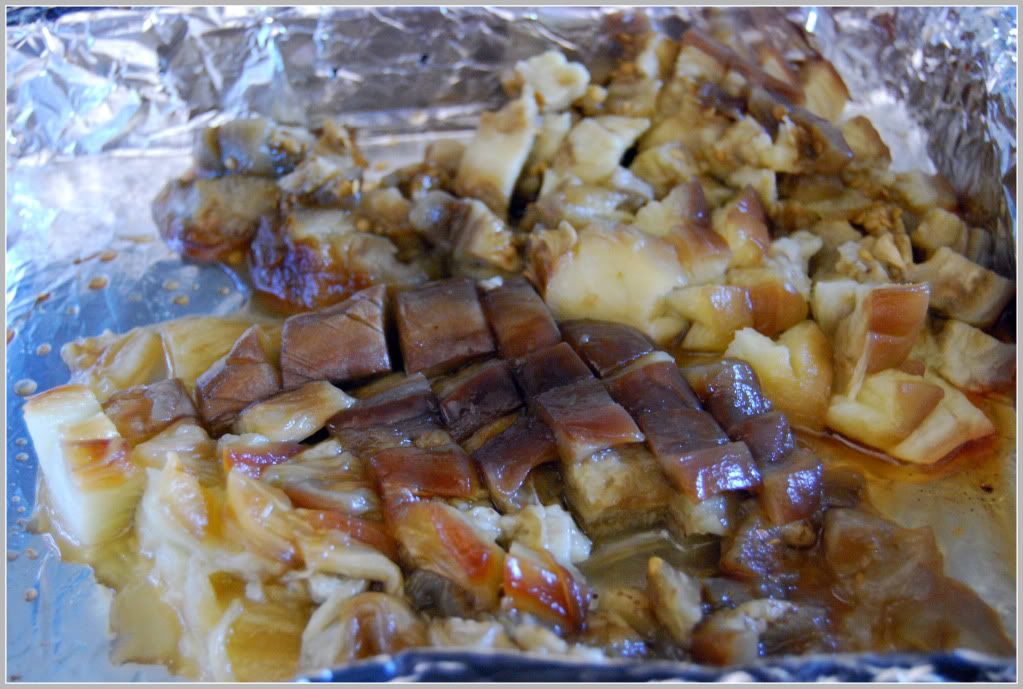
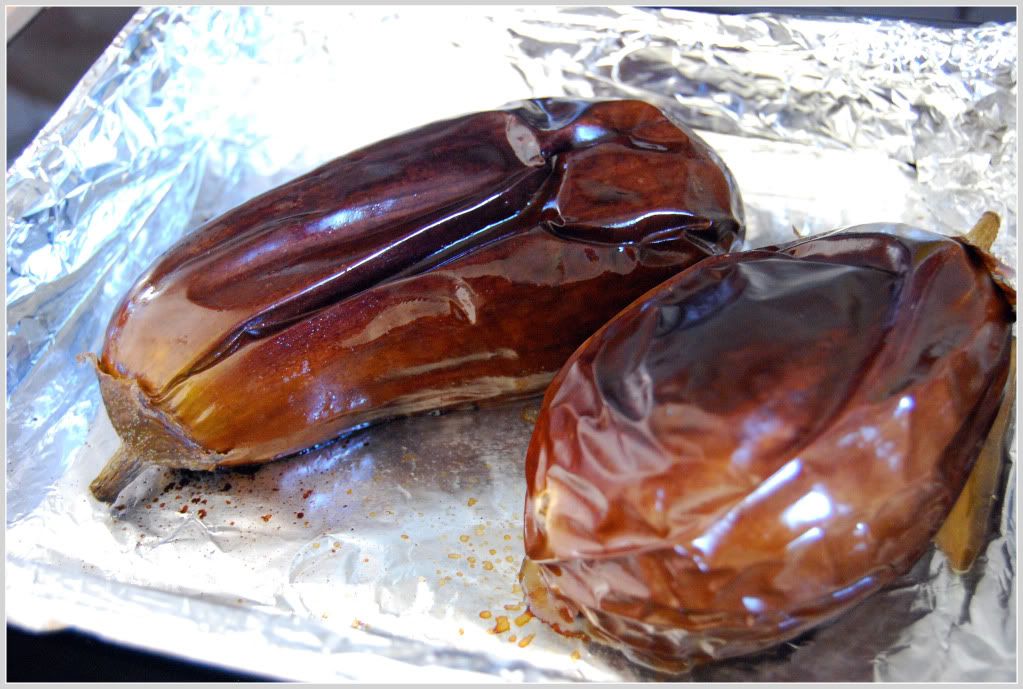 Once the brinjals have cooled, peel the skin off and discard the skin. And chop the inner flesh or just roughly mash it. It need not have to be completely mashed. Keep aside.
 Heat the ghee/oil in a pan and add asafoetida (hing) and cumin seeds.
When the seeds crackle add the onions and saute till they turn golden brown or translucent.
Add ginger, garlic and green chillies and saute for a few more seconds.
Add the tomatoes, peas, turmeric powder, coriander powder, cumin powder and cook covered till the tomatoes turn soft.
Add the mashed brinjal, garam masala powder and salt, mix well and cook for another 3-4 minutes. Serve hot garnished with coriander leaves.
Tuesday, August 18, 2009
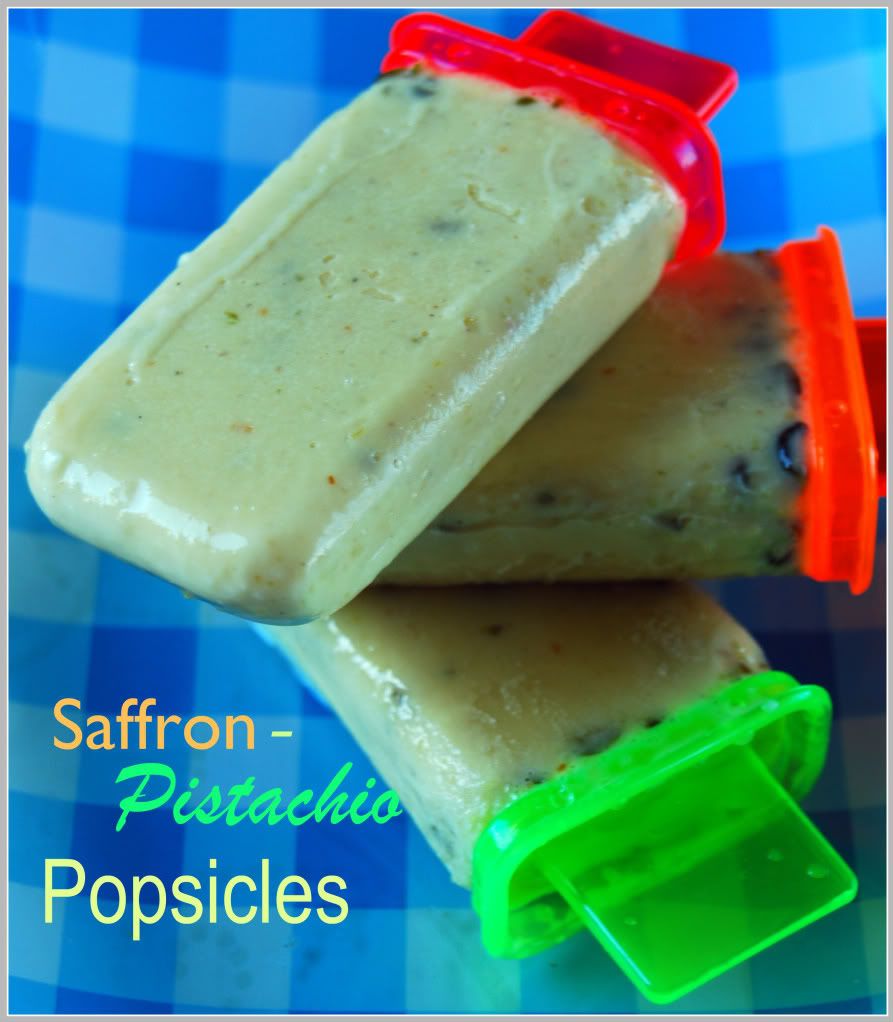
Kesar Pista Kulfi ( Saffron Pistachio Popsicles)
This is a wonderful treat during summer time. Any sweet dessert with a touch of cardamom and saffron gives a wonderful taste and aroma. It has chopped pistachios which give a light green color along with a crunch to the dessert. Its a must try recipe during this hot summer...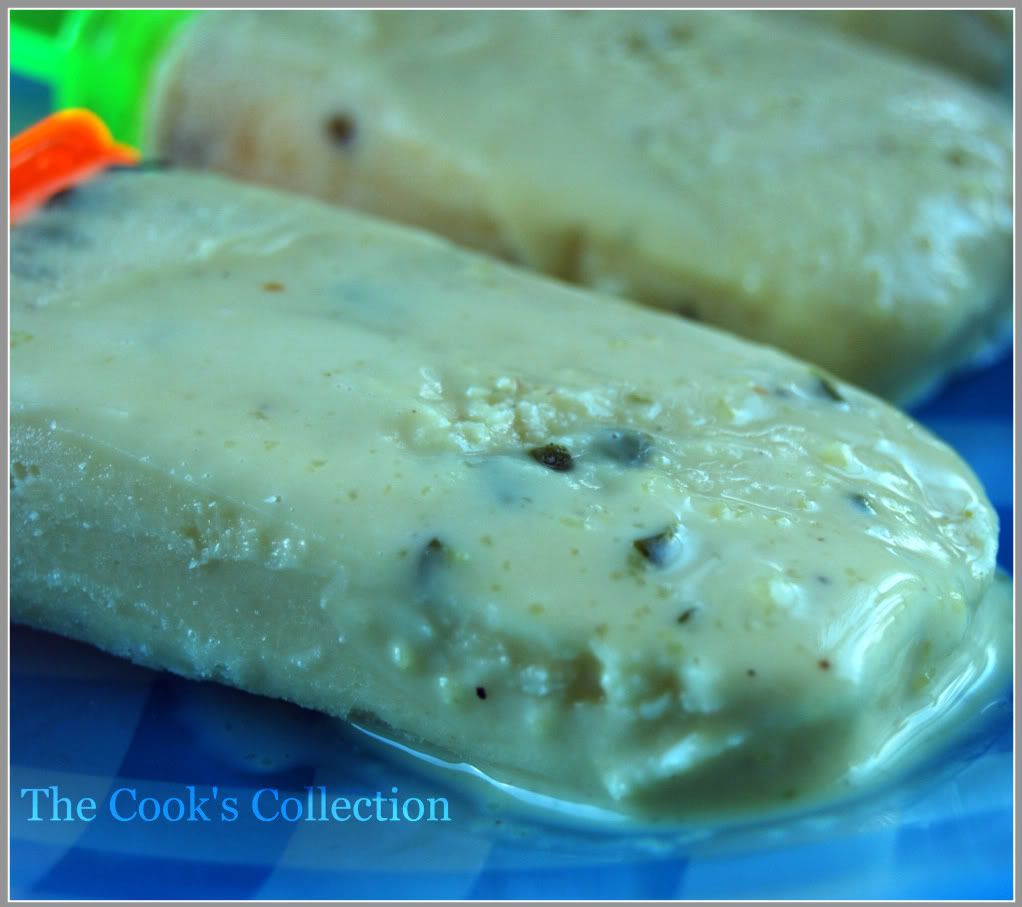
1 liter Milk
1/2 cup Sugar, can add more or less to your taste
2 pinches of Saffron
1/4 tsp Cardamom powder
1/4 cup Pistachio, finely chopped
2 slices of white bread, crust removed and roughly chopped
1 tbsp Cornflour
1/4 cup of milk
Directions..
In a large pan, on a medium flame boil milk with constant stirring till it reduces to nearly half of its volume or use Evaporated milk instead.
Meanwhile, blend bread, cornflour and 1/4 cup of milk together till you get a nice paste. Keep aside.
When the milk has reduced, add sugar, saffron, cardamom powder and blended paste and bring it to a boil. Test to see if the sugar is right and adjust accordingly.
Turn of the heat and let the milk cool to room temperature.
Then fill your Popsicles with the milk and freeze overnight or nearly 8 hours. If you do not have Popsicles, you can fill the liquid in small cups and when it has half frozen, insert the kulfi sticks and freeze again.
Tuesday, August 11, 2009
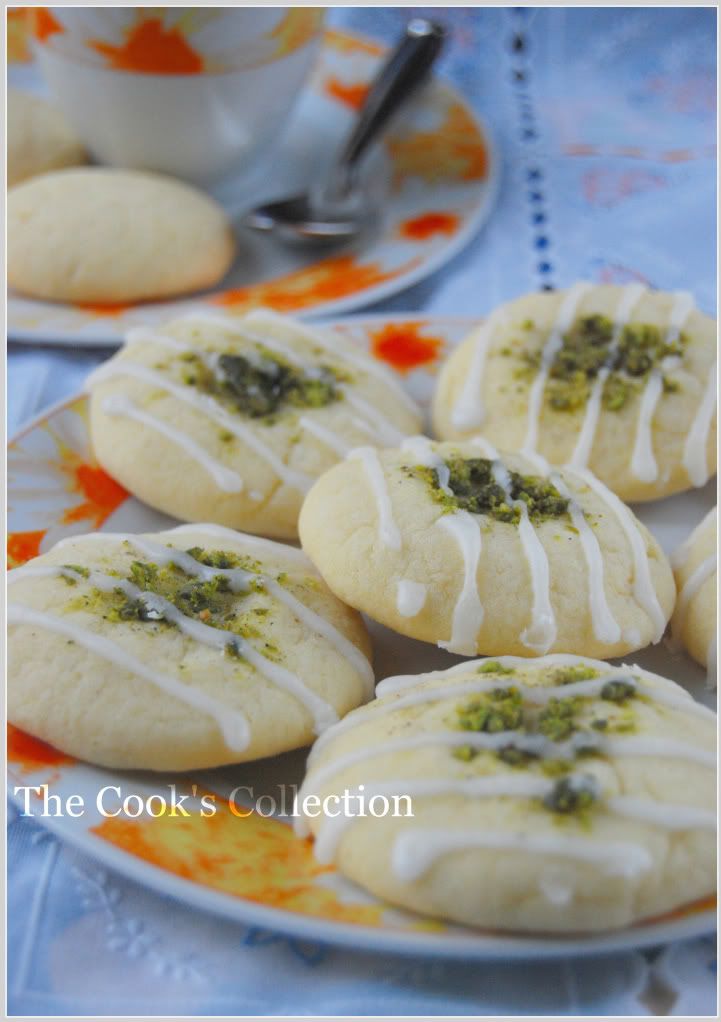
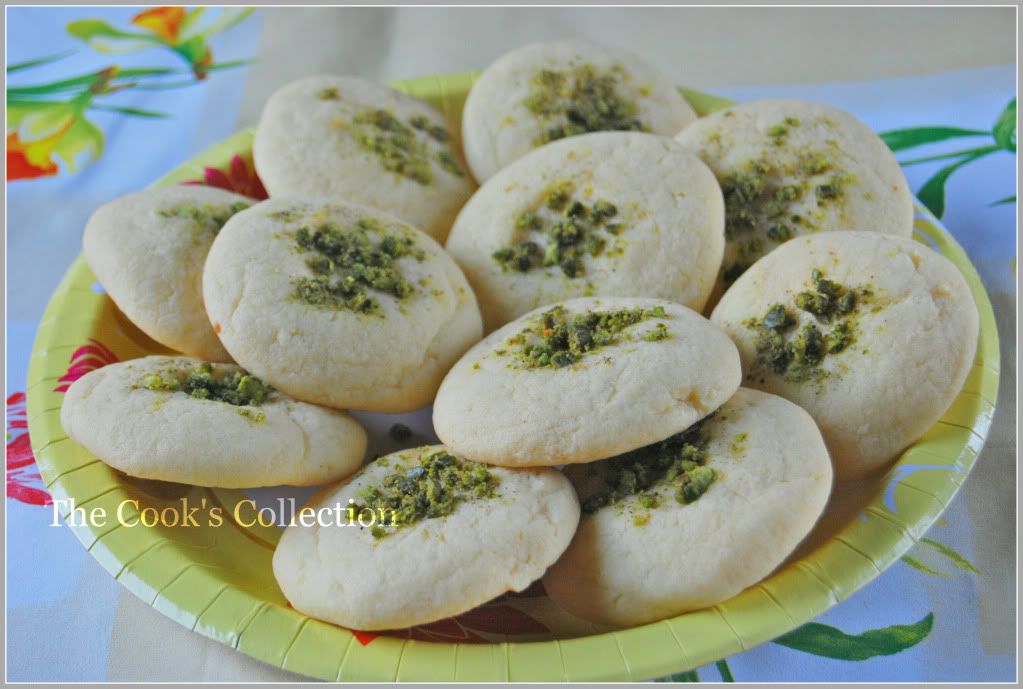
Nan Khatai ( Eggless Cookies)
Famous tea time Indian cookies. Egg-less, light and melting in the mouth-its texture is simply irresistible. These cookies traditionally use "Ghee" or "Clarified butter" but using butter or oil would do just fine.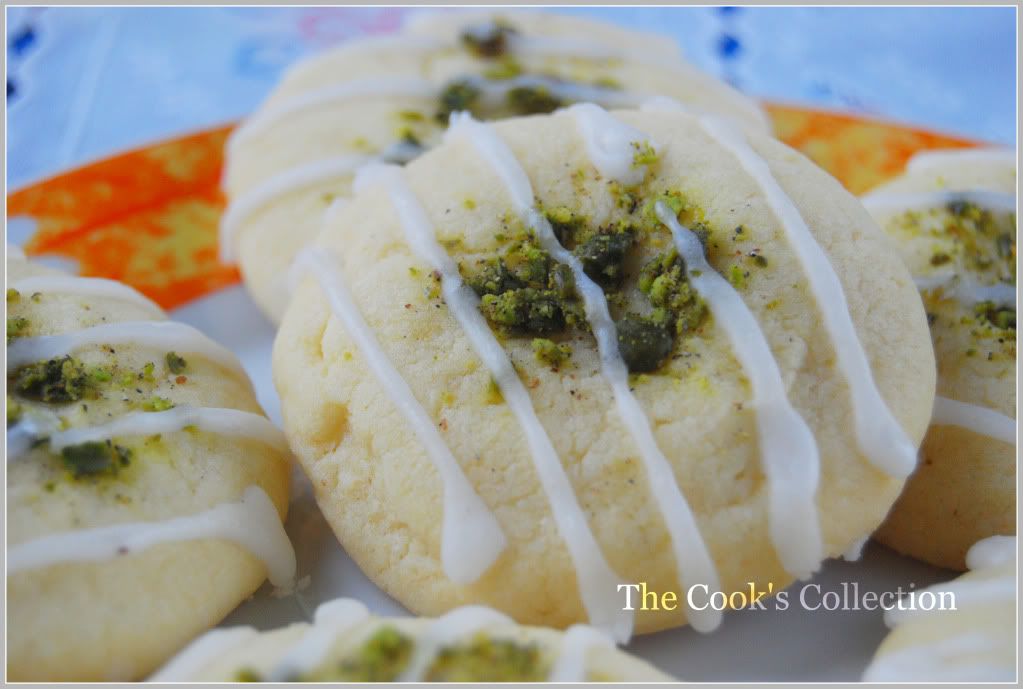
Ingredients:
200 gms, 2 cups All purpose flour(maida)
100 gms, 1/2 cup Semolina(very fine quality)
150 gms, 3/4th cup cooking oil/ghee/unsalted butter
150 gms, 1 cup + 1/3 cup Powdered sugar
2 tbsp Curd(Yogurt)
1 tsp Cardamom powder
1/4 tsp Soda bi-carbonate
2 tbsps Pistachios(chopped finely)
4-5 tbsp Milk (optional)
Directions:
Beat oil/ghee/butter, sugar and curd together using a hand mixer or a whisk till well combined.
Sieve flour, semolina and soda in a bowl. Add the dry ingredients to the curd mixture. Mix them well using your hands to form a soft dough. Add milk little by little if the dough seems hard otherwise just leave it as it is.
Preheat the oven to 180 deg C. Divide the dough into 20 small balls.
Place the balls 5 cms apart on a baking sheet lined with a baking paper. Press each ball in the center with your thumb and garnish with pista and cardamom powder(You can even use a mortar and pestle to chop and mix pistachio and cardamom powder together).
Place the baking sheet at the lower third rack of the oven and bake at 180 deg C for 15-20 minutes.
Serve hot with coffee or tea.
Tuesday, August 4, 2009
Om Biscuit (South Indian Style Breadsticks)
Om biscuit is one of the most popular South Indian bakery item. "Om" meaning Carom seed in "Kannada", a south Indian language. Its basically pencil-sized sticks of crispy, dry, sweet, Carom flavored bread.
This is one of my favourite snack and i badly wanted to try it out at home. After so many experiments and failures, i finally got this recipe right. I'm glad i did it. I'm sure you'll all love it!
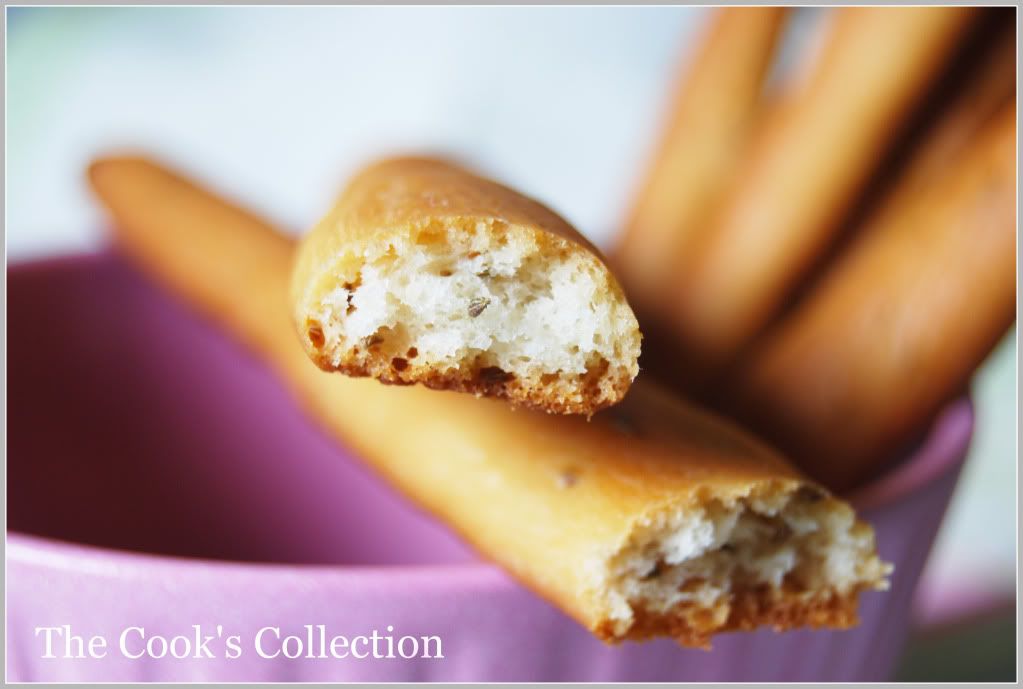
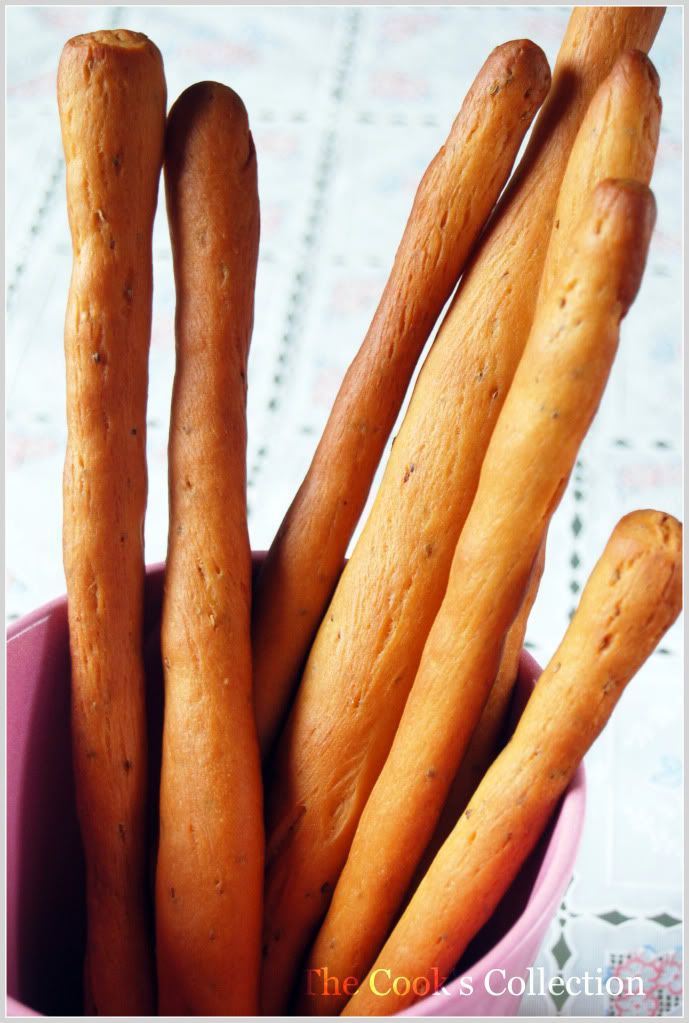
Makes: Eight 12" Sticks or Sixteen 6" Sticks
Ingredients:
1 cup All purpose flour (Maida)
1 tsp Ajwain or carom seeds
5 tsps Sugar
1 tsp DryYeast
4 tbsps lukewarm water
3 1/2 tbsps Oil (Vegetable or sunflower)
1/2 tsp Salt
Directions:
In a large bowl, combine the yeast, sugar and lukewarm water (105° to 115°). Let stand for 10 minutes until bubbly and foamy.
Stir in flour, salt, Ajwain and oil into the yeast mixture. Stir together with a wooden spoon or beat with an electric mixer or just use your hands and knead until the dough is shiny, elastic,and soft, 3 to 5 minutes.
Place the dough in a lightly oiled bowl. Toss the dough well to coat it with oil. Cover the bowl with a plastic wrap and let the dough ferment at room temperature until doubled in volume, about 2 hours.
Preheat the oven to 180 deg C. Line a baking sheet with a parchment paper and keep aside.
After 2 hours, Punch the dough and Knead by hand on a lightly floured surface until very smooth and soft. Divide the dough into 8 equal parts. Using floured hands, stretch and roll each piece of dough into a thin 12-inch-long breadstick. Place the breadsticks about ½ inch apart on the prepared baking sheets. And set aside for about an hour till the dough slightly rises.
Bake at 180 deg C until golden and crisp, about 15-20 minutes. Transfer the baking sheets to a rack and let the breadsticks cool completely.
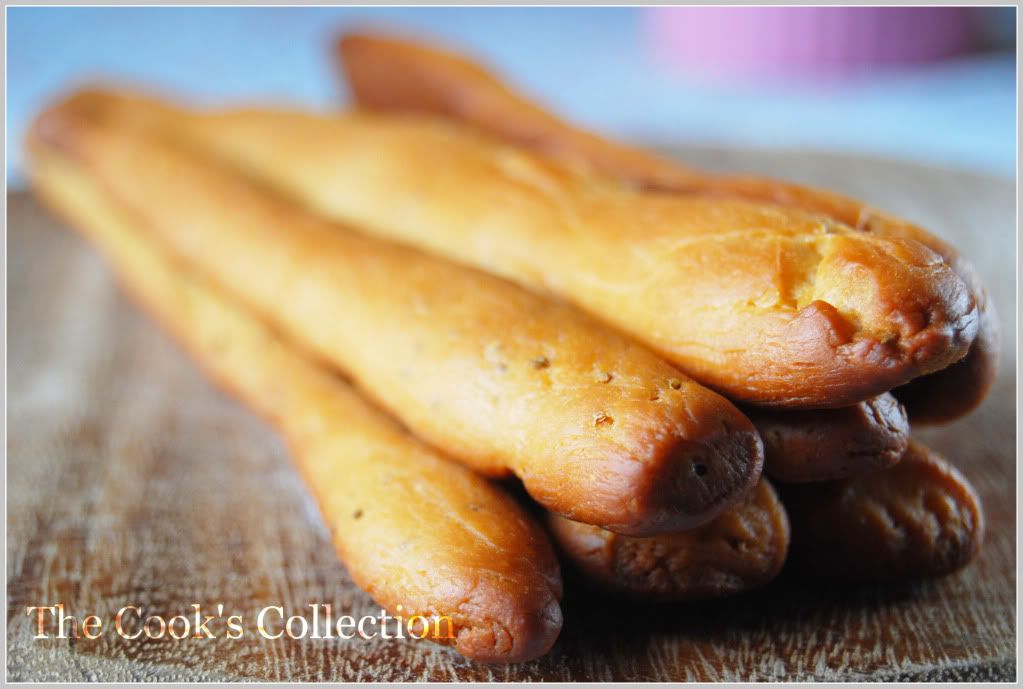 Enjoy and have a great day!!
Wednesday, July 29, 2009
Healthy Baked Sweet Potato Fries
This fry will replace all your high fat potato fries. These are healthy, low fat and a baked version of fries. Its easy to prepare and tastes awesome. Try these and you'll never want the fast food French fries.

1 medium sized sweet potato
1/2 tsp Salt
1/2 tsp chilli powder
1/4 tsp Garlic powder or 1 small garlic, mashed (optional)
1/4 tsp cumin powder
1 tbsp oil, any
Directions:
Preheat the oven to 425 deg F(220 deg C). Line a baking with with a parchment paper.
Wash, peel, and cut the sweet potato just like you cut the potatoes for the French fries (cut it a little thin if you want a crispy fry).
Now toss the potatoes with the rest of the ingredients and spread them on the lined baking sheet in a single layer.
Bake them at 425 deg F(220 deg C) for 15 to 20 minutes. Few more minutes if you like it crunchy. Do keep an eye so that it doesn't get burned.
Enjoy the fries with a little ketchup!
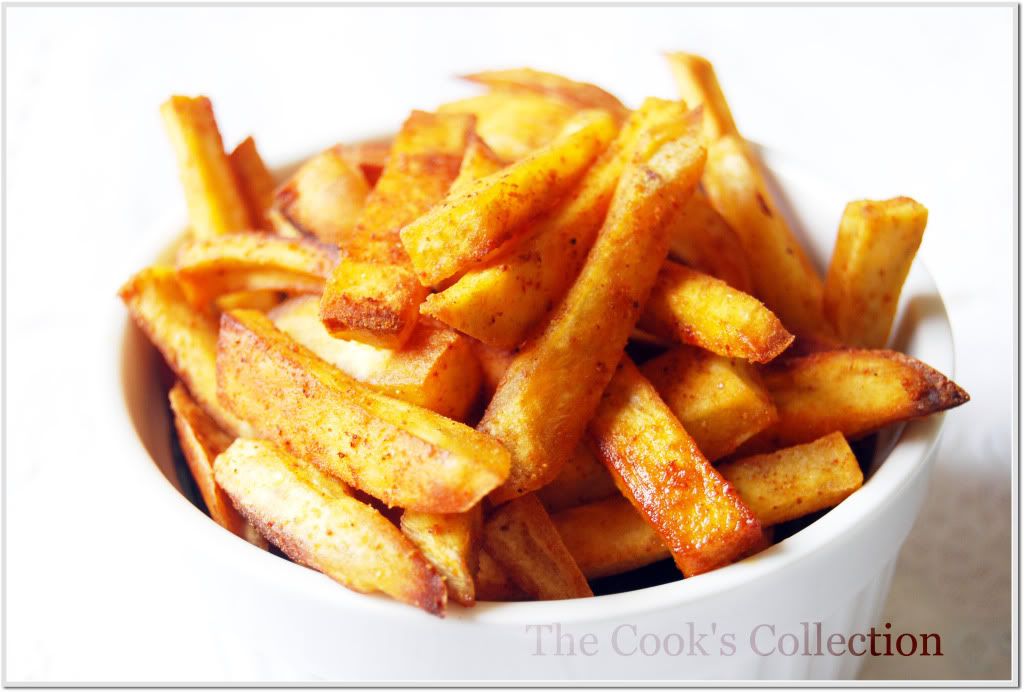
Also sending my first pic of fries to "CLICK", a food photography event. This month's theme being Bi-Color, any food related picture having just 2 colors. While the pic may have several colours, but TWO colors must be DOMINANT. Here i go..
Enjoy and have a great week!
Monday, July 27, 2009
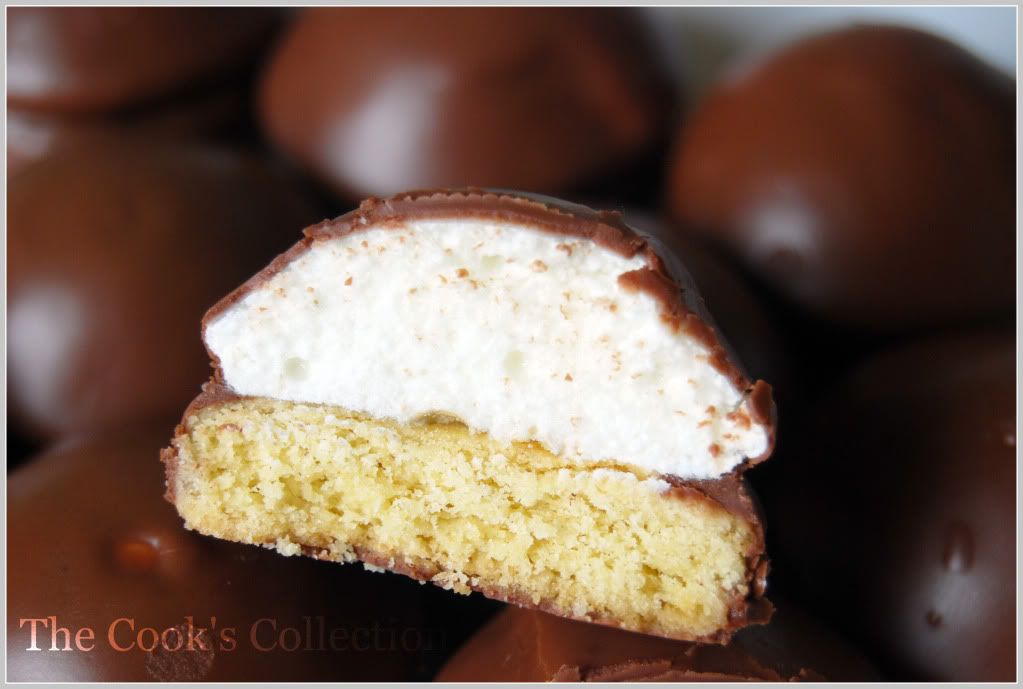
Mallows - Chocolate Covered Marshmallow Cookies
Daring Bakers July 2009 Challenge
The July Daring Bakers' challenge was hosted by Nicole at Sweet Tooth. She chose Chocolate Covered Marshmallow Cookies and Milan Cookies from pastry chef Gale Gand of the Food Network.
Mallows(Chocolate Covered Marshmallow Cookies)
Recipe courtesy Gale Gand, from Food Network website
Prep Time: 10 min
Inactive Prep Time: 5 min
Cook Time: 10 min
Serves: about 2 dozen cookies
Ingredients for the cookies:

- 3 cups (375grams/13.23oz) all purpose flour
- 1/2 cup (112.5grams/3.97oz) white sugar
- 1/2 teaspoon salt
- 3/4 teaspoon baking powder
- 3/8 teaspoon baking soda
- 1/2 teaspoon ground cinnamon
- 12 tablespoons (170grams/ 6 oz) unsalted butter
- 3 eggs, whisked together
- Homemade marshmallows, recipe follows
- Chocolate glaze, recipe follows
- 2 cups sugar
- 3/4 cup water
- 2 tbsp. powdered gelatin
- 1/2 cup cold water
- pinch of cream of tartar
- 1 tsp. vanilla extract
- 1/2 tsp. salt
- 1 cup cornstarch
- 12 ounces (340 gms) semisweet chocolate
- 2 ounces (1/4 cup)cocoa butter or vegetable oil
For the Cookie: In a mixer with the paddle attachment, blend the dry ingredients.
On low speed, add the butter and mix until sandy.
Add the eggs and mix until combine.
Form the dough into a disk, wrap with clingfilm or parchment and refrigerate at least 1 hour and up to 3 days.
When ready to bake, grease a cookie sheet or line it with parchment paper or a silicon mat.
Preheat the oven to 375 degrees F.
Roll out the dough to 1/8-inch thickness, on a lightly floured surface. Use a 1 to 1 1/2 inches cookie cutter to cut out small rounds of dough.
Transfer to the prepared pan and bake for 10 minutes or until light golden brown. Let cool to room temperature.
Pour the cooked sugar over bloomed gelatin in thin steam while the hand mixer is on high speed.
Change to medium speed and add cream of tartar, continue to whip until the mixture hold its shape. Add vanilla extract and salt and continue whipping until stiff.
Transfer to a pastry bag.
Sprinkle cornstarch onto a large baking pan and push it in with the object of your favorite shape and pipe in the marshmallow mixture.

OR Pipe a “kiss” of marshmallow onto each cookie directly. Let set at room temperature for 2 hours.
One at a time, gently drop the marshmallow-topped cookies into the hot chocolate glaze.
Lift out with a fork and let excess chocolate drip back into the bowl.
Place on the prepared pan and let set at room temperature until the coating is firm, about 1 to 2 hours.
Note: if you don’t want to make your own marshmallows, you can cut a large marshmallow in half and place on the cookie base. Heat in a preheated 350-degree oven to slump the marshmallow slightly, it will expand and brown a little. Let cool, then proceed with the chocolate dipping.
Tuesday, July 21, 2009
Pineapple Gojju ( Pineapple Cooked in a Spicy Coconut Sauce)
Pineapple gojju is one of the traditional South India recipe served most commonly during marriage functions or festivals. "Gojju" is the term used in South Indian language "Kannada" for a gravy/curry. This gojju is basically nothing but chopped pineapple cooked in a spicy coconut sauce. This recipe goes well with both sweet pineapple and the tangy one. If you're using a sweet one, then you'll need to add more tamarind and if you're using a tangy one, you'll be using less tamarind. You just need to alter the tamarind, palm sugar and salt quantities accordingly.
Its got the tang, sweet, salt and spicy flavors to bring out all together a new delicious flavor. Its a must try recipe!
Ingredients:
1 pineapple , peel and chop into 1 inch cubes, or the canned pineapples
1 tbsp coriander seeds
2 tbsps Urad dal or Black gram
8-10 Byadgi red chillies
1" cinnamon
1 tbsp Poppy seeds
1/2 cup dessicated coconut powder or freshly grated dry coconut
3-4 tbsp jaggery or palm sugar
2 tbsp thick tamarind pulp
1/2 tsp Mustard seeds
1 tbsp oil
salt to taste
Directions:
Heat the oil in a pan, add mustard seeds and let it splutter, then add the chopped pineapple and enough water to cover the pineapple. Do not add more water. Cover and cook at low to medium heat and let it boil for few minutes till the pineapple become slightly soft.
Meanwhile, fry the masala ingredients, i.e., urad dal, red chillies (broken), coriander seeds, cumin seeds, and cinnamon. When urad dal starts turning golden brown, switch off the heat and add the poppy seeds. You add poppy seeds at the end as it doesn't require to be fried for a longer time. Just the heat which is in the pan is good enough.
Cool the masala ingredients and grind it along with the desiccated coconut adding as much water required to form a thick smooth fine paste.
Now add the ground masala paste, along with tamarind juice, jaggery and salt to the pineapple. Bring it to boil. Simmer for 10-15 minutes until the curry thickens. If the curry becomes too thick, you can add water and bring it to the curry consistency. You can taste the curry and adjust the tamarind, jaggery and salt quantities.. As these 3 ingredients play a major role in getting the tongue tickling taste.
Serve with any of the Indian flat breads recipes in my blog, or with plain steamed rice. Enjoy!
Variation: You can follow the recipe with any other tangy fruit like grapes, or any other berries. Just make sure you dont boil the fruits too much and let them hold there shape. Its nice when you get bits of these fruits when eating.


Tuesday, July 14, 2009
Paushtic Roti (100% Whole Wheat Nutritious Flat bread)
The word "paushtic" in Hindi means nutritious, healthy or life giving. This roti is a nutritious combination of a cereal and a pulse along with a green leafy vegetable, enhanced further by the addition of milk or curds. All of these contribute to make this dish rich in folic acid, iron, protein and calcium.

Recipe adapted from the book Parathas by Tarla Dalal
Makes 12 rotis.
Cooking Time : 20 mins.
Preparation Time : 15 mins.
Ingredients required..
1/2 cup Bengal gram flour (besan)
3/4 cup boiled and grated potatoes, around 1 medium sized
1 cup Fresh Spinach leaves, finely chopped
2 green chillies, finely chopped
4tbsp fresh curds or milk
1 tbsp oil
Salt to taste
Other ingredients
Whole wheat flour for rolling
Oil for cooking
Method:
Mix all the ingredients and make a soft, smooth dough. Add a very little water, a tsp a time if required. Too much water can result in a sticky, lumpy dough as even potatoes and spinach leave some water. Leave the dough to rest for 10 minutes.
Divide the dough into 12 equal portions and roll out each portion into small rotis using wheat flour for rolling.
Cook on a non stick tava (griddle) spreading a tsp of oil on both the sides till small dots of brown skin appears on the skin.
Serve hot with any of your favorite side dish or with just pickle and curd.
Tuesday, July 7, 2009
Apple Jam
A delightful treat for your entire family, try this absolutely delicious recipe made simple in microwave. This recipe tastes exactly like the one in the stores, sweet, tangy with a lovely spreadable texture. When its so simple and can be prepared at home, then why buy from a supermarket?
Cooking time: 10 minutes
Ingredients:
2 Apples, big , peeled & Chopped (if taking small apples,take 3 nos)
1/2 Cup Sugar
2 Tbsp lemon juice
few drops of lemon yellow color (optional)
Method:
Mix sugar and chopped apples in a microwave safe bowl covered. Microwave at 100% power for 3 -4 minutes. Or till apples are softened.
Blend softened apple-sugar mixture in a blender.
Microwave (covered) this blended mixture at 60% power for 7 -8 minutes. or till its slightly thickened and translucent. Stir in between to prevent scorching.
Stir lemon juice, color (if using) and pour in prepared glass jars. Let cool at room temperature and refrigerate. Serve with toasted bread, cakes and cookies.

Have a great week!


