
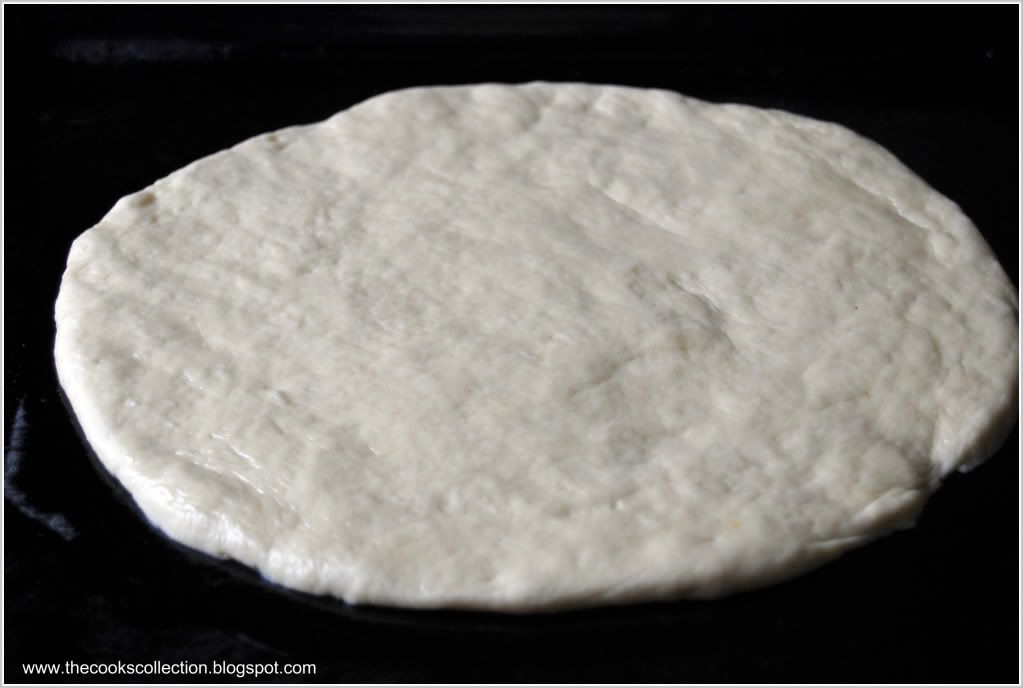
A hot oven, a preheated pizza stone or baking sheet and a well- floured wooden board for sliding the pizza dough into the oven, all help to produce an authentic, crisp-based pizza. To make a thicker, soft crust for a hearty pizza, use the entire 1 quantity pizza dough in the recipe below and spread it on to a baking sheet using greased hands. Try not to spread too much and keep the thickness of the dough to about 3/4th of an inch. If you want a thin crispy crust, just halve the 1 quantity pizza dough recipe and spread it a little thin about 1/4th of an inch or even less if possible. Load with your favorite toppings, also try not to overload with too many toppings. Keep it as minimal as possible.
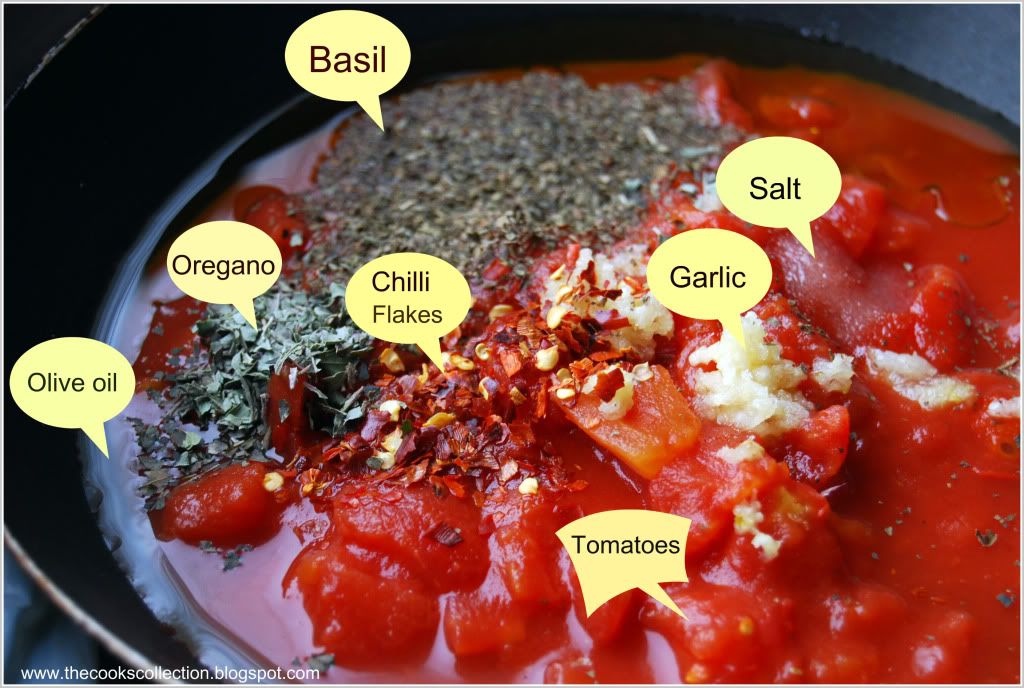
Also the base for all the toppings, the chunky pizza sauce blends wonderfully with the other topping ingredients. You can even double the sauce recipe as it can be used along with spaghetti or noodles as well and it even stores well in an air tight container in the refrigerator for up to 3 to 4 days and even freezes well for up to a month.
This is the best pizza recipe i have ever come across. Its got the perfect crust(i like a soft thick crust) just like the pan pizzas you get in pizza hut. And now lets go for the recipe..
Serves 2
Ingredients:
1 quantity basic pizza dough
For the pizza sauce:
400 g (13 oz) can chopped tomatoes or can use fresh tomatoes instead
1 garlic clove, crushed
2 tablespoons extra virgin olive oil, plus extra to drizzle
2 tablespoons chopped fresh basil or 1/2 tablespoon dried basil
1/2 teaspoon caster sugar
1/4 teaspoon dried red chilli flakes
1 teaspoons dried oregano
salt and pepper to taste
Other toppings: These are my favorite toppings but you can choose any of your favorites.
2 Capsicums, thinly sliced, any color of your choice
1 onion, thinly sliced
125 g canned sweet corn
150 g (5 oz) mozarella cheese, grated
Method:
Make the pizza dough
Meanwhile, make the pizza sauce. Put the tomatoes, garlic, oil, basil, sugar, chilli flakes and some salt and pepper in a saucepan. Bring to the boil and simmer gently for 25 - 30 minutes until thickened. Adjust the seasoning and transfer to a bowl to cool.
Turn out the risen dough on to a lightly floured surface. Divide the dough in half and roll out one piece thinly to a 30 cm (12 inch) round or make just one big pizza. Put it on a well-floured wooden board.
Top the dough with half the pizza sauce, capsicum, onion, corn and mozzarella. Drizzle with a little oil.
Carefully slide the pizza on to a preheated pizza stone or baking sheet and bake on the middle shelf of a preheated oven, at least 230 deg C (450 deg F), Gas mark 8 or hotter if possible, for 10 to 12 minutes until the base is crisp and the topping is bubbling and golden. Repeat to make a second pizza.
Serve hot. Enjoy!
Sunday, January 24, 2010
Vegetable Pizza







Basic pizza dough
This simple bread dough makes the perfect crust for pizzas, and this recipe is sufficient for 2 medium-sized pizzas.
Makes dough for 2 x 30 cm (12 inch) thin pizza bases or 1 (11 inch) thick pizza base
Ingredients
2 cups, 250 g (8oz) White bread flour or all purpose flour
1 teaspoon fast-acting yeast
1 teaspoon salt
1/2 teaspoon sugar
150 ml (1/4 pint) warm water
1 tablespoon extra virgin olive oil
Method
Sift the flour into the bowl of a food mixer and stir in the yeast, salt and sugar. Add the water and oil, set the mixer to low and work the ingredients until they just come together. Increase the speed and knead the dough for 8 - 10 minutes until smooth and elastic.
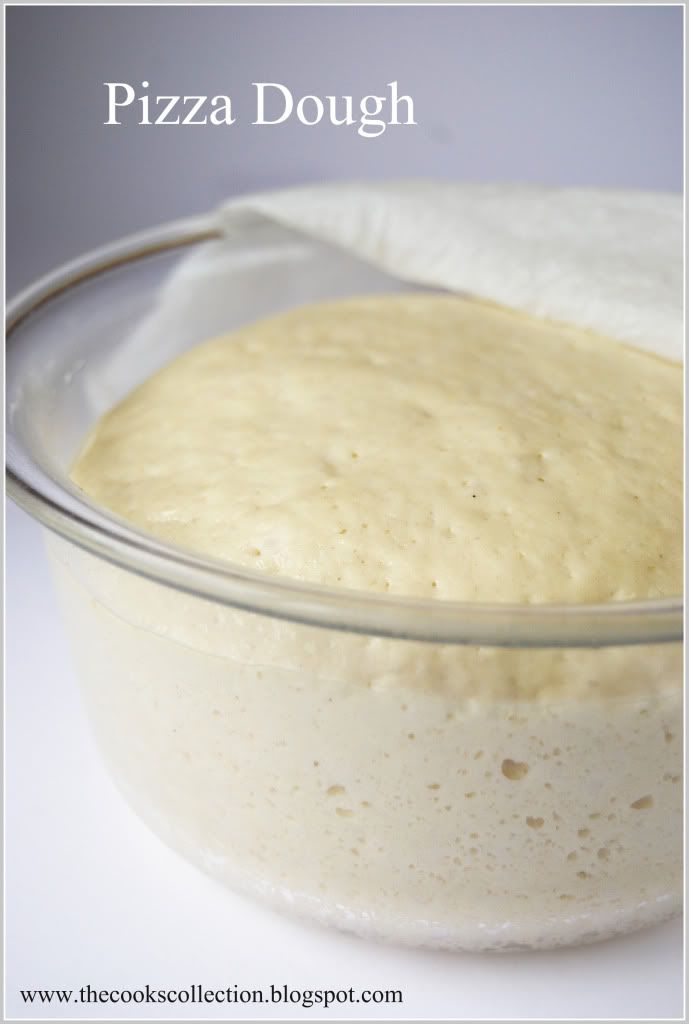
Shape the dough into a ball and put in a lightly oiled bowl. Cover with cling form and leave to rise in a warm place for 1 hour until the dough has doubled in size. Transfer the risen dough to a lightly floured surface and knock out the air. Use as required.
Note: To make the dough by hand sift the flour and salt into a bowl. Add the sugar then make a well in the center and add the frothed yeast, water and oil. Using your hands, gradually work the ingredients together to form a soft dough. Turn out the dough on to a lightly floured surface and knead for 8 - 10 minutes until it is smooth and elastic. Continue as above.
Tuesday, November 10, 2009
Pumpkin Cinnamon Rolls
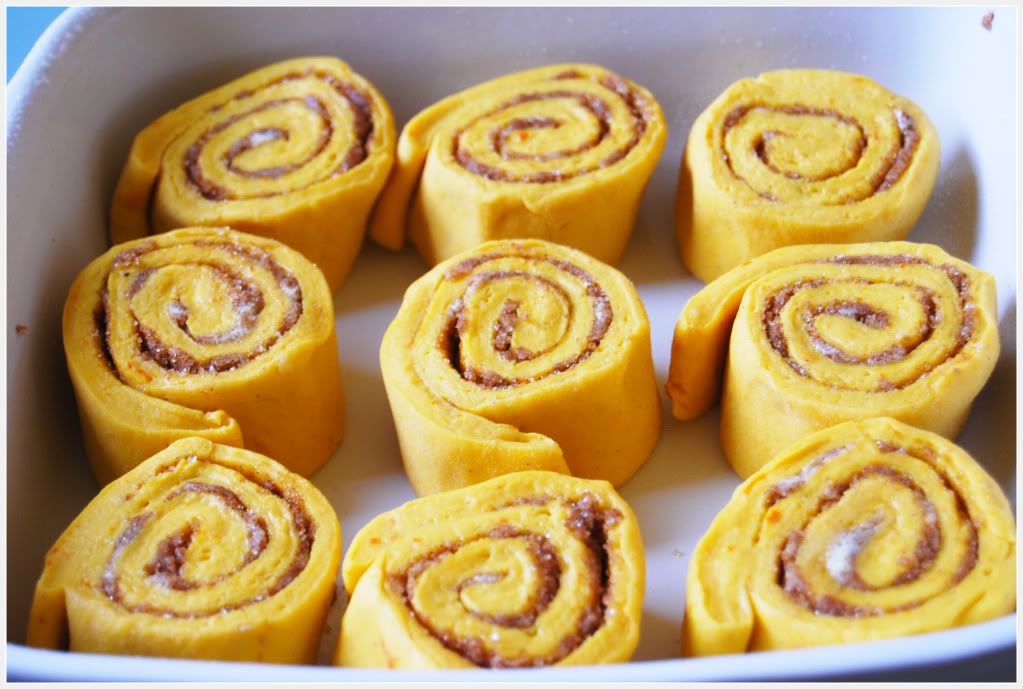
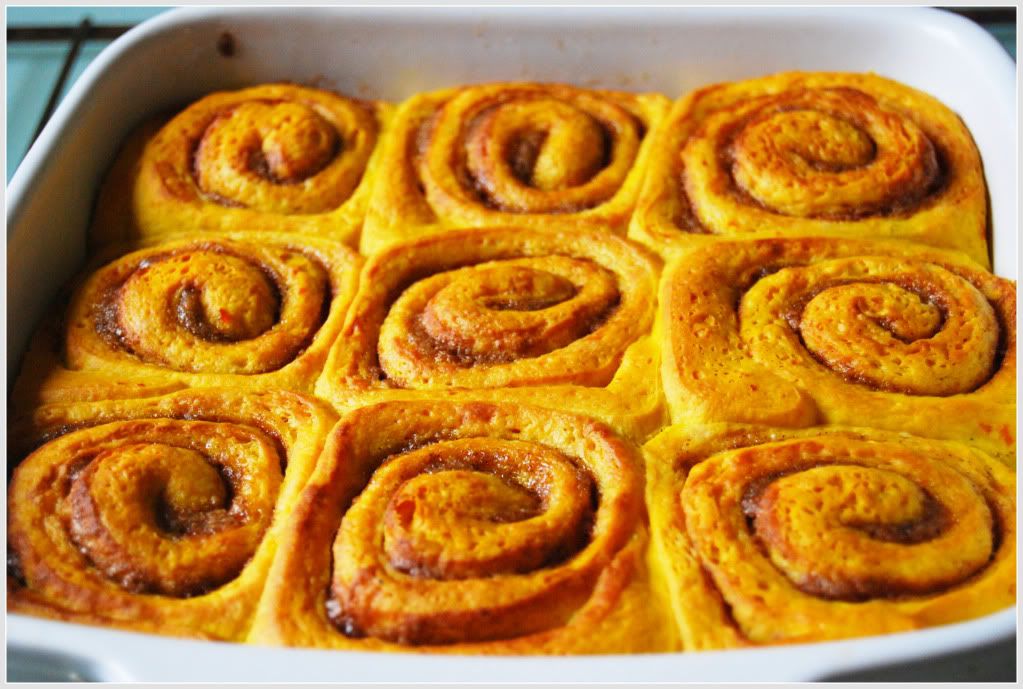
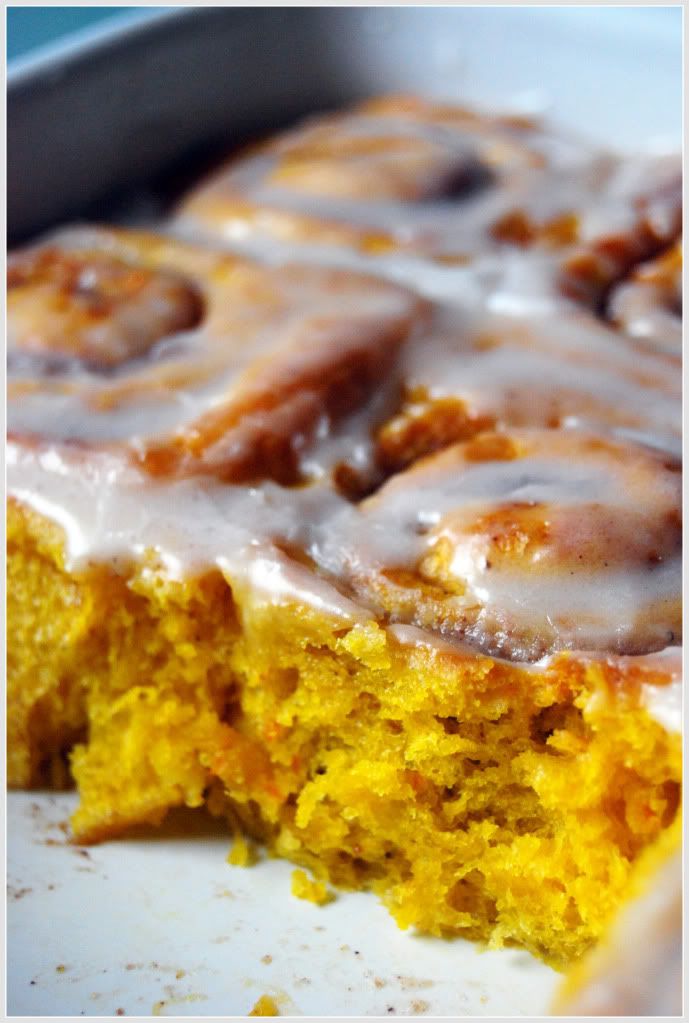
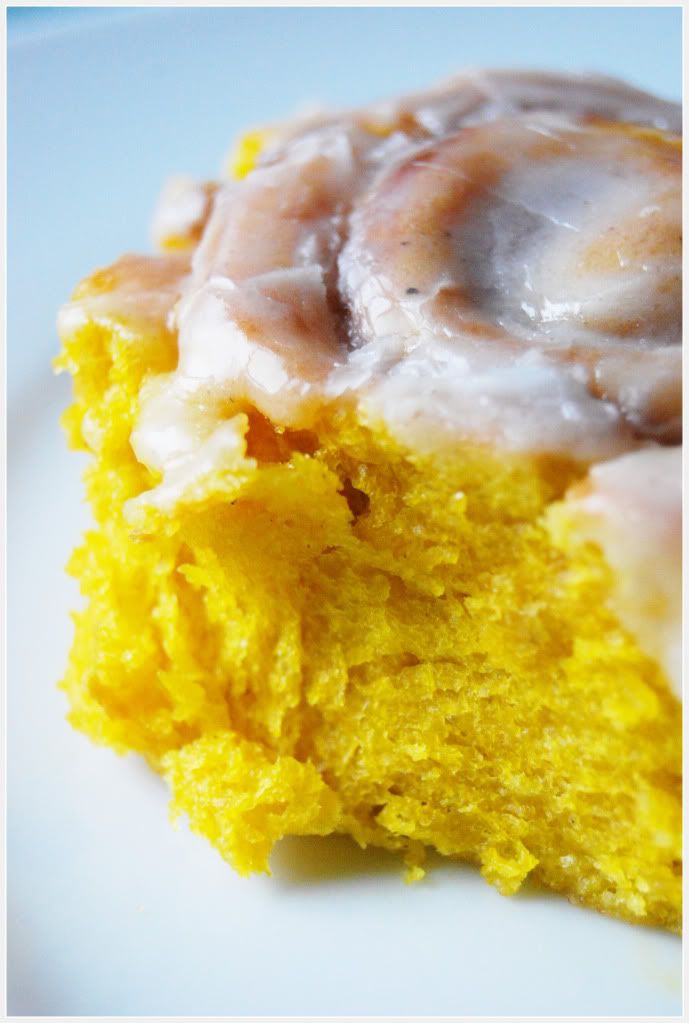
I had bookmarked this recipe from a very long time and finally i made it. These rolls turned out very moist and were full of flavor. The addition of pumpkin to the dough gave a lovely color and flavor. These pumpkin cinnamon rolls are just like the usual cinnamon rolls we make except that there is the addition of pureed pumpkin to the dough and instead of the usual cinnamon-sugar mixture sprinkled on the rolled, buttered dough, here we make a streusel using cinnamon, sugar, flour, and butter which is sprinkled on the rolled dough, rolled again into a log, cut into individual portions and then baked. The vanilla sugar glaze on top of the baked rolls gives a wonderful sweetness. Must say, i am fully satisfied with the results. It was a great tasting recipe!
Recipe adapted and slightly altered from myrecipes
Ingredients
For the buns:
1 package dry yeast (about 2 1/4 teaspoons)
1/4 cup warm water (100° to 110°)
3 cups all-purpose flour
1/2 cup Homemade Pumpkin Puree (recipe below)
1/4 cup milk
1/4 cup (57 gm) butter, melted
1 tablespoon + a pinch granulated sugar
1 1/4 teaspoons salt
1/4 teaspoon ground nutmeg
Cooking spray
For the filling:
3 tablespoons granulated sugar
3 tablespoons brown sugar
2 tablespoons all-purpose flour
1 1/2 teaspoons ground cinnamon
2 tablespoons chilled butter, cut into small pieces
For the glaze:
3/4 cup sifted powdered sugar
1 tablespoon hot water
1/4 teaspoon vanilla extract
Directions:
For the pumpkin puree:
You'll need 2 small pumpkins( i used Hokkaido)
Gives: 2 cups of pumpkin puree.
Cut the pumpkins into fourths. Remove and discard seeds and strings. Place pumpkin pieces on a baking sheet lined with aluminium foil. Bake in a preheated 180 deg C oven for 30 - 45 minutes or until tender. Cool, peel and mash it with a potato masher or by just using your hands.
Keeps well in an air tight box, in the refrigerator for 3 to 4 days , and freeze up to 3 months.
To prepare the rolls:
Dissolve yeast in warm water with a pinch of sugar in a large bowl. Let stand for 5 minutes.
Lightly spoon flour into dry measuring cups, and level with a knife. Add flour, pumpkin, milk, melted butter, 1 tbsp sugar, salt and nutmeg; beat with a mixer at medium speed until smooth. Turn dough out onto a floured surface. Knead until smooth and elastic (about 10 minutes) OR just use your hands to bring all the ingredients together and knead well to form a smooth dough.
Place the dough in a large bowl coated with cooking spray or some neutral oil, turning to coat top. Cover with a plastic wrap and let rise in a warm place (85°), free from drafts, for 45 minutes or until doubled in size. (Press two fingers into the dough. If an indentation remains, the dough has risen enough.)
For the filling:
Combine 3 tablespoons granulated sugar, brown sugar, 2 tablespoons flour, and cinnamon in a small bowl. Cut in butter with a pastry blender or 2 knives until mixture resembles coarse meal.
Punch dough down; cover and let rest for 5 minutes. Roll the dough into a 12 x 10-inch rectangle on a floured surface. Sprinkle with brown sugar mixture. Roll up the rectangle tightly, starting with a long edge, pressing firmly to eliminate air pockets; pinch seam and ends to seal. Cut roll into 12 (1-inch) slices. Place slices in a 9-inch square baking pan coated with cooking spray(9 slices fits the pan, the left 3 slices can be baked in a muffin tray).
Cover and let rise 45 minutes or until doubled in size.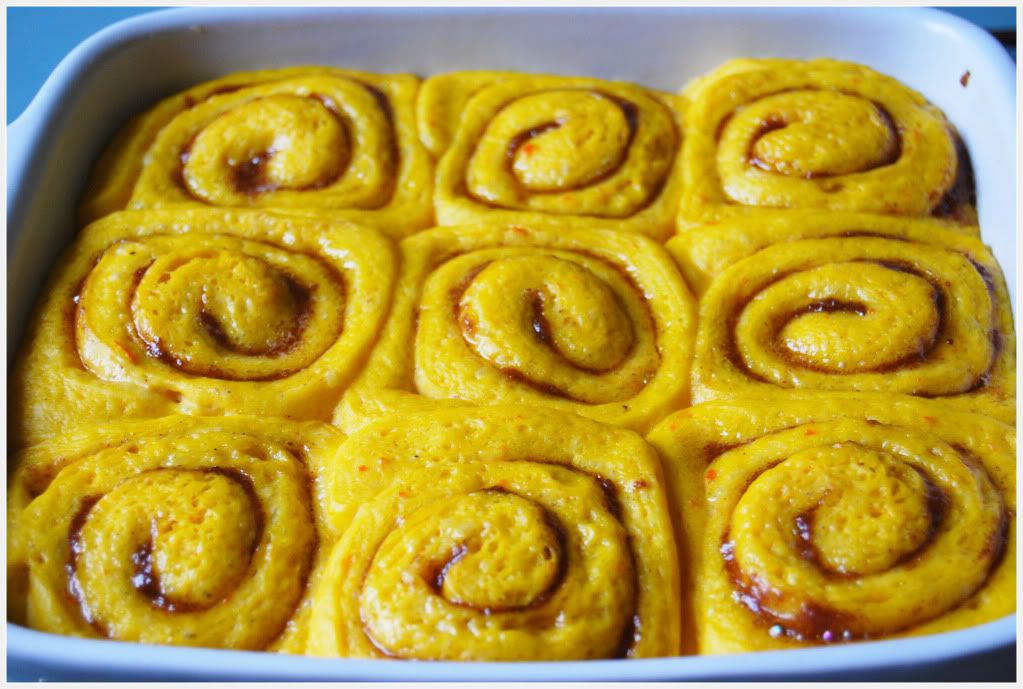
Bake the rolls at 375° for 20 minutes or until golden brown. Cool for 15 minutes in pan on a wire rack.
To prepare the glaze, combine the powdered sugar, 1 tablespoon water, and vanilla extract in a small bowl, stirring with a whisk until smooth. Drizzle glaze over buns.
Serve warm.


Tuesday, August 4, 2009
Om Biscuit (South Indian Style Breadsticks)
Om biscuit is one of the most popular South Indian bakery item. "Om" meaning Carom seed in "Kannada", a south Indian language. Its basically pencil-sized sticks of crispy, dry, sweet, Carom flavored bread.
This is one of my favourite snack and i badly wanted to try it out at home. After so many experiments and failures, i finally got this recipe right. I'm glad i did it. I'm sure you'll all love it!
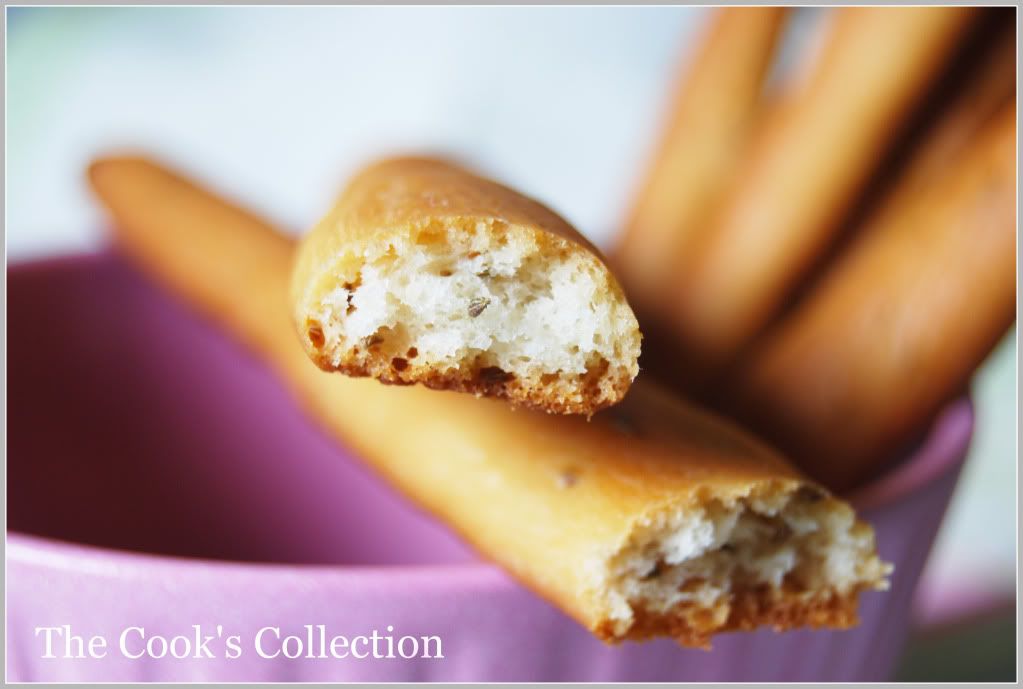

Makes: Eight 12" Sticks or Sixteen 6" Sticks
Ingredients:
1 cup All purpose flour (Maida)
1 tsp Ajwain or carom seeds
5 tsps Sugar
1 tsp DryYeast
4 tbsps lukewarm water
3 1/2 tbsps Oil (Vegetable or sunflower)
1/2 tsp Salt
Directions:
In a large bowl, combine the yeast, sugar and lukewarm water (105° to 115°). Let stand for 10 minutes until bubbly and foamy.
Stir in flour, salt, Ajwain and oil into the yeast mixture. Stir together with a wooden spoon or beat with an electric mixer or just use your hands and knead until the dough is shiny, elastic,and soft, 3 to 5 minutes.
Place the dough in a lightly oiled bowl. Toss the dough well to coat it with oil. Cover the bowl with a plastic wrap and let the dough ferment at room temperature until doubled in volume, about 2 hours.
Preheat the oven to 180 deg C. Line a baking sheet with a parchment paper and keep aside.
After 2 hours, Punch the dough and Knead by hand on a lightly floured surface until very smooth and soft. Divide the dough into 8 equal parts. Using floured hands, stretch and roll each piece of dough into a thin 12-inch-long breadstick. Place the breadsticks about ½ inch apart on the prepared baking sheets. And set aside for about an hour till the dough slightly rises.
Bake at 180 deg C until golden and crisp, about 15-20 minutes. Transfer the baking sheets to a rack and let the breadsticks cool completely.
 Enjoy and have a great day!!
Tuesday, May 26, 2009
Zucchini and walnut bread
A quintessential summer vegetable, Zucchini are tender and deliciously mild. Its flavor is so mild it picks up that of whatever you cook it with. It is low in calories and provides a bright green colour, moisture and nutrition to the cooked dish. Zucchini bread along with a glass of cold milk is a great way to start your day. This bread forms a thin soft outer crust and a very soft inner crumb. The presence of walnuts give a crunchy effect with every bite. Its not very sweet. Its a light bread which can be had without any extra accompaniment. This recipe is adapted from the culinary institute of America. Here goes the recipe..

Makes 2 loaves
Ingredients
flour less cooking spray for greasing
3 1/2 cups all-purpose flour plus extra for dusting
2 tsp baking powder
1/2 tsp baking soda
1 tsp salt
1 tsp ground cinnamon
1/2 tsp freshly grated nutmeg
1/4 tsp ground cloves
2 1/2 cups grated unpeeled zucchini
1 cup sugar
4 large eggs, lightly beaten
1/2 cup vegetable oil
2 tbsps grated orange zest
1 cup coarsely chopped toasted walnuts or pecans
Directions
Preheat the oven to 350°F(180°C).
Grease and flour two 8½-inch loaf pans.
Sift the flour, baking powder, baking soda, salt, cinnamon, nutmeg, and cloves into a bowl and set aside.
Combine the zucchini, sugar, eggs, oil, and orange zest in a large bowl and mix by hand until evenly blended.
Add the sifted dry ingredients to the zucchini mixture. Stir by hand just until the batter is evenly moistened and blended.
Fold in the nuts.
Divided the batter between the prepared loaf pans. Bake until the edges are browned and starting to pull away from the pan and the bread springs back when lightly pressed with your fingertip, 50-55 minutes.
Remove the loaves from the pans and let cool on wire racks before serving.
Tuesday, March 24, 2009
Buttermilk Scones
Makes 12 triangular or 24 rolled scones
Think of scones as British biscuits. They are made in a manner similar to biscuits and, in fact, share biscuits' buttery-layered texture, but their name, their shape, and the fact that they're served with tea rather than gravy lift them to the level of fancier fare.
Here are scones two ways: the traditional triangle and the rolled--tender buttermilk dough rolled around chopped fruits, nuts, and/or jam. Whichever way you choose, they're luscious: à la the British, with tea and whipped cream, or served the American way, with coffee and a gloss of jam.
 These scones had a very thin crisp outer crust and a soft, flaky and moist bread/cake like inner crumb. Rolled scones were a nice idea as they already had jam filled in and no other accompanyment was required. These scones can be served as a great snack along with coffee or tea.

This post is my contribution to Egg Substitute - Yogurt/Buttermilk Event , an event hosted by Madhuram of Eggless Cooking.
Recipe adapted from "Baking with Julia" by Dorie Greenspan.
Ingredients required:
3 cups all-purpose flour
1/3 cup sugar (i added plus 1/4 cup)
2 1/2 tsps baking powder
1/2 tsp baking soda
3/4 teaspoon salt
1 1/2 sticks (6 ounces) cold unsalted butter, cut into small pieces
1 cup (approximately) buttermilk
1 tablespoon grated orange or lemon zest
1/2 stick (2 ounces) unsalted butter, melted, for brushing
1/4 cup sugar, for dusting
4 tablespoons jam or jelly and/or 4 tablespoons diced or small plump dried fruits, such as currants, raisins, apricots, or figs, for filling (optional)
Here we start..
Position the oven racks to divide the oven into thirds and preheat the oven to 425 deg F (220 deg C).
Mixing and Kneading:
In a medium bowl, stir the flour, sugar, baking powder, baking soda, and salt together with a fork. Add the cold butter pieces and, using your fingertips (the first choice), a pastry blender, or two knives, work the butter into the dry ingredients until the mixture resembles coarse cornmeal. It's OK if some largish pieces of butter remain--they'll add to the scones' flakiness
Pour in 1 cup buttermilk, toss in the zest, and mix with the fork only until the ingredients are just moistened--you'll have a soft dough with a rough look. (If the dough looks dry, add another tablespoon of buttermilk.) Gather the dough into a ball, pressing it gently so that it holds together, turn it out onto a lightly floured work surface, and knead it very briefly--a dozen turns should do it. Cut the dough in half.
To make triangular shaped scones:
Roll one piece of the dough into a 1/2-inch-thick circle that is about 7 inches across. Brush the dough with half of the melted butter, sprinkle with 2 tablespoons of the sugar, and cut the circle into 6 triangles. Place the scones on an ungreased baking sheet and set aside while you roll out the rest of the dough.
To make rolled scones:
Roll one piece of dough into a strip that is 12 inches long and 1/2-inch-thick (the piece will not be very wide). Spread the strip with half of the melted butter and dust with half of the sugar. If you want to spread the roll with jam and/or sprinkle it with dried fruits, now's the time to do so; leave a narrow border on a long edge bare. Roll the strip up from a long side like a jelly roll; pinch the seam closed and turn the roll seam side down. Cut the roll in half and cut each piece into six 1-inch-wide roll-ups. Place the rolled scones cut side down on an ungreased baking sheet, leaving a little space between each one. Repeat with the remaining dough.
Baking the scones:
Bake the scones for 10 to 12 minutes, until both the tops and bottoms are golden. Transfer the scones to a rack to cool slightly. These are best served warm but are just fine at room temperature.

Storing:
If you're not going to eat the scones the day they are made, wrap them airtight and freeze; they'll stay fresh for a month. To serve, defrost the scones at room temperature in their wrappers, then unwrap and reheat on a baking sheet for 5 minutes in a 350 degree F oven.
Tuesday, January 6, 2009
White Loaf
This is a basic, have-it-on-hand-at-all-times white bread with a difference--its got full, rounded flavor and a substantial texture; not your average sandwich loaf. And it makes great toast-the little bit of butter browns nicely under heat. Its got a crunchy crust and very softy inside.

Makes 1 Loaf
Ingredients:
1 1/4 cups warm water
1/2 tbsp Active dry yeast
1/2 tbsp sugar
3 1/2 cups bread flour or all purpose flour
1/2 tbsp Salt
1/4 stick butter(1 ounce) unsalted butter, at room temperature
Method:
Mixing and kneading; Pour 1/4 cup of water into a large bowl. Sprinkle in the yeast and sugar, and whisk to blend. Allow the mixture to rest until the yeast is creamy, about 5 minutes.
Sift the flour and salt together. Add the remaining 1 cup of water and half of the flour to the yeast and start mixing it with a wooden spatula. Add the remaining flour and start working with your hands till the dough comes together(if the dough does not come together, add a bit more flour, a tablespoon at a time). Work until the dough is smooth and elastic. Knead it with your hands on a lightly floured surface for 8 to 10 minutes.
When the dough is thoroughly mixed, add the butter, a tablespoon at a time and knead until incorporated. Dont be disconcerted if the beautiful dough comes apart with the addition of butter-kneading will bring it back together.
First rise; Turn the dough onto a lightly floured surface and shape it into a ball. Place it in a large buttered or oiled bowl and turn the dough around to cover its entire surface with butter or oil. Cover and let the dough rest at room temperature until it doubles in bulk, about 45 minutes to 1 hour.
During winter switch the oven to max for 2 minutes and swich it off. Place a bowl of boiling water in the bottom of the oven and place the bowl with the dough in the center rack. Close the oven and let it rise.
Shaping the dough; Butter a loaf pan and set aside.
Deflate the dough and turn it onto a lightly floured work surface. Roll the dough into a rectangle. With the short side facing you, start rolling the dough and seal the seam by pinching it. Drop the loaf into the pan, seam side down.
Second Rise; Place the loaf in a warm place covered with a loose oiled plastic wrap until they double in size again growing over the tops of the pan about 45 minutes.
Baking the bread; Center a rack in the oven and preheat the oven to 375 deg F. When the loaf has fully risen, bake for 35 to 45 minutes or until they are honey brown. Cool completely before cutting.

Storing; Once completely cool, the bread can be kept in a brown paper bag for a day or two. Once the loaf is sliced,turn it cut side down on a cutting board and cover with a kitchen towel. For longer storage, wrap the bread airtight and freeze for upto a month. Thaw still wrapped at room temperature.
Tuesday, December 2, 2008
Semolina Bread
Golden semolina flour gives this bread a warm, sunny color, a tender crumb and a nutty taste. Semolina loaves are often associated with Italian baking-perhaps because semolina flour is milled from durum wheat, the flour used to make pasta. I've just given a twist to the bread by spreading a layer of cinnamon and brown sugar into the bread. Even the plain loaf tastes good as well.. Adapted from Baking with Julia and altered by me.
Makes 1 loaf
THE SPONGE
1 Cup warm water (about 110 deg F)
1 tsp Active dry yeast
1 tsp Sugar
1 Cup All-purpose flour
Pour the warm water into a medium bowl and whisk in the yeast and the sugar. When the yeast has dissolved and is creamy, about 5 minutes, stir in the flour.
Rise; Cover the bowl and let it rest at room temperature until the sponge doubles in volume, about 2 hours.
THE DOUGH
The sponge (above)
1/2 to 3/4 Cup All purpose flour
3/4 Cup Semolina flour
1 tsp Salt
1 tbsp Olive oil
METHOD
Grease a loaf pan with little butter and keep side.
Take the sponge in a large bowl. Add 1/2 cup of the all purpose flour and rest of the ingredients and work with your hands till the dough forms a ball. If the dough doesn't come together in a ball, add another 1/4 cup of all purpose flour, mixing a tablespoon at a time. Take the dough on a lightly floured surface and knead for 5 to 10 minutes.
First rise; Turn the dough into an oiled bowl, cover the bowl with plastic wrap and let the dough rest at room temperature until it doubles in volume.
In this cold weather you can use the oven method to give the dough a rise. Just switch on the oven to max for 2 minutes and switch it off. Now take a bowl of boiling water and place it in the bottom rack of the oven. Now place the bowl with the dough in the middle rack and close the oven. let it stand for about and hour or so.. you can see that the dough would have raised beautifully.
Shaping and second rise; Deflate the dough and turn it on to a floured surface. Flatten it with your palms and pat the dough into a rough oval shape and then roll it from one long side to the other, to form a plump loaf. Tuck the ends under and transfer it into the prepared loaf pan and allow it to rest until it doubles in bulk again, about 2 hours.
Baking the bread; Preheat the oven to 400 deg F( 200 deg C).
Bake for about 35 mintes, until deeply golden. Transfer the bread to a rack and cool completely before cutting.
Variation; To create the sweet layer in between, just mix in 1/4 Cup of brown sugar and a tsp of Cinnamon and chopped nuts if you prefer. Spread a tbsp of softened butter before rolling the dough in for the second rise and spread the cinnamon and sugar mixture. Then follow the given steps.
 Storing; The bread can be kept at room temperature for a day; cover it loosely with plastic wrap. For longer storage, wrap it airtight and freeze for up to 1 month. Thaw, still wrapped, at room temperature.
Tuesday, November 4, 2008
Finnish pulla

Adapted from Baking with Julia
You'll need the following ingredients..
1 cup Milk
1 tbsp Active dry yeast
1/4 cup warm water(about 110 deg F)
1/2 cup Sugar
1 tsp Crushed cardamom seeds(from about 7 pods)
1 tsp Salt
2 large eggs, lightly beaten, at room temperature
4 1/2 to 5 cups All purpose flour (unbleached)
1 stick Unsalted butter, melted
For Glaze
1 large egg beaten with 1 tbsp milk
For topping
Sliced almonds
Pearl sugar
Method
Put the milk in a small saucepan and scald it(heat it until a ring of small bubbles is visible around the sides of the pan). Remove the pan from the heat and cool the milk to a room temperature of between 105 deg F and 115 deg F.
In a large bowl, whisk the yeast into the warm water. Set aside for 5 minutes, or until the yeast has dissolved and is creamy. Whisk in the milk, sugar, cardamom, salt and eggs. Switch to a wooden spoon, add 2 cups of flour, and beat the mixture until smooth. Beat in the butter and add as much additional flour, 1/2 cup at a time, as you can until the dough is stiff but not dry.
Cover the bowl with plastic wrap and allow the dough to rest for 15 minutes.
Turn the dough out onto a lightly floured work surface and knead until it is smooth and satiny, about 10 minutes.
Shape the dough into a ball. Place it in a lightly greased bowl, turn it around in the bowl to grease the top, and cover the bowl tightly with plastic wrap. Let the dough rise at room temperature until it doubles in bulk, 45 minutes to 1 hour. You can use the method for raising the dough in winter which is given in my layered rolls recipe.
Line a large baking sheet with parchment paper and set aside
Turn the dough out onto the oiled surface and knead it lightly and briefly, just to deflate it and release the air. Divide the dough into thirds and roll each third into a rope of about 36 inches long. Braid the three strands(refer my challah recipe), braiding as far down to the bottom of the strands as you can. lift the long braid onto the parchment-lined pan, shaping it into a circle as you place it on the pan. Snip about 1 inch of dough off each end of the braid and fuse the ends together, pressing ans pinching them (if necessary) to fit.
Cover the wreath with a kitchen towel and allow it to rise at room temperature until it is puffy but not doubled, about 45 minutes.
Center a rack in the oven and preheat the oven to 375 deg F(190 deg C).
Brush the egg glaze over the bread. Sprinkle the wreath with sliced almonds and pearl sugar.
Bake for 20 to 25 minutes, until golden, taking care not to over bake the wreath. Transfer the loaf to a rack to cool at room temperature before cutting.


Storing:
The bread will keep for a day at room temperature, lightly covered with plastic. If you want to keep the bread longer, wrap it air tight ans freeze it for upto 1 month. Thaw, still wrapped, at room temperature.

Tuesday, October 14, 2008
Layered Dinner Rolls
These beautiful homemade dinner rolls will definitely win the hearts and stomachs of your family members. These rolls are layered and very soft from inside. They can be had as it is or with any accompaniment you wish..
Adapted from myrecipes.com
Yields 12 rolls
Ingredients
3 tbsp Sugar
1 package Dry yeast (7 gm,about 2 1/4 tsps)
1 1/4 cup Lukewarm milk
3 cups All-purpose flour
3/4 tsp Salt
3-4 tbsp Butter, softened
Cooking spray
Method
In a large bowl, dissolve sugar and warm milk. Add yeast and let stand for few minutes until its frothy.
In a large bowl, sieve flour and salt. Add in the yeast mixture; stir until a dough forms. Turn dough out onto a lightly floured surface. Knead with your hands till you get a smooth non sticky dough. Do not add extra flour or liquid. Knead well for about 5 to 8 minutes. Let the dough rest covered for 10 minutes.
On a lightly floured surface, roll the dough into a 12 x 10-inch rectangle. Gently spread butter over 2/3rd surface of the dough. Keeping the plain surface towards your left,fold the plain surface over the buttered surface and the right surface over the first fold to form a 12 x 3-inch rectangle(refer the figure below). Cover with a plastic wrap and place in freezer for 10 minutes.
Remove dough from freezer. Remove plastic wrap. Roll the dough again (sprinkle on a little more flour, if needed), into a 12 x 10-inch rectangle. Working with a long side, fold up bottom third of dough. Fold top third of dough over the first fold to form a 12 x 3-inch rectangle. Cover with plastic wrap; place in freezer for 10 minutes.
Remove dough from freezer, Remove plastic wrap. Roll the dough into a 12 x 8-inch rectangle. Beginning with a long side, roll up dough jelly-roll fashion(do not seal ends of roll). Cut roll into 12 equal slices.
Place slices, cut sides up, in muffin cups coated with cooking spray. Lightly coat tops of dough slices with cooking spray.
Cover and let rise in a warm place 45 minutes or until doubled in size.
If the weather is cold and you're in search of a warm place in your kitchen. I've an idea.
Use the oven, place a pan of boiling water on the bottom rack of the oven. Turn the oven on to its highest setting for 2 minutes. Turn oven off. Cover the muffin tray with a towel or a plastic wrap and place in the oven above the pan of steaming water. This method helps a lot during winter.
I followed this method for my dinner rolls and as you can see,the rolls raised beautifully.
Now preheat the oven to 375°F (190°C)
Bake dough at 375°F (190°C) for 20 minutes or until golden brown. Change the psotions of the muffin trays after 10 or 15 minutes by checking which side of your rolls have started turning brown.
Remove from pan, and cool for 5 minutes on a wire rack.
Serve rolls warm. Enjoy!!


