Showing posts with label eggs. Show all posts

Thursday, January 27, 2011

Daring Bakers : Biscuit Joconde Imprime/Entremet

The January 2011 Daring Bakers’ challenge was hosted by Astheroshe of the blog accro. She chose to challenge everyone to make a Biscuit Joconde Imprime to wrap around an Entremets dessert.


Joconde imprime /entremets. A joconde imprime (French Baking term) is a decorative design baked into a light sponge cake providing an elegant finish to desserts/torts/entremets/ formed in ring molds. A joconde batter is used because it bakes into a moist, flexible cake. The cake batter may be tinted or marbleized for a further decorative effect.

This Joconde/spongecake requires attentive baking so that it remains flexible to easily conform to the molds. If under baked it will stick to the baking mat. It over baked it will dry out and crack. Once cooled, the sponge may be cut into strips to line any shape ring mold.

Entremets (French baking term)- an ornate dessert with many different layers of cake and pastry creams in a mold, usually served cold. Think Trifle in a mold vs. a glass bowl.

Equipment required:

Silpat or a silicon baking mat
½ baking sheets or a 13” x 18” jelly roll sheet (rimmed baking sheet)
Mixer (optional)
Bowls
Knives
Offset spatula
Regular spatula
Pastry comb (optional)
Rulers
Spring form pan
Biscuit cutter (or ring mold, or cut PVC pipe, or whatever else you can think of to use as a mold for individual desserts)
Torte/entremets mold/Springform pan/ Trifle dish (for larger desserts)
Cling wrap
Parchment paper
Gel, paste or liquid food coloring (optional)
Joconde Sponge

YIELD: Two ½ size sheet pans or a 13” x 18” (33 x 46 cm) jelly roll pan

Ingredients:
¾ cup/ 180 ml/ 3oz/ 85g almond flour/meal - *You can also use hazelnut flour, just omit the butter
½ cup plus 2 tablespoons/ 150 ml/ 2⅔ oz/ 75g confectioners' (icing) sugar
¼ cup/ 60 ml/ 1 oz/ 25g cake flour *See note below
3 large eggs - about 5⅓ oz/ 150g
3 large egg whites - about 3 oz/ 90g
2½ teaspoons/ 12½ ml/ ⅓ oz/ 10g white granulated sugar or superfine (caster) sugar
2 tablespoons/ 30 ml/ 1oz / 30g unsalted butter, melted

*Note: How to make cake flour: http://www.joythebaker.com/blog/2009/09/how-to-make-cake-flour/

Directions:

1. In a clean mixing bowl whip the egg whites and white granulated sugar to firm, glossy peeks. Reserve in a separate clean bowl to use later.
2. Sift almond flour, confectioner’s sugar, cake flour. (This can be done into your dirty egg white bowl)
3. On medium speed, add the eggs a little at a time. Mix well after each addition. Mix until smooth and light. (If using a stand mixer use blade attachment. If hand held a whisk attachment is fine, or by hand. )
4. Fold in one third reserved whipped egg whites to almond mixture to lighten the batter. Fold in remaining whipped egg whites. Do not over mix.
5. Fold in melted butter.
6. Reserve batter to be used later.


Patterned Joconde-Décor Paste

YIELD: Two ½ size sheet pans or a 13” x 18” (33 x 46 cm) jelly roll pan

Ingredients
14 tablespoons/ 210ml/ 7oz/ 200g unsalted butter, softened
1½ cups plus1½ tablespoons/ 385ml/ 7oz/ 200g Confectioners' (icing) sugar
7 large egg whites - about 7 oz / 200g
1¾ cup/ 420ml/ 7¾ oz/ 220g cake flour
Food coloring gel, paste or liquid

COCOA Décor Paste Variation: Reduce cake flour to 6 oz / 170g. Add 2 oz/ 60 g cocoa powder. Sift the flour and cocoa powder together before adding to creamed mixture.

Directions:

1. Cream butter and sugar until light and fluffy (use stand mixer with blade, hand held mixer, or by hand)
2. Gradually add egg whites. Beat continuously.
3. Fold in sifted flour.
4. Tint batter with coloring to desired color, if not making cocoa variation.

Preparing the Joconde- How to make the pattern:

1. Spread a thin even layer of décor paste approximately 1/4 inch (5 millimeter) thick onto silicone baking mat with a spatula, or flat knife. Place mat on an upside down baking sheet. The upside down sheet makes spreading easier with no lip from the pan.
2. Pattern the décor paste – Here is where you can be creative. Make horizontal /vertical lines (you can use a knife, spatula, cake/pastry comb). Squiggles with your fingers, zig zags, wood grains. Be creative whatever you have at home to make a design can be used. OR use a piping bag. Pipe letters, or polka dots, or a piped design. If you do not have a piping bag. Fill a ziplock bag and snip off corner for a homemade version of one.
3. Slide the baking sheet with paste into the freezer. Freeze hard. Approx 15 minutes.
4. Remove from freezer. Quickly pour the Joconde batter over the design. Spread evenly to completely cover the pattern of the Décor paste.
5. Bake at 475ºF /250ºC until the joconde bounces back when slightly pressed, approx. 15 minutes. You can bake it as is on the upside down pan. Yes, it is a very quick bake, so watch carefully.
6. Cool. Do not leave too long, or you will have difficulty removing it from mat.
7. Flip cooled cake on to a powdered sugared parchment paper. Remove silpat. Cake should be right side up, and pattern showing! (The powdered sugar helps the cake from sticking when cutting.)


Preparing the Jaconde for Molding:

Video: MUST WATCH THIS. This is a very good demo of the joconde and filling the entremets:
http://www.youtube.com/watch?v=ca4eLDok-4Q

1. Trim the cake of any dark crispy edges. You should have a nice rectangle shape.
2. Decide how thick you want your “Joconde wrapper”. Traditionally, it is ½ the height of your mold. This is done so more layers of the plated dessert can be shown. However, you can make it the full height.
3. Once your height is measured, then you can cut the cake into equal strips, of height and length. (Use a very sharp paring knife and ruler.)
4. Make sure your strips are cut cleanly and ends are cut perfectly straight. Press the cake strips inside of the mold, decorative side facing out. Once wrapped inside the mold, overlap your ends slightly. You want your Joconde to fit very tightly pressed up to the sides of the mold. Then gently push and press the ends to meet together to make a seamless cake. The cake is very flexible so you can push it into place. You can use more than one piece to “wrap “your mold, if one cut piece is not long enough.
5. The mold is done, and ready to fill.

*Note: If not ready to use. Lay cake kept whole or already cut into strips, on a flat surface, wrap in parchment and several layers of cling wrap and freeze.

Entremet- Filling

It is nice to have a completed dessert so you can unmold and see the Joconde working. Fill with anything you desire. Layers of different flavors and textures! However, it needs to be something cold that will not fall apart when unmolded.

Half of my Cake was filled with French Pastry Cream and another half with Strawberry Mousse.

French Pastry Cream

Ingredients:
350ml milk
17 gm / 1 tsp sugar, for the milk
27 gm corn starch
70 gm sugar
55 gm egg yolk
35 gm butter
250 gm freshly whipped cream
6 gm agar agar or gelatin

Method:
1. Boil the milk and sugar in a saucepan.
2. Next in a bowl mix the yolks, corn starch and sugar ill it becomes white.
3. Then pour half the boiling milk into the bowl and mix well. Now pour this into the saucepan and heat until it thickens.
4. Take the pan off the heat and add butter.
5. Mix agar agar into the above mixture.
6. Cool the mixture and mix with the whipped cream and fill into the round shaped prepared biscuit.

Suggestions:
Mousses, pastry creams, Bavarian creams, cheesecakes, puddings, curds, jams, cookie bases, more cake (bake off the remaining sponge and cut to layer inside), nuts, Dacquoise, fresh fruit, chocolates, gelee.
Wednesday, January 13, 2010

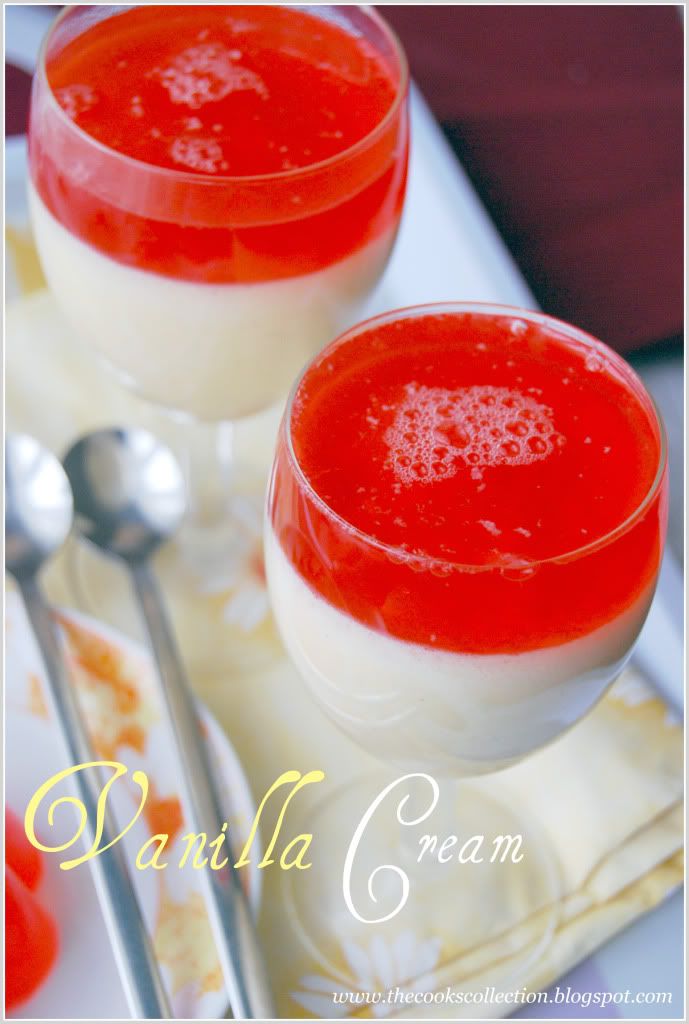
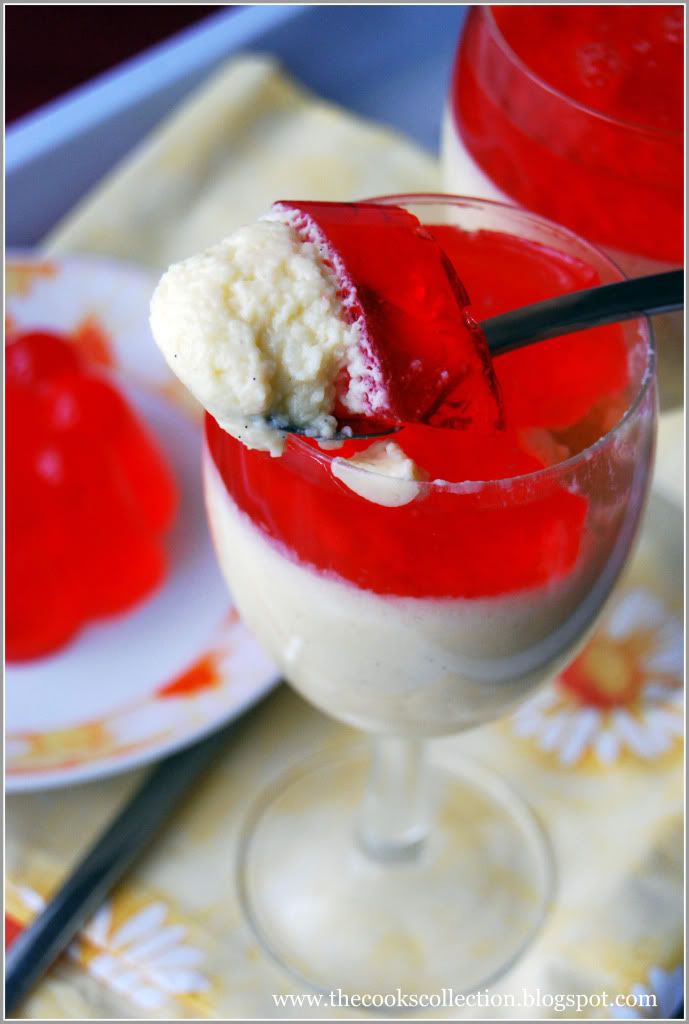
Bayerische Creme ( Bavarian cream with Raspberry jelly )

Bayerische Creme is a classic rich and creamy German dessert. It is basically vanilla cream, thickened with gelatine, whipped cream, and egg yolks. It is similar to flour or cornstarch thickened crème pâtissière but thickened with gelatin instead. It is lightened with whipped cream when on the edge of setting up, before being molded, for a true Bavarian cream is usually filled into a fluted mold chilled until firm, then turned out onto a serving plate.


Little about Vanilla : The name vanilla derives from the Spanish word "vainilla", little pod. Vanilla is an Evergreen annual creeper plant from genus of orchid plants which flourish in tropical and subtropical climate. Vanilla is the only type of Orchid which contributes to the human diet. The plant originally comes from Mexico and Central America. Today's areas of vanilla are situated in the tropical Island Madagascar, the Comoros, Reunion and other tropical areas along the Indian Ocean. From over one hundred Types of vanilla, only fifteen are interestingly aromatic and only three are suitable for the manufacture of vanilla. The special aroma of vanilla is formed from 35 other substances along with vanillin and glucose. This aroma is achieved only after a very intensive working process where a fermentation is achieved by drying and sweating. And finally, the pods contain a maximum of just 3 % of vanillin.

Vanilla is the second most expensive spice after saffron, due to the extensive labor required to grow the vanilla seed pods. Despite the expense, it is highly valued for its flavor, which author Frederic Rosengarten, Jr. described in The Book of Spices as "pure, spicy, and delicate" and its complex floral aroma depicted as a "peculiar bouquet." Despite its high cost, vanilla is widely used in both commercial and domestic baking, perfume manufacture and aromatherapy.

Now with the recipe..

Recipe Serves : 6

Ingredients Required:
500 ml milk
100 g sugar
6 egg yolks
1 vanilla pod
200 g whipping cream
4 gelatin sheets

1 packet raspberry jelly (optional)

Directions:
Soak the gelatin sheets in a bowl of cold water for 5 minutes and let it soften.

Cut the vanilla pod lengthwise and scrap the seeds using the sharp end of the knife. In a saucepan, combine milk and the pod along with the seeds and simmer them together over low-to-medium heat for about ten minutes. Don't allow to scald or boil!. Take the pan off the heat and let the vanilla get infused into the milk for a while.

Meanwhile, beat the yolks and sugar together using a hand mixer till pale and fluffy.

Slowly add warm vanilla-milk into the yolk mixture and combine using a whisk. Add this vanilla milk-yolk mixture back into the saucepan and simmer on low heat till the mixture thickens, and cook until the mixture is thick enough to coat the back of a spoon. Take it off the heat.

Now take the gelatin out of the cold water, squeeze and add it to the hot vanilla custard, whisking well to combine. And let this custard cool completely.

Beat the cream along with 3 tablespoons of sugar until stiff and fold this into the cooled custard. Pour this mixture into individual wine glasses and refrigerate until to set.

Use raspberry jelly according to the instructions on the packet and pour it on to the fully set vanilla cream. Or you can simply use any fruit purees on top of the cream.

The cream even tastes delicious with or without any fruits.


So enjoy this awesome dessert.

Saturday, February 14, 2009

Cream Caramel

Creme caramel is a great make ahead dessert option. Its a beatiful, rich and delicate custard dessert with a layer of soft caramel on top. This dessert would just melt in your mouth.
Its baked in hot water bath so as to avoid the direct contact of heat with the cream. It lets the cream to stay soft and supple.


So here is the recipe for the cream caramel

Ingredients:

Condensed milk [Milkmaid] : 1 tin
Milk : 500ml
Eggs : 4
Lemon (grated rind only) : 1 tsp
Sugar : 2 tbsp (to coat the mould with caramelised sugar)

Method:

Preheat thr oven to 180 deg C. Place a shallow pan of water in the oven.

Heat sugar in the ring mould till it melts and caramelises. Turn the mould so as to coat its base and sides with caramel. Keep aside. [ You can even caramelise sugar in a small pan and transfer it immediately into the ramkins. Just turn a little so that it coats the base. It need not have to coat the base completely as it hardens very soon.]

Combine milk and milkmaid together.

Beat the eggs lightly. Add lemon rind. Gradually add milk and keep stirring till all the ingredients combine.

Pour into the caramelised ring mould or ramkins. Place the mould in the pan of water in the oven and bake for 30 to 40 minutes.

Cool, chill in the refrigerator for 5 to 6 hours before unmoulding to serve.


Serve chilled.

Tuesday, February 3, 2009

Very Very Chocolatey Mousse - 3 Layered !!

This is a delicious light and creamy dessert. Its got the airy and sandy texture, the richness and the taste. This sneakily delicious version combines cornstarch-and-egg yolk thickened custard folded with whipped cream and beaten egg whites to produce a light and fluffy yet extremely rich confection, Plus, a triple-dose of white, bittersweet and milk chocolate. Because this dessert needs time to chill to maintain its aeration, it is a terrific make-ahead option.

A lot of patience and time is required in this preparation but this dessert is worth all your patience and time. Just go for it. Remember to keep all your mixing and beating bowls ready before you start ;)(you'll need lots..)

I present this recipe to all the chocolate lovers out there..!!

So here is the recipe..

Ingredients:

3 Eggs
1 tbsp Cornstarch
75g Sugar
300 ml Milk
1 Pkt Gelatin
3 tbsps Water
300g Whipped cream
75g Bittersweet Chocolate
75g White Chocolate
75g Milk Chocolate
Chocolate shavings for decorating

How to..

Line a loaf pan (850 ml) or any other pan with baking paper.

Break the eggs. Seperate egg whites in 3 different glass bowls and mix in all the egg yolks together in another bowl. Stir in the cornstarch and sugar with the egg yolks and keep aside.

Boil the milk stirring gently. Place another bowl filled with water on high heat and let it come to a boil. Meanwhile gradually pour the egg yolk mixture into the milk and keep stirring with a whisk. When the milk and yolks has combined well, remove the bowl from the heat and place it in the hot water bowl such that the base of the bowl touches the boiling water. Keep stirring until the mixture thickens. Remove and let cool.

Mix in the Gelatin with 3 tbsps of water in a small bowl and leave to swell. Place the bowl in hot water and keep stirring till it dissolves completely (You can also use a microwave, just microwave for 4 to 5 seconds on low). Mix the dissolved gelatin into the milk-yolk custard and keep aside.

Whip the cream until stiff and fold it gently into the milk-yolk custard. Now divide this custard-cream mixture into 3 portions.

Melt all the 3 types of chocolates seperately using a double boiler (You can use a large bowl with water which can accomidate all the 3 chocolate bowls or cups and melt them simultaneously, remember to use 3 different spoons to stir).

First stir in the melted dark chocolate into one portion of the custard-cream mixture. Beat 1 egg white until stiff and fold it into the dark chocolate-custard-cream mixture. Pour the mixture into the prepared pan and smoothen on top. Place the pan in the refrigerator.

Meanwhile, mix the melted white chocolate with the second portion of custard-cream mixture. Beat the second egg white until stiff and fold it into the white chocolate-custard-cream mixture. Pour this on the first layer of mousse and smoothen on top. Transfer it back to the refrigerator.

Repeat the same steps with the milk chocolate and layer it on top of the white chocolate. Let it stay in the refrigerator for 5 to 6 hours or overnight or until you serve.

Before serving, Carefully place the prepared serving plate on top of the loaf pan and turn the pan upside down. Lift the pan up and remove the parchment paper. Decorate with chocolate shavings before you serve.


Hmm..... yummy!!! :)

Saturday, August 9, 2008

Kosher Challah


Kosher Challah is a Jewish Bread which is braided before baking. This bread is also used for French Toast which is a popular breakfast food.

For making One small loaf you'll need..
Ingredients
2 1/2 cups sifted All purpose flour
3/4th packet dry yeast
1/4 cup lukewarm water(about 38 to 40 Deg )
1 tsp sugar
1 tbsp oil
1 tsp salt
1 egg
1 egg yolk for brushing
1/2 cup water

Method

combine the yeast, sugar, and 1/4 cup of lukewarm water and leave it for 5 minutes.

In a large bowl, combine the flour and salt. Add in the eggs, oil, 1/2 cup of water, and the yeast mixture. Mix well using both your hands. knead well. Cover it with a plastic wrap and let it raise for about an hour in a warm place. The dough should be about double its original size.

After an hour punch down the dough, and then let it rise again for about an hour.

Divide the dough into three long strands. Attach them on top. Braid them like how your braid your hair. At the end bring the strands together and tuck them under.


Place the braided dough on a oven plate which is lined with a baking sheet. Preheat the oven to 375 degrees, and let the dough rise one last time.

Finally, brush the dough with the egg yolk. This will bring a nice golden color to the finished bread.

Bake for 50 minutes. Let it cool before you cut.

Enjoy!

Tuesday, July 8, 2008

Waffles

Preparation time : 10 minutes
Baking time : 3 - 4 minutes
Makes about 6 - four inch square waffles

You'll need..

Butter - 40gm
Sugar - 30gm
Vanilla extract - 1tsp
Eggs - 1(large)
All purpose flour - 150gm
Baking powder - 1tsp
Milk - 100ml

Method:

Sift togeher the flour and the baking powder. Keep it aside.

Gently mix butter with sugar. When the butter mixture becomes soft,add the vanilla extract and gradually add the eggs one after the other.

Add milk and mix it well. See that no lumps are formed.

Finally add the flour mixture. The waffle mixture should be fairly thick but fluid enough to drop off a spoon.

For this recipe you'll need to buy either an electric or stovetop Waffle iron and both consists of two metal grids , facing each other, that are held together with hinges. You just need to follow the manufacturer's instructions.

To make a waffle you pour about 1/2 a cup of the batter onto one side of the iron, the second metal grid is then closed over the batter and the waffle is cooked until crisp and golden brown. Use a wooden spatula to remove the waffle once its done.
Serve it immediately with whipped cream and any fruit(strawberry or berries)

Enjoy!

About Us | Site Map | Privacy Policy | Contact Us | Blog Design | 2007 Company Name