Showing posts with label Cakes. Show all posts

Tuesday, January 10, 2012

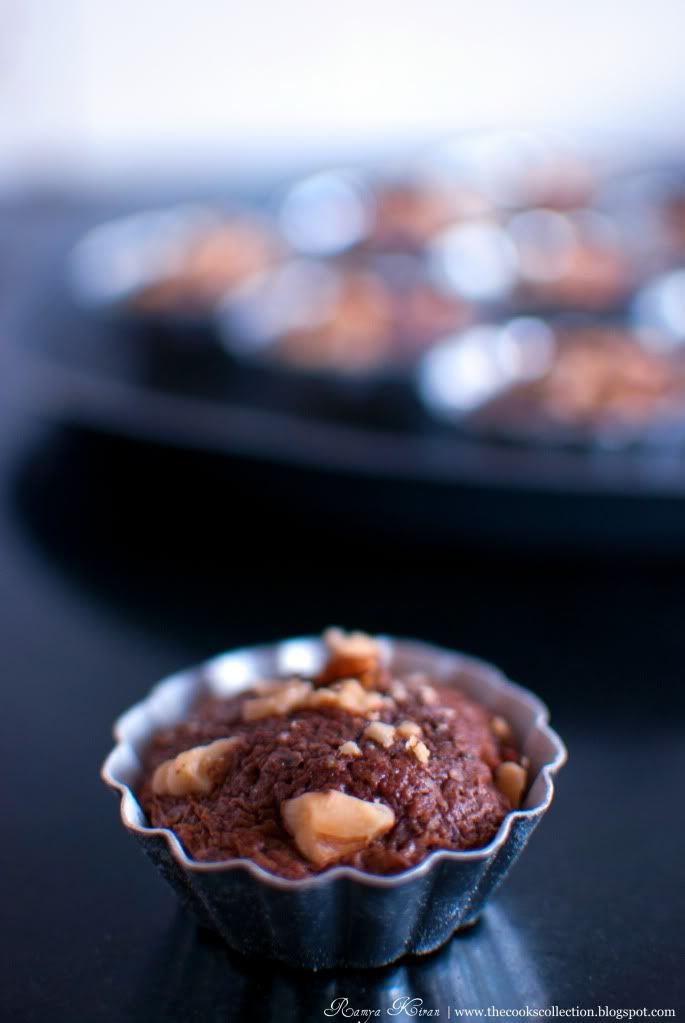
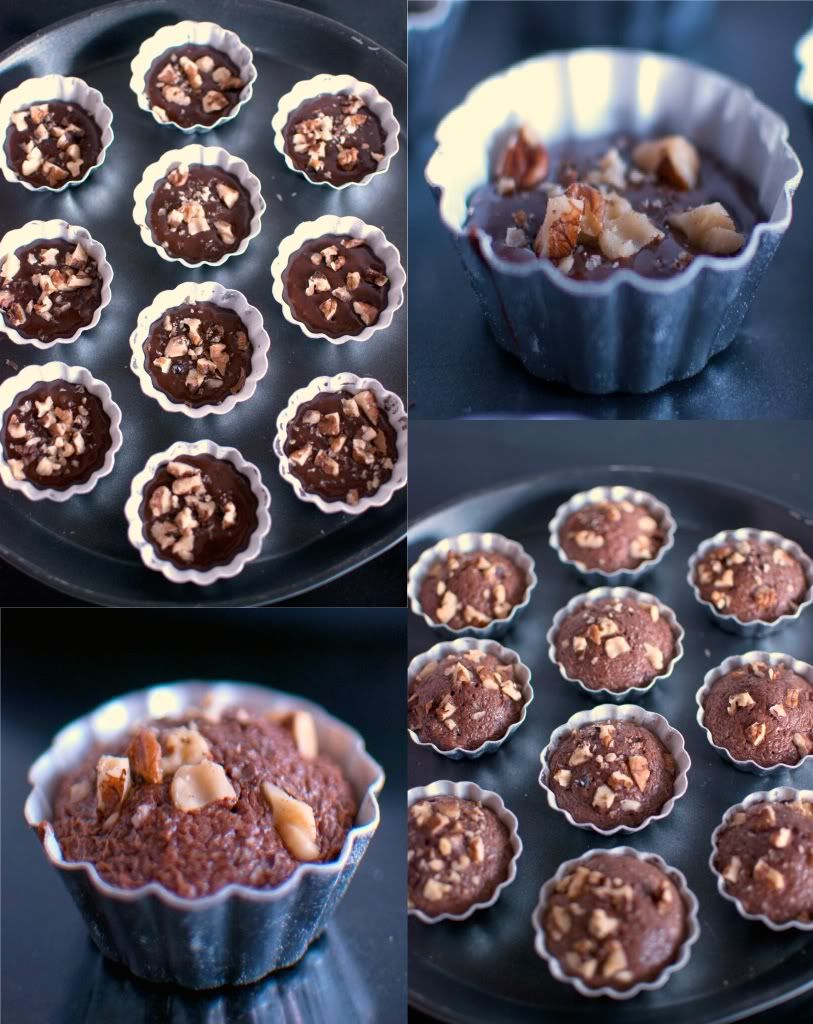
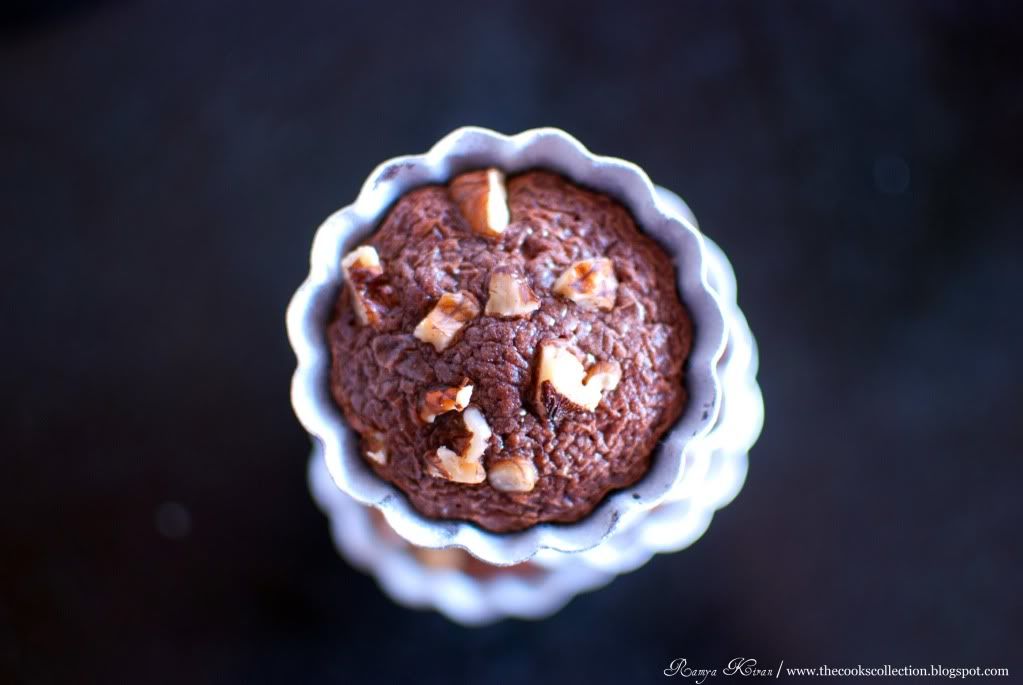
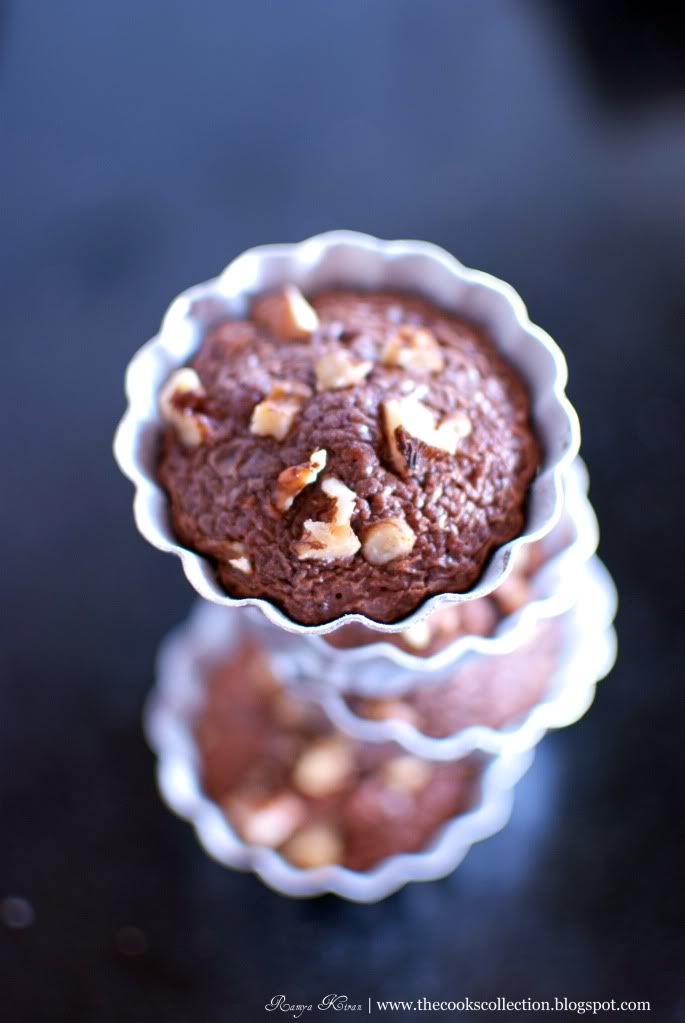
Nutella Fudge Brownies


These small bites are just not enough to satisfy your sweet buds. You'll surely be asking for more and 12 minis will be just gone in minutes. These brownie bites are just made with using 4 ingredients and can be whipped in just 2 minutes. These brownies are fudgy in texture and not too sweet,  just perfect for me and the nuts on top get roasted as they bake and give a wonderful crunch. You'll need mini muffin cups or pan for the recipe. If you are in Bangalore, India you can get these mini muffin cups in General Food Additives.
Here goes the recipe...

Recipe Adapted from Desserts 4 Today: Flavorful Desserts with Just Four Ingredients (USA |India)


Makes 12 Brownies

Ingredients:

  • 1/2 cup Nutella Spread 
  • 1 Large Egg
  • 5 Tablespoons all-purpose flour
  • 1/4 cup hazelnuts, chopped ( i have used walnuts, can use almonds too)

Method:

  1. Heat the oven to 350 degrees. Line a 12-cup mini muffin pan with paper or foil liners.
  2. Put the Nutella and egg in a medium bowl and whisk until smooth and well blended. Add the flour and whisk until blended.
  3. Spoon the batter into the prepared muffin tins (about 3/4 full) and sprinkle with the chopped hazelnuts.
  4. Bake until a pick comes out with wet, gooey crumbs, 11 to 12 minutes. Set on a rack to cool completely. Serve immediately or cover and store at room temperature for up to 3 days.


Switch-Ins:
In place of the hazelnuts, switch in one of the following:
* ground cinnamon, 1/4 teaspoon (add with the flour)
* peanuts, chopped, 1/4 cup


Thursday, January 27, 2011

Daring Bakers : Biscuit Joconde Imprime/Entremet

The January 2011 Daring Bakers’ challenge was hosted by Astheroshe of the blog accro. She chose to challenge everyone to make a Biscuit Joconde Imprime to wrap around an Entremets dessert.


Joconde imprime /entremets. A joconde imprime (French Baking term) is a decorative design baked into a light sponge cake providing an elegant finish to desserts/torts/entremets/ formed in ring molds. A joconde batter is used because it bakes into a moist, flexible cake. The cake batter may be tinted or marbleized for a further decorative effect.

This Joconde/spongecake requires attentive baking so that it remains flexible to easily conform to the molds. If under baked it will stick to the baking mat. It over baked it will dry out and crack. Once cooled, the sponge may be cut into strips to line any shape ring mold.

Entremets (French baking term)- an ornate dessert with many different layers of cake and pastry creams in a mold, usually served cold. Think Trifle in a mold vs. a glass bowl.

Equipment required:

Silpat or a silicon baking mat
½ baking sheets or a 13” x 18” jelly roll sheet (rimmed baking sheet)
Mixer (optional)
Bowls
Knives
Offset spatula
Regular spatula
Pastry comb (optional)
Rulers
Spring form pan
Biscuit cutter (or ring mold, or cut PVC pipe, or whatever else you can think of to use as a mold for individual desserts)
Torte/entremets mold/Springform pan/ Trifle dish (for larger desserts)
Cling wrap
Parchment paper
Gel, paste or liquid food coloring (optional)
Joconde Sponge

YIELD: Two ½ size sheet pans or a 13” x 18” (33 x 46 cm) jelly roll pan

Ingredients:
¾ cup/ 180 ml/ 3oz/ 85g almond flour/meal - *You can also use hazelnut flour, just omit the butter
½ cup plus 2 tablespoons/ 150 ml/ 2⅔ oz/ 75g confectioners' (icing) sugar
¼ cup/ 60 ml/ 1 oz/ 25g cake flour *See note below
3 large eggs - about 5⅓ oz/ 150g
3 large egg whites - about 3 oz/ 90g
2½ teaspoons/ 12½ ml/ ⅓ oz/ 10g white granulated sugar or superfine (caster) sugar
2 tablespoons/ 30 ml/ 1oz / 30g unsalted butter, melted

*Note: How to make cake flour: http://www.joythebaker.com/blog/2009/09/how-to-make-cake-flour/

Directions:

1. In a clean mixing bowl whip the egg whites and white granulated sugar to firm, glossy peeks. Reserve in a separate clean bowl to use later.
2. Sift almond flour, confectioner’s sugar, cake flour. (This can be done into your dirty egg white bowl)
3. On medium speed, add the eggs a little at a time. Mix well after each addition. Mix until smooth and light. (If using a stand mixer use blade attachment. If hand held a whisk attachment is fine, or by hand. )
4. Fold in one third reserved whipped egg whites to almond mixture to lighten the batter. Fold in remaining whipped egg whites. Do not over mix.
5. Fold in melted butter.
6. Reserve batter to be used later.


Patterned Joconde-Décor Paste

YIELD: Two ½ size sheet pans or a 13” x 18” (33 x 46 cm) jelly roll pan

Ingredients
14 tablespoons/ 210ml/ 7oz/ 200g unsalted butter, softened
1½ cups plus1½ tablespoons/ 385ml/ 7oz/ 200g Confectioners' (icing) sugar
7 large egg whites - about 7 oz / 200g
1¾ cup/ 420ml/ 7¾ oz/ 220g cake flour
Food coloring gel, paste or liquid

COCOA Décor Paste Variation: Reduce cake flour to 6 oz / 170g. Add 2 oz/ 60 g cocoa powder. Sift the flour and cocoa powder together before adding to creamed mixture.

Directions:

1. Cream butter and sugar until light and fluffy (use stand mixer with blade, hand held mixer, or by hand)
2. Gradually add egg whites. Beat continuously.
3. Fold in sifted flour.
4. Tint batter with coloring to desired color, if not making cocoa variation.

Preparing the Joconde- How to make the pattern:

1. Spread a thin even layer of décor paste approximately 1/4 inch (5 millimeter) thick onto silicone baking mat with a spatula, or flat knife. Place mat on an upside down baking sheet. The upside down sheet makes spreading easier with no lip from the pan.
2. Pattern the décor paste – Here is where you can be creative. Make horizontal /vertical lines (you can use a knife, spatula, cake/pastry comb). Squiggles with your fingers, zig zags, wood grains. Be creative whatever you have at home to make a design can be used. OR use a piping bag. Pipe letters, or polka dots, or a piped design. If you do not have a piping bag. Fill a ziplock bag and snip off corner for a homemade version of one.
3. Slide the baking sheet with paste into the freezer. Freeze hard. Approx 15 minutes.
4. Remove from freezer. Quickly pour the Joconde batter over the design. Spread evenly to completely cover the pattern of the Décor paste.
5. Bake at 475ºF /250ºC until the joconde bounces back when slightly pressed, approx. 15 minutes. You can bake it as is on the upside down pan. Yes, it is a very quick bake, so watch carefully.
6. Cool. Do not leave too long, or you will have difficulty removing it from mat.
7. Flip cooled cake on to a powdered sugared parchment paper. Remove silpat. Cake should be right side up, and pattern showing! (The powdered sugar helps the cake from sticking when cutting.)


Preparing the Jaconde for Molding:

Video: MUST WATCH THIS. This is a very good demo of the joconde and filling the entremets:
http://www.youtube.com/watch?v=ca4eLDok-4Q

1. Trim the cake of any dark crispy edges. You should have a nice rectangle shape.
2. Decide how thick you want your “Joconde wrapper”. Traditionally, it is ½ the height of your mold. This is done so more layers of the plated dessert can be shown. However, you can make it the full height.
3. Once your height is measured, then you can cut the cake into equal strips, of height and length. (Use a very sharp paring knife and ruler.)
4. Make sure your strips are cut cleanly and ends are cut perfectly straight. Press the cake strips inside of the mold, decorative side facing out. Once wrapped inside the mold, overlap your ends slightly. You want your Joconde to fit very tightly pressed up to the sides of the mold. Then gently push and press the ends to meet together to make a seamless cake. The cake is very flexible so you can push it into place. You can use more than one piece to “wrap “your mold, if one cut piece is not long enough.
5. The mold is done, and ready to fill.

*Note: If not ready to use. Lay cake kept whole or already cut into strips, on a flat surface, wrap in parchment and several layers of cling wrap and freeze.

Entremet- Filling

It is nice to have a completed dessert so you can unmold and see the Joconde working. Fill with anything you desire. Layers of different flavors and textures! However, it needs to be something cold that will not fall apart when unmolded.

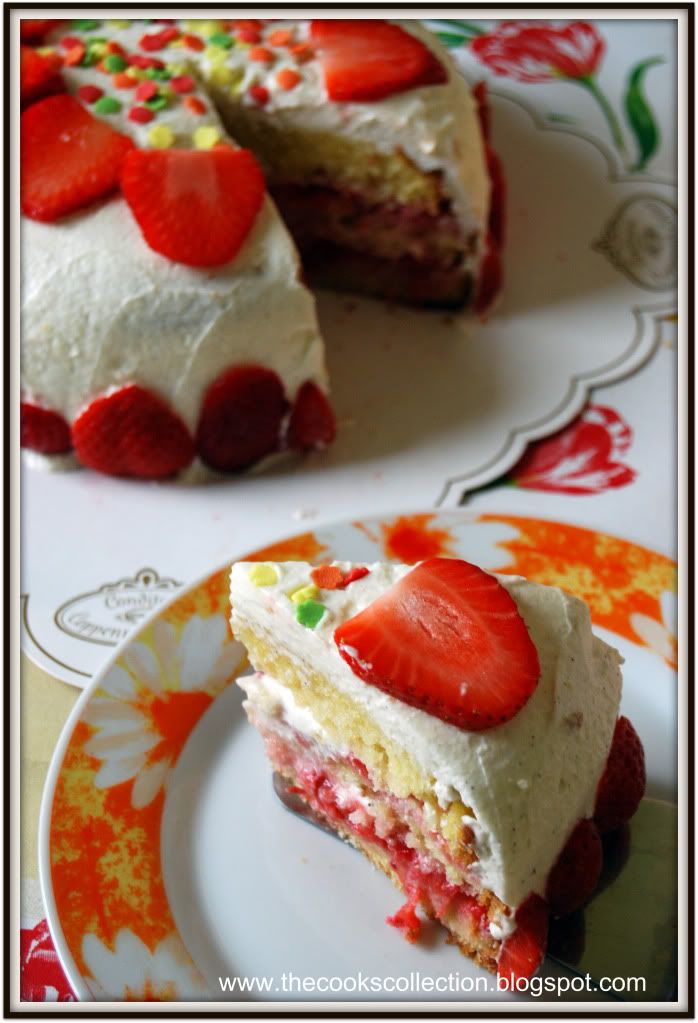
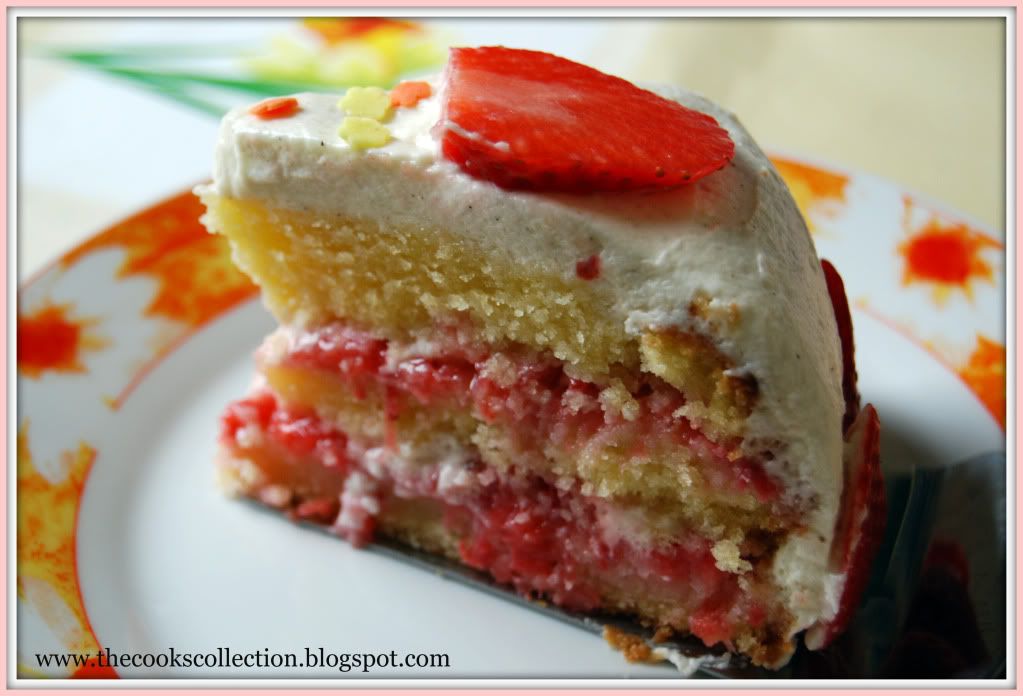
Half of my Cake was filled with French Pastry Cream and another half with Strawberry Mousse.

French Pastry Cream

Ingredients:
350ml milk
17 gm / 1 tsp sugar, for the milk
27 gm corn starch
70 gm sugar
55 gm egg yolk
35 gm butter
250 gm freshly whipped cream
6 gm agar agar or gelatin

Method:
1. Boil the milk and sugar in a saucepan.
2. Next in a bowl mix the yolks, corn starch and sugar ill it becomes white.
3. Then pour half the boiling milk into the bowl and mix well. Now pour this into the saucepan and heat until it thickens.
4. Take the pan off the heat and add butter.
5. Mix agar agar into the above mixture.
6. Cool the mixture and mix with the whipped cream and fill into the round shaped prepared biscuit.

Suggestions:
Mousses, pastry creams, Bavarian creams, cheesecakes, puddings, curds, jams, cookie bases, more cake (bake off the remaining sponge and cut to layer inside), nuts, Dacquoise, fresh fruit, chocolates, gelee.

Saturday, September 11, 2010

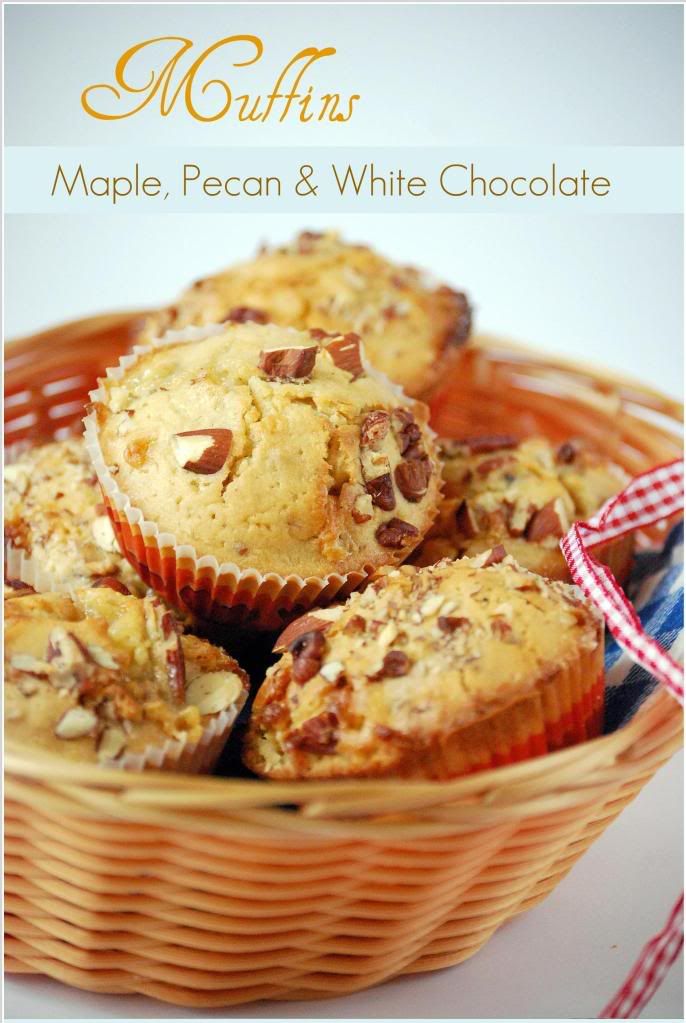
Maple, Pecan & White Chocolate Muffins

Maple syrup adds a lovely caramel flavor to these muffins. These muffins have a soft crumb and goes well with the crunchiness of the pecans and the feel of the soft sweet touch of white chocolate.


Makes 12 muffins

Ingredients:

300 g (10 oz) self-raising flour
1 teaspoon baking powder
125 g (4 oz) soft brown sugar
1 egg
50 ml (2 fl oz ) maple syrup
250 ml (8 fl oz) milk
5o g (2 oz) unsalted butter, melted
125 g (14 oz) white chocolate, chopped or white chocolate chips
75 g (3 oz) pecan nuts, coarsely chopped

to decorate
chopped pecans
chopped white chocolate

Method:
Sift the flour and baking powder into a bowl and stir in the sugar.

Beat together the egg, syrup, milk and melted butter and beat into the dry ingredients until mixed. do not over mix.

Fold in the chocolate and pecan nuts.

Line 12 holes of a muffin tray with paper cases. Divide the mixture among the paper cases and top with some extra chopped nuts and chocolate.

Bake in a preheated oven 200 deg C(400 deg F), Gas Mark 6, for 20 - 25 minutes until risen and golden. Leave to cool on a wire rack.

Wednesday, August 11, 2010

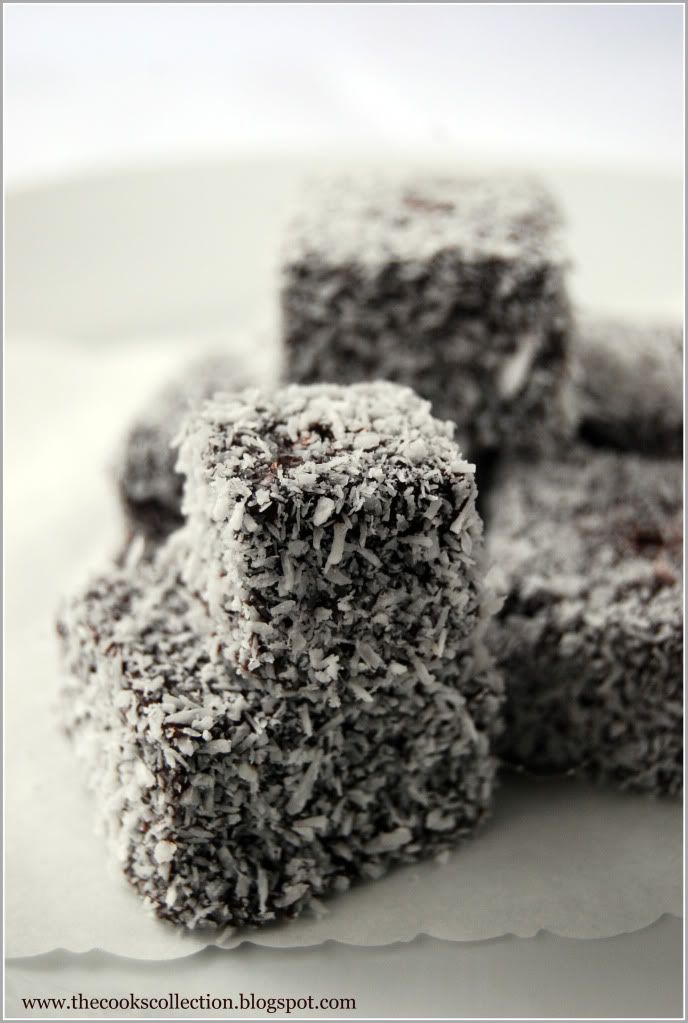
Lamingtons

Lamingtons are to Australians what the chocolate brownie is to Americans. These are basically cubes of sponge cake coated in chocolate icing and then rolled in desiccated coconut to finish.


Makes 24 small cakes

Ingredients:

For cake:
125 g unsalted butter, softened
125 g caster sugar
2 eggs, lightly beaten
250 g self raising flour, sifted
pinch of salt
1/2 cup or 8 tablespoons milk
1 teaspoon vanilla extract

For icing:
200 g icing sugar
50 g cocoa powder
75 -100 ml boiling water
100 g desiccated coconut

Method:
Make the cake: Put all the cake ingredients in a food processor and process until smooth. Or if you are making the cake batter by hand, beat the butter and sugar together until pale and light. Then beat in the eggs, a little at a time, until incorporated. Sift in the flour and salt and fold into the creamed mixture with milk and vanilla.

Oil and base-line a 18 x 25 cm (7 x 10 inch) cake tin and transfer the mixture to the prepared tin. Smooth the surface with a palette knife and bake in a preheated oven, 190 degrees C (375 degrees F) for 25 -30 minutes until risen and firm to touch. Leave to cool in the tin for 5 minutes and then turn out on a wire rack to cool. Leave out overnight.

Make the icing: Sift the icing sugar and cocoa powder into a bowl. Male a well in the center and beat in the boiling water to make a smooth icing with a pouring consistency.

How to proceed: Cut the cooled cake into 24 squares. Use 2 forks or a big skewer to dip each cake into the icing and then immediately coat with the coconut. Leave to set on a baking paper.


Enjoy!!

Tuesday, June 8, 2010

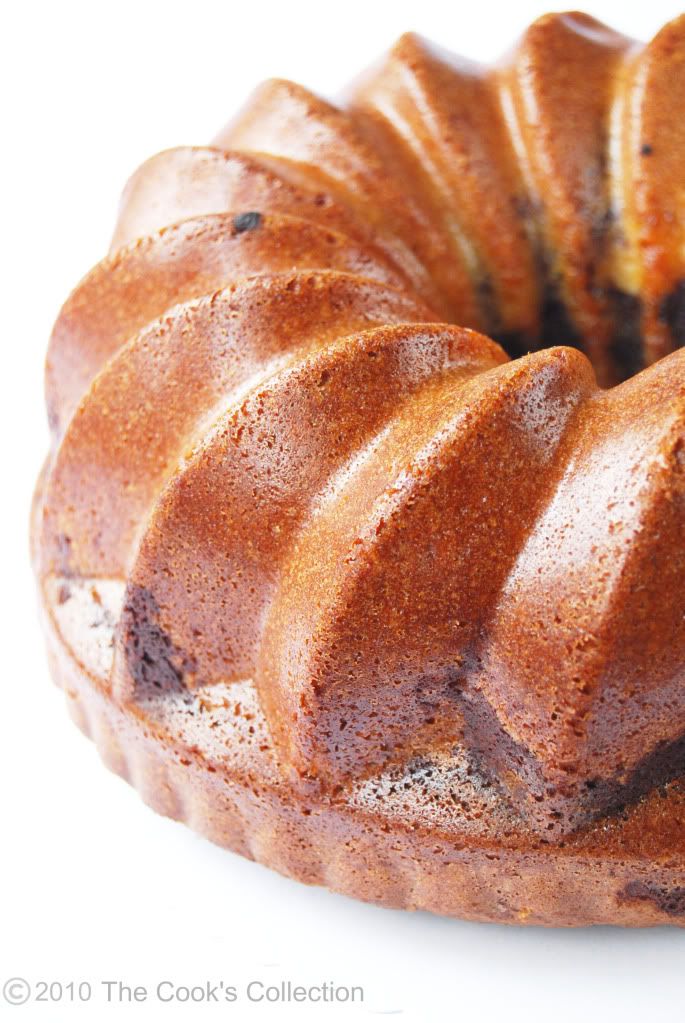
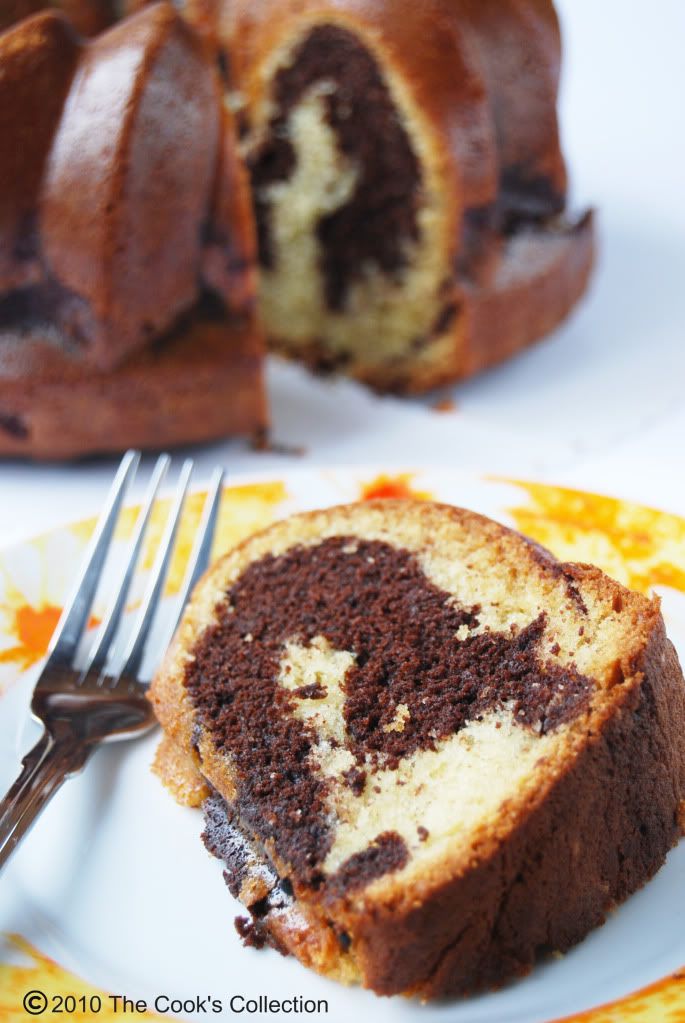
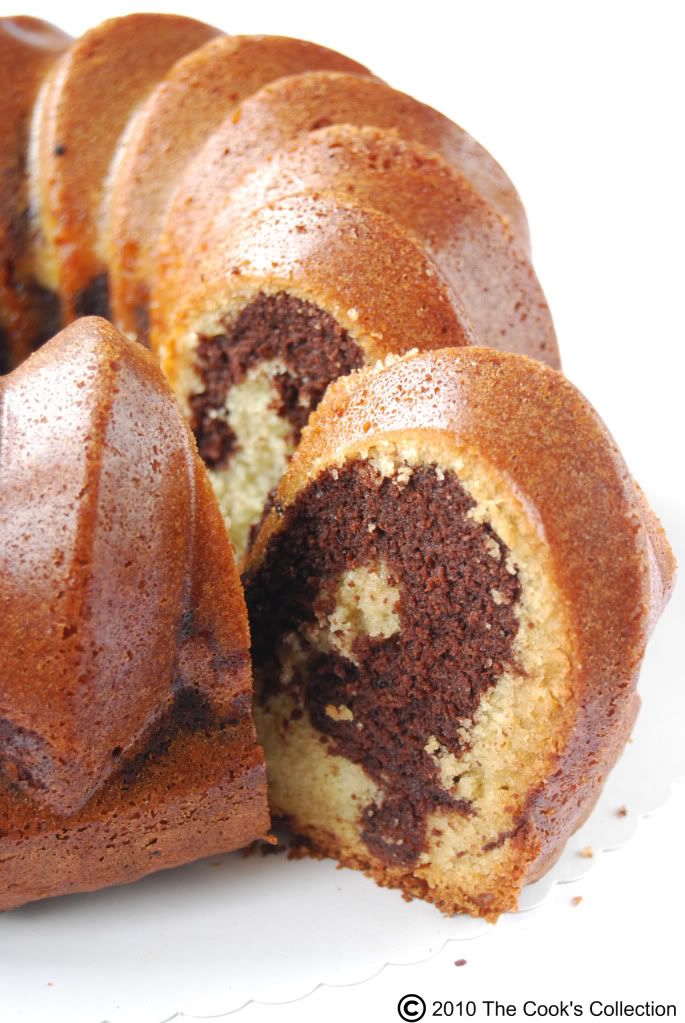
Marble Bundt Cake

The cake - it is cake, so don't kid yourself - should be delight to eat. It is the ultimate coffee accompaniment, when made correctly it is the perfect yin - yang dessert. Unfortunately, many marble cakes lack any distinction between the chocolate and vanilla components; the chocolate flavor is no more interesting than brown food coloring. This recipe is a tribute to the classic marble bundt, with a rich chocolate flavor (thanks to the combination of dark chocolate and cocoa powder) that contrasts nicely with the delicate vanilla swirl. If you're going to eat cake for breakfast, it should be this one.


This is the best homemade marble cake i've ever had. I recommend the book "Baked - New Frontiers in Baking" to all my readers who love baking. Go for it!!


Yield : 1 (10 inch) BUNDT CAKE

Adapted from Baked - New Frontiers in Baking

Ingredients:

FOR THE CHOCOLATE SWIRL

6 ounces, 170 grams dark chocolate (60 to 72 % cocoa), coarsely chopped
1 teaspoon unsweetened dark cocoa powder (like Valrhona)

FOR THE SOUR CREAM CAKE

3 1/2 cups all-purpose flour
1 1/2 teaspoons baking powder
1 1/2 teaspoons baking soda
1/2 teaspoon salt
1 cup (2 sticks) unsalted butter, soft but cool, cut into 1-inch pieces
2 1/4 cups sugar
4 large eggs
16 ounces, 453 grams sour cream
1 1/2 teaspoons pure vanilla extract

Directions:

MAKE THE CHOCOLATE SWIRL : In the top of a double boiler over simmering Water, melt the chocolate. When the chocolate is completely smooth, add the cocoa powder and whisk until thoroughly incorporated. Remove the bowl from the heat and set aside.

MAKE THE SOUR CREAM CAKE : Preheat the oven to 350 degrees F. Spray the inside of a 10-inch bundt pan with a nonstick cooking spray or simply use a silicon bundt pan.

Sift the flour, baking powder, baking soda, and slat together into a medium bowl.

In the bowl of an electric mixer fitted with the paddle attachment, cream the butter until smooth and ribbon like. Scrape down the bowl and add the sugar. Beat until the mixture is smooth and fluffy. Add the eggs, one at a time, beating well after each addition. Scrape down the bowl and mix for 30 seconds.

Add the sour cream and vanilla and beat just until incorporated. Add the dry ingredients in three additions, scraping down the bowl before each addition and beating only until each addition is just incorporated. Do not over mix.

Pour one third of the cake batter into the chocolate swirl mixture. Use a spatula to combine the chocolate mixture and the batter to make a smooth chocolate batter. Spread half of the remaining batter in the prepared pan. Use an ice cream scoop to dollop the chocolate cake batter directly on top of the plain cake batter. The dollops will touch and mostly cover the plain batter, but some plain batter will peek through. Use a butter knife to swirl the chocolate and plain cake batter together. Pour the remaining plain batter on top of the chocolate layer and smooth it out. Once again, use the knife to pull through the layers to create a swirl.

Bake in the center of the oven for about 1 hour, rotating the pan halfway through the baking time, or until a sharp knife inserted in the center of the cake comes out clean.

Remove from the oven and let the cake cool in the pan on a wire rack for 30 minutes. Use a knife to loosen the edges of the cake and invert it into the wire rack and let cool. Serve warm or at room temperature.


STORAGE : The cake will keep for 3 days. tightly covered. at room temperature.

Thursday, April 29, 2010

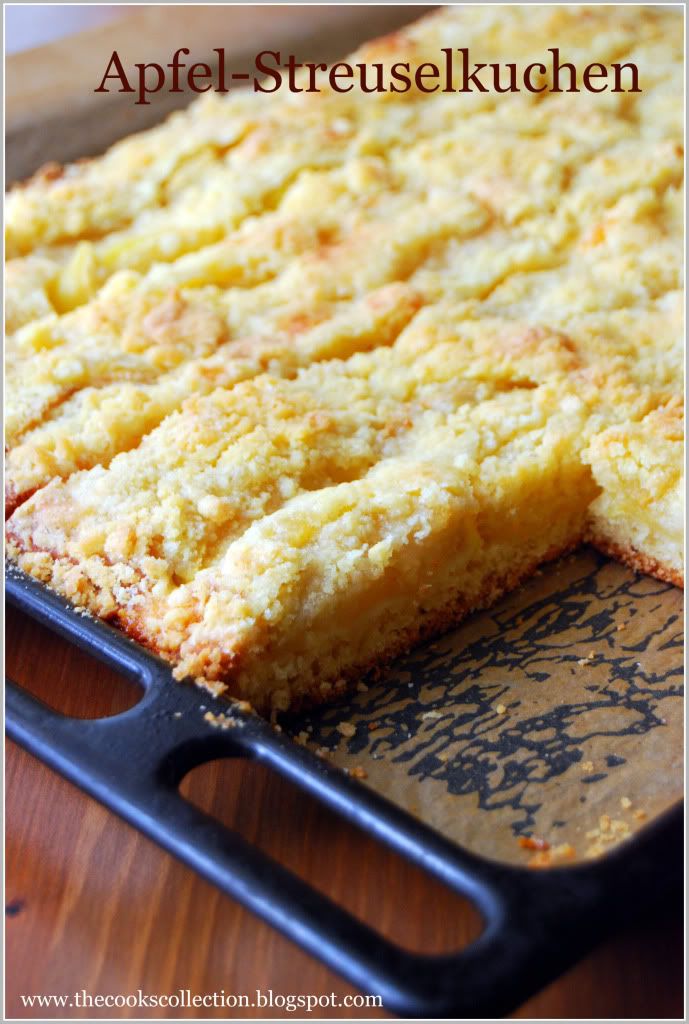
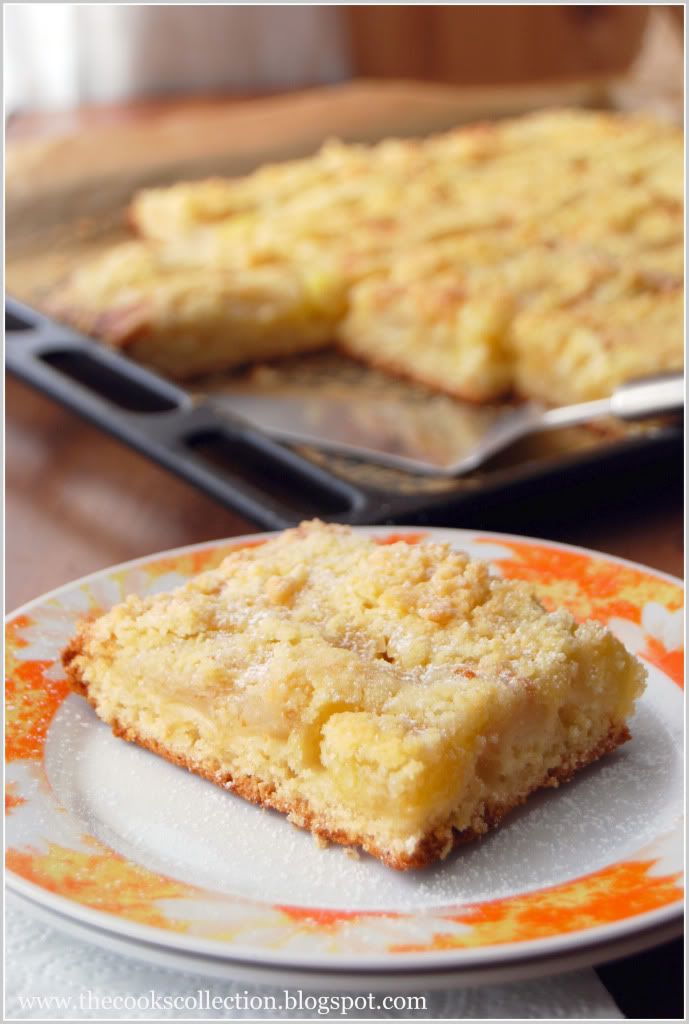
Apfel Streuselkuchen ( Apple Crumb Cake )

Streuselkuchen (crumb cake) is a German speciality. Traditionally it is made of a yeast dough covered with crumbs. The term "streusel" (a German word meaning "something scattered or sprinkled", refers to a crumb topping of butter, flour, and white sugar. This yeasted dough can be topped with any of your favorite fresh fruits, be it, plums, apricot, cherries, or any of the berries. The streusel gives the cake a nice crunch and the added sweetness balances the slight tanginess of the fruits.


Ingredients:

For the dough:
400 g flour
30g fresh yeast or 2teaspoons dry yeast
150ml milk, luke warm
80g sugar
1 egg, large
100g butter or Margarine
pinch of salt

For the topping:
1.2 kg Apples, about 5-6, each cut into 8 pieces

For the streusel:
175 g butter
250 g four
200 g sugar
1 packet vanilla sugar

Directions:

Prepare the dough by dissolving the yeast and a pinch of sugar in the lukewarm milk. Keep aside till you start seeing bubbles and froth on top of the solution. Combine the flour, sugar, eggs, butter, frothed yeast and a pinch of salt and knead with the kneading hooks of your machine or simply with your hands. The dough should be smooth and silky. If kneading by hand, take your time and knead well till smooth. Cover with a damp cloth and allow to rise in a warm dry place till it doubles in volume - approx. 1 hour. If the weather is too cold in your kitchen, then simply switch on the baking oven to max for 2 minutes and switch it off. Place a bowl of hot bubbly water in the bottom of the oven and the dough in the center rack. Close and let it rest till it doubles.

For the streusel, melt the butter. In a bowl, combine the flour, sugar and vanilla sugar. Add the hot melted butter and work with the flour until you form pea-size crumbs.

Preheat the oven to 200 degrees C, and prepare a baking tray by lining it with some baking paper.

Once the dough has risen using floured fingers spread the dough out to the edges of the baking tray (39 cm X 32 cm). Spread the apple pieces over the dough without leaving any gaps in between. Now spread the crumble topping and let the dough rest for another 10-15 minutes.

Bake in a preheated 200 deg C oven for 30 minutes. Remove and let cool.

Saturday, February 27, 2010

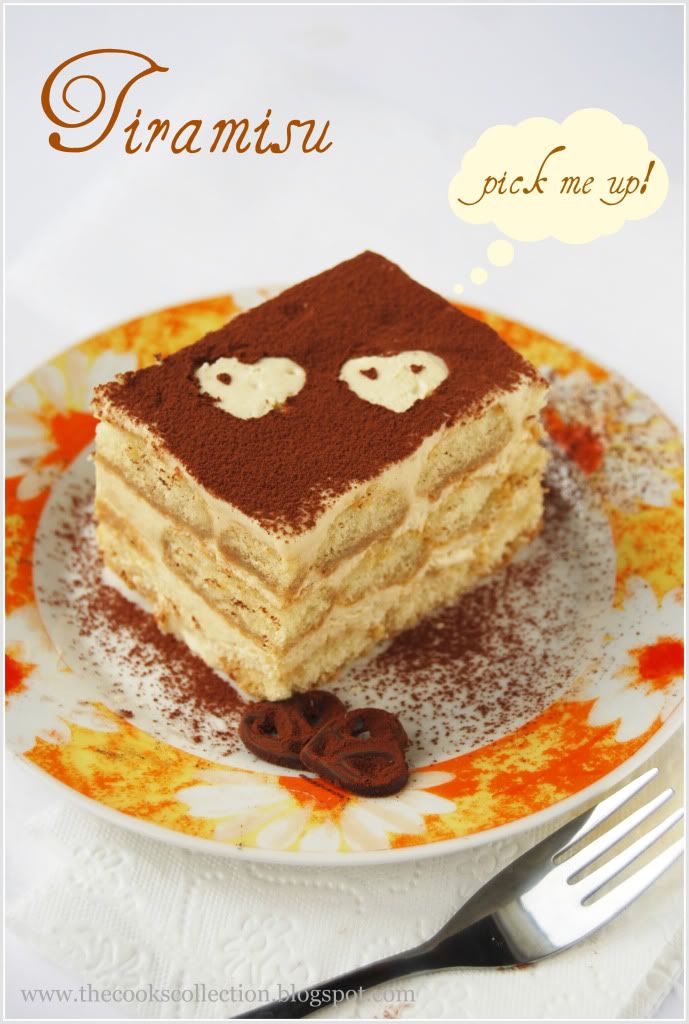
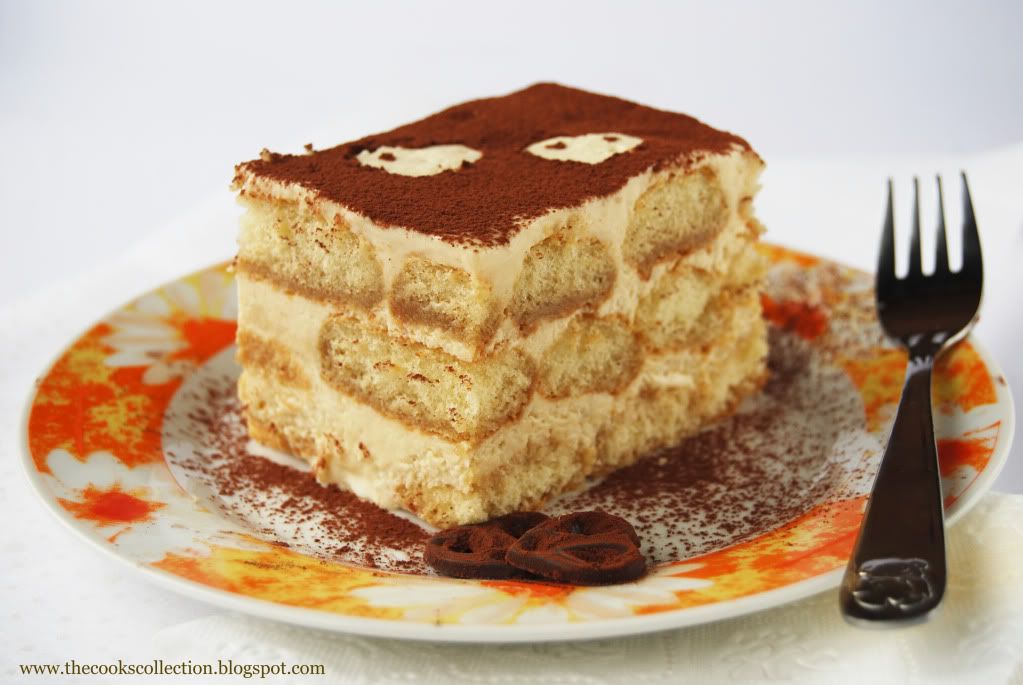
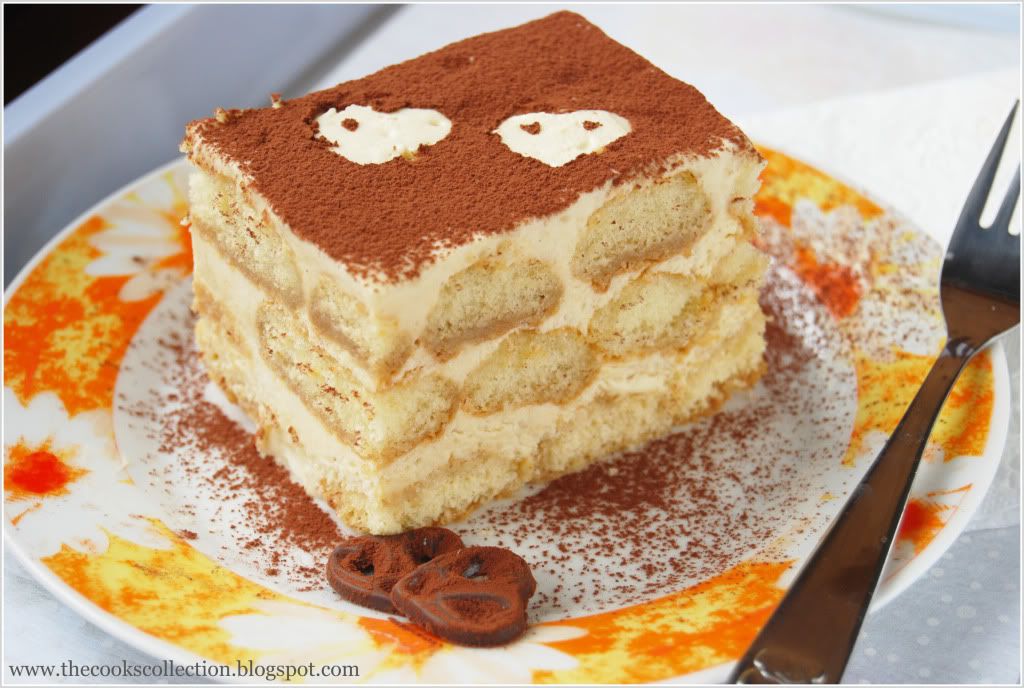
Tiramisu ~ Heaven on a Dessert Plate!

DARING BAKER CHALLENGE FEBRUARY, 2010


This divine Italian dessert translates to mean ‘pick me up’, supposedly referring to the ‘kick’ provided by the strong coffee, sugar and alcohol in it!
On the other hand, a slight mistake in spelling it as "Tiramuso" could end up meaning that you were "pulling a sulky face"! Classic tiramisu is made of alternate layers of espresso soaked ladyfinger biscuits and a cream made from mascarpone cheese and zabaglione (an egg custard).


The perfect Tiramisu is a balance of flavors of a sweet zabaglione, strong coffee, marsala wine, creamy mascarpone cheese and the dusting of unsweetened cocoa.

So when, where and how was tiramisu born?

Tiramisu is said to have its origins in Treviso (Italy), and there are quite a few stories about how it came to be created.
One story traces the tiramisu as far back as the Renaissance claiming that it was first made in honour of the visit of Grand Duke Cosimo di Medici to Tuscany. Yet another one points to the tiramisu being an adaptation of the "Zuppa Inglese" referring to the sponge cake and cream layered English Trifle.
However, experts in this area generally agree that the tiramisu as we know it today, was born in the ‘70s.
Some believe that the Tiramisu was created in the the Le Beccherie (a restaurant in Treviso). Ohters suggest that Tiramisu was first made in 1971 by an Italian baker named Carminantonio Iannaccone in a small bakery in Treviso, Italy.

The February 2010 Daring Bakers’ challenge was hosted by Aparna of My Diverse Kitchen and Deeba of Passionate About Baking. They chose Tiramisu as the challenge for the month. Their challenge recipe is based on recipes from The Washington Post, Cordon Bleu at Home and Baking Obsession.

PREPARATION TIME:

Tiramisu is made up of several components which can be made separately and ahead of time and put together the day before serving.
Making tiramisu from scratch requires about 2 to 3 days (including refrigeration) from when you start making the mascarpone to the time the tiramisu is served. So this challenge requires some prior planning.

Please read the instructions as you need to begin making the mascarpone at least a day in advance.
The zabaglione & pastry cream also need 4 hours to an overnight for chilling, as does the main dessert. The flavours mature after an overnight rest, and the dessert can be kept refrigerated for 2-3 days.
Once assembled, the tiramisu can be frozen till you need to serve it, in case you are not serving it immediately
.

EQUIPMENT REQUIRED:

A double boiler (a stainless steel bowl that fits inside a large saucepan/ pot without touching the bottom will do)
Two or three large mixing bowls
Whisk
A medium sized heavy bottomed pan
Fine meshed strainer (to remove lumps from pastry cream, if any)
Electric mixer, hand held
Serving dish (or dishes) of choice (8" by 8" should be fine)
Spatula for folding and spoons as required
Plastic wrap/ clingfilm
Baking sheets
Parchment paper or nonstick liners
Pastry bag (can be disposable)
Plain 3/4" pastry bag tip or cut the end of pastry bag to this size (If you don’t have a pastry bag and/or tips, you can use a Ziploc bag with the corner snipped off)
Oven
Cooling rack
Thin-bladed spatula for removing ladyfinger biscuits from the baking sheets
Instant-read thermometer (optional)
Strainer
Cheesecloth or cotton napkin for draining mascarpone
Fine-mesh strainer for shaking cocoa powder on tiramisu

TIRAMISU

(Recipe source: Carminantonio's Tiramisu from The Washington Post, July 11 2007 )
This recipe makes 6 servings

Ingredients:
For the zabaglione:
2 large egg yolks
3 tablespoons sugar/50gms
1/4 cup/60ml Marsala wine (or port or coffee)
1/4 teaspoon/ 1.25ml vanilla extract
1/2 teaspoon finely grated lemon zest

For the vanilla pastry cream:
1/4 cup/55gms sugar
1 tablespoon/8gms all purpose flour
1/2 teaspoon finely grated lemon zest
1/2 teaspoon/ 2.5ml vanilla extract
1 large egg yolk
3/4 cup/175ml whole milk

For the whipped cream:
1 cup/235ml chilled heavy cream (we used 25%)
1/4 cup/55gms sugar
1/2 teaspoon/ 2.5ml vanilla extract

To assemble the tiramisu:
2 cups/470ml brewed espresso, warmed
1 teaspoon/5ml rum extract (optional)
1/2 cup/110gms sugar
1/3 cup/75gms mascarpone cheese
36 savoiardi/ ladyfinger biscuits (you may use less)
2 tablespoons/30gms unsweetened cocoa powder

Method:
For the zabaglione:
Heat water in a double boiler. If you don’t have a double boiler, place a pot with about an inch of water in it on the stove. Place a heat-proof bowl in the pot making sure the bottom does not touch the water.
In a large mixing bowl (or stainless steel mixing bowl), mix together the egg yolks, sugar, the Marsala (or espresso/ coffee), vanilla extract and lemon zest. Whisk together until the yolks are fully blended and the mixture looks smooth.
Transfer the mixture to the top of a double boiler or place your bowl over the pan/ pot with simmering water. Cook the egg mixture over low heat, stirring constantly, for about 8 minutes or until it resembles thick custard. It may bubble a bit as it reaches that consistency.
Let cool to room temperature and transfer the zabaglione to a bowl. Cover and refrigerate at least 4 hours or overnight, until thoroughly chilled.

For the pastry cream:
Mix together the sugar, flour, lemon zest and vanilla extract in a medium heavy-bottomed saucepan. To this add the egg yolk and half the milk. Whisk until smooth.
Now place the saucepan over low heat and cook, stirring constantly to prevent the mixture from curdling.
Add the remaining milk a little at a time, still stirring constantly. After about 12 minutes the mixture will be thick, free of lumps and beginning to bubble. (If you have a few lumps, don’t worry. You can push the cream through a fine-mesh strainer.)
Transfer the pastry cream to a bowl and cool to room temperature. Cover with plastic film and refrigerate at least 4 hours or overnight, until thoroughly chilled.

For the whipped cream:
Combine the cream, sugar and vanilla extract in a mixing bowl. Beat with an electric hand mixer or immersion blender until the mixture holds stiff peaks. Set aside.

To assemble the tiramisu:
Have ready a rectangular serving dish (about 8" by 8" should do) or one of your choice.
Mix together the warm espresso, rum extract and sugar in a shallow dish, whisking to mix well. Set aside to cool.
In a large bowl, beat the mascarpone cheese with a spoon to break down the lumps and make it smooth. This will make it easier to fold. Add the prepared and chilled zabaglione and pastry cream, blending until just combined. Gently fold in the whipped cream. Set this cream mixture aside.

Now to start assembling the tiramisu.
Workings quickly, dip 12 of the ladyfingers in the sweetened espresso, about 1 second per side. They should be moist but not soggy. Immediately transfer each ladyfinger to the platter, placing them side by side in a single row. You may break a lady finger into two, if necessary, to ensure the base of your dish is completely covered.
Spoon one-third of the cream mixture on top of the ladyfingers, then use a rubber spatula or spreading knife to cover the top evenly, all the way to the edges.
Repeat to create 2 more layers, using 12 ladyfingers and the cream mixture for each layer. Clean any spilled cream mixture; cover carefully with plastic wrap and refrigerate the tiramisu overnight.
To serve, carefully remove the plastic wrap and sprinkle the tiramisu with cocoa powder using a fine-mesh strainer or decorate as you please. Cut into individual portions and serve.

LADYFINGERS/ SAVOIARDI BISCUITS

(Source: Recipe from Cordon Bleu At Home)
This recipe makes approximately 24 big ladyfingers or 45 small (2 1/2" to 3" long) ladyfingers.

Ingredients:
3 eggs, separated
6 tablespoons /75gms granulated sugar
3/4 cup/95gms cake flour, sifted (or 3/4 cup all purpose flour + 2 tbsp corn starch)
6 tablespoons /50gms confectioner's sugar,

Method:
Preheat your oven to 350 F (175 C) degrees, then lightly brush 2 baking sheets with oil or softened butter and line with parchment paper.
Beat the egg whites using a hand held electric mixer until stiff peaks form. Gradually add granulate sugar and continue beating until the egg whites become stiff again, glossy and smooth.
In a small bowl, beat the egg yolks lightly with a fork and fold them into the meringue, using a wooden spoon. Sift the flour over this mixture and fold gently until just mixed. It is important to fold very gently and not overdo the folding. Otherwise the batter would deflate and lose volume resulting in ladyfingers which are flat and not spongy.
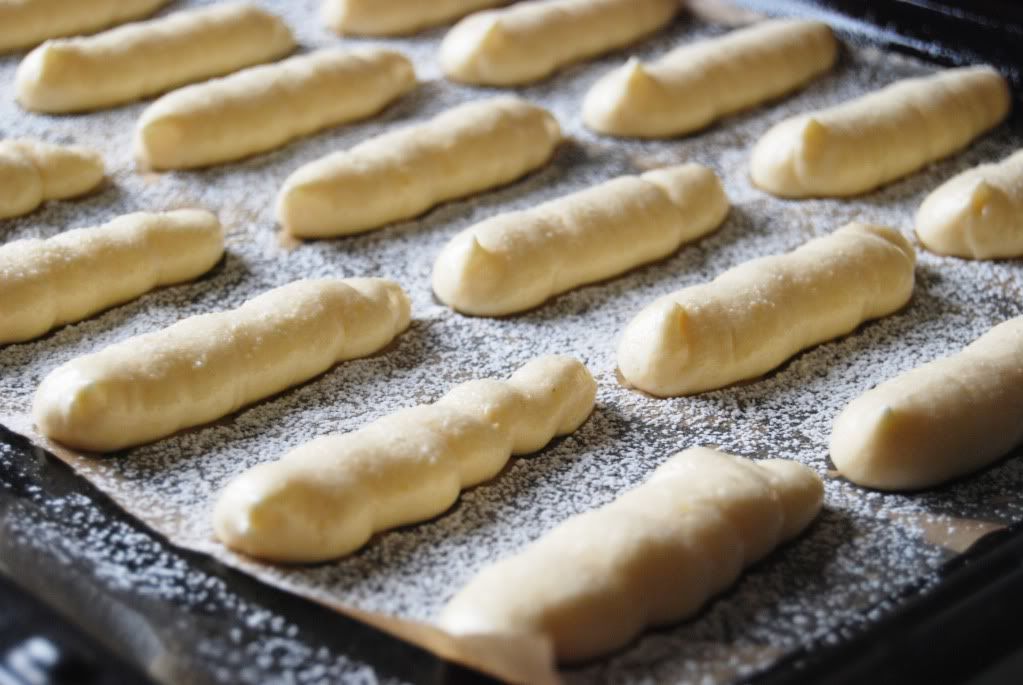
Fit a pastry bag with a plain tip (or just snip the end off; you could also use a Ziploc bag) and fill with the batter. Pipe the batter into 5" long and 3/4" wide strips leaving about 1" space in between the strips.


Sprinkle half the confectioner's sugar over the ladyfingers and wait for 5 minutes. The sugar will pearl or look wet and glisten. Now sprinkle the remaining sugar. This helps to give the ladyfingers their characteristic crispness.
Hold the parchment paper in place with your thumb and lift one side of the baking sheet and gently tap it on the work surface to remove excess sprinkled sugar.
Bake the ladyfingers for 10 minutes, then rotate the sheets and bake for another 5 minutes or so until the puff up, turn lightly golden brown and are still soft.

Allow them to cool slightly on the sheets for about 5 minutes and then remove the ladyfingers from the baking sheet with a metal spatula while still hot, and cool on a rack.
Store them in an airtight container till required. They should keep for 2 to 3 weeks.

MASCARPONE CHEESE

(Source: Vera’s Recipe for Homemade Mascarpone Cheese)
This recipe makes 12oz/ 340gm of mascarpone cheese


Ingredients:
474ml (approx. 500ml)/ 2 cups whipping (36 %) pasteurized (not ultra-pasteurized), preferably organic cream (between 25% to 36% cream will do)
1 tablespoon fresh lemon juice

Method:
Bring 1 inch of water to a boil in a wide skillet. Reduce the heat to medium-low so the water is barely simmering. Pour the cream into a medium heat-resistant bowl, then place the bowl into the skillet. Heat the cream, stirring often, to 190 F. If you do not have a thermometer, wait until small bubbles keep trying to push up to the surface.
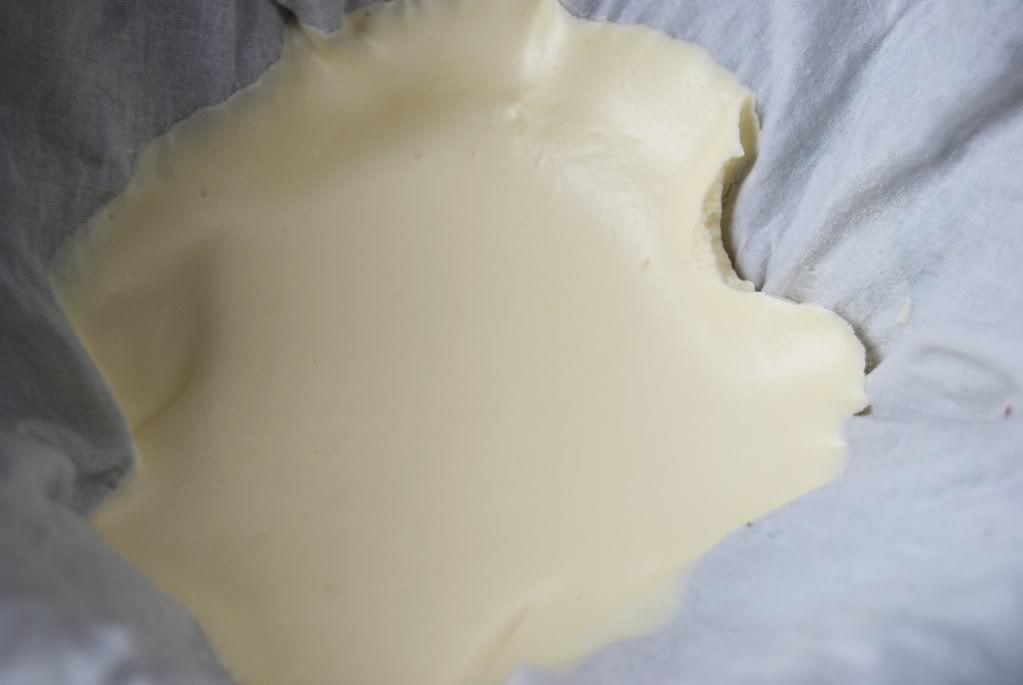
It will take about 15 minutes of delicate heating. Add the lemon juice and continue heating the mixture, stirring gently, until the cream curdles. Do not expect the same action as you see during ricotta cheese making. All that the whipping cream will do is become thicker, like a well-done crème anglaise. It will cover a back of your wooden spoon thickly. You will see just a few clear whey streaks when you stir. Remove the bowl from the water and let cool for about 20 minutes. Meanwhile, line a sieve with four layers of dampened cheesecloth and set it over a bowl. Transfer the mixture into the lined sieve. Do not squeeze the cheese in the cheesecloth or press on its surface (be patient, it will firm up after refrigeration time). Once cooled completely, cover with plastic wrap and refrigerate (in the sieve) overnight or up to 24 hours.
Vera’s notes: The first time I made mascarpone I had all doubts if it’d been cooked enough, because of its custard-like texture. Have no fear, it will firm up beautifully in the fridge, and will yet remain lusciously creamy.
Keep refrigerated and use within 3 to 4 days.

NOTES/ TIPS:

1. If you cannot find Marsala, port wine is considered a good substitute.
2. If you would rather not use alcohol in your tiramisu due to diet restrictions or because you want to serve it to children, you may replace the Marsala with an equal amount of espresso or coffee.
3. Many people, especially those who are not excessively fond of coffee, might find brewed espresso very strong. In this case, please feel free to dilute the espresso or coffee to the desired strength.
4. It is generally suggested that cream with 25% fat is best for making mascarpone, but 36% works just as well.
5. We both used lime juice. Deeba has a recipe for mascarpone posted on her blog here.
6. The mascarpone recipe below is for approximately 340gms of mascarpone. The tiramisu recipe requires only 1/3 cup/75gms so you may scale down the recipe to requirement or put the extra mascarpone cheese to other equally good use. (100gms cream will yield approximately 75gms mascarpone)
7. While using the double boiler to make the mascarpone as well as the zabaglione, always ensure that the bottom of the bowl on top doesn't touch the bottom of the lower one. It is important to use a stainless steel bowl to pour your cream into, while making the mascarpone.
8. Ladyfinger batter is very fragile so fold in the flour and yolks very carefully into the meringue so that the whites don't lose their volume.
9. It might be a good idea to decide the size of the dish in which you intend to set the dessert, and make the fingers to a size which would fit that dish. This makes it easier when assembling the tiramisu later. Do remember that ladyfingers/ savioardi puff up a little while baking.
10. Ladyfinger biscuits may be stored up to a week in an airtight container. We both made the savoiardi fingers 4-5 days in advance, and stored them in an airtight box in a cool place (or the refrigerator).
11. We both made the zabaglione & pastry cream the previous day, and assembled the tiramisu the next morning. I (Aparna) then froze my tiramisu for 7 days before decorating and serving it.
12. Placing the bowl (in which cream is to be whipped) and the beaters of the hand held electric mixer in the fridge for about 1/2 to 1 hour before hand makes the cream whip up very well.
13. Do not dip the ladyfinger/ savoiardi into the coffee solution for more than ONE second, or they might become very fragile & disintegrate. Extra soaking is likely to spoil the end product, making it soggy. I (Aparna) dipped my biscuits only on one side and found they soaked up more than enough coffee solution.
14. If you would like to de-mould your tiramisu from your dish (cutting can be easier and neater this way, you can line your dish with plastic wrap (leaving a little extra on the sides of the dish) and then start assembling your tiramisu. Once the tiramisu sets in the refrigerator, you can use the overhang to pull the tiramisu out of the dish.

Tuesday, November 24, 2009

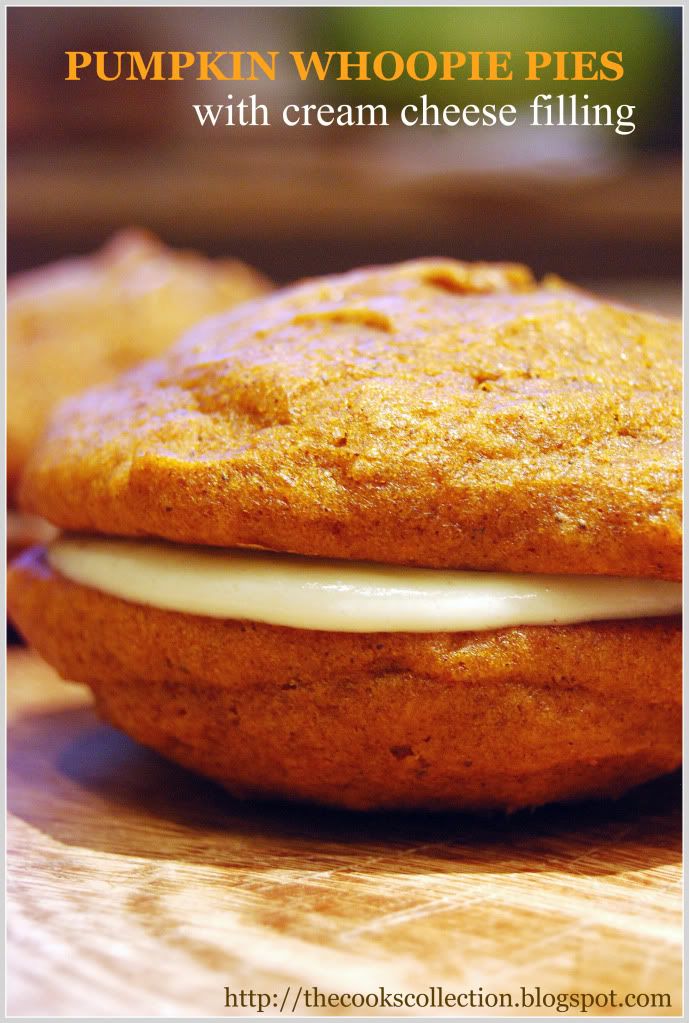
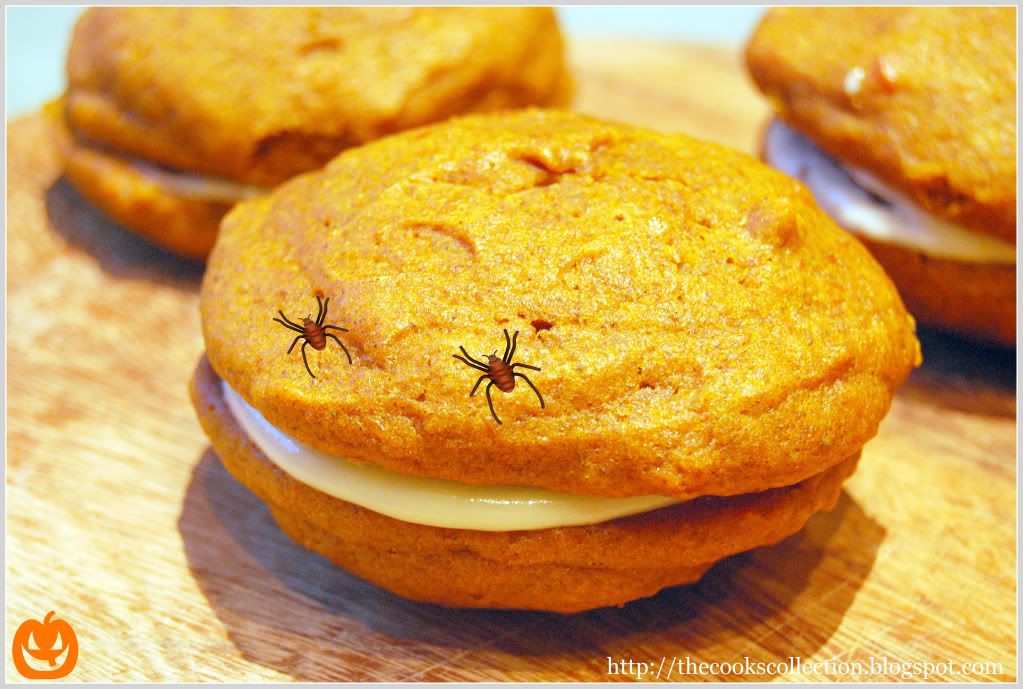
Pumpkin Whoopie Pies

These whoopies pies are two soft, spiced cakey cookies with a fair amount of cream sandwiched between them. These cookies are so much full of flavor, the spices and the pumpkin flavor blend beautifully together. They taste great with the vanilla flavored cream cheese filling and these cookies are so good and moist, that they are delicious and can be had even without the cream cheese filling. One change i made with the recipe was that i reduced the recipe by half and made 6 sandwiched whoopie pies which was good enough for just 2 of us (me and my hubby) and i also reduced the quantity of confectioners' sugar in the filling. It was little too sweet for my taste bud. Altogether this is a great recipe for people with sweet tooth.


Recipe adapted from Baked, new frontiers in baking.

Yield : 12 WHOOPIE PIES

Ingredients for the pumpkin whoopie cookies:

3 cups all-purpose flour
1 teaspoon salt
1 teaspoon baking powder
1 teaspoon baking soda
2 tablespoons cinnamon powder
1 tablespoon ginger powder
1 tablespoon cloves powder
2 cups firmly packed dark brown sugar (i used light brown sugar)
1 cup vegetable oil (i used sunflower oil)
3 cups chilled pumpkin puree
2 large eggs
1 teaspoon pure vanilla extract

For the cream cheese frosting:

3 cups confectioners sugar (powdered sugar) You can reduce the amount according to your taste
1/2 cup (1 stick) unsalted butter, softened
8 ounces cream cheese, softened
1 teaspoon pure vanilla extract

Directions:

Preheat the oven to 350 deg F(180 deg C). Line two baking sheets with parchment paper.

In a large bowl, whisk the flour, salt, baking powder, baking soda, cinnamon, ginger and cloves together and set aside.

In a separate bowl, whisk the brown sugar and oil together until combined. Add the pumpkin puree and whisk to combine thoroughly. Add the eggs and vanilla and whisk until combined.

Sprinkle the flour mixture over the pumpkin mixture and whisk until completely combined.

Use a small ice cream scoop with release mechanism to drop heaping tablespoons of the dough on to the prepared baking sheets, about 1 inch apart. Bake for 10 to 12 minutes, until the cookies are just starting to crack on top and the toothpick inserted into the center of the cookie comes out clean. Remove from the oven and let the cookies cool completely on the pan while you make the filling.

Make the cream cheese filling

Sift the confectioners' sugar into a medium bowl and set aside.

In the bowl of an electric mixer fitted with the paddle attachment(you can even use medium sized bowl and a hand beater), beat the butter until it is completely smooth, with no visible lumps. Add the cream cheese and beat until combined.

Add the confectioners' sugar and vanilla and beat until smooth. Be careful not to overeat the filling, or it will loose structure. (The filling can be made 1 day ahead. Cover the bowl tightly and put it in the refrigerator. Let the filling soften at room temperature before filling.)

Assemble the whoopie pies

Turn half of the cooled cookies upside down (flat side facing up).

Use an ice cream scoop or a tablespoon to drop a large dollop of filling onto the flat side of the cookie. Place another cookie, flat side down, on top of the filling. Press down slightly so that the filling spreads to the edges of the cookie. Repeat until all the cookies are used. Put the whoopie pies in the refrigerator for about 30 minutes to firm up before serving.


Storing:

The whoopie pies will keep for up to 3 days, on a parchment-lined baking sheet covered with plastic wrap, in the refrigerator.

Note:

Make sure you chill the pumpkin puree thoroughly before making this recipe. The chilled puree will make your whoopies easier to scoop and give them a domed top.

Tuesday, October 27, 2009

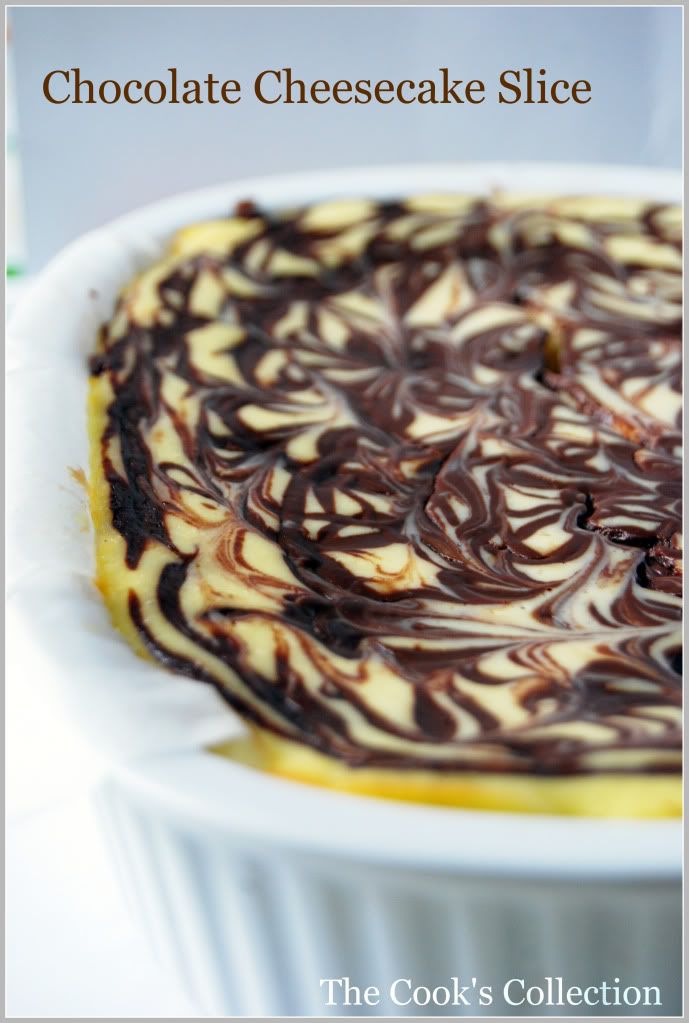
Chocolate Cheesecake Slice

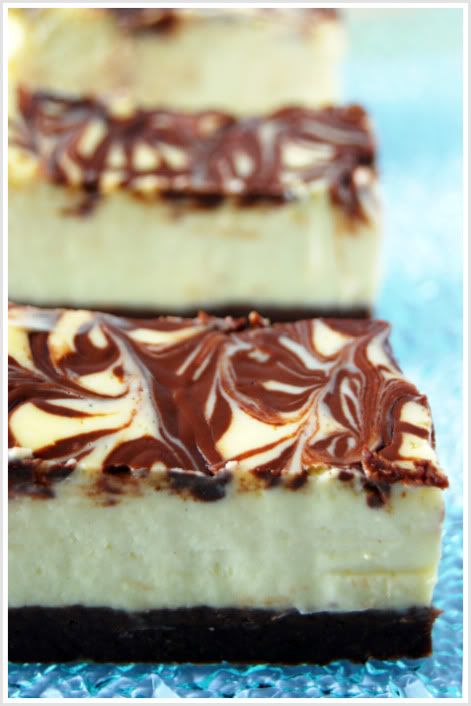
This is another delicious and wickedly indulgent treat that is best cut into fingers. I decided to bake this cake as soon as i saw this recipe in the book "Fresh Baked" with a lovely picture. This recipe is very quick with very easy to follow instructions and the result is in front of you. Its got a nice chocolate base topped with a lovely satiny cheesecake layer which is again decorated with a lacy melted chocolate. Any favorite chocolate biscuits can be used for the base. I used butter biscuits coated with dark chocolate which went very well with the cheesecake layer.


Use the exact sized baking pan for the recipe mentioned as this effects the thickness of the cheesecake. I also used a weighing machine to weigh the ingredients which gave me the perfect result.

Chocolate Cheesecake Slice
from Fresh Baked

preparation time: 20 minutes
cooking time 50-60 minutes
serves: 12-16

Ingredients:

250 gm (8 oz) Chocolate biscuits (any of your favorite)
100 gm (3 1/2 oz) unsalted butter, melted
50 gm (2 oz) dark chocolate
500 gm (1 lb) cream cheese
150 ml (1/4 pint) sour cream
3 eggs (i used large)
125 gm (4 oz) caster sugar (powdered sugar)
1 teaspoon vanilla extract

Method:

Put the chocolate biscuits in a food processor and process until smooth, then stir into the melted butter until evenly combined. Lightly oil and line a 18 x 25 cm (7 x 10 inch) cake tin with baking paper, allowing the paper to overhang the edges. Spoon the mixture into the prepared tin and spread flat. Chill while preparing the topping.

Put the chocolate in a bowl set over a pan of gently simmering water (do not let the bowl touch the water) and stir until it has melted. Keep warm. [If the chocolate turns too thick, add few teaspoons of sour cream to slightly liquidity it so that it would be easy to drizzle over the cheesecake layer. I filled this chocolate - sour cream mixture into a small zip lock cover. Made a small hole in the corner and this ended up with a very clean , hazel free drizzle.]

Put the cream cheese, sour cream, eggs, sugar and vanilla extract in a clean bowl and, using an electric beaters, beat together until smooth. Pour into the tin and drizzle over the melted chocolate, using a skewer to create a swirling pattern over the creamed mixture.

Bake in a preheated oven 150 deg C (300 deg F), Gas Mark 2, FOR 50 - 60 minutes until the mixture is firm, remove from the oven and leave to cool. Chill for 1 hour, then carefully remove the cheesecake from the tin and cut it into fingers.

Enjoy with a cup of hot coffee!

Tuesday, September 8, 2009

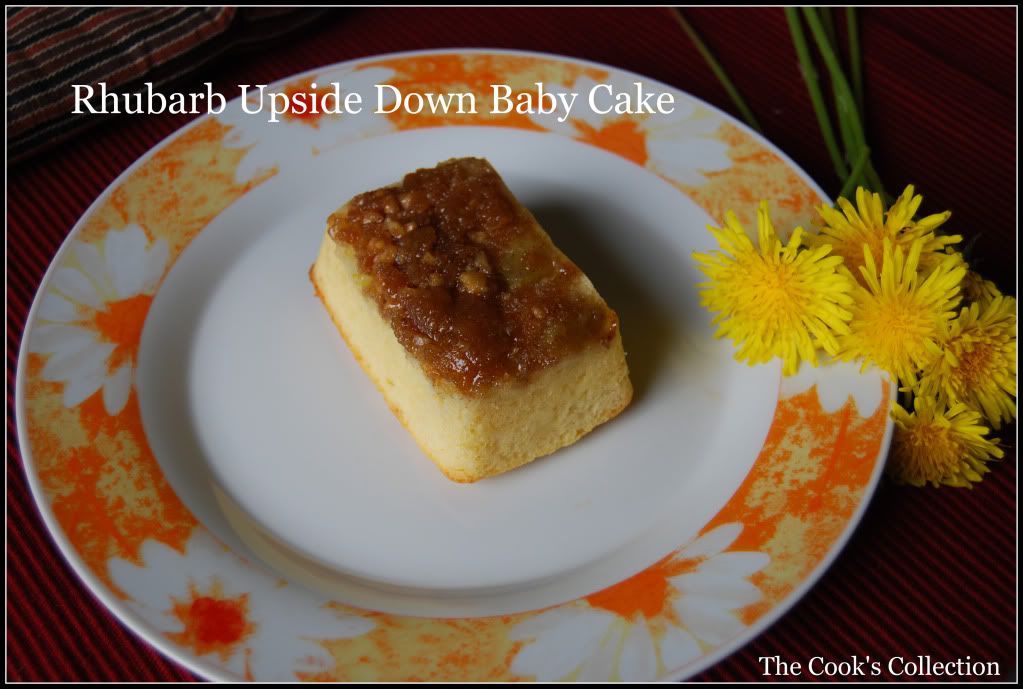
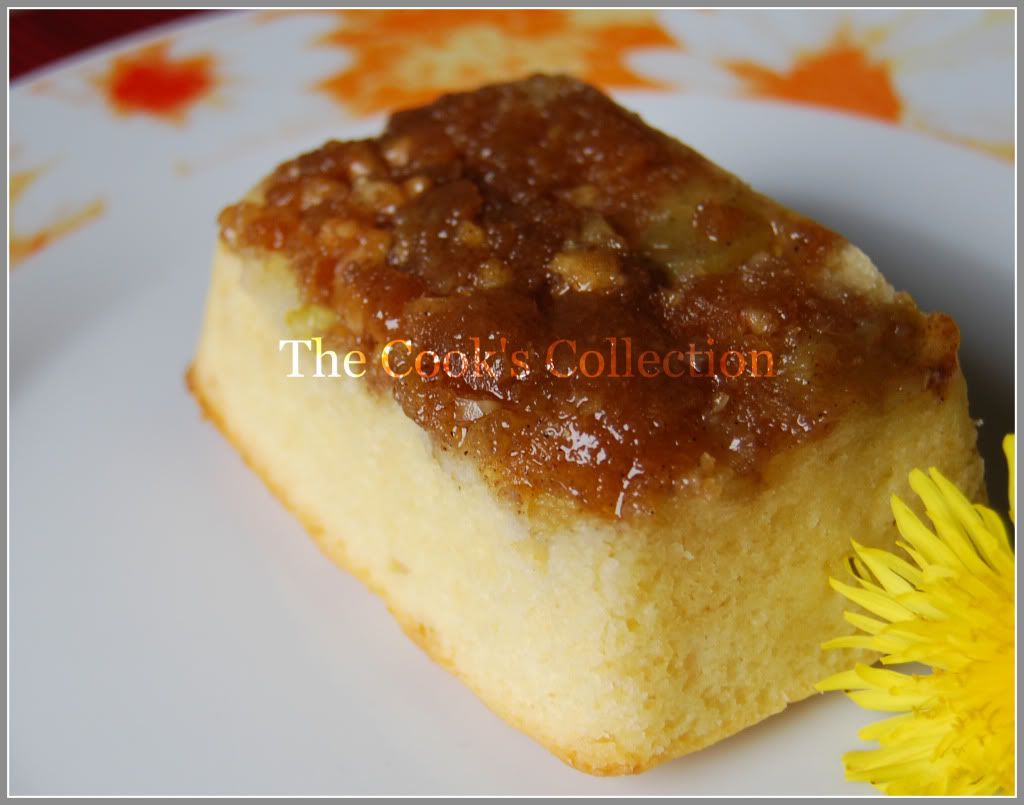
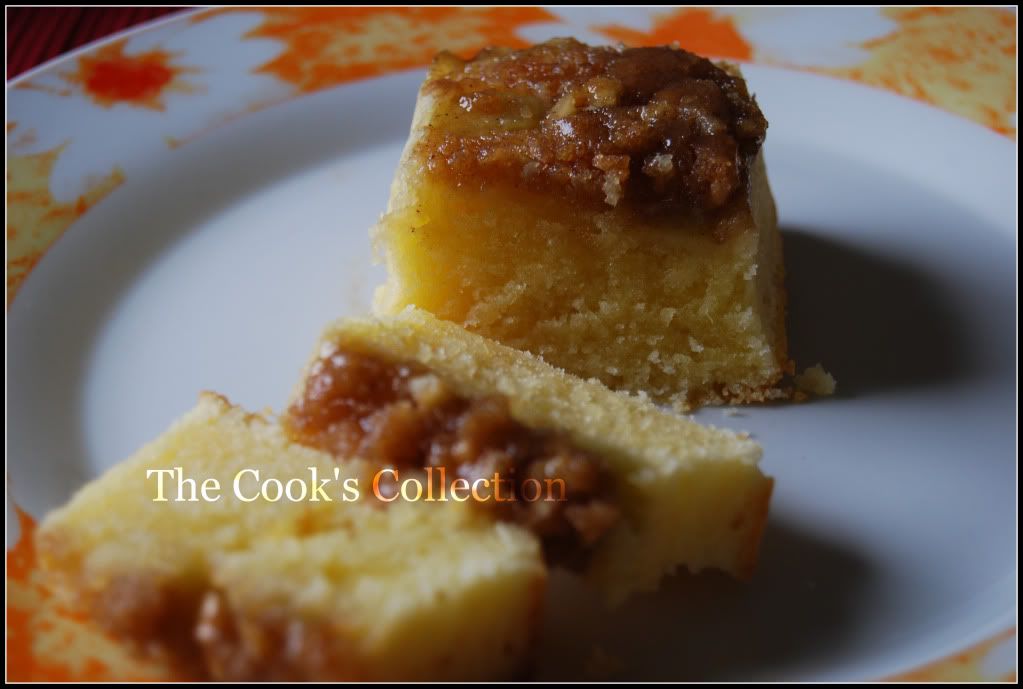
Fresh Rhubarb Upside-down Baby Cakes


Here's a tender, soft-crumbled butter cake, a classic of the genre, made as individual upside-down cakes. The baby cake pans, each four inches across, are lined with a mixture of melted butter, brown sugar, and pecans and decorated with slices of Rhubarb before the bourbon-boosted butter cake batter is poured in. In fact, there's nothing sacred about Rhubarb; you can vary the fruit as you choose. Try using mangoes, apples or pears, apricots, plums, or bananas, and vary the liqueur or flavoring to match the fruit.

If the urge to bake these lovely cakes strikes and you haven't a set of baby cake pans at hand, make these in muffin tins or custard cups, or make the recipe as one large cake. The batter is perfect for an eleven- or twelve-inch cast iron skillet or a twelve-inch round cake pan, and turned out, the large cake is impressive.

These baby cakes, as well as the Hazelnut baby loaves, Vanilla pound cake, are members of the same large and universally appealing family, the butter cake clan.

Recipe adapted from "Baking With Julia"

You'll be needing the following ingredients..

1 2/3 cup all purpose flour
2 tsps baking powder
1 tsp salt
2 tsp pure vanilla extract
1 cup creme fraiche, homemade or store bought, or sour cream
1 1/2 sticks (6 ounces) unsalted butter, at room temperature
1/2 cup(lightly packed) brown sugar
1 tbsp bourbon
2 tbsps chopped pecans
6 to 7 stalks (12 ounces) fresh Rhubarb, trimmed and cut into 1/4-inch-thick-slices
1 cup granulated sugar
2 large eggs, at room temperature

Melted butter for greasing the pans
Lightly sweetened whipped cream, for serving(optional)

Here we start..

Position a rack in the center of the oven and preheat the oven to 35o deg F. Brush the insides of 8-mini or baby cake pans, each 4 inches across and 1 inch deep, with a light coating of melted butter, dust the flour and tap out the excess. Whisk or stir the flour, baking powder, and salt together just to blend;reserve. In a separate bowl, stir the vanilla into the creme fraiche and set aside until needed.
Melt the 1/2 stick butter in a heavy skillet. Add the brown sugar and bourbon and cook over medium heat, stirring with wooden spoon until the sugar melts. Stir in the pecans to coat with the caramel and turn of the heat. Divide the caramel evenly among the pans, working quickly to get it to the edges of the pan before it sets( cooked sugar cools rapidly). Arrange the rhubarb in circles over the sugar, and set aside while you make the batter.
Put the remaining stick of butter and the granulated sugar in the bowl of a mixer fitted with the paddle attachment, or use a hand-held mixer, and beat on medium-high speed until the mixture is smooth and creamy, scrapping down the sides of the bowl with a rubber spatula as needed. The butter and sugar must be beaten until they're light, fluffy, and pale, so don't rush it- the process can take 3 to 4 minutes with a heavy duty mixer and 6 to 8 minutes with a hand-held mixer. Reduce the speed to medium and add the eggs one at a time, beating well after each addition.
Working with a rubber spatula, carefully fold in the dry ingredients and the creme fraiche alternately- 3 additions of dry ingredients, 2 of the creme fraiche. You'll end up with a thick batter.

Baking the cakes Spoon the batter over the rhubarb and smooth the tops by rotating the pans while you run the rubber spatula over the batter. Put the pans on a jelly role pan and bake for 20 to 25 minutes, or until a toothpick inserted in the center of a cake comes out clean. (Test couple of cakes to be certain.) As soon as the cakes are removed from the oven, turn them out of their pans on to a rack.

Serve with whipped cream if desired.

Storage The cakes can be kept wrapped in plastic at room temperature overnight.

Thursday, August 27, 2009

Daring Bakers Dobos Torte

Daring Bakers August 2009 Challenge

The August 2009 Daring Bakers' challenge was hosted by Angela of A Spoonful of Sugar and Lorraine of Not Quite Nigella. They chose the spectacular Dobos Torte based on a recipe from Rick Rodgers' cookbook Kaffeehaus: Exquisite Desserts from the Classic Caffés of Vienna, Budapest, and Prague.
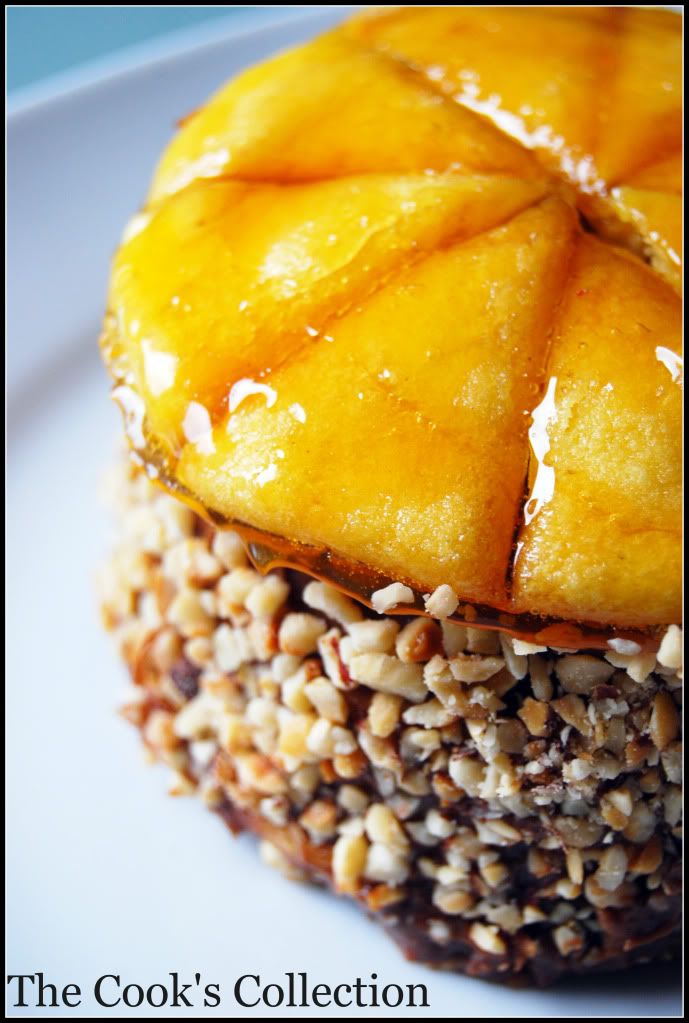
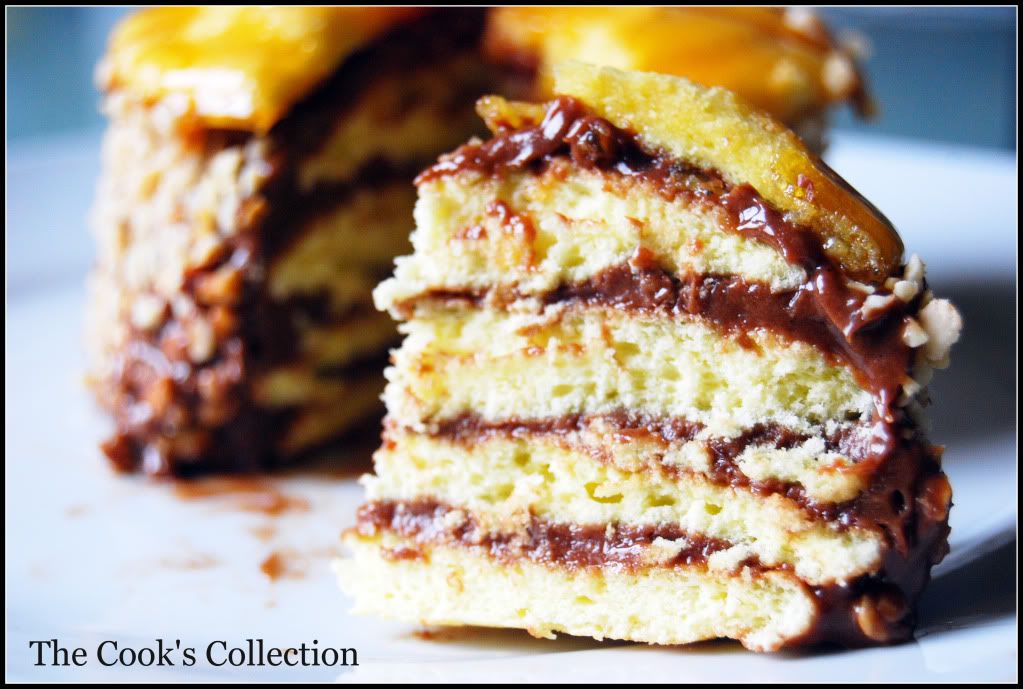
The Dobos Torta is a five-layer sponge cake, filled with a rich chocolate buttercream and topped with thin wedges of caramel. (You may come across recipes which have anywhere between six and 12 layers of cake; there are numerous family variations!) It was invented in 1885 by József C. Dobos, a Hungarian baker, and it rapidly became famous throughout Europe for both its extraordinary taste and its keeping properties. The recipe was a secret until Dobos retired in 1906 and gave the recipe to the Budapest Confectioners' and Gingerbread Makers' Chamber of Industry, providing that every member of the chamber can use it freely.
As i cook and bake only for two,i reduced the recipe by half and was able to get 2 4" diameter round cake, perfect for me. The cake turned out delicious especially when served chilled. Also i suggest not to add lemon juice to the caramel as it turns out bitter. Overall, a wonderful challenge.


Equipments required..

2 baking sheets
9” (23cm) springform tin and 8” cake tin, for templates
mixing bowls (1 medium, 1 large)
a sieve
a double boiler (a large saucepan plus a large heat-proof mixing bowl which fits snugly over the top of the pan)
a small saucepan
a whisk (you could use a balloon whisk for the entire cake, but an electric hand whisk or stand mixer will make life much easier)
metal offset spatula
sharp knife
a 7 1/2” cardboard cake round, or just build cake on the base of a sprinfrom tin.
piping bag and tip, optional

Preparation time:

Sponge layers 20 mins prep, 40 mins cooking total if baking each layer individually.
Buttercream
: 20 mins cooking. Cooling time for buttercream: about 1 hour plus 10 minutes after this to beat and divide.
Caramel layer: 10-15 minutes.
Assembly of whole cake: 20 minutes

Ingredients for Sponge cake layers:

6 large eggs, separated, at room temperature
1 1/3 cups (162g) confectioner's (icing) sugar, divided
1 teaspoon (5ml) vanilla extract
1 cup plus 2 tablespoons (112g) sifted cake flour (SUBSTITUTE 95g plain flour + 17g cornflour (cornstarch) sifted together)
pinch of salt

Directions for the sponge layers:

NB. The sponge layers can be prepared in advance and stored interleaved with parchment and well-wrapped in the fridge overnight.

1.Position the racks in the top and centre thirds of the oven and heat to 400F (200C).

2.Cut six pieces of parchment paper to fit the baking sheets. Using the bottom of a 9" (23cm) springform tin as a template and a dark pencil or a pen, trace a circle on each of the papers, and turn them over (the circle should be visible from the other side, so that the graphite or ink doesn't touch the cake batter.)

3.Beat the egg yolks, 2/3 cup (81g) of the confectioner's (icing) sugar, and the vanilla in a medium bowl with a mixer on high speed until the mixture is thick, pale yellow and forms a thick ribbon when the beaters are lifted a few inches above the batter, about 3 minutes. (You can do this step with a balloon whisk if you don't have a mixer.)

4.In another bowl, using clean beaters, beat the egg whites until soft peaks form. Gradually beat in the remaining 2/3 cup (81g) of confectioner's (icing)sugar until the whites form stiff, shiny peaks. Using a large rubber spatula, stir about 1/4 of the beaten whites into the egg yolk mixture, then fold in the remainder, leaving a few wisps of white visible. Combine the flour and salt. Sift half the flour over the eggs, and fold in; repeat with the remaining flour.

5.Line one of the baking sheets with a circle-marked paper. Using a small offset spatula, spread about 3/4cup of the batter in an even layer, filling in the traced circle on one baking sheet.


Bake on the top rack for 5 minutes, until the cake springs back when pressed gently in the centre and the edges are lightly browned.


While this cake bakes, repeat the process on the other baking sheet, placing it on the centre rack. When the first cake is done, move the second cake to the top rack. Invert the first cake onto a flat surface and carefully peel off the paper. Slide the cake layer back onto the paper and let stand until cool. Rinse the baking sheet under cold running water to cool, and dry it before lining with another parchment. Continue with the remaining papers and batter to make a total of six layers. Completely cool the layers. Using an 8" springform pan bottom or plate as a template, trim each cake layer into a neat round. (A small serrated knife is best for this task.)

Ingredients for Chocolate Buttercream:

4 large eggs, at room temperature
1 cup (200g) caster (ultrafine or superfine white) sugar
4oz (110g) bakers chocolate or your favourite dark chocolate, finely chopped
2 sticks plus 2 tablespoons (250g) unsalted butter, at room temperature.

Directions for the chocolate buttercream:

NB. This can be prepared in advance and kept chilled until required.


1.Prepare a double-boiler: quarter-fill a large saucepan with water and bring it to a boil.

2.Meanwhile, whisk the eggs with the sugar until pale and thickened, about five minutes. You can use a balloon whisk or electric hand mixer for this.

3.Fit bowl over the boiling water in the saucepan (water should not touch bowl) and lower the heat to a brisk simmer. Cook the egg mixture, whisking constantly, for 2-3 minutes until you see it starting to thicken a bit. Whisk in the finely chopped chocolate and cook, stirring, for a further 2-3 minutes.

4.Scrape the chocolate mixture into a medium bowl and leave to cool to room temperature. It should be quite thick and sticky in consistency.

5.When cool, beat in the soft butter, a small piece (about 2 tablespoons/30g) at a time. An electric hand mixer is great here, but it is possible to beat the butter in with a spatula if it is soft enough. You should end up with a thick, velvety chocolate buttercream. Chill while you make the caramel topping.

Ingredients for Caramel topping:

1 cup (200g) caster (superfine or ultrafine white) sugar
12 tablespoons (180 ml) water
8 teaspoons (40 ml) lemon juice
1 tablespoon neutral oil (e.g. grapeseed, rice bran, sunflower)
Finishing touches

Directions for the caramel topping:

1.Choose the best-looking cake layer for the caramel top. To make the caramel topping: Line a jellyroll pan with parchment paper and butter the paper. Place the reserved cake layer on the paper. Score the cake into 12 equal wedges. Lightly oil a thin, sharp knife and an offset metal spatula.

2.Stir the sugar, water and lemon juice in a small saucepan. Bring to a boil over a medium heat, stirring often to dissolve the sugar. Once dissolved into a smooth syrup, turn the heat up to high and boil without stirring, swirling the pan by the handle occasionally and washing down any sugar crystals on the sides of the pan with a wet brush until the syrup has turned into an amber-coloured caramel.

3.The top layer is perhaps the hardest part of the whole cake so make sure you have a oiled, hot offset spatula ready. I also find it helps if the cake layer hasn't just been taken out of the refrigerator. I made mine ahead of time and the cake layer was cold and the toffee set very, very quickly—too quickly for me to spread it. Immediately pour all of the hot caramel over the cake layer. You will have some leftover most probably but more is better than less and you can always make nice toffee pattern using the extra to decorate. Using the offset spatula, quickly spread the caramel evenly to the edge of the cake layer. Let cool until beginning to set, about 30 seconds. Using the tip of the hot oiled knife (keep re-oiling this with a pastry brush between cutting), cut through the scored marks to divide the caramel layer into 12 equal wedges. Cool another minute or so, then use the edge of the knife to completely cut and separate the wedges using one firm slice movement (rather than rocking back and forth which may produce toffee strands). Cool completely.


You'll also need..

a 7” cardboard round
12 whole hazelnuts, peeled and toasted
½ cup (50g) peeled and finely chopped hazelnuts

Lorraine's note: If you're in Winter just now your butter might not soften enough at room temperature, which leads to lumps forming in the buttercream. Male sure the butter is of a very soft texture I.e. running a knife through it will provide little resistance, before you try to beat it into the chocolate mixture. Also, if you beat the butter in while the chocolate mixture is hot you'll end up with more of a ganache than a buttercream!

Angela's note: I recommend cutting, rather than scoring, the cake layer into wedges before covering in caramel (reform them into a round). If you have an 8” silicon round form, then I highly recommend placing the wedges in that for easy removal later and it also ensures that the caramel stays on the cake layer. Once set, use a very sharp knife to separate the wedges.

Assembling the Dobos

1.Divide the buttercream into six equal parts.

2.Place a dab of chocolate buttercream on the middle of a 7 1/2” cardboard round and top with one cake layer. Spread the layer with one part of the chocolate icing. Repeat with 4 more cake layers. Spread the remaining icing on the sides of the cake.

3.Optional: press the finely chopped hazelnuts onto the sides of the cake.

4.Propping a hazelnut under each wedge so that it sits at an angle, arrange the wedges on top of the cake in a spoke pattern. If you have any leftover buttercream, you can pipe rosettes under each hazelnut or a large rosette in the centre of the cake. Refrigerate the cake under a cake dome until the icing is set, about 2 hours. Let slices come to room temperature for the best possible flavour.

Storage

I (Angela) am quite happy to store this cake at room temperature under a glass dome, but your mileage may vary. If you do decide to chill it, then I would advise also using a glass dome if you have done. I should also note that the cake will cut more cleanly when chilled.

Variations

Shape: The traditional shape of a Dobos Torta is a circular cake, but you can vary the shape and size if you want. Sherry Yard in Desserts By The Yard makes a skyscraper Dobos by cutting a full-size cake into four wedges and stacking them to create a tall, sail-shaped cake. Mini Dobos would be very cute, and you could perch a little disc of caramel on top.

Flavour: While we both love the dark chocolate buttercream and this is traditional, we think it would be fun to see what fun buttercreams you all come up with! So, go wild! Or, you could brush each layer with a flavoured syrup if you just want a hint of a second flavour. Cointreau syrup would be divine!

Nuts: These are optional for decoration, so no worries if you're allergic to them. If you don't like hazelnuts, then substitute for another variety that you like.

Egg concerns

The cooking process for the buttercream will produce lightly cooked eggs. If you fall into a vulnerable health group then you may wish to use an egg-less buttercream.

Tuesday, May 12, 2009

Layered Strawberry Cake

This Strawberry cake is basically a pound cake which is layered with sweet, tangy, juicy and colorful sugared berries and a velvety blend of whipped sweet cream, finished with the same cream and topped with fresh berries. The berry filling and the cream mixture can be used with any Genoise cake or any other plain vanilla cake.


I present this Strawberry cake to Meeta's Monthly Mingle - Spring Cakes!

This recipe is adapted and altered from "Baking With Julia".

The ingredients used for this recipe are:

For the cake
1 1/2 cups all-purpose flour
1 tsp baking powder
1/4 tsp salt
1 stick (4 ounce),115 gms butter, at room temperature
1 cup sugar
2 large eggs, at room temperature, whisked to blend
1/2 cup milk, at room temperature
1 tsp pure vanilla extract

For the Strawberry filling
1 pint (2 cups) ripe fresh strawberries, hulled and sliced
1/4 cup sugar (depending on the sweetness of the fruit)

For the cream
1 1/4 cups cold heavy cream
2 tbsps sour cream
2 tbsps sugar
1 tsp pure vanilla extract

Position a rack in the lower third of the oven and preheat the oven to 350 deg F(180 deg C). Butter and flour a 7 inch round pan.

For the cake Sift the flour, baking powder, and salt together onto a sheet of waxed or parchment paper. Reserve.
Put the butter into the bowl of a mixer fitted with the paddle attachment(or work with a hand-held mixer) and beat at medium speed until smooth. With the machine running, add the sugar in a steady steam. Stop the machine and scrap down the paddle and the sides of the bowl with a rubber spatula. Continue to beat at medium speed until the mixture is very light and fluffy, about 4 to 5 minutes.
With the mixer still at medium speed, begin to add the eggs in small addition, about a tablespoon at a time. If the mixture becomes watery or shiny, stop adding the eggs and beat at an increased speed just until it smooths out. When the batter has come together again, decrease the speed to medium and continue adding the eggs, scraping down the paddle and sides of the bowl from time to time; it will take 3 to 4 minutes to incorporate the eggs. The mixture is properly combined when it appears white, fluffy, and increased in volume.
Reduce the mixer speed to low and add the flour mixture and the milk alternately--4 additions of flour, 3 of milk-- scraping the paddle and bowl frequently and mixing until the batter is smooth after each addition. Add the vanilla and mix just to blend.

Baking the cake Spoon the batter into the prepared pan and smooth the top with a spatula. Bake for 55 to 65 minutes, or until a wooden toothpick inserted in the center of the cake comes out clean. Transfer the cake to a cooling rack and allow it to cool in the pan for 10 minutes. Invert the cake onto a rack, remove the pan, and cool to room temperature.

Preparing the Berries Toss the sliced berries with the sugar in a large bowl and leave them uncovered, at room temperature for at least 2 hours.
Coarsely mash the berries with the tines of the fork and toss them again; let them stand for 1 hour longer. You can do this the day before, but the berries should be refrigerated after they are mashed.

For the cream Using a mixer fitted with the whisk attachment or a hand held mixer, whip the heavy cream, sour cream, sugar and vanilla together until the mixture forms soft peaks. The cream is the proper consistency when the tracks made by the whisk close slowly and almost disappear. Cover and refrigerate the cream, give it a turn or two by hand with a whisk to bring the mixture together again.

Finishing the cake Using a serrated knife and a gentle sawing motion, cut the cake horizontally into 3 layers. Pace the bottom layer cut side up on a cardboard round and the removable bottom of a tart pan. Lifting the berries from the bowl with a slotted spoon so that most of the liquid drains of, spoon half of the mashed strawberries over the cake layer, then spread a thin layer of the whipped cream over the berries. Top with the middle layer, spoon on the rest of the strawberries, and spread another thin layer of the cream over the berries. Center the top layer over the filling.
Working with a flexible metal icing spatula, frost the top and sides of the cake with whipped cream and decorate as you wish with strawberries or with some icing left out. Refrigerate the cake for at least an hour before serving.

Storing The cake can be refrigerated for several hours before serving. Keep it away from the foods in the refrigerator with strong odors, as cream picks up odors quickly. It would be ideal if you could store this cake in a box.

Monday, April 27, 2009

Daring Bakers - Cheesecake

Daring Bakers April 2009 - Cheesecake Centerpiece


Cheesecake cupcakes

After a very sweaty but delicious March challenge of Daring Bakers Lasagna, April challenge was very relaxing and cool..

The April 2009 challenge is hosted by Jenny from Jenny Bakes. She has chosen Abbey's Infamous Cheesecake as the challenge.

Cheesecake was very new to me as i had never baked a cheesecake before and had tasted it just once as one of my friend had forced me to try it as it was her favorite dessert. It was long time ago and i had almost forgot how it had tasted. I used to avoid buying cheesecake as just had in mind that, it would be full of cheese and would load me with calories.. And finally i ended up baking it for the Daring Bakers challenge and i had to bake it!
The challenge here was to bake not a usual cheesecake but we were given freedom to play with the flavours, the sauces and the topping. We had to make it look and taste unique and make it a showstopper of a dessert. Yes, it was another daring bakers creative challenge.

First thing i did was i stepped into a bakery and tasted a simple cheesecake. Just to get the taste of it so that i could think upon what kind of flavours i could use and with what i could decorate it with. Then i decided to pair it with cardamom, as somehow i felt it would taste more like our North Indian sweets where Indian cheese, Paneer is paired with cardamom and i loved that combination. For the topping i decided to use a vibrant colour which would go well with the light shade of the cheese filling. I then decided to use fruits, all kinds, berry's, banana, grapes.. I found this gelatine based strawberry glaze which i thought, i would use over the fruits. Finally i ended up with a rich, creamy and delicious dessert. I actually fell in love with it. I loved the combination of the base, the creamy cheese filling paired with cardamom and the stawberry glazed fruits topping. It was scrumptious.

The recipe would fit for a 9" springform pan but i had a 7" pan. So i used the recipe for one 7" pan and used up the extra with a muffin pan, where i got another 6 muffin shaped cheese cakes.

So here is the recipe..

Abbey's Infamous Cheesecake:

Crust:
2 cups / 180 g graham cracker crumbs (I used zweiback)
1 stick / 4 oz butter, melted
2 tbsp. / 24 g sugar
1 tsp. vanilla extract

Cheesecake:
3 sticks of cream cheese, 8 oz each (total of 24 oz) room temperature
1 cup / 210 g sugar
3 large eggs
1 cup / 8 oz heavy cream
3 cardamon pods, with seeds removed
1 tbsp. fresh lemon juice
1 tbsp. vanilla extract (or the innards of a vanilla bean)

Topping:

2 Cups fruits, Chopped ( Strawberry, raspberry, blueberry, banana, grapes)
250 ml Water, hot

DIRECTIONS:
1. Preheat oven to 350 degrees F (Gas Mark 4 = 180C = Moderate heat). Begin to boil a large pot of water for the water bath.

2. Mix together the crust ingredients and press into your preferred pan. You can press the crust just into the bottom, or up the sides of the pan too - baker's choice. Set crust aside.

3. Combine cream cheese, cardamom seeds and sugar in the bowl of a stand-mixer (or in a large bowl if using a hand-mixer) and cream together until smooth. Add eggs, one at a time, fully incorporating each before adding the next. Make sure to scrape down the bowl in between each egg. Add heavy cream, vanilla, lemon juice, and alcohol and blend until smooth and creamy.


4. Pour batter into prepared crust and tap the pan on the counter a few times to bring all air bubbles to the surface. Place pan into a larger pan and pour boiling water into the larger pan until halfway up the side of the cheesecake pan. If cheesecake pan is not airtight, cover bottom securely with foil before adding water.

5. Bake 45 to 55 minutes, until it is almost done - this can be hard to judge, but you're looking for the cake to hold together, but still have a lot of jiggle to it in the center. You don't want it to be completely firm at this stage. Close the oven door, turn the heat off, and let rest in the cooling oven for one hour. This lets the cake finish cooking and cool down gently enough so that it won't crack on the top. After one hour, remove cheesecake from oven and lift carefully out of water bath. Let it finish cooling on the counter, and then cover and put in the fridge to chill. Once fully chilled, it is ready to serve.

6. For the topping, spread the chopped fruits over the chilled cake.

Stir in hot boiling water with tortenguss and leave it for a minute for the flavour to infuse. Just pour the tortenguss liquid over the fruits and chill.

7.Just before you serve just take some left over crust mixture and pat the sides of the cheesecake with your hands, just to cover the sides evenly.


Pan note: The creator of this recipe used to use a springform pan, but no matter how well she wrapped the thing in tin foil, water would always seep in and make the crust soggy. Now she uses one of those 1-use foil "casserole" shaped pans from the grocery store. They're 8 or 9 inches wide and really deep, and best of all, water-tight. When it comes time to serve, just cut the foil away.

Prep notes: While the actual making of this cheesecake is a minimal time commitment, it does need to bake for almost an hour, cool in the oven for an hour, and chill overnight before it is served. Please plan accordingly!

About Us | Site Map | Privacy Policy | Contact Us | Blog Design | 2007 Company Name