
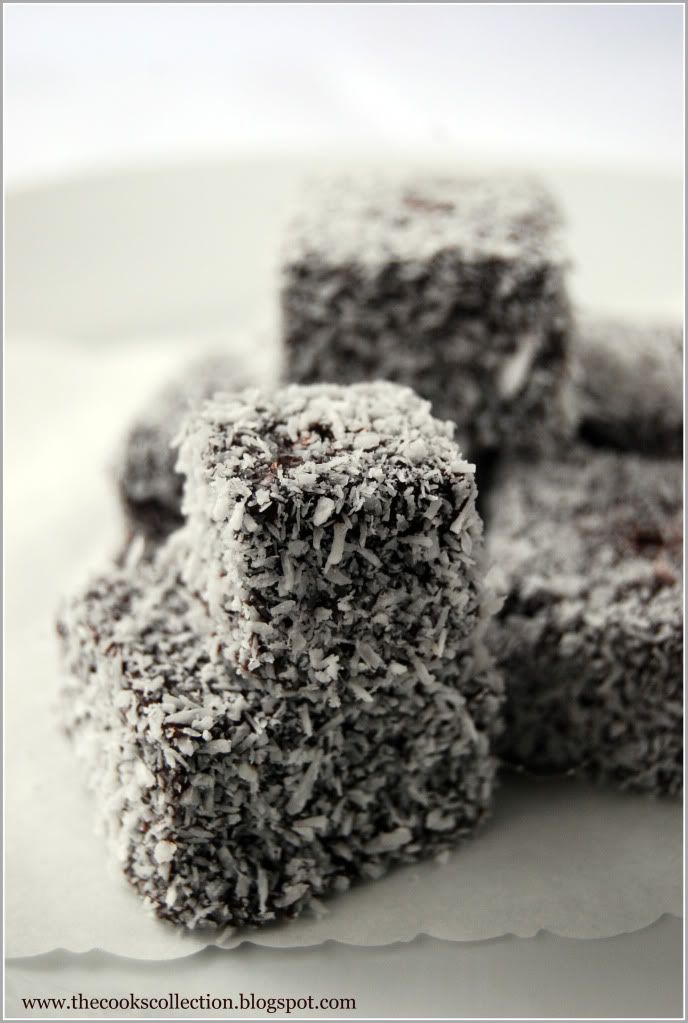
Lamingtons are to Australians what the chocolate brownie is to Americans. These are basically cubes of sponge cake coated in chocolate icing and then rolled in desiccated coconut to finish.
Makes 24 small cakes
Ingredients:
For cake:
125 g unsalted butter, softened
125 g caster sugar
2 eggs, lightly beaten
250 g self raising flour, sifted
pinch of salt
1/2 cup or 8 tablespoons milk
1 teaspoon vanilla extract
For icing:
200 g icing sugar
50 g cocoa powder
75 -100 ml boiling water
100 g desiccated coconut
Method:
Make the cake: Put all the cake ingredients in a food processor and process until smooth. Or if you are making the cake batter by hand, beat the butter and sugar together until pale and light. Then beat in the eggs, a little at a time, until incorporated. Sift in the flour and salt and fold into the creamed mixture with milk and vanilla.
Oil and base-line a 18 x 25 cm (7 x 10 inch) cake tin and transfer the mixture to the prepared tin. Smooth the surface with a palette knife and bake in a preheated oven, 190 degrees C (375 degrees F) for 25 -30 minutes until risen and firm to touch. Leave to cool in the tin for 5 minutes and then turn out on a wire rack to cool. Leave out overnight.
Make the icing: Sift the icing sugar and cocoa powder into a bowl. Male a well in the center and beat in the boiling water to make a smooth icing with a pouring consistency.
How to proceed: Cut the cooled cake into 24 squares. Use 2 forks or a big skewer to dip each cake into the icing and then immediately coat with the coconut. Leave to set on a baking paper.
Enjoy!!
Wednesday, August 11, 2010
Lamingtons


Wednesday, July 14, 2010
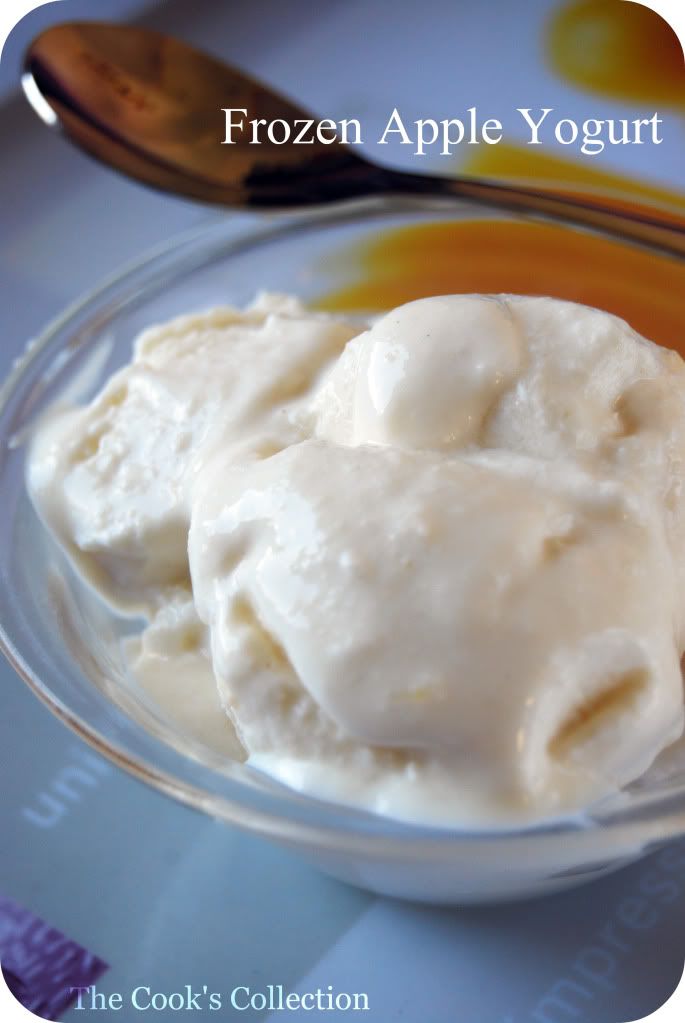
Frozen Apple Yogurt
This delicious dessert is simple and perfect not only for the heating summer But for the winter too. I loved the flavor of apple with the curd cheese. This recipe is definitely a keeper.
Ingredients:
500ml yogurt mass(recipe below)
125 gms sugar
1 big apple, pureed
1 tsp vanilla extract
3 egg whites
Directions:
For the yogurt mass, put 1 kg skimmed milk yogurt into a strainer which has been lined with a thin cheese cloth. Put the transparent film on top, weigh down with a plate, and allow to drip off at least for 6 hours or overnight. The yogurt should now have a consistency of firm curd cheese or cream cheese.
Mix yogurt mass, sugar, pureed apple and vanilla well.
Beat the egg white until stiff and mix carefully with the yogurt mass. Fill the mass into the bowl of an ice cream maker and run the machine for approx. 30-40 minutes.
Note:
If you do not have an ice-cream maker, then after the mixture has been in the refrigerator overnight, pour into a deep plastic vessel and place in the freezer. After 30 - 45 minutes take out and whisk with an electric hand mixer. Place back into the freezer. Repeat this process several times - 3 to 4 - then allow to freeze until firm.
Tuesday, June 8, 2010
Marble Bundt Cake
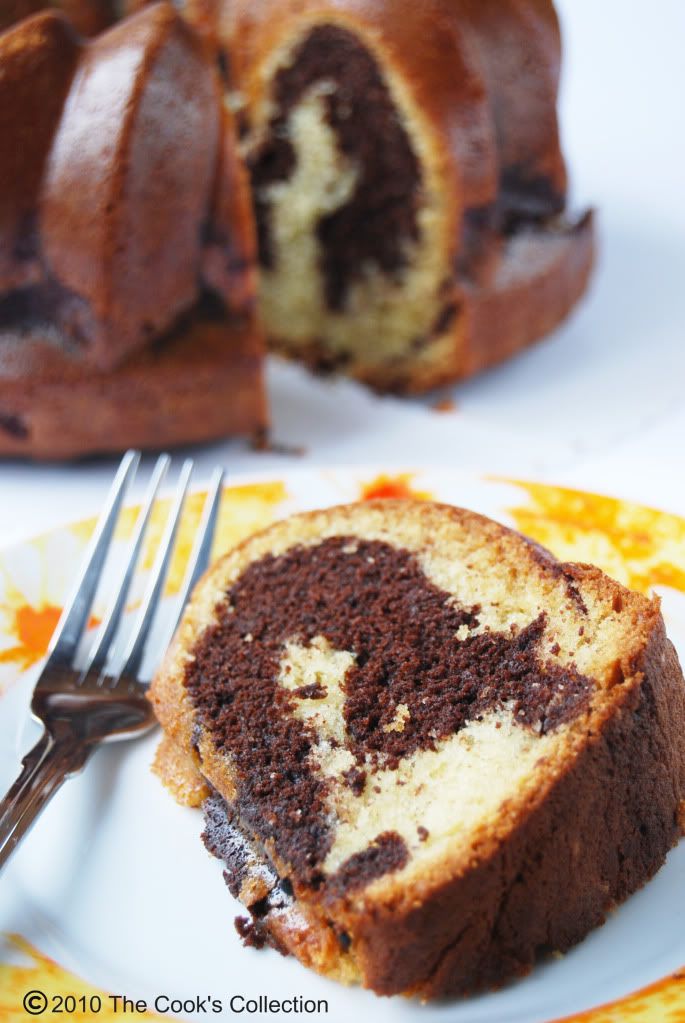
The cake - it is cake, so don't kid yourself - should be delight to eat. It is the ultimate coffee accompaniment, when made correctly it is the perfect yin - yang dessert. Unfortunately, many marble cakes lack any distinction between the chocolate and vanilla components; the chocolate flavor is no more interesting than brown food coloring. This recipe is a tribute to the classic marble bundt, with a rich chocolate flavor (thanks to the combination of dark chocolate and cocoa powder) that contrasts nicely with the delicate vanilla swirl. If you're going to eat cake for breakfast, it should be this one.
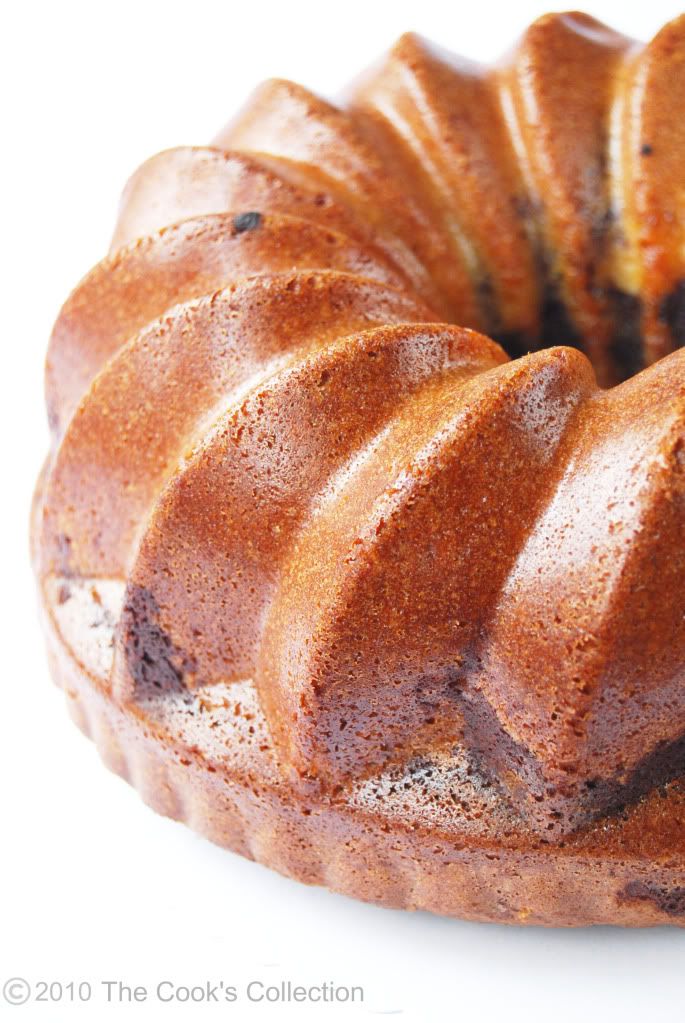
This is the best homemade marble cake i've ever had. I recommend the book "Baked - New Frontiers in Baking" to all my readers who love baking. Go for it!!
Yield : 1 (10 inch) BUNDT CAKE
Adapted from Baked - New Frontiers in Baking
Ingredients:
FOR THE CHOCOLATE SWIRL
6 ounces, 170 grams dark chocolate (60 to 72 % cocoa), coarsely chopped
1 teaspoon unsweetened dark cocoa powder (like Valrhona)
FOR THE SOUR CREAM CAKE
3 1/2 cups all-purpose flour
1 1/2 teaspoons baking powder
1 1/2 teaspoons baking soda
1/2 teaspoon salt
1 cup (2 sticks) unsalted butter, soft but cool, cut into 1-inch pieces
2 1/4 cups sugar
4 large eggs
16 ounces, 453 grams sour cream
1 1/2 teaspoons pure vanilla extract
Directions:
MAKE THE CHOCOLATE SWIRL : In the top of a double boiler over simmering Water, melt the chocolate. When the chocolate is completely smooth, add the cocoa powder and whisk until thoroughly incorporated. Remove the bowl from the heat and set aside.
MAKE THE SOUR CREAM CAKE : Preheat the oven to 350 degrees F. Spray the inside of a 10-inch bundt pan with a nonstick cooking spray or simply use a silicon bundt pan.
Sift the flour, baking powder, baking soda, and slat together into a medium bowl.
In the bowl of an electric mixer fitted with the paddle attachment, cream the butter until smooth and ribbon like. Scrape down the bowl and add the sugar. Beat until the mixture is smooth and fluffy. Add the eggs, one at a time, beating well after each addition. Scrape down the bowl and mix for 30 seconds.
Add the sour cream and vanilla and beat just until incorporated. Add the dry ingredients in three additions, scraping down the bowl before each addition and beating only until each addition is just incorporated. Do not over mix.
Pour one third of the cake batter into the chocolate swirl mixture. Use a spatula to combine the chocolate mixture and the batter to make a smooth chocolate batter. Spread half of the remaining batter in the prepared pan. Use an ice cream scoop to dollop the chocolate cake batter directly on top of the plain cake batter. The dollops will touch and mostly cover the plain batter, but some plain batter will peek through. Use a butter knife to swirl the chocolate and plain cake batter together. Pour the remaining plain batter on top of the chocolate layer and smooth it out. Once again, use the knife to pull through the layers to create a swirl.
Bake in the center of the oven for about 1 hour, rotating the pan halfway through the baking time, or until a sharp knife inserted in the center of the cake comes out clean.
Remove from the oven and let the cake cool in the pan on a wire rack for 30 minutes. Use a knife to loosen the edges of the cake and invert it into the wire rack and let cool. Serve warm or at room temperature.
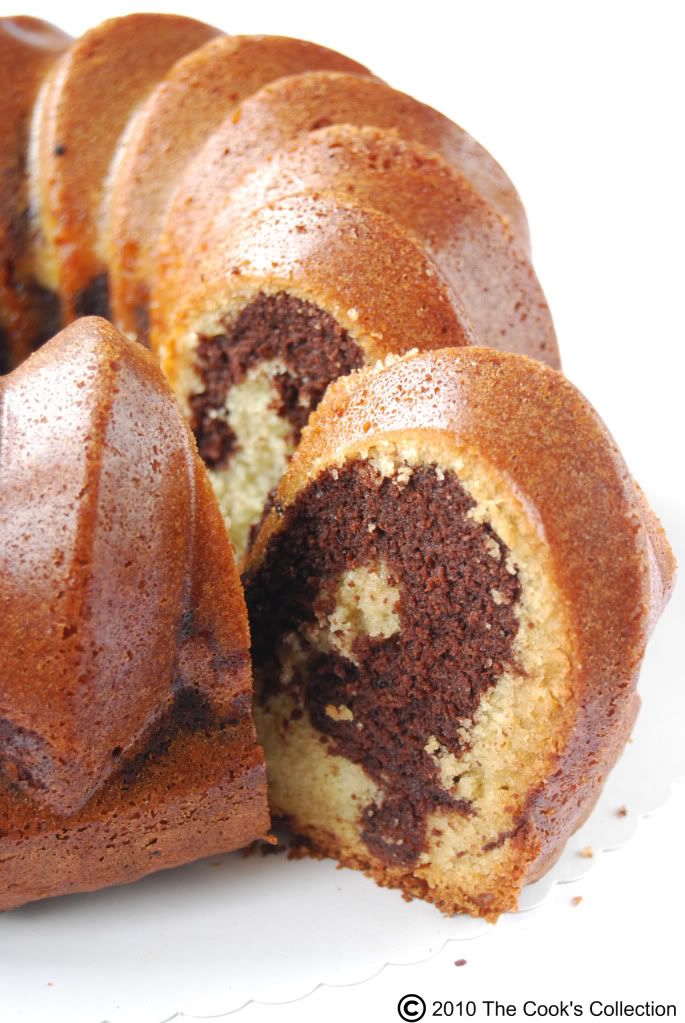
STORAGE : The cake will keep for 3 days. tightly covered. at room temperature.
Friday, May 28, 2010
Daring Bakers Piece Montée
May 2010 Challenge
The May 2010 Daring Bakers’ challenge was hosted by Cat of Little Miss Cupcake. Cat challenged everyone to make a piece montée, or croquembouche, based on recipes from Peter Kump’s Baking School in Manhattan and Nick Malgieri.
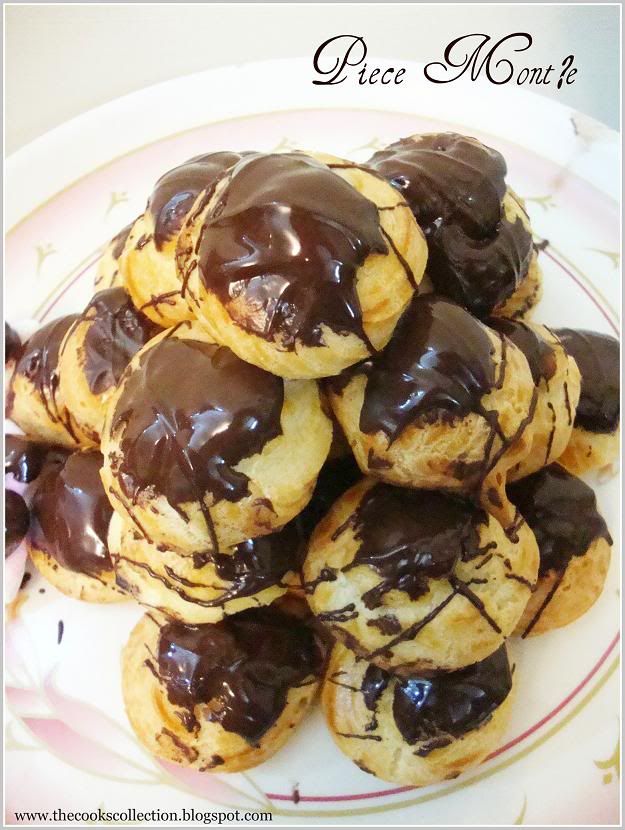
This month’s challenge recipe is for a Piece Montée, which means literally “mounted piece.” You may know this dessert by another name – Croquembouche (“crunch in the mouth”). Piece montée is the traditional wedding cake here in France. They are often served at baptisms and communions as well.
The classic piece montée is a high pyramid/cone made of profiteroles (cream-filled puff pastries) sometimes dipped in chocolate, bound with caramel, and usually decorated with threads of caramel, sugared almonds, chocolate, flowers, or ribbons.
Recipe Source: The recipes used for this month’s challenge comes from Peter Kump’s Baking School in Manhattan and were originally created by famed pastry chef, Nick Malgieri.
Note: This recipe has 3 main components: the pate a choux, the crème patissiere, and the glaze used to mount/decorate it. While you can purchase or make a cardboard conical structure to build your piece montée or use toothpicks as an aid, it is relatively easy to assemble it using just the baked pate a choux as the main building blocks and the glaze as the glue.
While a piece montée may be a bit time-consuming to assemble, the various components are relatively easy to make and don’t require any special ingredients. The best part about them is that once you have mastered them, you will be able to go on and make many beloved French French pastries such as éclairs, profiteroles, Paris-Brest, etc. all of which are made with this pate a choux recipe, a filling and glaze.
Preparation time: You will want to use your puff pastry batter and chocolate glaze or caramel as soon as it has been prepared and as close to serving time as possible. This is not a dessert that stores well and it may be a bit temperamental in humid areas as the glaze needs to harden to hold the choux together. The crème patissiere can be made a couple of days in advance and stored in the fridge until ready to use.
You will need approximately 10 minutes to prepare the puff pastry, 10 minutes to pipe and about 30 minutes to bake each batch. The crème patissiere should take about 10 minutes to cook and then will need to be cooled for at least 6 hours or overnight. The glazes take about 10 minutes to prepare.
Equipment required:
• several baking sheets
• parchment paper
• a whisk
• a pastry brush (for the egg wash)
• a pastry bag and tip (a plain tip or no tip is best for piping the puff pastry; you can use a plain or star tip to fill the puff pastry with the cream)
• a flat surface such as a baking sheet or cake board/stand on which to assemble your piece montée
• some of the items you may want to use to decorate your piece montée include ribbons, Jordan almonds, fresh flowers, sugar cookie cut-outs, chocolates, etc.
Vanilla Crème Patissiere
Ingredients:
For the Vanilla Crème Patissiere (Half Batch)
1 cup (225 ml.) whole milk
2 Tbsp. cornstarch
6 Tbsp. (100 g.) sugar
1 large egg
2 large egg yolks
2 Tbsp. (30 g.) unsalted butter
1 Tsp. Vanilla
Preparation: Dissolve cornstarch in ¼ cup of milk. Combine the remaining milk with the sugar in a saucepan; bring to boil; remove from heat.
Beat the whole egg, then the yolks into the cornstarch mixture. Pour 1/3 of boiling milk into the egg mixture, whisking constantly so that the eggs do not begin to cook.
Return the remaining milk to boil. Pour in the hot egg mixture in a stream, continuing whisking.
Continue whisking (this is important – you do not want the eggs to solidify/cook) until the cream thickens and comes to a boil. Remove from heat and beat in the butter and vanilla.
Pour cream into a stainless steel/ceramic bowl. Press plastic wrap firmly against the surface. Chill immediately and until ready to use.
Pate a Choux (Yield: About 28)
¾ cup (175 ml.) water
6 Tbsp. (85 g.) unsalted butter
¼ Tsp. salt
1 Tbsp. sugar
1 cup (125 g.) all-purpose flour
4 large eggs
For Egg Wash: 1 egg and pinch of salt
Pre-heat oven to 425◦F/220◦C degrees. Line two baking sheets with parchment paper.
Preparing batter:
Combine water, butter, salt and sugar in a saucepan over medium heat. Bring to a boil and stir occasionally. At boil, remove from heat and sift in the flour, stirring to combine completely.
Return to heat and cook, stirring constantly until the batter dries slightly and begins to pull away from the sides of the pan.
Transfer to a bowl and stir with a wooden spoon 1 minute to cool slightly.
Add 1 egg. The batter will appear loose and shiny.
As you stir, the batter will become dry-looking like lightly buttered mashed potatoes.
It is at this point that you will add in the next egg. Repeat until you have incorporated all the eggs.
Piping:
Transfer batter to a pastry bag fitted with a large open tip (I piped directly from the bag opening without a tip). Pipe choux about 1 inch-part in the baking sheets. Choux should be about 1 inch high about 1 inch wide.
Using a clean finger dipped in hot water, gently press down on any tips that have formed on the top of choux when piping. You want them to retain their ball shape, but be smoothly curved on top.
Brush tops with egg wash (1 egg lightly beaten with pinch of salt).
Baking:
Bake the choux at 425◦F/220◦C degrees until well-puffed and turning lightly golden in color, about 10 minutes.
Lower the temperature to 350◦F/180◦C degrees and continue baking until well-colored and dry, about 20 minutes more. Remove to a rack and cool.
Can be stored in a airtight box overnight.
Filling:
When you are ready to assemble your piece montée, using a plain pastry tip, pierce the bottom of each choux. Fill the choux with pastry cream using either the same tip or a star tip, and place on a paper-lined sheet. Choux can be refrigerated briefly at this point while you make your glaze.
Use one of these to top your choux and assemble your piece montée.
Chocolate Glaze:
8 ounces/200 g. finely chopped chocolate (use the finest quality you can afford as the taste will be quite pronounced; I used semi-sweet)
Melt chocolate in microwave or double boiler. Stir at regular intervals to avoid burning. Use the best quality chocolate you can afford. Use immediately.
Assembly of your Piece Montée:
You may want to lay out your unfilled, unglazed choux in a practice design to get a feel for how to assemble the final dessert. For example, if making a conical shape, trace a circle (no bigger than 8 inches) on a piece of parchment to use as a pattern. Then take some of the larger choux and assemble them in the circle for the bottom layer. Practice seeing which pieces fit together best.
Once you are ready to assemble your piece montée, dip the top of each choux in your glaze (careful it may be still hot!), and start assembling on your cake board/plate/sheet. Continue dipping and adding choux in levels using the glaze to hold them together as you build up.
When you have finished the design of your piece montée, you may drizzle with remaining glaze or use ribbons, sugar cookie cut-outs, almonds, flowers, etc. to decorate. Have fun and enjoy! Bon appétit!
Thursday, April 29, 2010
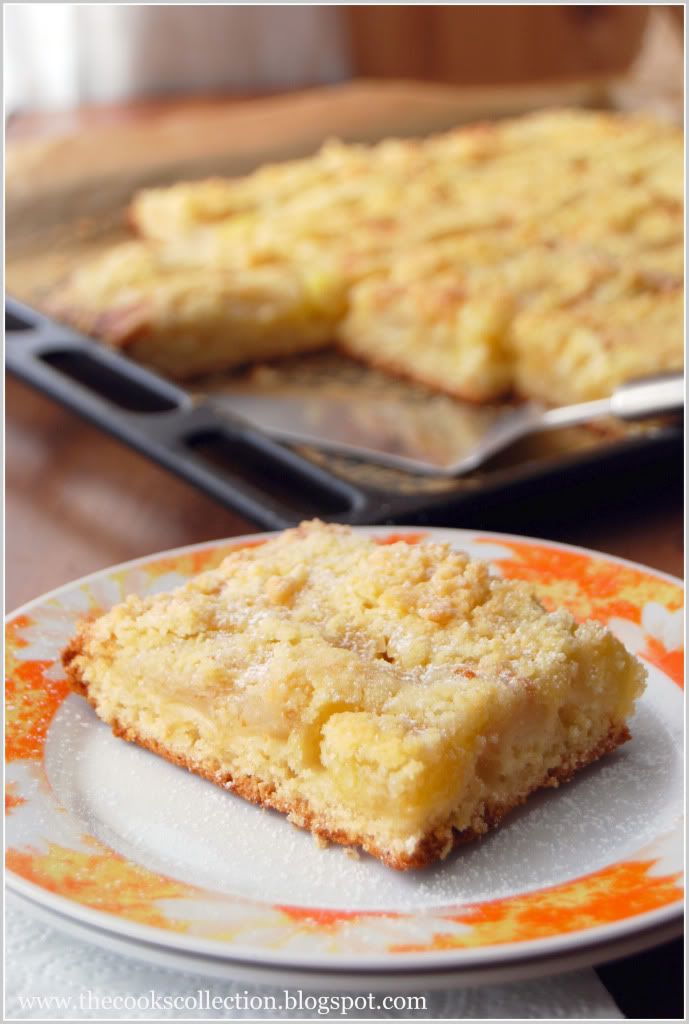
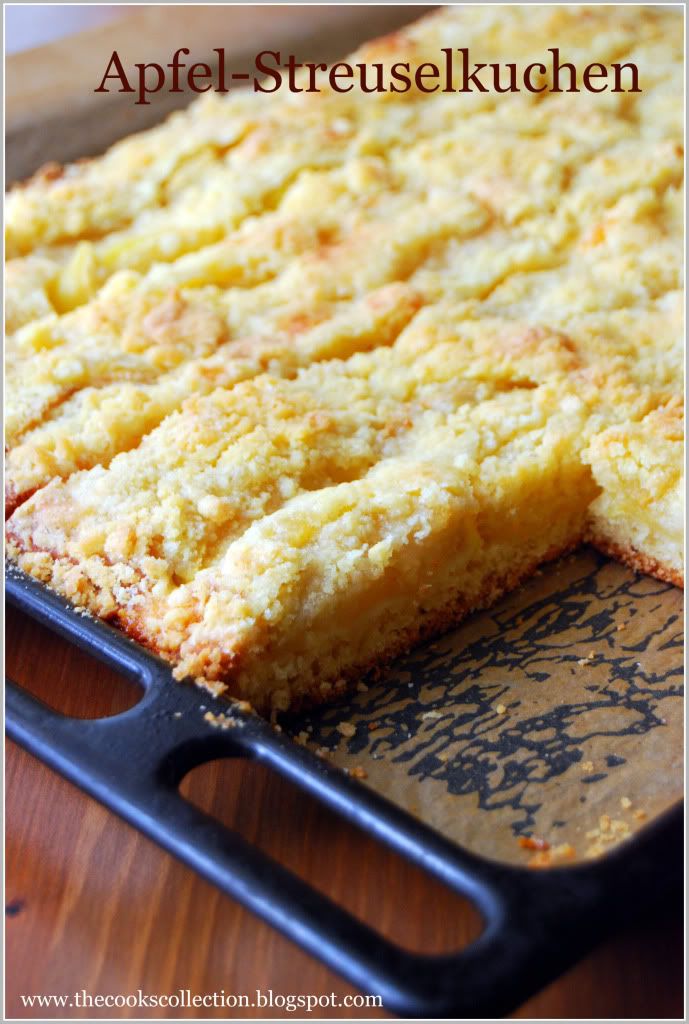
Apfel Streuselkuchen ( Apple Crumb Cake )
Streuselkuchen (crumb cake) is a German speciality. Traditionally it is made of a yeast dough covered with crumbs. The term "streusel" (a German word meaning "something scattered or sprinkled", refers to a crumb topping of butter, flour, and white sugar. This yeasted dough can be topped with any of your favorite fresh fruits, be it, plums, apricot, cherries, or any of the berries. The streusel gives the cake a nice crunch and the added sweetness balances the slight tanginess of the fruits.
For the dough:
400 g flour
30g fresh yeast or 2teaspoons dry yeast
150ml milk, luke warm
80g sugar
1 egg, large
100g butter or Margarine
pinch of salt
For the topping:
1.2 kg Apples, about 5-6, each cut into 8 pieces
For the streusel:
175 g butter
250 g four
200 g sugar
1 packet vanilla sugar
Directions:
Prepare the dough by dissolving the yeast and a pinch of sugar in the lukewarm milk. Keep aside till you start seeing bubbles and froth on top of the solution. Combine the flour, sugar, eggs, butter, frothed yeast and a pinch of salt and knead with the kneading hooks of your machine or simply with your hands. The dough should be smooth and silky. If kneading by hand, take your time and knead well till smooth. Cover with a damp cloth and allow to rise in a warm dry place till it doubles in volume - approx. 1 hour. If the weather is too cold in your kitchen, then simply switch on the baking oven to max for 2 minutes and switch it off. Place a bowl of hot bubbly water in the bottom of the oven and the dough in the center rack. Close and let it rest till it doubles.
For the streusel, melt the butter. In a bowl, combine the flour, sugar and vanilla sugar. Add the hot melted butter and work with the flour until you form pea-size crumbs.
Preheat the oven to 200 degrees C, and prepare a baking tray by lining it with some baking paper.
Once the dough has risen using floured fingers spread the dough out to the edges of the baking tray (39 cm X 32 cm). Spread the apple pieces over the dough without leaving any gaps in between. Now spread the crumble topping and let the dough rest for another 10-15 minutes.
Bake in a preheated 200 deg C oven for 30 minutes. Remove and let cool.
Monday, March 29, 2010
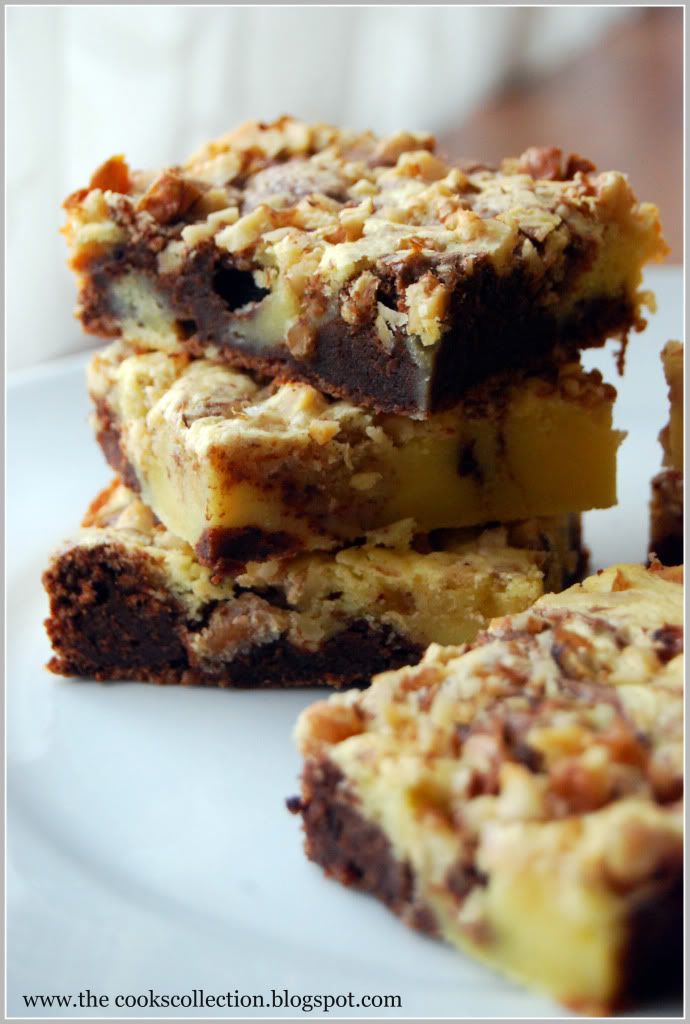
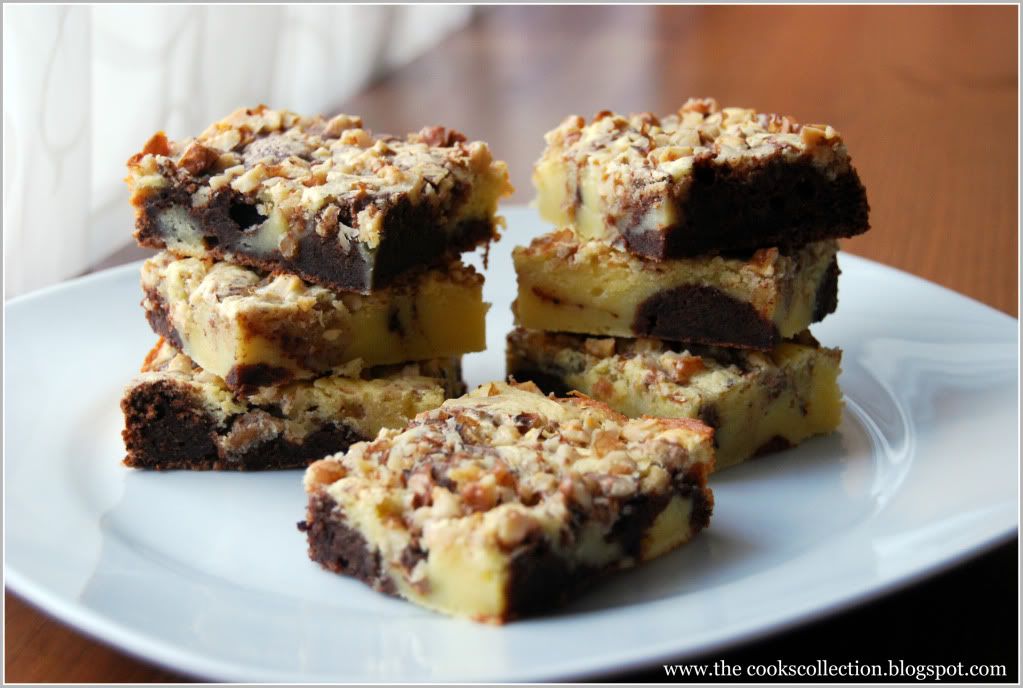
Marbled Brownies
You cant get enough of these!! Best part of these brownies is that cream cheese is used instead of butter. 100 g of cream cheese equals to 170 kcal where as the same amount of butter gives you 737 kcal. Isn't that great?? Also the addition of both the dark and white chocolates in the recipe gives the brownie two different chocolate flavors along with the marbling effect. The walnuts are added at the end which can be made optional if you are allergic to nuts or the quantity can be reduced according to your taste.
Recipe adapted from Brownies, einfach schokoladig
Ingredients:
100 g dark chocolate, chopped
50 g white chocolate, chopped
300 g Philadelphia cream cheese
200 g fine sugar
3 eggs, large
1 tsp vanilla extract
100 g all purpose flour
80 g Walnuts , finely chopped
1 Brownie form (20 x 25 cm), greased and lined with a baking paper.
Directions:
Preheat the oven to 180 deg C.
Melt the dark chocolate and white chocolate separately over 2 double boilers and let cool.
Combine the cream cheese and sugar in a stand mixer or a hand mixer till well combined. Add eggs one at a time and mix well after each addition. Add the vanilla. Reduce the speed to low and add the flour. Combine well.
Now divide this mixture into 2 equal portions into two separate bowls. Add the melted dark chocolate to one bowl and combine. Do the same with the melted white chocolate. The dark chocolate mixture would be a little thick compared to the white chocolate mixture.
Now spread dark chocolate mixture into the prepared pan, about a tablespoon each, evenly on the prepared pan leaving a gap in between. Finish up the mixture. Now fill up the gaps with the white chocolate mixture. Spread the chopped walnuts all over the pan.
Using a skewer or using the back of a wooden spoon, zig -zag the mixture giving a marbled effect. Do not mix up too much or else the batter would look mushy.
Now in a preheated 180 deg oven, bake the brownie for about 25 - 30 minutes. Let cool.
Storage: This brownie keeps well in an air tight container at room temperature for up to 5 days.
Saturday, February 27, 2010
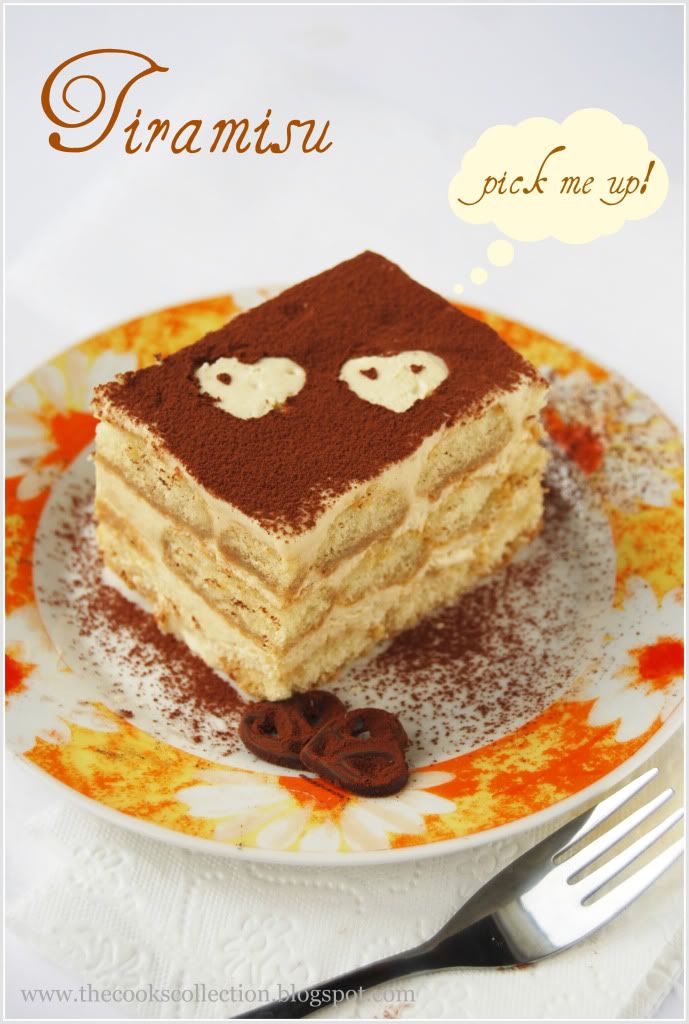
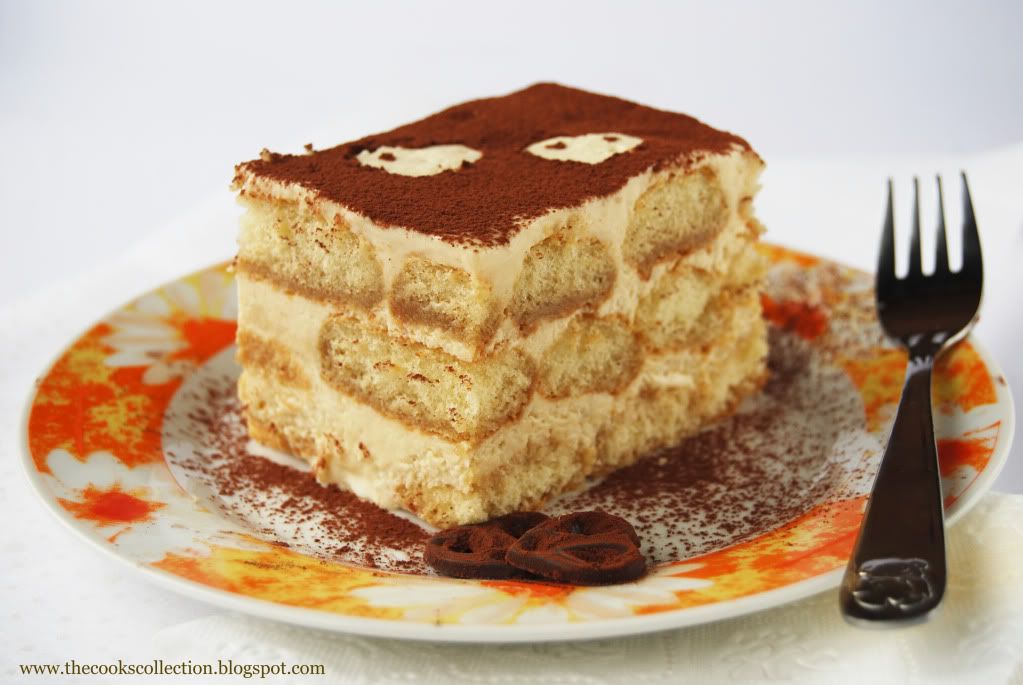
Tiramisu ~ Heaven on a Dessert Plate!
DARING BAKER CHALLENGE FEBRUARY, 2010
This divine Italian dessert translates to mean ‘pick me up’, supposedly referring to the ‘kick’ provided by the strong coffee, sugar and alcohol in it!
On the other hand, a slight mistake in spelling it as "Tiramuso" could end up meaning that you were "pulling a sulky face"! Classic tiramisu is made of alternate layers of espresso soaked ladyfinger biscuits and a cream made from mascarpone cheese and zabaglione (an egg custard).
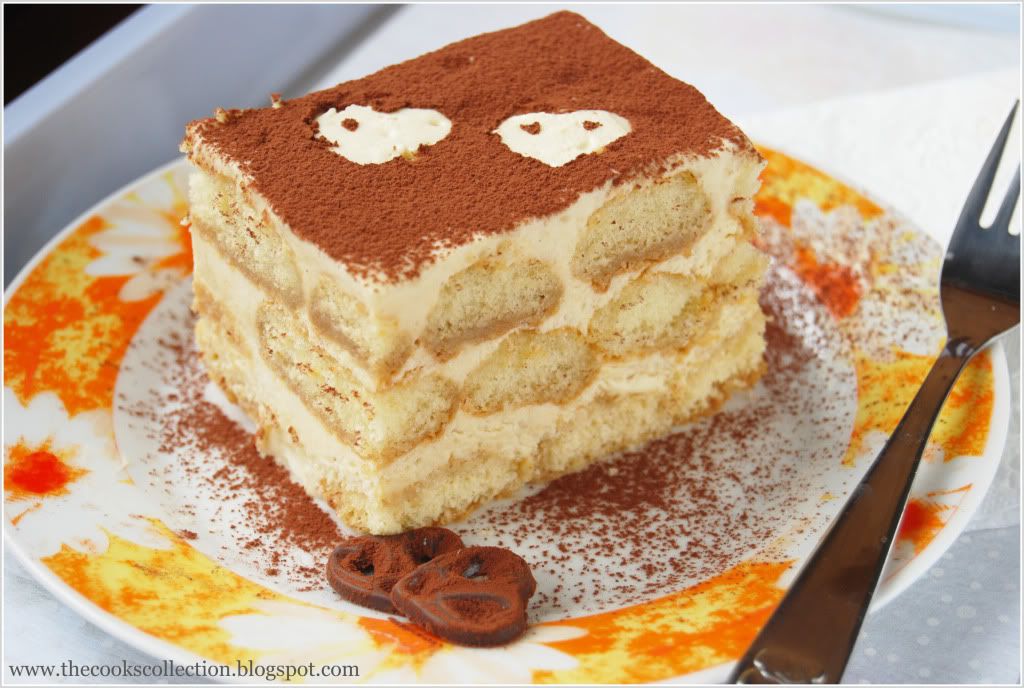
The perfect Tiramisu is a balance of flavors of a sweet zabaglione, strong coffee, marsala wine, creamy mascarpone cheese and the dusting of unsweetened cocoa.
So when, where and how was tiramisu born?
Tiramisu is said to have its origins in Treviso (Italy), and there are quite a few stories about how it came to be created.
One story traces the tiramisu as far back as the Renaissance claiming that it was first made in honour of the visit of Grand Duke Cosimo di Medici to Tuscany. Yet another one points to the tiramisu being an adaptation of the "Zuppa Inglese" referring to the sponge cake and cream layered English Trifle.
However, experts in this area generally agree that the tiramisu as we know it today, was born in the ‘70s.
Some believe that the Tiramisu was created in the the Le Beccherie (a restaurant in Treviso). Ohters suggest that Tiramisu was first made in 1971 by an Italian baker named Carminantonio Iannaccone in a small bakery in Treviso, Italy.
The February 2010 Daring Bakers’ challenge was hosted by Aparna of My Diverse Kitchen and Deeba of Passionate About Baking. They chose Tiramisu as the challenge for the month. Their challenge recipe is based on recipes from The Washington Post, Cordon Bleu at Home and Baking Obsession.
PREPARATION TIME:
Tiramisu is made up of several components which can be made separately and ahead of time and put together the day before serving.
Making tiramisu from scratch requires about 2 to 3 days (including refrigeration) from when you start making the mascarpone to the time the tiramisu is served. So this challenge requires some prior planning.
Please read the instructions as you need to begin making the mascarpone at least a day in advance.
The zabaglione & pastry cream also need 4 hours to an overnight for chilling, as does the main dessert. The flavours mature after an overnight rest, and the dessert can be kept refrigerated for 2-3 days.
Once assembled, the tiramisu can be frozen till you need to serve it, in case you are not serving it immediately.
EQUIPMENT REQUIRED:
A double boiler (a stainless steel bowl that fits inside a large saucepan/ pot without touching the bottom will do)
Two or three large mixing bowls
Whisk
A medium sized heavy bottomed pan
Fine meshed strainer (to remove lumps from pastry cream, if any)
Electric mixer, hand held
Serving dish (or dishes) of choice (8" by 8" should be fine)
Spatula for folding and spoons as required
Plastic wrap/ clingfilm
Baking sheets
Parchment paper or nonstick liners
Pastry bag (can be disposable)
Plain 3/4" pastry bag tip or cut the end of pastry bag to this size (If you don’t have a pastry bag and/or tips, you can use a Ziploc bag with the corner snipped off)
Oven
Cooling rack
Thin-bladed spatula for removing ladyfinger biscuits from the baking sheets
Instant-read thermometer (optional)
Strainer
Cheesecloth or cotton napkin for draining mascarpone
Fine-mesh strainer for shaking cocoa powder on tiramisu
TIRAMISU
(Recipe source: Carminantonio's Tiramisu from The Washington Post, July 11 2007 )
This recipe makes 6 servings
Ingredients:
For the zabaglione:
2 large egg yolks
3 tablespoons sugar/50gms
1/4 cup/60ml Marsala wine (or port or coffee)
1/4 teaspoon/ 1.25ml vanilla extract
1/2 teaspoon finely grated lemon zest
For the vanilla pastry cream:
1/4 cup/55gms sugar
1 tablespoon/8gms all purpose flour
1/2 teaspoon finely grated lemon zest
1/2 teaspoon/ 2.5ml vanilla extract
1 large egg yolk
3/4 cup/175ml whole milk
For the whipped cream:
1 cup/235ml chilled heavy cream (we used 25%)
1/4 cup/55gms sugar
1/2 teaspoon/ 2.5ml vanilla extract
To assemble the tiramisu:
2 cups/470ml brewed espresso, warmed
1 teaspoon/5ml rum extract (optional)
1/2 cup/110gms sugar
1/3 cup/75gms mascarpone cheese
36 savoiardi/ ladyfinger biscuits (you may use less)
2 tablespoons/30gms unsweetened cocoa powder
Method:
For the zabaglione:
Heat water in a double boiler. If you don’t have a double boiler, place a pot with about an inch of water in it on the stove. Place a heat-proof bowl in the pot making sure the bottom does not touch the water.
In a large mixing bowl (or stainless steel mixing bowl), mix together the egg yolks, sugar, the Marsala (or espresso/ coffee), vanilla extract and lemon zest. Whisk together until the yolks are fully blended and the mixture looks smooth.
Transfer the mixture to the top of a double boiler or place your bowl over the pan/ pot with simmering water. Cook the egg mixture over low heat, stirring constantly, for about 8 minutes or until it resembles thick custard. It may bubble a bit as it reaches that consistency.
Let cool to room temperature and transfer the zabaglione to a bowl. Cover and refrigerate at least 4 hours or overnight, until thoroughly chilled.
For the pastry cream:
Mix together the sugar, flour, lemon zest and vanilla extract in a medium heavy-bottomed saucepan. To this add the egg yolk and half the milk. Whisk until smooth.
Now place the saucepan over low heat and cook, stirring constantly to prevent the mixture from curdling.
Add the remaining milk a little at a time, still stirring constantly. After about 12 minutes the mixture will be thick, free of lumps and beginning to bubble. (If you have a few lumps, don’t worry. You can push the cream through a fine-mesh strainer.)
Transfer the pastry cream to a bowl and cool to room temperature. Cover with plastic film and refrigerate at least 4 hours or overnight, until thoroughly chilled.
For the whipped cream:
Combine the cream, sugar and vanilla extract in a mixing bowl. Beat with an electric hand mixer or immersion blender until the mixture holds stiff peaks. Set aside.
To assemble the tiramisu:
Have ready a rectangular serving dish (about 8" by 8" should do) or one of your choice.
Mix together the warm espresso, rum extract and sugar in a shallow dish, whisking to mix well. Set aside to cool.
In a large bowl, beat the mascarpone cheese with a spoon to break down the lumps and make it smooth. This will make it easier to fold. Add the prepared and chilled zabaglione and pastry cream, blending until just combined. Gently fold in the whipped cream. Set this cream mixture aside.
Now to start assembling the tiramisu.
Workings quickly, dip 12 of the ladyfingers in the sweetened espresso, about 1 second per side. They should be moist but not soggy. Immediately transfer each ladyfinger to the platter, placing them side by side in a single row. You may break a lady finger into two, if necessary, to ensure the base of your dish is completely covered.
Spoon one-third of the cream mixture on top of the ladyfingers, then use a rubber spatula or spreading knife to cover the top evenly, all the way to the edges.
Repeat to create 2 more layers, using 12 ladyfingers and the cream mixture for each layer. Clean any spilled cream mixture; cover carefully with plastic wrap and refrigerate the tiramisu overnight.
To serve, carefully remove the plastic wrap and sprinkle the tiramisu with cocoa powder using a fine-mesh strainer or decorate as you please. Cut into individual portions and serve.
LADYFINGERS/ SAVOIARDI BISCUITS
(Source: Recipe from Cordon Bleu At Home)
This recipe makes approximately 24 big ladyfingers or 45 small (2 1/2" to 3" long) ladyfingers.
Ingredients:
3 eggs, separated
6 tablespoons /75gms granulated sugar
3/4 cup/95gms cake flour, sifted (or 3/4 cup all purpose flour + 2 tbsp corn starch)
6 tablespoons /50gms confectioner's sugar,
Method:
Preheat your oven to 350 F (175 C) degrees, then lightly brush 2 baking sheets with oil or softened butter and line with parchment paper.
Beat the egg whites using a hand held electric mixer until stiff peaks form. Gradually add granulate sugar and continue beating until the egg whites become stiff again, glossy and smooth.
In a small bowl, beat the egg yolks lightly with a fork and fold them into the meringue, using a wooden spoon. Sift the flour over this mixture and fold gently until just mixed. It is important to fold very gently and not overdo the folding. Otherwise the batter would deflate and lose volume resulting in ladyfingers which are flat and not spongy.
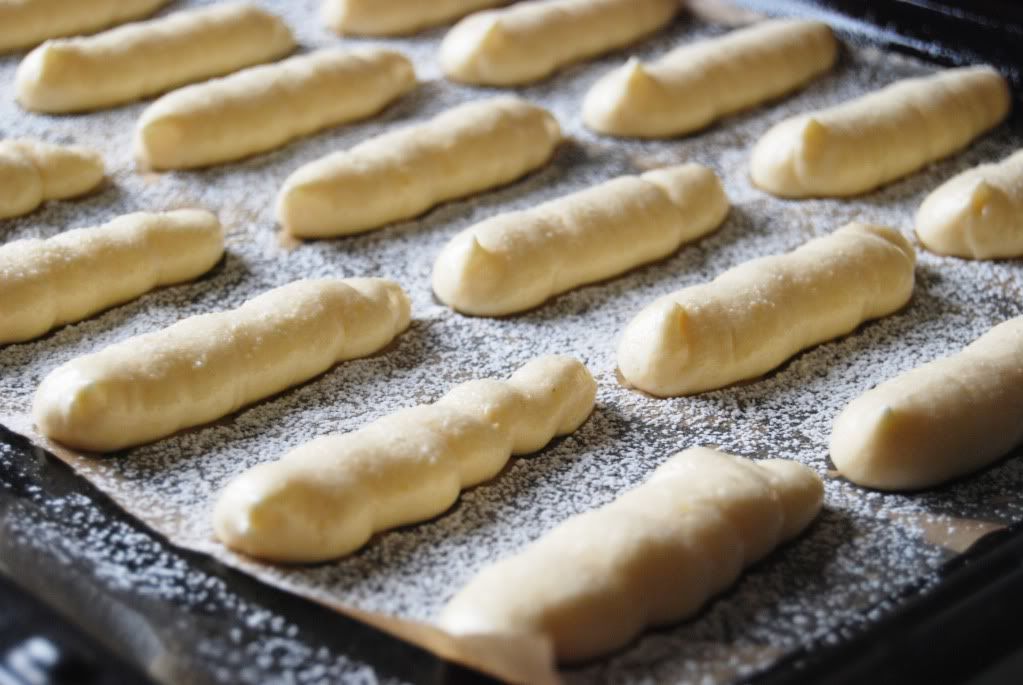
Fit a pastry bag with a plain tip (or just snip the end off; you could also use a Ziploc bag) and fill with the batter. Pipe the batter into 5" long and 3/4" wide strips leaving about 1" space in between the strips.
Sprinkle half the confectioner's sugar over the ladyfingers and wait for 5 minutes. The sugar will pearl or look wet and glisten. Now sprinkle the remaining sugar. This helps to give the ladyfingers their characteristic crispness.
Hold the parchment paper in place with your thumb and lift one side of the baking sheet and gently tap it on the work surface to remove excess sprinkled sugar.
Bake the ladyfingers for 10 minutes, then rotate the sheets and bake for another 5 minutes or so until the puff up, turn lightly golden brown and are still soft.
Store them in an airtight container till required. They should keep for 2 to 3 weeks.
MASCARPONE CHEESE
(Source: Vera’s Recipe for Homemade Mascarpone Cheese)
This recipe makes 12oz/ 340gm of mascarpone cheese
Ingredients:
474ml (approx. 500ml)/ 2 cups whipping (36 %) pasteurized (not ultra-pasteurized), preferably organic cream (between 25% to 36% cream will do)
1 tablespoon fresh lemon juice
Method:
Bring 1 inch of water to a boil in a wide skillet. Reduce the heat to medium-low so the water is barely simmering. Pour the cream into a medium heat-resistant bowl, then place the bowl into the skillet. Heat the cream, stirring often, to 190 F. If you do not have a thermometer, wait until small bubbles keep trying to push up to the surface.
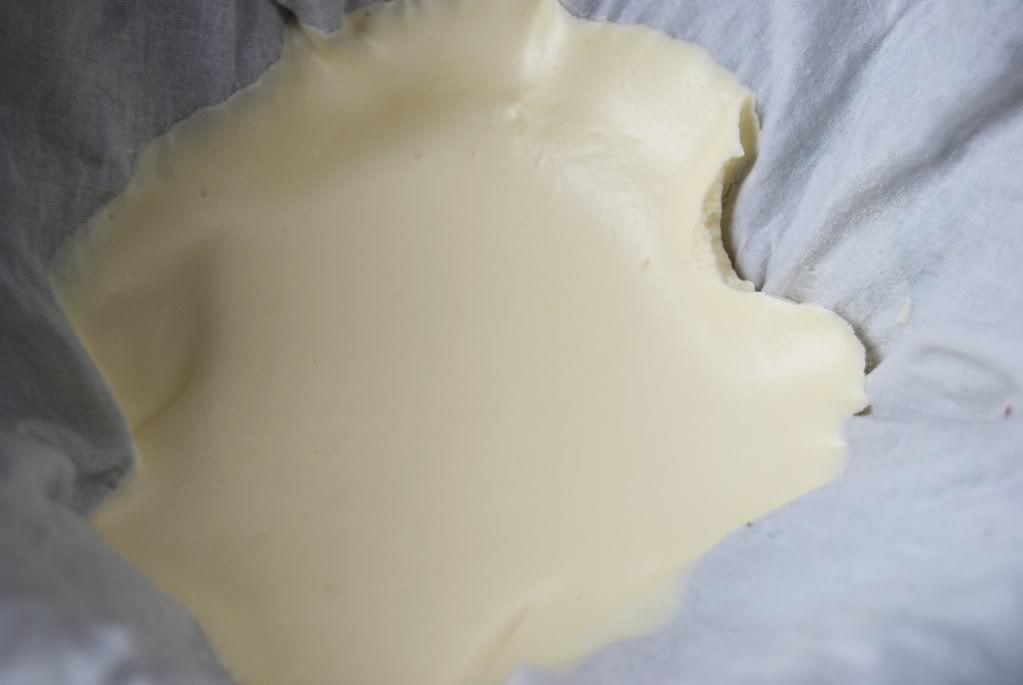
It will take about 15 minutes of delicate heating. Add the lemon juice and continue heating the mixture, stirring gently, until the cream curdles. Do not expect the same action as you see during ricotta cheese making. All that the whipping cream will do is become thicker, like a well-done crème anglaise. It will cover a back of your wooden spoon thickly. You will see just a few clear whey streaks when you stir. Remove the bowl from the water and let cool for about 20 minutes. Meanwhile, line a sieve with four layers of dampened cheesecloth and set it over a bowl. Transfer the mixture into the lined sieve. Do not squeeze the cheese in the cheesecloth or press on its surface (be patient, it will firm up after refrigeration time). Once cooled completely, cover with plastic wrap and refrigerate (in the sieve) overnight or up to 24 hours.
Vera’s notes: The first time I made mascarpone I had all doubts if it’d been cooked enough, because of its custard-like texture. Have no fear, it will firm up beautifully in the fridge, and will yet remain lusciously creamy.
Keep refrigerated and use within 3 to 4 days.
NOTES/ TIPS:
1. If you cannot find Marsala, port wine is considered a good substitute.
2. If you would rather not use alcohol in your tiramisu due to diet restrictions or because you want to serve it to children, you may replace the Marsala with an equal amount of espresso or coffee.
3. Many people, especially those who are not excessively fond of coffee, might find brewed espresso very strong. In this case, please feel free to dilute the espresso or coffee to the desired strength.
4. It is generally suggested that cream with 25% fat is best for making mascarpone, but 36% works just as well.
5. We both used lime juice. Deeba has a recipe for mascarpone posted on her blog here.
6. The mascarpone recipe below is for approximately 340gms of mascarpone. The tiramisu recipe requires only 1/3 cup/75gms so you may scale down the recipe to requirement or put the extra mascarpone cheese to other equally good use. (100gms cream will yield approximately 75gms mascarpone)
7. While using the double boiler to make the mascarpone as well as the zabaglione, always ensure that the bottom of the bowl on top doesn't touch the bottom of the lower one. It is important to use a stainless steel bowl to pour your cream into, while making the mascarpone.
8. Ladyfinger batter is very fragile so fold in the flour and yolks very carefully into the meringue so that the whites don't lose their volume.
9. It might be a good idea to decide the size of the dish in which you intend to set the dessert, and make the fingers to a size which would fit that dish. This makes it easier when assembling the tiramisu later. Do remember that ladyfingers/ savioardi puff up a little while baking.
10. Ladyfinger biscuits may be stored up to a week in an airtight container. We both made the savoiardi fingers 4-5 days in advance, and stored them in an airtight box in a cool place (or the refrigerator).
11. We both made the zabaglione & pastry cream the previous day, and assembled the tiramisu the next morning. I (Aparna) then froze my tiramisu for 7 days before decorating and serving it.
12. Placing the bowl (in which cream is to be whipped) and the beaters of the hand held electric mixer in the fridge for about 1/2 to 1 hour before hand makes the cream whip up very well.
13. Do not dip the ladyfinger/ savoiardi into the coffee solution for more than ONE second, or they might become very fragile & disintegrate. Extra soaking is likely to spoil the end product, making it soggy. I (Aparna) dipped my biscuits only on one side and found they soaked up more than enough coffee solution.
14. If you would like to de-mould your tiramisu from your dish (cutting can be easier and neater this way, you can line your dish with plastic wrap (leaving a little extra on the sides of the dish) and then start assembling your tiramisu. Once the tiramisu sets in the refrigerator, you can use the overhang to pull the tiramisu out of the dish.
Monday, February 22, 2010
Easy Homemade Granola
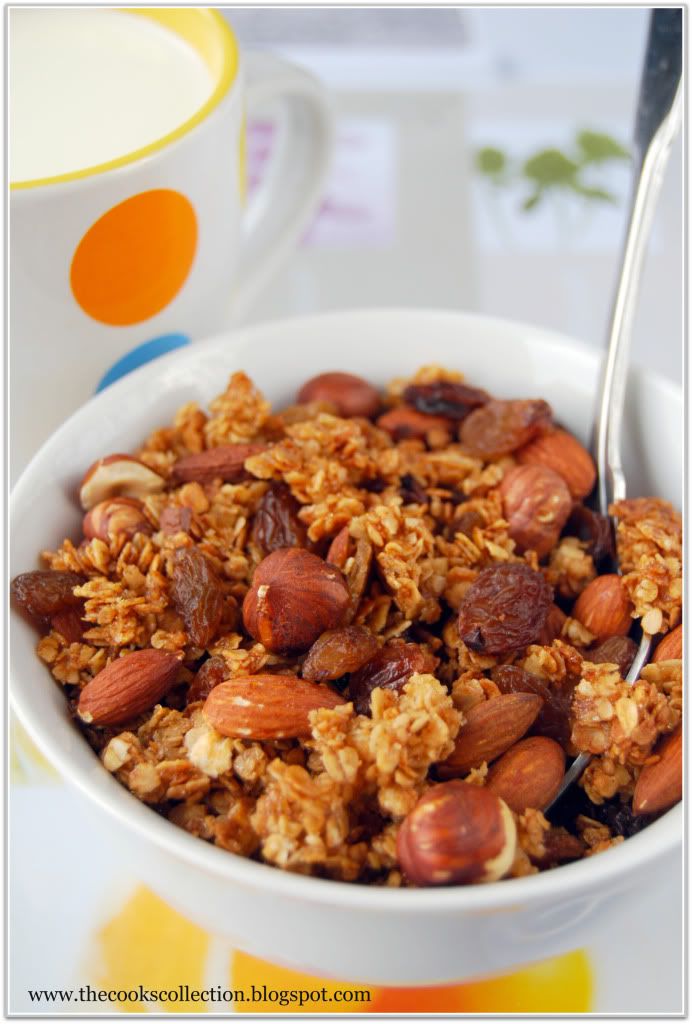
This homemade granola is filled with nuts and dried fruits, it's reasonably healthy and wholly addictive. You can customize your own blend by exchanging fruits and nuts at will. I even added few flax seeds and sunflower seeds for extra crunch. You'll just fall in love with the aroma of toasted oats and nuts starts to emanate from your oven. This granola is great for snacking on its own, and for layering in fresh fruit, in yogurt parfaits or by simply adding plain milk to it. This will serve as a very healthy breakfast and you'll definitely enjoy making it all by yourself. You can even double the batch if you want.
Yield: 1 pound
Easy Homemade Granola
from "Baked: New Frontiers in Baking" by Matt Lewis and Renato Poliafito
Ingredients:
2 cups rolled oats
1 teaspoon cinnamon
1/2 teaspoon salt
3 tablespoon plus 1 teaspoon vegetable oil
1/4 cup honey
1/4 cup firmly packed light brown sugar
1 teaspoon pure vanilla extract
1/3 cup whole almonds
1/3 cup whole hazelnuts
1/3 cup golden raisins
1/3 cup dried cherries
plus (i added 2 tablespoons flaxseeds and 2 tablespoons sunflower seeds)
Directions:
Preheat the oven to 325 degrees F or 160 degrees C. Line a baking sheet with parchment paper.
In a large bowl, toss the oats with cinnamon and salt.
In a medium bowl, stir together the oil, honey, brown sugar, and vanilla. Whisk until completely combined.
Pour the honey mixture over the oats mixture and use your hands to combine them: Gather up some of the mixture in each hand and make a fist. Repeat until all of the oats are coated with the honey mixture.
Pour the mixture onto the prepared baking sheet. Spread it out evenly, but leave a few clumps here and there for texture.
Bake for 10 minutes, then remove from the oven and use a metal spatula to lift and flip the granola. Sprinkle the almonds over the granola and return the baking sheet to the oven.
Bake for 5 minutes, then remove from the oven and use a metal spatula to lift and flip the granola. Sprinkle the hazelnuts over the granola and return the baking sheet to the oven.
Bake for 10 minutes, then remove from the oven. Let cool completely. Sprinkle the raisins and cherries over the granola and use your hands to transfer it to an airtight container. The granola will keep for 1 week.
Friday, February 12, 2010
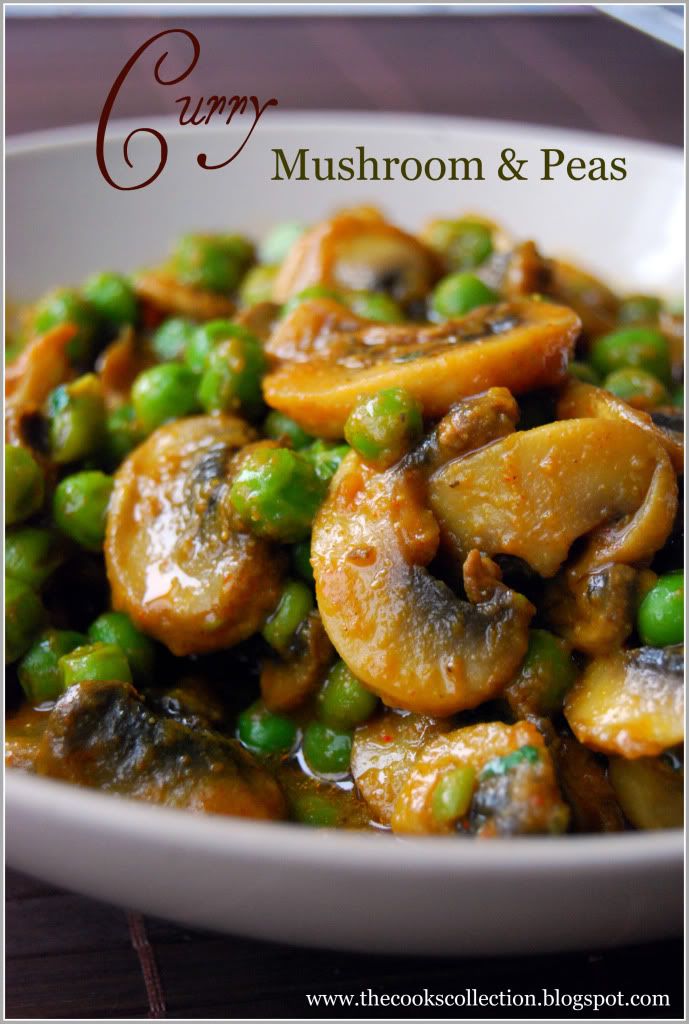
Mushroom Mutter Masala
Mushroom Peas Curry
This delicious dish is not often found in restaurants, but one that is definitely worth trying. The ingredients are so simple and you'll be surprised to see the end result which will make you keep licking your fingers. You can just halve, quarter, or thickly slice the mushrooms according to their size.
Serves 3-4
Ingredients:
350 g button mushrooms
225 g frozen peas
4 tablespoons vegetable oil
200 ml or 1 US Cup Curry sauce
1 teaspoon salt
1/2 teaspoon turmeric
1/2 teaspoon ground cumin or cumin powder
1/2 teaspoon chilli powder
1/2 teaspoon dried fenugreek leaves/ kasoori methi
1/2 teaspoon garam masala
2 teaspoons chopped green coriander
Directions
Rinse and thickly slice the mushrooms. Rinse the frozen peas well in hot water and drain.
Heat the oil in a deep frying pan. When hot. add the mushrooms and green peas and fry on a gentle heat for 4 - 5 minutes till the mushrooms look soft.
Now add the curry sauce and bring to a simmer. Stir in the salt, turmeric, ground cumin, and chilli powder. Simmer stirring occasionally. for about 15 minutes.
Add the dried fenugreek and the garam masala and simmer for a further 5 minutes.
Allow the oil to settle and skim off the excess. Stir in the green coriander and serve.
Basic Curry Sauce
This is the most closely guarded of all the secrets of restaurant cooking.
Once prepared, it has a very smooth texture and a pale golden color. Taste it and it is pleasant with a subtle curry flavor. Every good restaurant has a large pan of the sauce always at hand, with the recipe varying only slightly from chef to chef. It forms the base of all the restaurant curries from the very mild to very hot and spicy. It will keep in the refrigerator for up to 5 days, although the best restaurants will prepare no more than 3 day' requirement in one go. Together with your spices, the prior preparation of the curry sauce and whatever vegetable you propose to use, a selection of dishes can be made in a matter of minutes.
You will see that the making of the curry sauce is in fact simple with no special equipment required other than a blender. It is essential, though, that you follow strictly the instructions for blending and skimming as these are two procedures that can make the difference between a good curry and a poor one.
The quantities given here are enough for 3 to 4 people. If you do not require so much, you may halve the quantity of each ingredient, or alternatively freeze the remainder of the finished sauce.
Adapted from "The Curry Secret" from Kris Dhillon
For approximately 4 main course dishes.
Preparation and cooking time : About 1 1/2 hours
Ingrdeints:
450 g onions
25 g ginger
25 g garlic
750 ml water
3/4th teaspoon salt
1 small tin(110 g )tomatoes OR can use 2 fresh ripe tomatoes
4 tablespoons vegetable oil
1/2 teaspoon turmeric
1/2 teaspoon paprika (can substitute chilli powder)
Peel and rinse the onions. ginger, and garlic. Slice the onions and roughly chop the ginger and garlic.
Put the chopped ginger and garlic into a small blender with about 1/2 cup of water and blend until smooth.
Take a large saucepan and put into it the onions, the blended garlic and ginger, and the remainder of the water. Add the salt and bring to a boil. Turn down the heat to very low and simmer, with the lid on, for 40 to 45 minutes. You'll see that the water turns green. Don't worry.
Leave to cool.
Once cooled pour half of the boiled onion mixture into a blender and blend until smooth. Absolute smoothness is essential. To be certain, blend for at least 2 minutes. Pour the blended onion mixture into a clean pan or bowl and repeat with the other half of the boiled onions.[ To make this more easier, just drain the boiled onions and reserve the water. Simply blend the onions until smooth and combine it with the reserved water.]
Open the can of tomatoes. Pour into the rinsed blender jug, and blend. If using fresh tomatoes, blanch them first by boiling whole tomatoes in a pan of hot water for few minutes and take the skin off, let cool and then blend. Again, it is important that they are perfectly smooth, so blend for about 2 minutes.
Into a clean saucepan, put the oil, turmeric, and paprika/chilli powder. Add the blended tomatoes and bring to a boil. Turn down the heat and cook, stirring occasionally, for 10 minutes.
Now add the onion mixture to the saucepan and bring to a boil again. Turn down the heat enough to keep the sauce at a simmer.
You will notice at this stage that a froth rises to the surface of the sauce. This needs to be skimmed off. Keep simmering and skimming for 20 -25 minutes, stirring now and again to prevent the surface sticking to the bottom of the saucepan.
Use immediately or cool and refrigerate for up to 4 days.


