Daring Bakers November 2009 Challenge
The November 2009 Daring Bakers Challenge was chosen and hosted by Lisa Michele of Parsley, Sage, Desserts and Line Drives. She chose the Italian Pastry, Cannolo (Cannoli is plural), using the cookbooks Lidia’s Italian-American Kitchen by Lidia Matticchio Bastianich and The Sopranos Family Cookbook by Allen Rucker; recipes by Michelle Scicolone, as ingredient/direction guides. She added her own modifications/changes, so the recipe is not 100% verbatim from either book.
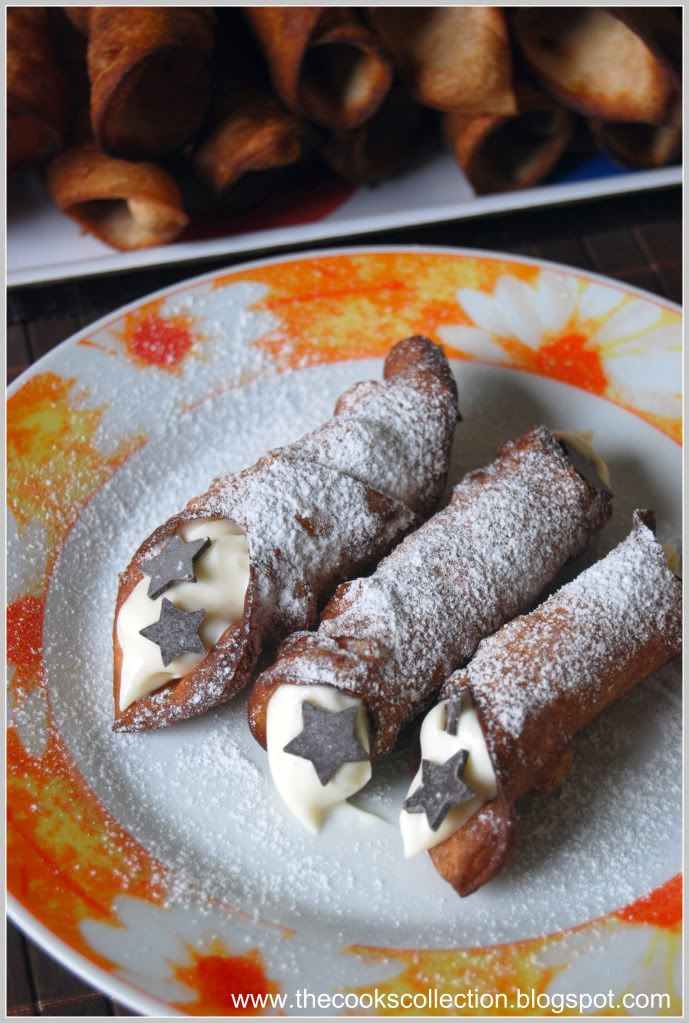
Cannoli are known as Italian-American pastries, although the origin of cannoli dates back to Sicily, specifically Palermo, where it was prepared during Carnevale season, and according to lore, as a symbol of fertility. The cannoli is a fried, tube-shaped pastry shell (usually containing wine) filled with a creamy amalgamation of sweetened ricotta cheese, chocolate, candied fruit or zest, and sometimes nuts. Although not traditional, mascarpone cheese is also widely used, and in fact, makes for an even creamier filling when substituted for part of the ricotta, or by itself. However, cannoli can also be filled with pastry creams, mousses, whipped cream, ice cream etc. You could also add your choice of herbs, zests or spices to the dough, if desired. Marsala is the traditional wine used in cannoli dough, but any red or white wine will work fine, as it’s not only added for flavor or color, but to relax the gluten in the dough since it can be a stiff dough to work with.
Equipment:
Cannoli forms/tubes - optional, but recommended if making traditional shaped cannoli. Dried cannelloni pasta tubes work just as well!
Deep, heavy saucepan, enough to hold at least 2-3-inches of oil or deep fryer
Deep fat frying thermometer. although the bread cube or bit of dough test will work fine.
Metal tongs
Brass or wire skimmer OR large slotted spoon
Pastry bag with large star or plain tip, but a snipped ziplock bag, butter knife or teaspoon will work fine.
Cooling rack
Paper bags or paper towels
Pastry Brush
Cheesecloth
Sieve or fine wire mesh strainer
Electric Mixer, stand or hand, optional, as mixing the filling with a spoon is fine.
Food Processor or Stand Mixer – also optional, since you can make the dough by hand, although it takes more time.
Rolling pin and/or Pasta roller/machine
Pastry or cutting board
Round cutters - The dough can also be cut into squares and rolled around the cannoli tube prior to frying. If making a stacked cannoli, any shaped cutter is fine, as well as a sharp knife.
Mixing bowl and wooden spoon if mixing filling by hand
Plastic Wrap/Clingfilm
Tea towels or just cloth towels
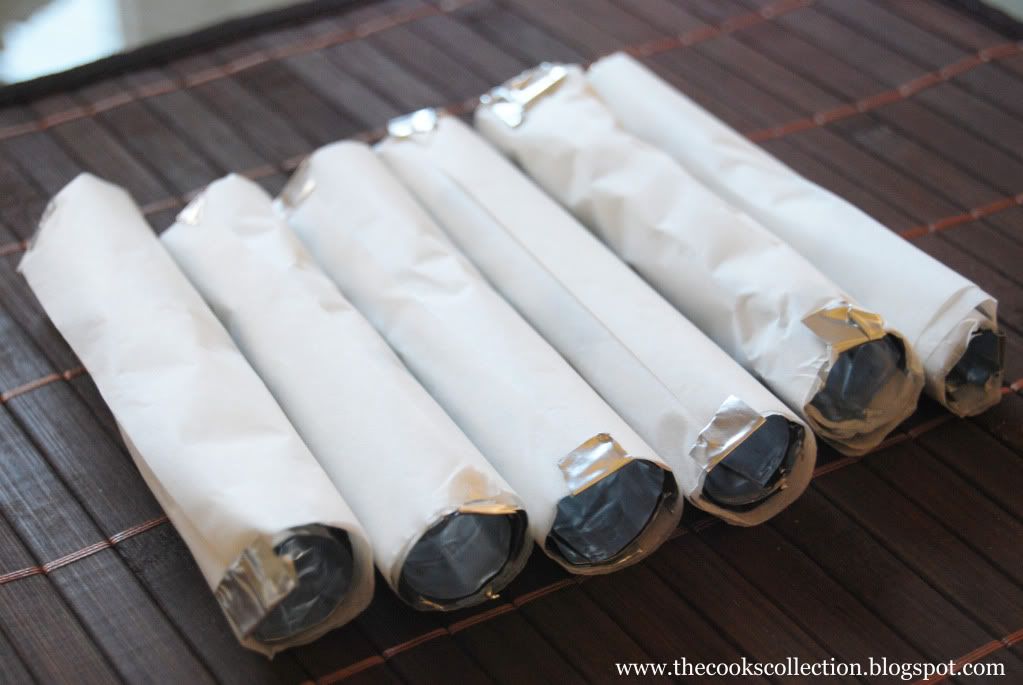
Required: If you don’t have or do not want to purchase cannoli forms, which I would never ask of any of you, you could simply cut out circles, squares, or any shapes you want and stack them with the filling of your choice to make stacked cannoli's aka Cannolipoleons (directions below). If desired, you can channel MacGuyver and fashion something heat proof to get traditional shaped cannoli (6-8 inch sawed off lengths of a wooden broom stick or cane, sanded down and oiled, is THE authentic cannoli form!), or non-traditional shapes such as creating a form to make bowls, or even using cream horns if you happen to have them. Mini cannoli would be great too, and I've provided links to retailers of cannoli forms of all sizes. I used Aluminum Foil BBQ Grill Trays for the cannoli forms. I cut them and rolled them using garlic presser and rolled them again with a sheet of parchment paper. I sealed the ends of the parchment paper using small cut outs of the grill sheet. This helps when you fry the pastry for the first time. Later the parchment paper sticks by itself and you wont need the sealing. This is a wonderful alternative for the steel cannoli forms. The fried pastry come sout easily without any problems.
Also, for those who don't like to cook or bake with alcohol - grape juice, cranberry juice, pomegranate juice, apple juice..any sweet juice of a fruit, especially ones used in or to make wine, can be substituted. Just add a little more vinegar to insure you get enough acid to relax the dough
Makes 22-24 4-inch cannoli
Prep time:
Dough – 2 hours and 10-20 minutes, including resting time, and depending on whether you do it by hand or machine.
Filling – 5-10 minutes plus chilling time (about 2 hours or more)
Frying – 1-2 minutes per cannoli
Assemble – 20–30 minutes
CANNOLI SHELLS
2 cups (250 grams/8.82 ounces) all-purpose flour
2 tablespoons(28 grams/1 ounce) sugar
1 teaspoon (5 grams/0.06 ounces) unsweetened baking cocoa powder
1/2 teaspoon (1.15 grams/0.04 ounces) ground cinnamon
1/2 teaspoon (approx. 3 grams/0.11 ounces) salt
3 tablespoons (42 grams/1.5 ounces) vegetable or olive oil
1 teaspoon (5 grams/0.18 ounces) white wine vinegar
Approximately 1/2 cup (approx. 59 grams/approx. 4 fluid ounces/approx. 125 ml) sweet Marsala or any white or red wine you have on hand
1 large egg, separated (you will need the egg white but not the yolk)
Vegetable or any neutral oil for frying – about 2 quarts (8 cups/approx. 2 litres)
1/2 cup (approx. 62 grams/2 ounces) toasted, chopped pistachio nuts, mini chocolate chips/grated chocolate and/or candied or plain zests, fruits etc.. for garnish
Confectioners' sugar
Note - If you want a chocolate cannoli dough, substitute a few tablespoons of the flour (about 25%) with a few tablespoons of dark, unsweetened cocoa powder (Dutch process) and a little more wine until you have a workable dough.
CANNOLI FILLING
2 lbs (approx. 3.5 cups/approx. 1 kg/32 ounces) ricotta cheese, drained (i used half ricotta and half mascarpone cheese)
1 2/3 cups cup (160 grams/6 ounces) confectioner’s sugar, (more or less, depending on how sweet you want it), sifted
1/2 teaspoon (1.15 grams/0.04 ounces) ground cinnamon
1 teaspoon (4 grams/0.15 ounces) pure vanilla extract or the beans from one vanilla bean
3 tablespoons (approx. 28 grams/approx. 1 ounce) finely chopped good quality chocolate of your choice
2 tablespoons (12 grams/0.42 ounces) of finely chopped, candied orange peel, or the grated zest of one small to medium orange
3 tablespoons (23 grams/0.81 ounce) toasted, finely chopped pistachios
Note - If you want chocolate ricotta filling, add a few tablespoons of dark, unsweetened cocoa powder to the above recipe, and thin it out with a few drops of warm water if too thick to pipe.
DIRECTIONS FOR SHELLS:
1. In the bowl of an electric stand mixer or food processor, combine the flour, sugar, cocoa, cinnamon, and salt. Stir in the oil, vinegar, and enough of the wine to make a soft dough. Turn the dough out onto a lightly floured surface and knead until smooth and well blended, about 2 minutes. Shape the dough into a ball. Cover with plastic wrap and let rest in the fridge from 2 hours to overnight. (I kept the dough covered with a plastic wrap in the refrigerator for 2 days and i had no problems with the pastry. It was easy to roll and had blisters on the surface.)
2 Cut the dough into two pieces. Keep the remaining dough covered while you work. Lightly flour a large cutting or pastry board and roll the dough until super thin, about 1/16 to 1/8” thick (An area of about 13 inches by 18 inches should give you that). Cut out 3 to 5-inch circles (3-inch – small/medium; 4-inch – medium/large; 5-inch;- large. Your choice). Roll the cut out circle into an oval, rolling it larger and thinner if it’s shrunk a little.
3 Oil the outside of the cannoli tubes (You only have to do this once, as the oil from the deep fry will keep them well, uhh, oiled..lol). Roll a dough oval from the long side (If square, position like a diamond, and place tube/form on the corner closest to you, then roll) around each tube/form and dab a little egg white on the dough where the edges overlap. (Avoid getting egg white on the tube, or the pastry will stick to it.) Press well to seal. Set aside to let the egg white seal dry a little.
4. In a deep heavy saucepan, pour enough oil to reach a depth of 3 inches, or if using an electric deep-fryer, follow the manufacturer's directions. Heat the oil to 375°F (190 °C) on a deep fry thermometer, or until a small piece of the dough or bread cube placed in the oil sizzles and browns in 1 minute. Have ready a tray or sheet pan lined with paper towels or paper bags.
5. Carefully lower a few of the cannoli tubes into the hot oil. Do not crowd the pan. Fry the shells until golden, about 2 minutes, turning them so that they brown evenly.
8. Lift a cannoli tube with a wire skimmer or large slotted spoon, out of the oil. Using tongs, grasp the cannoli tube at one end. Very carefully remove the cannoli tube with the open sides straight up and down so that the oil flows back into the pan. Place the tube on paper towels or bags to drain. Repeat with the remaining tubes. While they are still hot, grasp the tubes with a potholder and pull the cannoli shells off the tubes with a pair of tongs, or with your hand protected by an oven mitt or towel. Let the shells cool completely on the paper towels. Place shells on cooling rack until ready to fill.
9. Repeat making and frying the shells with the remaining dough. If you are reusing the cannoli tubes, let them cool before wrapping them in the dough.
Pasta Machine method:
1. Divide the dough into 4 equal pieces. Starting at the middle setting, run one of the pieces of dough through the rollers of a pasta machine. Lightly dust the dough with flour as needed to keep it from sticking. Pass the dough through the machine repeatedly, until you reach the highest or second highest setting. The dough should be about 4 inches wide and thin enough to see your hand through
2. Continue rolling out the remaining dough. If you do not have enough cannoli tubes for all of the dough, lay the pieces of dough on sheets of plastic wrap and keep them covered until you are ready to use them.
3, Roll, cut out and fry the cannoli shells as according to the directions above.
For stacked cannoli:
1. Heat 2-inches of oil in a saucepan or deep sauté pan, to 350-375°F (176 - 190 °C).
2. Cut out desired shapes with cutters or a sharp knife. Deep fry until golden brown and blistered on each side, about 1 – 2 minutes. Remove from oil with wire skimmer or large slotted spoon, then place on paper towels or bags until dry and grease free. If they balloon up in the hot oil, dock them lightly prior to frying. Place on cooling rack until ready to stack with filling.
DIRECTIONS FOR FILLING:
1. Line a strainer with cheesecloth. Place the ricotta in the strainer over a bowl, and cover with plastic wrap and a towel. Weight it down with a heavy can, and let the ricotta drain in the refrigerator for several hours to overnight.
2. In a bowl with electric mixer, beat ricotta until smooth and creamy. Beat in confectioner’s sugar, cinnamon, vanilla and blend until smooth. Transfer to another bowl and stir in chocolate, zest and nuts. Chill until firm.(The filling can be made up to 24 hours prior to filling the shells. Just cover and keep refrigerated).
ASSEMBLE THE CANNOLI:
1. When ready to serve..fill a pastry bag fitted with a 1/2-inch plain or star tip, or a ziplock bag, with the ricotta cream. If using a ziplock bag, cut about 1/2 inch off one corner. Insert the tip in the cannoli shell and squeeze gently until the shell is half filled. Turn the shell and fill the other side. You can also use a teaspoon to do this, although it’s messier and will take longer.
2. Press or dip cannoli in chopped pistachios, grated chocolate/mini chocolate chips, candied fruit or zest into the cream at each end. Dust with confectioner’s sugar and/or drizzles of melted chocolate if desired.
TIPS AND NOTES:
- Dough must be stiff and well kneaded
- Rolling the dough to paper thinness, using either a rolling pin or pasta machine, is very important. If the dough is not rolled thin enough, it will not blister, and good cannoli should have a blistered surface.
- Initially, this dough is VERY stubborn, but keep rolling, it eventually gives in. Before cutting the shapes, let the dough rest a bit, covered, as it tends to spring back into a smaller shapes once cut. Then again, you can also roll circles larger after they’re cut, and/or into ovals, which gives you more space for filling.
- Your basic set of round cutters usually doesn’t contain a 5-inch cutter. Try a plastic container top, bowl etc, or just roll each circle to 5 inches. There will always be something in your kitchen that’s round and 5-inches if you want large cannoli.
- Oil should be at least 3 inches deep and hot – 360°F-375°F, or you’ll end up with greasy shells. I prefer 350°F - 360°F because I felt the shells darkened too quickly at 375°F.
- If using the cannoli forms, when you drop the dough on the form into the oil, they tend to sink to the bottom, resulting in one side darkening more. Use a slotted spoon or skimmer to gently lift and roll them while frying.
- DO NOT crowd the pan. Cannoli should be fried 2-4 at a time, depending on the width of your saucepan or deep fryer. Turn them once, and lift them out gently with a slotted spoon/wire skimmer and tongs. Just use a wire strainer or slotted spoon for flat cannoli shapes.
- When the cannoli turns light brown - uniform in color, watch it closely or remove it. If it’s already a deep brown when you remove it, you might end up with a really dark or slightly burnt shell.
- Depending on how much scrap you have left after cutting out all of your cannoli shapes, you can either fry them up and sprinkle with confectioner’s sugar for a crispy treat, or let the scraps rest under plastic wrap and a towel, then re-roll and cut more cannoli shapes.
- Push forms out of cannoli very gently, being careful not to break the shells as they are very delicate. DO NOT let the cannoli cool on the form, or you may never get it off without it breaking. Try to take it off while still hot. Hold it with a cloth in the center, and push the form out with a butter knife or the back of a spoon.
- When adding the confectioner’s sugar to the filling..TASTE. You may like it sweeter than what the recipe calls for, or less sweet, so add in increments.
- Fill cannoli right before serving! If you fill them an hour or so prior, you’ll end up with soggy cannoli shells.
- If you want to prepare the shells ahead of time, store them in an airtight container, then re-crisp in a 350°F (176 °C) oven for a few minutes, before filling.
- Practice makes perfect. My first batch of shells came out less than spectacular, and that’s an understatement. As you go along, you’ll see what will make them more aesthetically pleasing, and adjust accordingly when rolling. My next several batches turned out great. Don’t give up!!
Friday, November 27, 2009
Daring Bakers: Cannoli filled with Ricotta and Mascarpone Cheese Cream



Tuesday, November 24, 2009
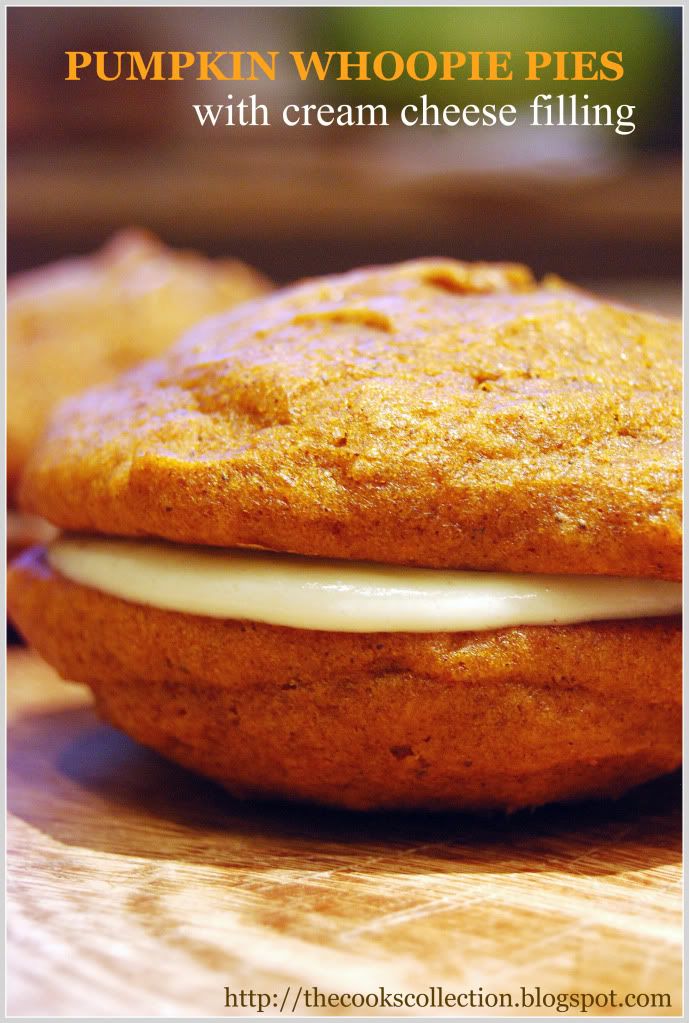
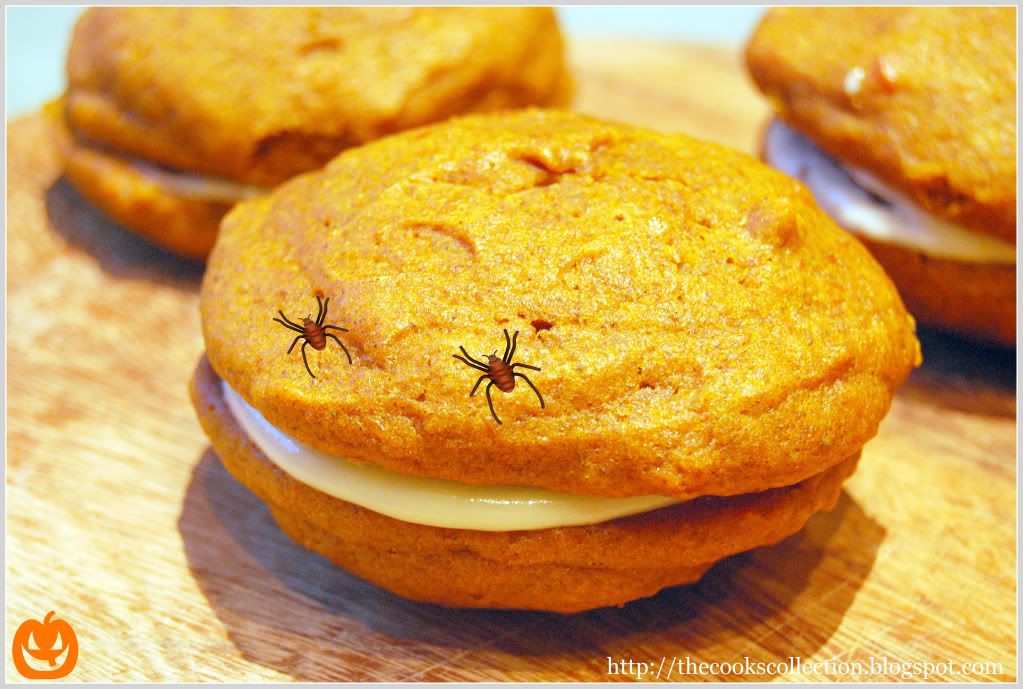
Pumpkin Whoopie Pies
These whoopies pies are two soft, spiced cakey cookies with a fair amount of cream sandwiched between them. These cookies are so much full of flavor, the spices and the pumpkin flavor blend beautifully together. They taste great with the vanilla flavored cream cheese filling and these cookies are so good and moist, that they are delicious and can be had even without the cream cheese filling. One change i made with the recipe was that i reduced the recipe by half and made 6 sandwiched whoopie pies which was good enough for just 2 of us (me and my hubby) and i also reduced the quantity of confectioners' sugar in the filling. It was little too sweet for my taste bud. Altogether this is a great recipe for people with sweet tooth.
Recipe adapted from Baked, new frontiers in baking.
Yield : 12 WHOOPIE PIES
Ingredients for the pumpkin whoopie cookies:
3 cups all-purpose flour
1 teaspoon salt
1 teaspoon baking powder
1 teaspoon baking soda
2 tablespoons cinnamon powder
1 tablespoon ginger powder
1 tablespoon cloves powder
2 cups firmly packed dark brown sugar (i used light brown sugar)
1 cup vegetable oil (i used sunflower oil)
3 cups chilled pumpkin puree
2 large eggs
1 teaspoon pure vanilla extract
For the cream cheese frosting:
3 cups confectioners sugar (powdered sugar) You can reduce the amount according to your taste
1/2 cup (1 stick) unsalted butter, softened
8 ounces cream cheese, softened
1 teaspoon pure vanilla extract
Directions:
Preheat the oven to 350 deg F(180 deg C). Line two baking sheets with parchment paper.
In a large bowl, whisk the flour, salt, baking powder, baking soda, cinnamon, ginger and cloves together and set aside.
In a separate bowl, whisk the brown sugar and oil together until combined. Add the pumpkin puree and whisk to combine thoroughly. Add the eggs and vanilla and whisk until combined.
Sprinkle the flour mixture over the pumpkin mixture and whisk until completely combined.
Use a small ice cream scoop with release mechanism to drop heaping tablespoons of the dough on to the prepared baking sheets, about 1 inch apart. Bake for 10 to 12 minutes, until the cookies are just starting to crack on top and the toothpick inserted into the center of the cookie comes out clean. Remove from the oven and let the cookies cool completely on the pan while you make the filling.
Make the cream cheese filling
Sift the confectioners' sugar into a medium bowl and set aside.
In the bowl of an electric mixer fitted with the paddle attachment(you can even use medium sized bowl and a hand beater), beat the butter until it is completely smooth, with no visible lumps. Add the cream cheese and beat until combined.
Add the confectioners' sugar and vanilla and beat until smooth. Be careful not to overeat the filling, or it will loose structure. (The filling can be made 1 day ahead. Cover the bowl tightly and put it in the refrigerator. Let the filling soften at room temperature before filling.)
Assemble the whoopie pies
Turn half of the cooled cookies upside down (flat side facing up).
Use an ice cream scoop or a tablespoon to drop a large dollop of filling onto the flat side of the cookie. Place another cookie, flat side down, on top of the filling. Press down slightly so that the filling spreads to the edges of the cookie. Repeat until all the cookies are used. Put the whoopie pies in the refrigerator for about 30 minutes to firm up before serving.
Storing:
The whoopie pies will keep for up to 3 days, on a parchment-lined baking sheet covered with plastic wrap, in the refrigerator.
Note:
Make sure you chill the pumpkin puree thoroughly before making this recipe. The chilled puree will make your whoopies easier to scoop and give them a domed top.
Tuesday, November 17, 2009
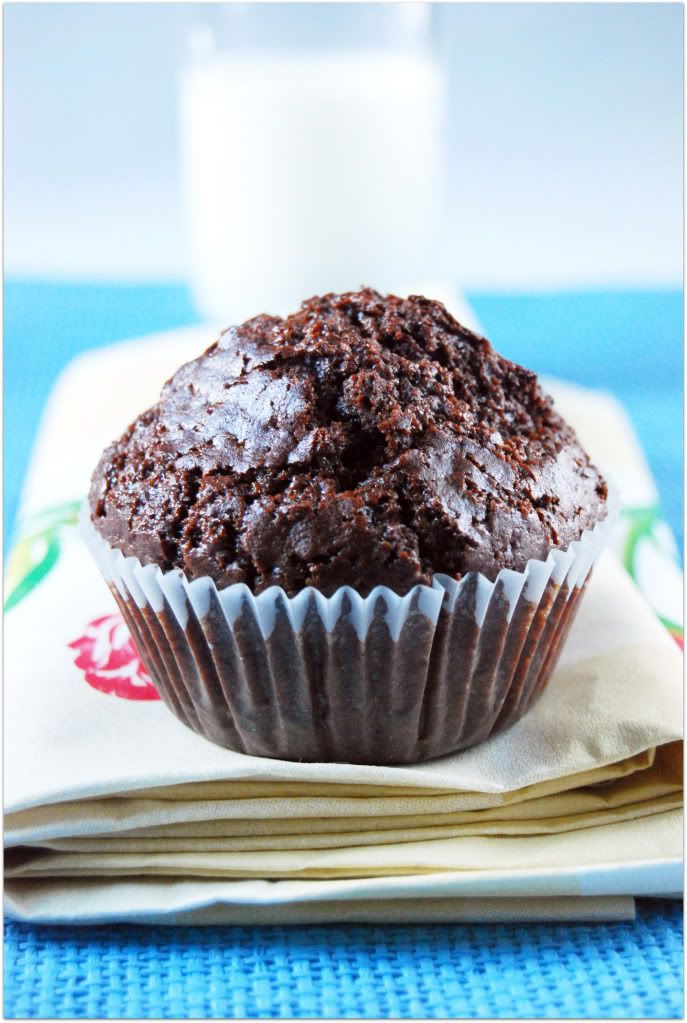
Schokoladen Sirup Muffins (Chocolate Syrup Muffins)
Schokoladen Sirup Muffins in German meaning Chocolate syrup Muffins ,adapted from "1 Teig = 100 Muffins" book. This book has a plenty of muffin recipes both sweet and savory. Its the german version of the book "1 Mix, 100 Muffins". Anybody wanting for a cake and have no buddies to share a big cake with, then go ahead and make these tiny muffins. It'll satisfy your wanting for a cake as well as serve just a few. You can even cut the recipe by half and make just 6 muffins.
I loved the texture these muffins had. They also have a strong cocoa flavor. You can make a simple sugar glaze to top these muffins with if your don't much like the strong flavor of cocoa or even a dusting of icing sugar would do. They taste great as it is as well. Enjoy these muffins just with a plain glass of milk. Yummy!!
Makes 12 regular-sized muffins
Ingredients:
225 gms all purpose flour (Appox. 1 1/2 cups + 1 1/2 tbsps)
50 gms Cocoa powder
3 tsp baking powder
1/8 tsp salt
150 gms light brown sugar
2 eggs (large)
200 gms sour cream
6 tbsps sunflower oil or 90 gms butter, melted and cooled
3 tbsps heller sirup ( can substitute golden syrup or honey)
Directions:
Preheat your oven to 400°F (200°C). Place rack in the middle of the oven. Line a muffin pan with 12 paper liners or spray with a non stick vegetable spray.
In a large mixing bowl, sieve together the flour, baking powder, salt, and cocoa powder. Stir in the sugar and keep aside.
In a medium sized bowl, lightly whisk the eggs. Add the sour cream, sunflower oil ( or melted butter) and syrup mixing well. Set aside.
Make a well inside the dry ingredients and pour in the wet ingredients. Do not over mix this batter or the muffins will be tough when baked.
Divide the batter amongst the 12 muffin cups using two spoons or an ice cream scoop, About 3/4th of the muffin cup. (I transfered the batter into a zip lock cover. Made a 1/2 inch hole in the corner. This helped me a lot and ensured me a clean fill up.)
Place in the oven and bake about 20 minutes or until lightly browned and a toothpick inserted in the center of a muffin comes out clean or with a touch, the muffin bounces back. Remove from oven and place on a wire rack to cool for about 5 minutes.
Serve warm with little icing sugar or a simple glaze using powdered sugar, water and vanilla on top.
Tuesday, November 10, 2009
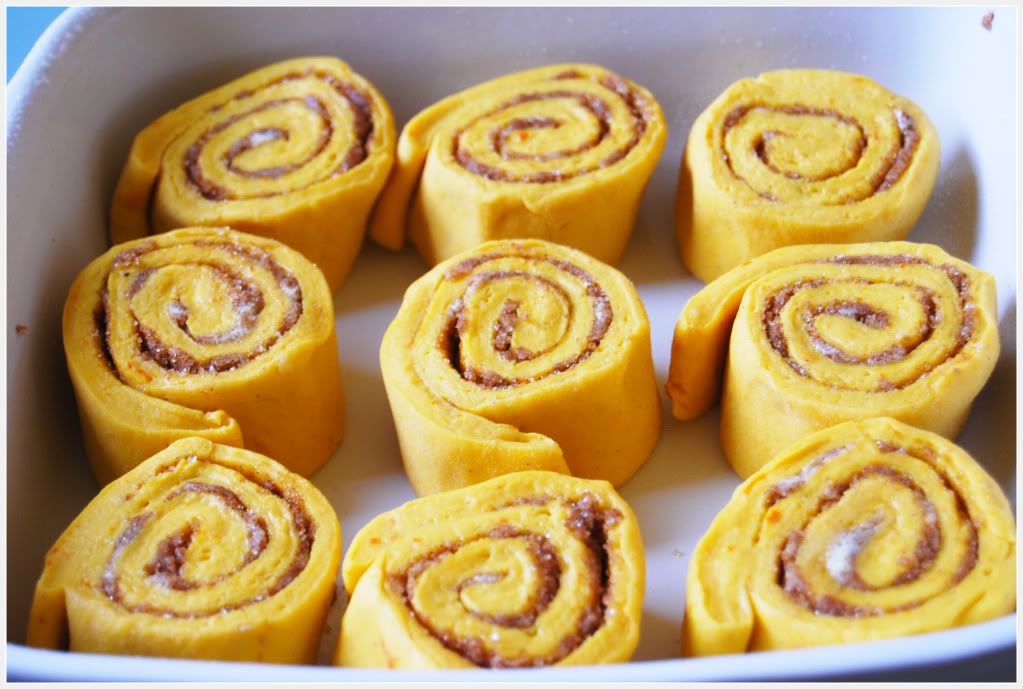
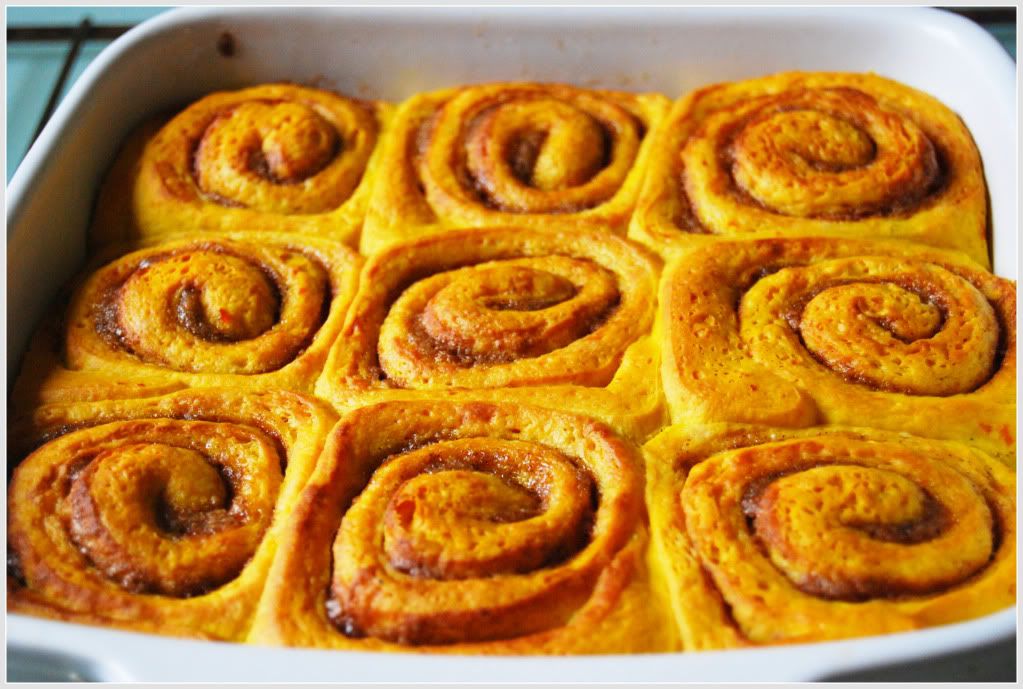
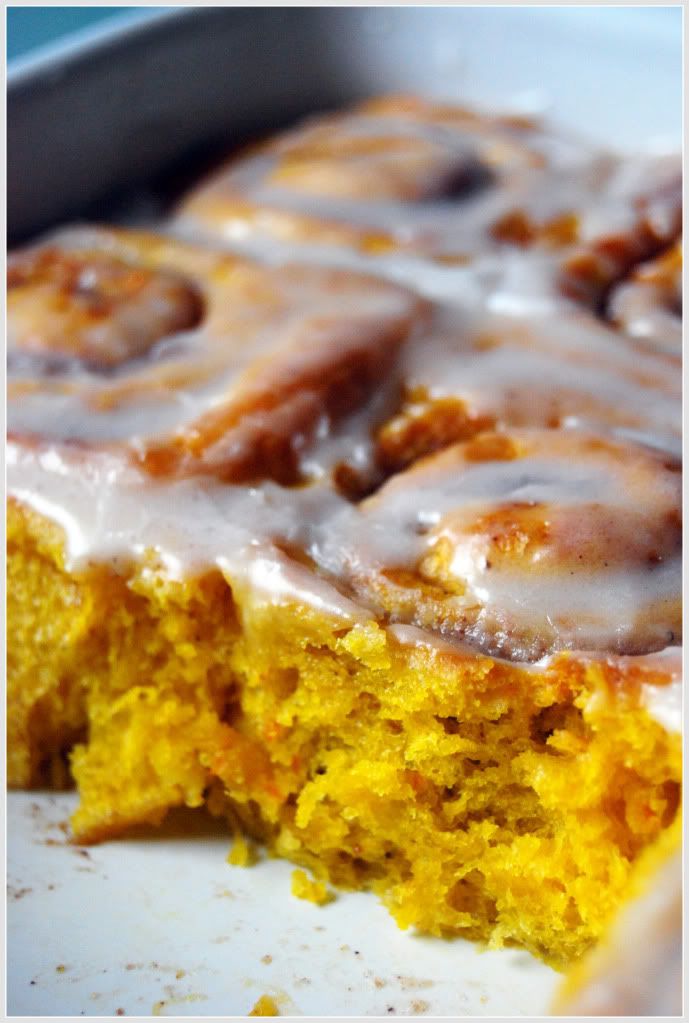
Pumpkin Cinnamon Rolls
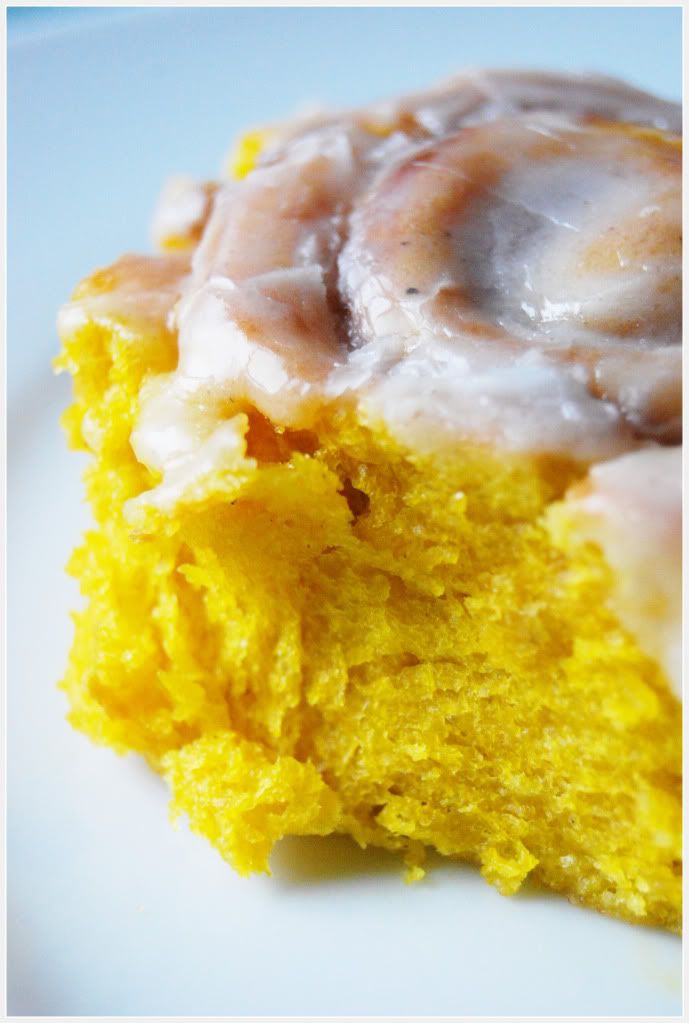
I had bookmarked this recipe from a very long time and finally i made it. These rolls turned out very moist and were full of flavor. The addition of pumpkin to the dough gave a lovely color and flavor. These pumpkin cinnamon rolls are just like the usual cinnamon rolls we make except that there is the addition of pureed pumpkin to the dough and instead of the usual cinnamon-sugar mixture sprinkled on the rolled, buttered dough, here we make a streusel using cinnamon, sugar, flour, and butter which is sprinkled on the rolled dough, rolled again into a log, cut into individual portions and then baked. The vanilla sugar glaze on top of the baked rolls gives a wonderful sweetness. Must say, i am fully satisfied with the results. It was a great tasting recipe!
Recipe adapted and slightly altered from myrecipes
Ingredients
For the buns:
1 package dry yeast (about 2 1/4 teaspoons)
1/4 cup warm water (100° to 110°)
3 cups all-purpose flour
1/2 cup Homemade Pumpkin Puree (recipe below)
1/4 cup milk
1/4 cup (57 gm) butter, melted
1 tablespoon + a pinch granulated sugar
1 1/4 teaspoons salt
1/4 teaspoon ground nutmeg
Cooking spray
For the filling:
3 tablespoons granulated sugar
3 tablespoons brown sugar
2 tablespoons all-purpose flour
1 1/2 teaspoons ground cinnamon
2 tablespoons chilled butter, cut into small pieces
For the glaze:
3/4 cup sifted powdered sugar
1 tablespoon hot water
1/4 teaspoon vanilla extract
Directions:
For the pumpkin puree:
You'll need 2 small pumpkins( i used Hokkaido)
Gives: 2 cups of pumpkin puree.
Cut the pumpkins into fourths. Remove and discard seeds and strings. Place pumpkin pieces on a baking sheet lined with aluminium foil. Bake in a preheated 180 deg C oven for 30 - 45 minutes or until tender. Cool, peel and mash it with a potato masher or by just using your hands.
Keeps well in an air tight box, in the refrigerator for 3 to 4 days , and freeze up to 3 months.
To prepare the rolls:
Dissolve yeast in warm water with a pinch of sugar in a large bowl. Let stand for 5 minutes.
Lightly spoon flour into dry measuring cups, and level with a knife. Add flour, pumpkin, milk, melted butter, 1 tbsp sugar, salt and nutmeg; beat with a mixer at medium speed until smooth. Turn dough out onto a floured surface. Knead until smooth and elastic (about 10 minutes) OR just use your hands to bring all the ingredients together and knead well to form a smooth dough.
Place the dough in a large bowl coated with cooking spray or some neutral oil, turning to coat top. Cover with a plastic wrap and let rise in a warm place (85°), free from drafts, for 45 minutes or until doubled in size. (Press two fingers into the dough. If an indentation remains, the dough has risen enough.)
For the filling:
Combine 3 tablespoons granulated sugar, brown sugar, 2 tablespoons flour, and cinnamon in a small bowl. Cut in butter with a pastry blender or 2 knives until mixture resembles coarse meal.
Punch dough down; cover and let rest for 5 minutes. Roll the dough into a 12 x 10-inch rectangle on a floured surface. Sprinkle with brown sugar mixture. Roll up the rectangle tightly, starting with a long edge, pressing firmly to eliminate air pockets; pinch seam and ends to seal. Cut roll into 12 (1-inch) slices. Place slices in a 9-inch square baking pan coated with cooking spray(9 slices fits the pan, the left 3 slices can be baked in a muffin tray).
Cover and let rise 45 minutes or until doubled in size.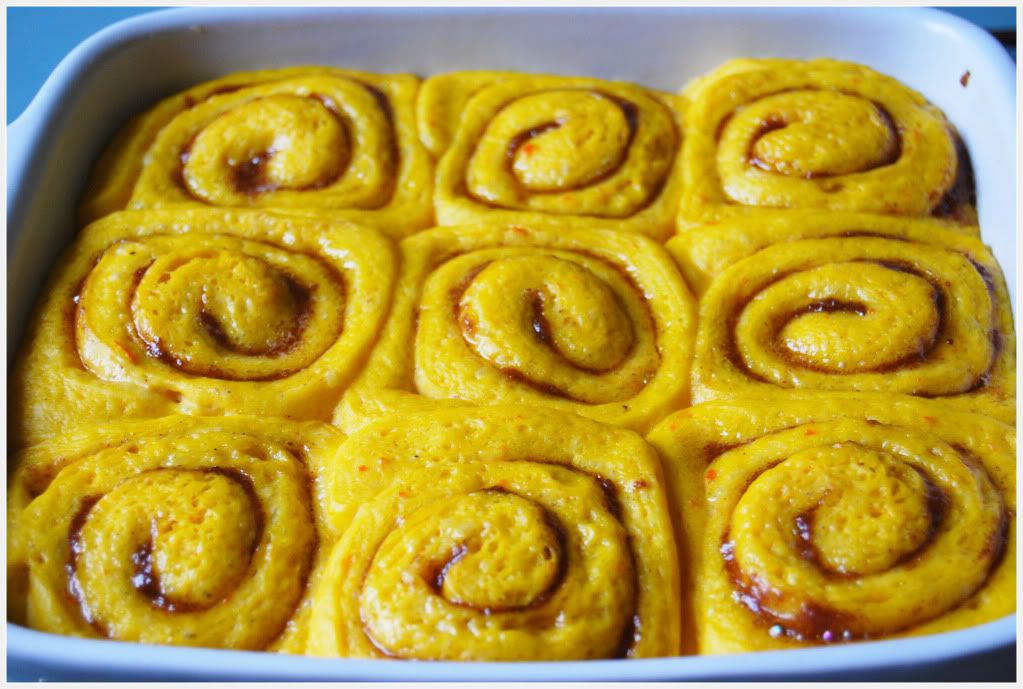
Bake the rolls at 375° for 20 minutes or until golden brown. Cool for 15 minutes in pan on a wire rack.
To prepare the glaze, combine the powdered sugar, 1 tablespoon water, and vanilla extract in a small bowl, stirring with a whisk until smooth. Drizzle glaze over buns.
Serve warm.


Tuesday, November 3, 2009
Creamy Carrot Soup
Many people think that for every bowl of smooth creamy soup on the table there's a worn-out cook in the kitchen. Cream soups are so impressive they must be difficult, right?
Wrong. Actually, this family of soup is easy to make in advance, which makes them perfect for entertaining. In fact, because they're mostly pureed, its better to make them in advance. Since creaminess often comes from a simple addition, it's really no big deal, and there is no denying their elegance.
For the recipe, you'll need the following ingredients..
3 tablespoons butter or extra virgin olive oil
1 small onion, sliced
1 pound (453 gm) (approx. 4 large) carrot, peeled and roughly chopped
1 large starchy potato, peeled and roughly chopped
Salt and freshly ground black pepper, to taste
5 cups (approx. 1 liter) vegetable stock or water
2 teaspoons sugar, or to taste (optional)
Directions:
Put the butter or oil in a large, deep saucepan over medium heat. When the butter melts or the oil is hot, add the vegetables. Season with salt and pepper and cook, stirring occasionally, for about 15 minutes, until the carrots soften a bit. Add the stock or water and cook until the vegetables are very tender, 15 to 20 minutes.
Use an immersion blender to puree the soup in the pan. Or cool the mixture slightly (hot soup is dangerous), pour it into a blender, and puree carefully until smooth, working in batches if necessary. (You may prepare the soup in advance up to this point. Cover and refrigerate for up to 2 days, and reheat before proceeding.) Adjust the seasoning; if the soup tastes flat, stir in the sugar to play up the carrot flavor.
If you're serving the soup hot, reheat it in the saucepan. If you're serving it cold, refrigerate, covered, for at least 2 hours. Either way, but i definitely prefer this soup hot. You can garnish the soup with few chopped parsley leaves or coriander leaves and serve.
Tuesday, October 27, 2009
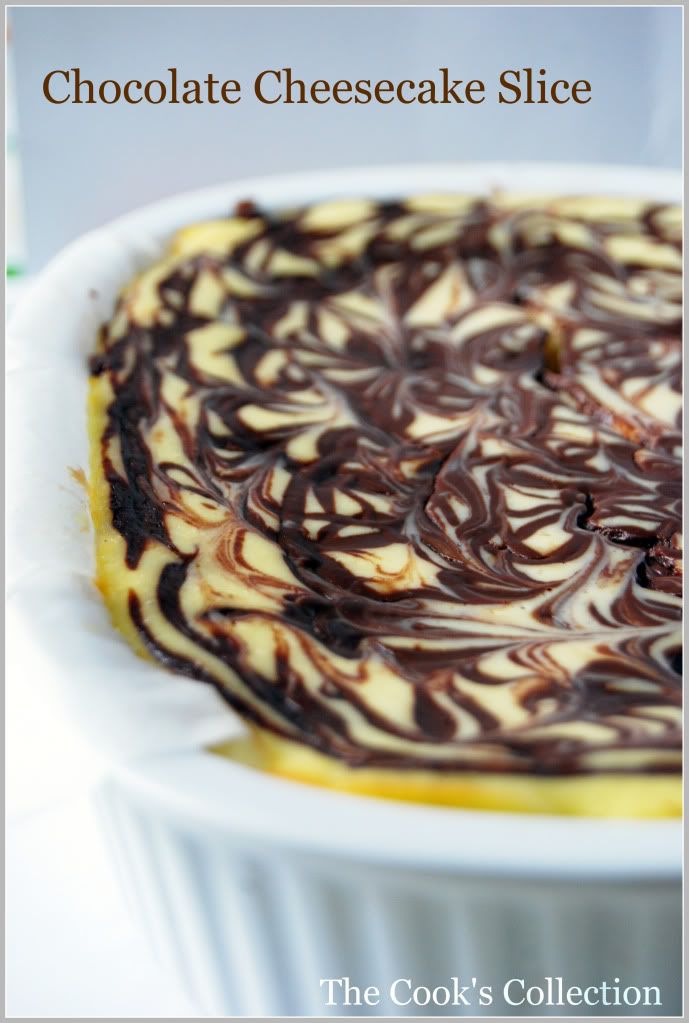
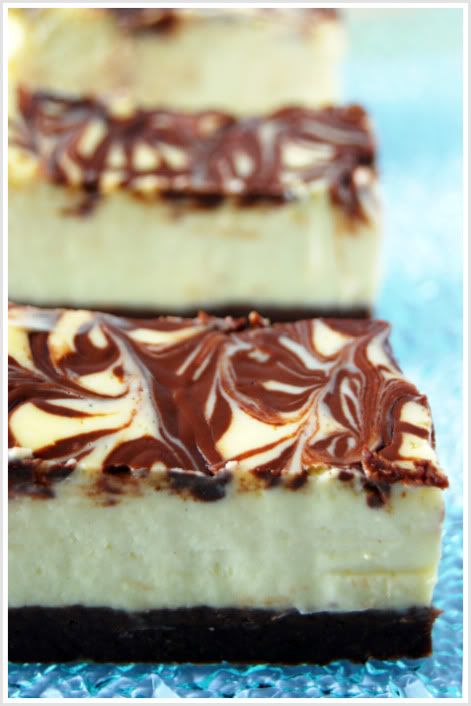
Chocolate Cheesecake Slice
This is another delicious and wickedly indulgent treat that is best cut into fingers. I decided to bake this cake as soon as i saw this recipe in the book "Fresh Baked" with a lovely picture. This recipe is very quick with very easy to follow instructions and the result is in front of you. Its got a nice chocolate base topped with a lovely satiny cheesecake layer which is again decorated with a lacy melted chocolate. Any favorite chocolate biscuits can be used for the base. I used butter biscuits coated with dark chocolate which went very well with the cheesecake layer.
Use the exact sized baking pan for the recipe mentioned as this effects the thickness of the cheesecake. I also used a weighing machine to weigh the ingredients which gave me the perfect result.
Chocolate Cheesecake Slice
from Fresh Baked
preparation time: 20 minutes
cooking time 50-60 minutes
serves: 12-16
Ingredients:
250 gm (8 oz) Chocolate biscuits (any of your favorite)
100 gm (3 1/2 oz) unsalted butter, melted
50 gm (2 oz) dark chocolate
500 gm (1 lb) cream cheese
150 ml (1/4 pint) sour cream
3 eggs (i used large)
125 gm (4 oz) caster sugar (powdered sugar)
1 teaspoon vanilla extract
Method:
Put the chocolate biscuits in a food processor and process until smooth, then stir into the melted butter until evenly combined. Lightly oil and line a 18 x 25 cm (7 x 10 inch) cake tin with baking paper, allowing the paper to overhang the edges. Spoon the mixture into the prepared tin and spread flat. Chill while preparing the topping.
Put the chocolate in a bowl set over a pan of gently simmering water (do not let the bowl touch the water) and stir until it has melted. Keep warm. [If the chocolate turns too thick, add few teaspoons of sour cream to slightly liquidity it so that it would be easy to drizzle over the cheesecake layer. I filled this chocolate - sour cream mixture into a small zip lock cover. Made a small hole in the corner and this ended up with a very clean , hazel free drizzle.]
Put the cream cheese, sour cream, eggs, sugar and vanilla extract in a clean bowl and, using an electric beaters, beat together until smooth. Pour into the tin and drizzle over the melted chocolate, using a skewer to create a swirling pattern over the creamed mixture.
Bake in a preheated oven 150 deg C (300 deg F), Gas Mark 2, FOR 50 - 60 minutes until the mixture is firm, remove from the oven and leave to cool. Chill for 1 hour, then carefully remove the cheesecake from the tin and cut it into fingers.
Enjoy with a cup of hot coffee!
Saturday, October 17, 2009
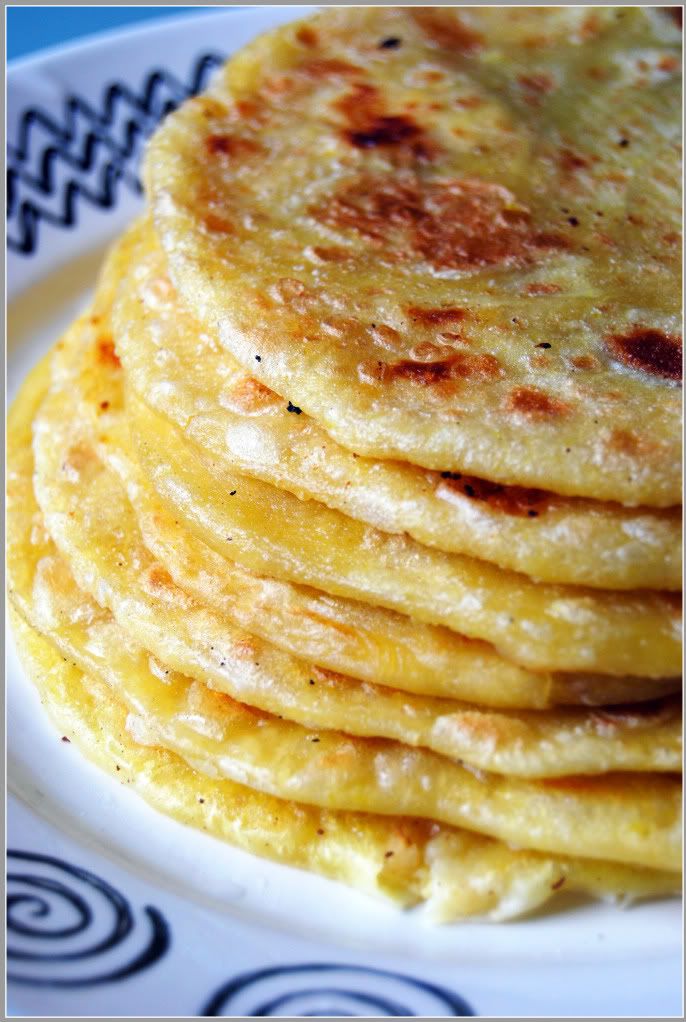
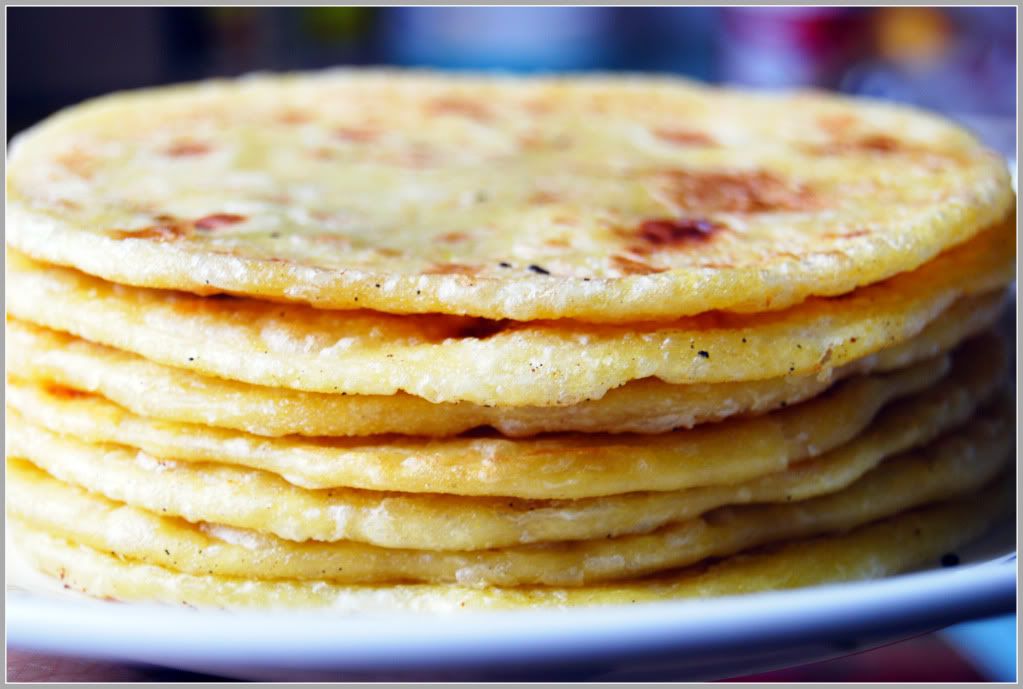
Puran Poli
Puran poli is one very popular Indian festival sweet dish. Its basically a soft dough filled with a sweet lentil mixture , rolled and fried. Puran poli usually uses jaggery as the sweetner but here i've used sweetened condensed milk which gives a lovely milky sweetness.
I made this dish for the diwali festival, a festival of lights. I also wish all my Indian readers a very happy and safe diwali.
Now for the recipe you'll need..

200 gms All purpose flour (maida)
3 tbsps fine semolina
1 tbsp rice flour
pinch of turmeric
pinch of salt
200gms (2 cups) raw chana dal
1 tin (400gms) Sweetened condensed milk (milkmaid)
water for dough
Directions:
For the puran mixture:
Wash and cook chana dal in a pressure cooker with 4 cups of water. Give 4 whistles and let the steam escape before you take off the lid. Let it cool. Drain the water completely.
Grind the chana cal to make a thick paste. Transfer the paste to a non-stick pan. Add the sweetened condensed milk and cardamom powder and cook till the mixture starts leaving the sides of the pan. Keep aside. This is the puran mixture.
To make the dough:
Combine all purpose flour, semolina, rice flour, turmeric, a pinch of salt with enough water to form a soft pliable dough.
Divide the dough into 10 equal parts. Also divide the puran mixture into 10 equal parts.
Using a rolling pin, roll the dough into a small disc, stuff each rolled disc with the puran mixture, enclose the stuffing with the dough from all the sides and flatten it lightly with both your palm. Now place this stuffed dough on a lightly floured work surface and roll it again to form a little larger discs. Use as much little extra flour required for rolling. This helps the dough to move easily on the counter.
Preheat a non stick pan or tawa. Place each rolled disc one at a time and fry each side by brushing little ghee or oil on both the sides till golden brown spots are formed on the surface. Follow the same with all the remaining dough and puran stuffing.
Serve hot or warm with a spoonful of ghee on top.
Tuesday, October 13, 2009
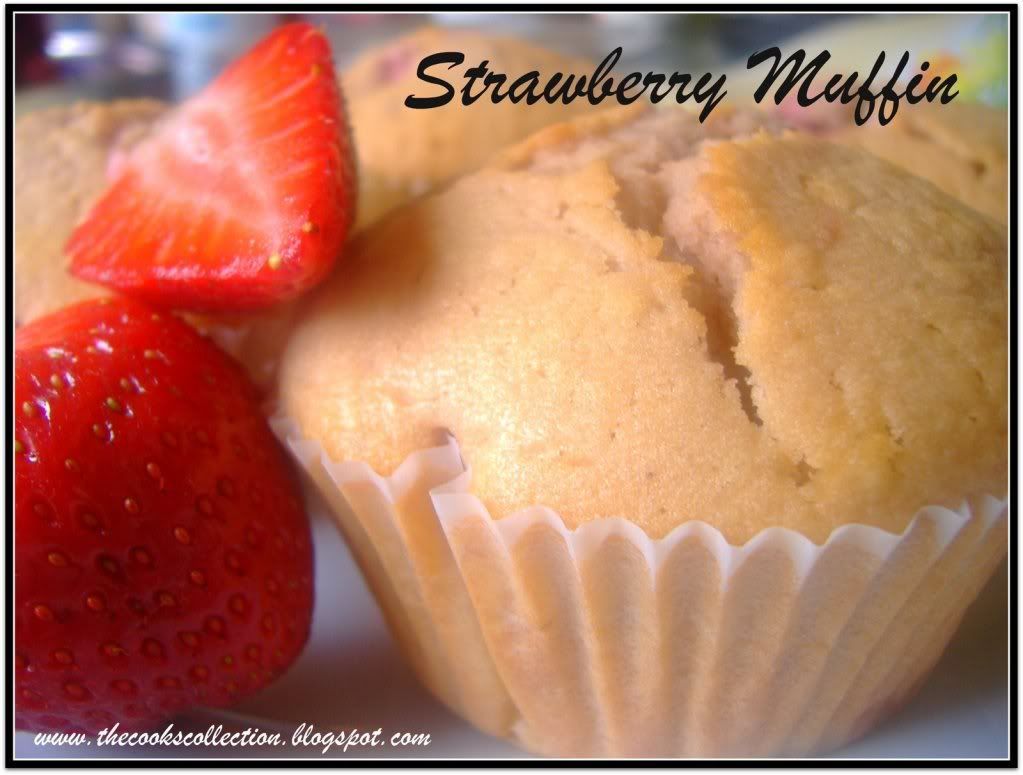
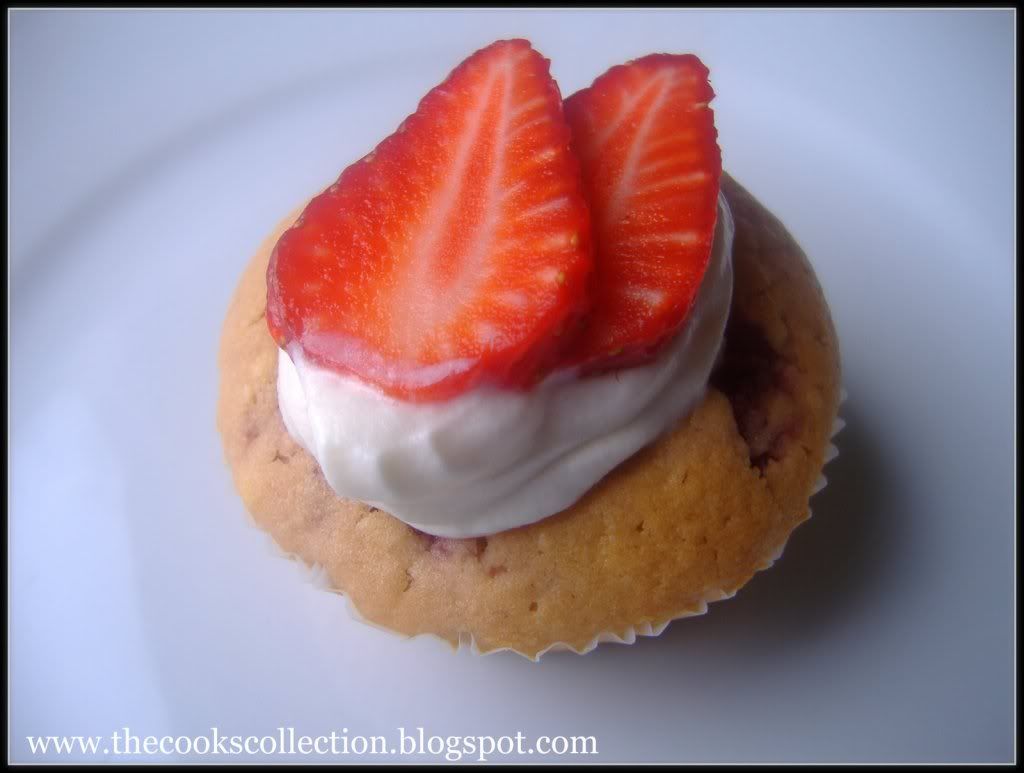
Strawberry Muffins With Cream
Muffins belongs to the 'quick bread' family as indeed it takes hardly few minutes to prepare and bake and the results are yummy and tasty. Strawberry muffins are the ultimate thing to bake when you have strawberry's left out in the kitchen. These muffins are moist, not too much of sweet and can serve as a great treat for your guests or for yourself. Any berry, be it, blueberry or raspberry can be substituted for strawberry's. These studded berry's with every bite give a lovely tangy taste with the cake like crumble. Hmm.. it tastes yummy!
Ingredients:
Oil or melted butter to grease the muffin pans or use muffin papers
150 gm Strawberry's (around 6 medium sized), finely chopped
280 gm All purpose Flour
3 tsp Baking Powder
1/8 tsp Salt
120 gm Sugar
2 large Eggs
250 gm Whipping Cream
6 Tbsp Sunflower oil OR 90 gm Butter, melted and cooled
5 drops Vanilla Aroma
To decorate:
125 gms Creme double
12 small strawberry's
Procedure:
Preheat the oven to 200 deg C. Position rack in center of oven. Line the muffin pan with paper liners or grease with butter or a vegetable spray. Set aside.
In another large bowl, sieve the flour, baking powder, salt and set aside. Stir in the strawberry's and sugar.
Lightly beat the eggs in another bowl. Add in the whipping cream, sunflower oil and vanilla aroma.
Make a well in the center of the dry ingredients. Add the wet ingredients to the dry ingredients and stir only until the ingredients are just combined. Do not over mix the batter or the muffins might turn tough.
Fill each muffin cup about two thirds full of batter, using two spoons or an ice cream scoop.
Bake for 20 minutes or until the muffins have turned golden brown and spring back with a touch.
Let the muffins stay in the pan for 5 minutes. Remove and cool completely on a wire rack.
Whip creme double until stiff with a little confectioners sugar if desired and spread it on the cooled muffins and decorate with the whole or sliced strawberry's.
Refrigerate until u serve. Serve chilled or at room temperature without the cream.
Wednesday, October 7, 2009
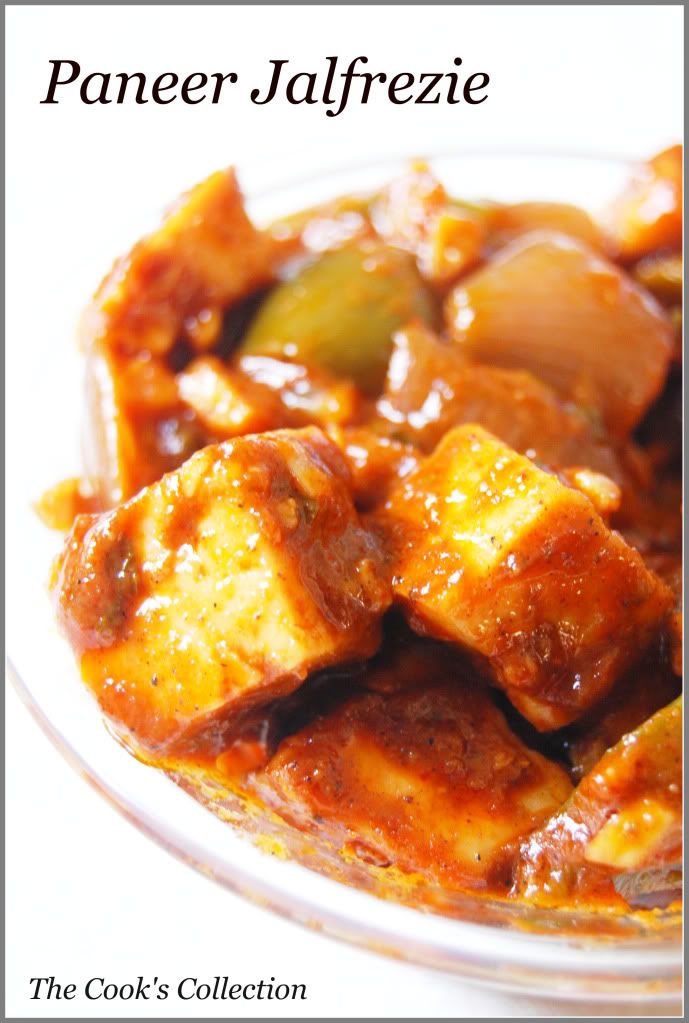
Paneer Jalfrezie (Creamy Cheese with Red Onion and Bell Peppers)
The word Jalfrezie, a coined term that originated in Indian restaurents catering to the English, has come to mean many things. Some associate it with "chiles-hot," while to others it indicates the inclusion of bell peppers and onions as key ingredient that contribute to the curry's gusto. So this recipe is an old English favorite curry.
Serves 6
Ingredients:
2 tbsps oil
1 large red onion, cut into 1-inch cubes
1 medium-size green bell pepper, stemmed, seeded, and cut into 1-inch pieces
6 large cloves garlic, finely chopped
2 tbsps finely chopped fresh ginger
1/2 cup tomato sauce, canned or homemade
1 tbsp Balti Masala
1 tsp salt
2 tbsps finely chopped fresh cilantro leaves and tender stems
8 ounce Paneer, cut into 1-inch cubes
Directions:
Heat the oil in a wok, or a large skillet over medium-high heat. Add the onion, bell pepper, garlic, and ginger, and stir fry until the onion is light brown around the edges, 3 to 5 minutes.
Stir in the tomato sauce, balti masala, and salt. Reduce the heat to medium and simmer, uncovered, stirring occasionally, until a bit of oil starts to form on the surface and sround the edges, 5 to 8 minutes.
Stir in 1 cup of water and the cilantro. (The water thins the curry to accommodate the cheese.)
Gently fold in the paneer, raise the heat to medium-high, and simmer, uncovered, stirring every so often, until the sauce starts to thicken, 10-12 minutes. Then serve.
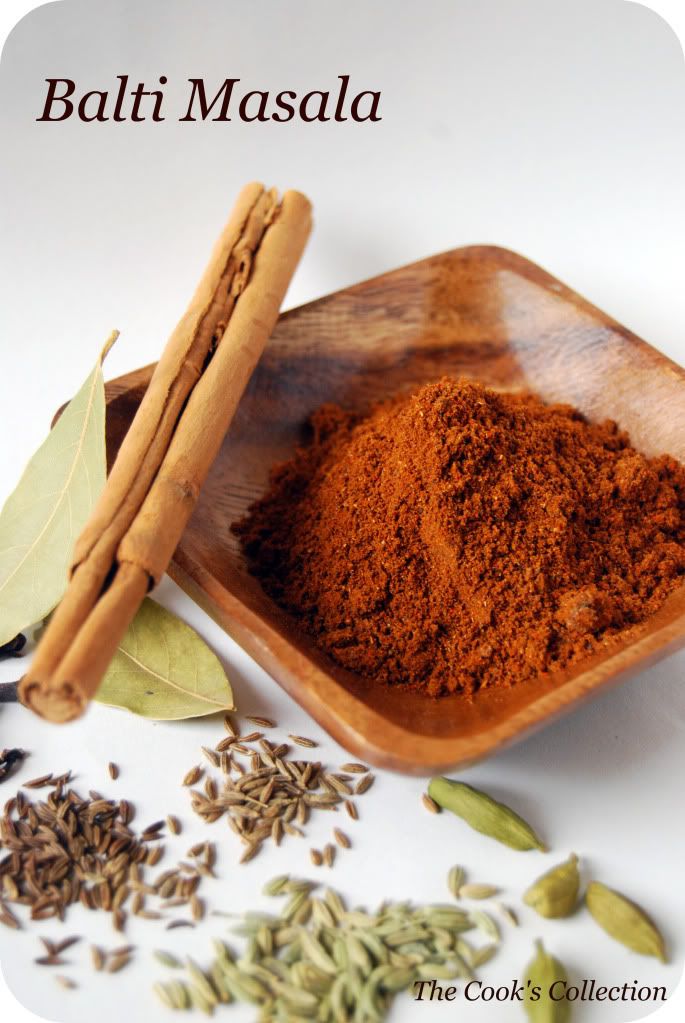
Balti Masala (Fennel-Flavored Toasted Spice Blend)
A Hindi/Urdu word for "bucket" is balti and here it's not a vessel for cooking. This is a coined terminology that originated with an enterprising Pakistani restaurant owner in Birmingham, England, and ended up back in restaurants in India. The food is actually cooked and served in a karhai, not a bucket: a karhai is the Indian version of the wok. Wherever it came from, some of the spices used in this blend are typical in Pakistani cooking. This blend can also be substituted for Kashmiri garam masala for equally satisfying results.
Makes 1/3 cup
Ingredients:
2 tsps fennel seeds
2 tsps coriander seeds
1 tsp cumin seeds
1 tsp mustard seeds
1/2 tsp whole cloves
1/2 tsp nigella seeds
3 fresh or dried bay leaves
2 cinnamon sticks (each 30inches long), broken into small pieces
2 tsp cayenne (ground red pepper) or can substitute red chilli powder
1/2 tsp ground nutmeg
Directions:
Preheat a small skillet over medium-high heat. Add all the whole spices (reserving the cayenne and nutmeg), and toast, shaking the skillet every few seconds, until the fennel, coriander, and cumin turn reddish brown, the mustard, cloves and bay leaves appear brittle and crinkly, and the mixture is highly fragrant, 1 to2 minutes. (The nigella will not change color.)
Immediately transfer the nutty smelling spices to a plate to cool. (The longer they sit in the hot skillet, the more likely it is that they will burn, making them bitter and unpalatable.) Once they are cool to the touch, place them in a spice grinder or coffee grinder, and grind until the texture resembles ground black pepper. (If you don't allow the spice to cool, the ground blend will acquire unwanted moisture from the heat making the final blend slightly "Cakey".) The ground blend will be a deep reddish brown and the aroma will be sweet and complex, very different from those of the pre-toasted or post-toasted whole spices. Stir in the cayenne and nutmeg.
Store the mix in a tightly sealed container, away from excess light, heat and humidity, for up to 2 months. (Also refrigerating the blend adversely affects its flavors.)