
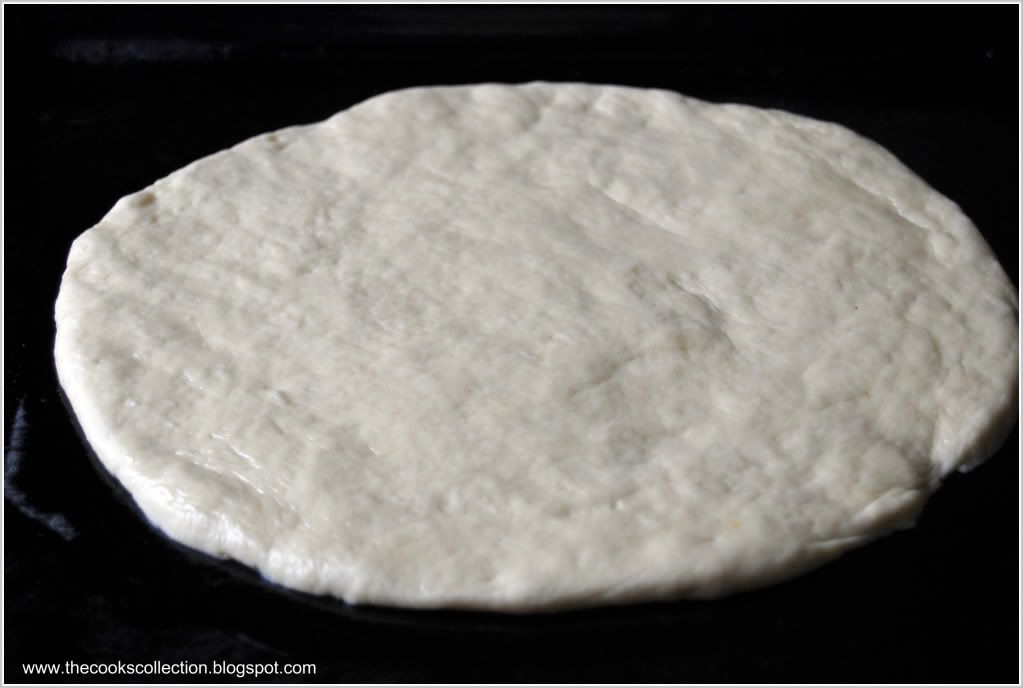
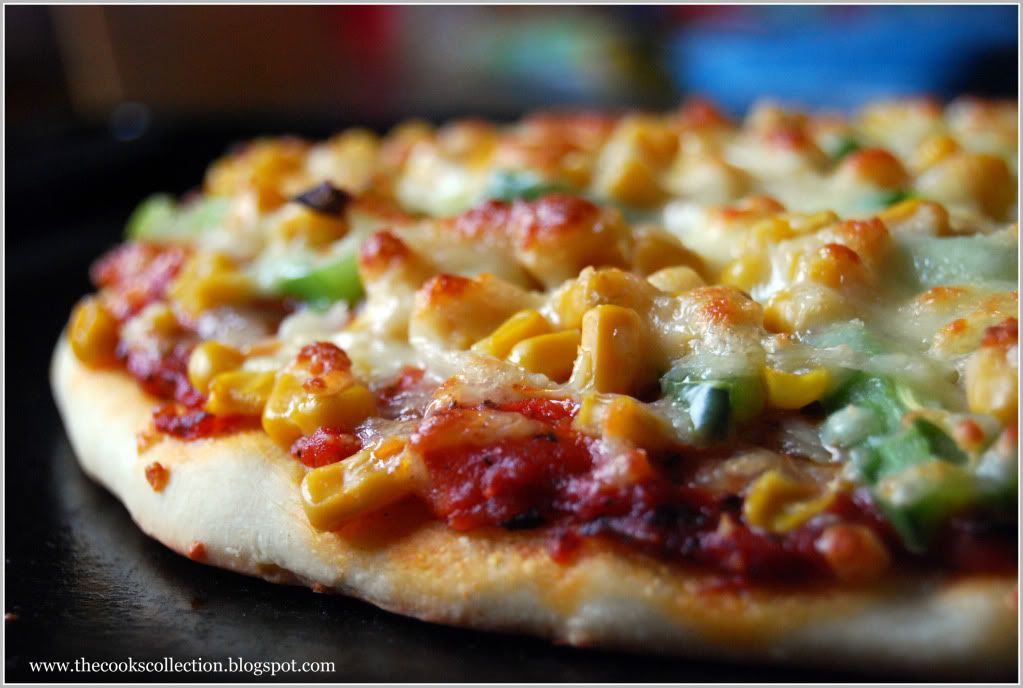
A hot oven, a preheated pizza stone or baking sheet and a well- floured wooden board for sliding the pizza dough into the oven, all help to produce an authentic, crisp-based pizza. To make a thicker, soft crust for a hearty pizza, use the entire 1 quantity pizza dough in the recipe below and spread it on to a baking sheet using greased hands. Try not to spread too much and keep the thickness of the dough to about 3/4th of an inch. If you want a thin crispy crust, just halve the 1 quantity pizza dough recipe and spread it a little thin about 1/4th of an inch or even less if possible. Load with your favorite toppings, also try not to overload with too many toppings. Keep it as minimal as possible.
Also the base for all the toppings, the chunky pizza sauce blends wonderfully with the other topping ingredients. You can even double the sauce recipe as it can be used along with spaghetti or noodles as well and it even stores well in an air tight container in the refrigerator for up to 3 to 4 days and even freezes well for up to a month.
This is the best pizza recipe i have ever come across. Its got the perfect crust(i like a soft thick crust) just like the pan pizzas you get in pizza hut. And now lets go for the recipe..
Serves 2
Ingredients:
1 quantity basic pizza dough
For the pizza sauce:
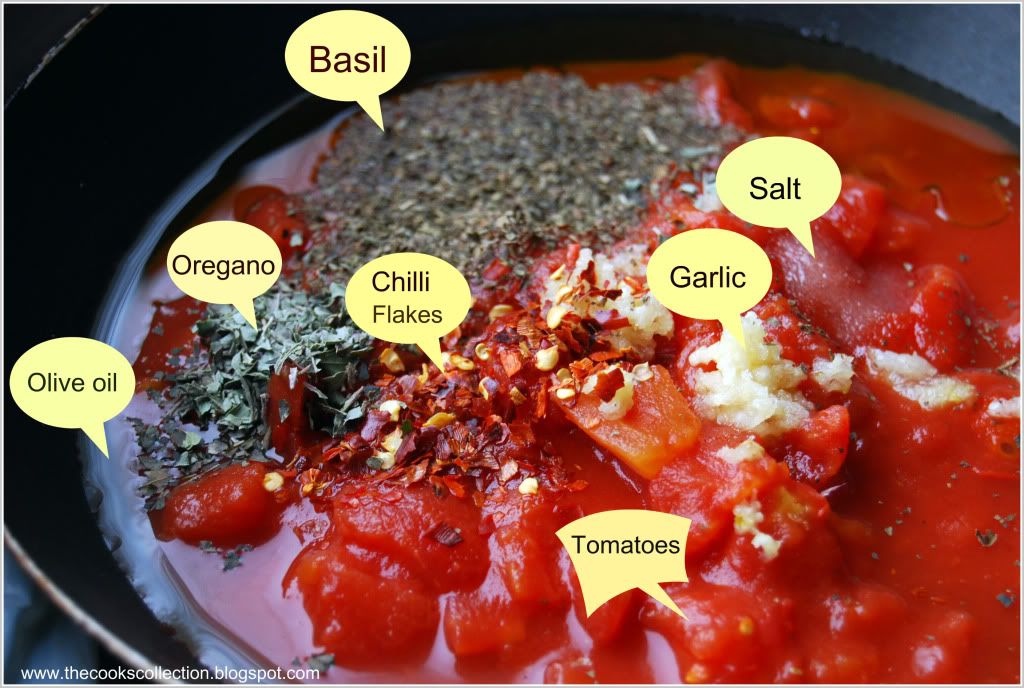
400 g (13 oz) can chopped tomatoes or can use fresh tomatoes instead
1 garlic clove, crushed
2 tablespoons extra virgin olive oil, plus extra to drizzle
2 tablespoons chopped fresh basil or 1/2 tablespoon dried basil
1/2 teaspoon caster sugar
1/4 teaspoon dried red chilli flakes
1 teaspoons dried oregano
salt and pepper to taste
Other toppings: These are my favorite toppings but you can choose any of your favorites.
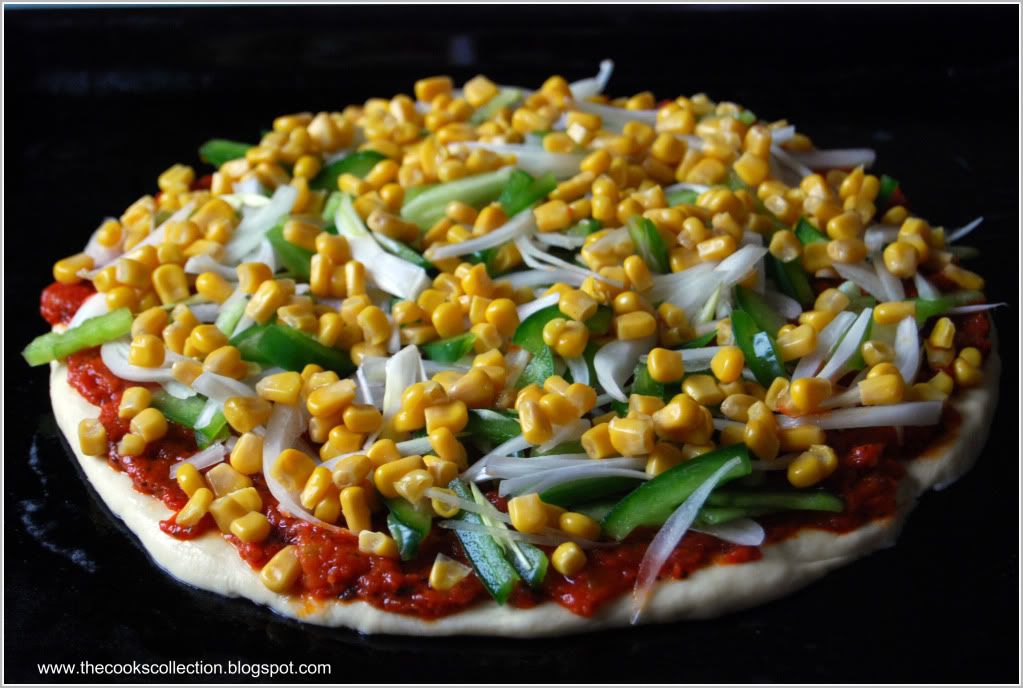
2 Capsicums, thinly sliced, any color of your choice
1 onion, thinly sliced
125 g canned sweet corn
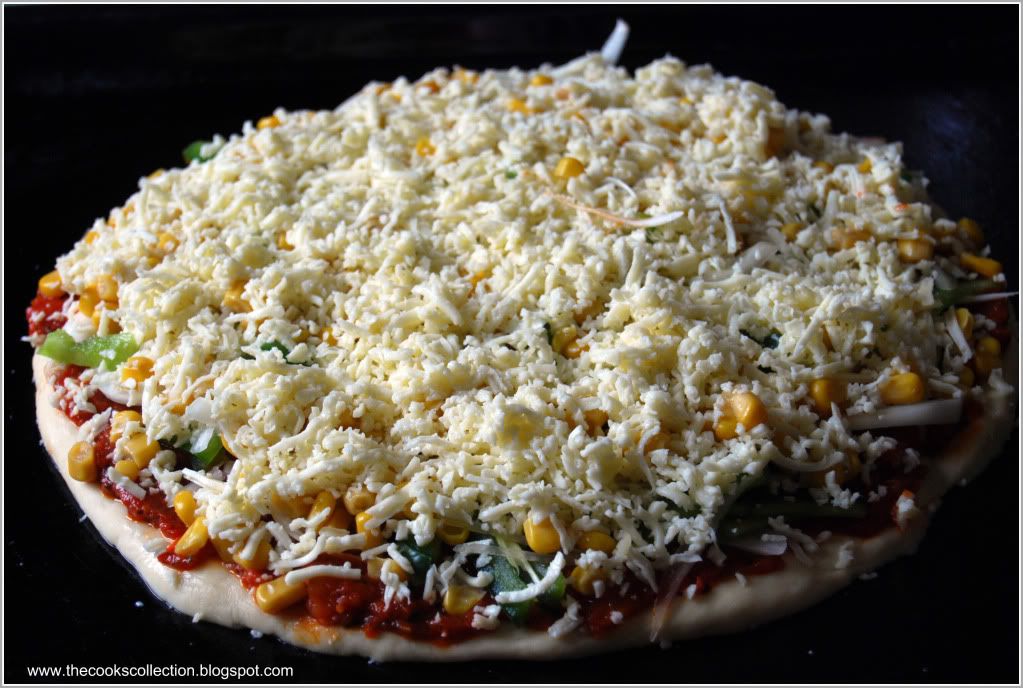
150 g (5 oz) mozarella cheese, grated
Method:
Make the pizza dough
Meanwhile, make the pizza sauce. Put the tomatoes, garlic, oil, basil, sugar, chilli flakes and some salt and pepper in a saucepan. Bring to the boil and simmer gently for 25 - 30 minutes until thickened. Adjust the seasoning and transfer to a bowl to cool.
Turn out the risen dough on to a lightly floured surface. Divide the dough in half and roll out one piece thinly to a 30 cm (12 inch) round or make just one big pizza. Put it on a well-floured wooden board.
Top the dough with half the pizza sauce, capsicum, onion, corn and mozzarella. Drizzle with a little oil.
Carefully slide the pizza on to a preheated pizza stone or baking sheet and bake on the middle shelf of a preheated oven, at least 230 deg C (450 deg F), Gas mark 8 or hotter if possible, for 10 to 12 minutes until the base is crisp and the topping is bubbling and golden. Repeat to make a second pizza.
Serve hot. Enjoy!
Sunday, January 24, 2010
Vegetable Pizza




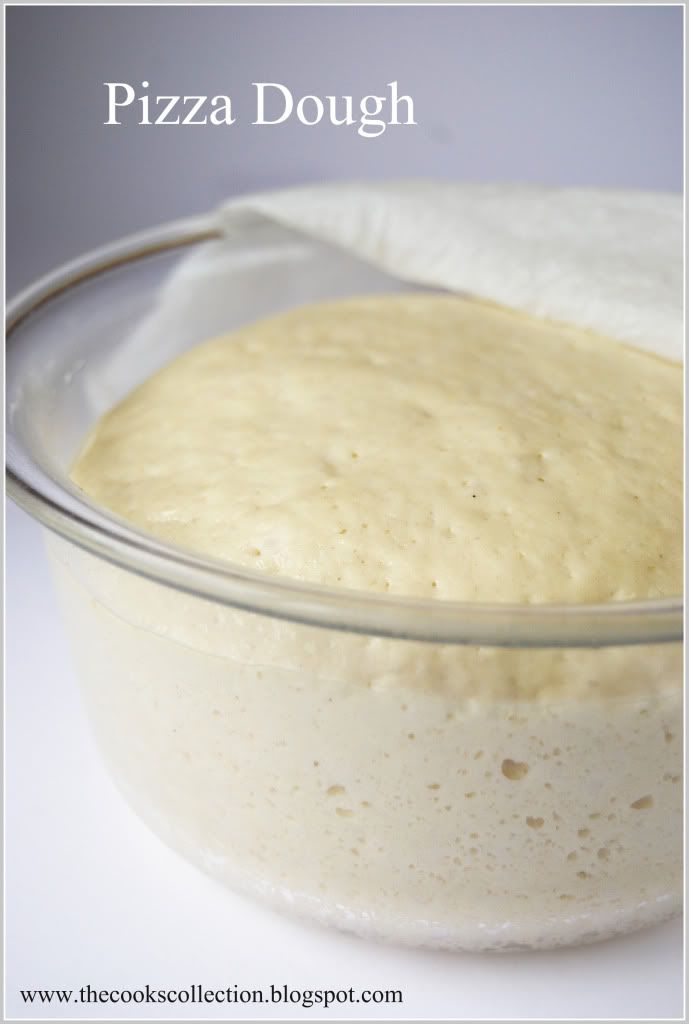
Basic pizza dough
This simple bread dough makes the perfect crust for pizzas, and this recipe is sufficient for 2 medium-sized pizzas.
Makes dough for 2 x 30 cm (12 inch) thin pizza bases or 1 (11 inch) thick pizza base
Ingredients
2 cups, 250 g (8oz) White bread flour or all purpose flour
1 teaspoon fast-acting yeast
1 teaspoon salt
1/2 teaspoon sugar
150 ml (1/4 pint) warm water
1 tablespoon extra virgin olive oil
Method
Sift the flour into the bowl of a food mixer and stir in the yeast, salt and sugar. Add the water and oil, set the mixer to low and work the ingredients until they just come together. Increase the speed and knead the dough for 8 - 10 minutes until smooth and elastic.
Shape the dough into a ball and put in a lightly oiled bowl. Cover with cling form and leave to rise in a warm place for 1 hour until the dough has doubled in size. Transfer the risen dough to a lightly floured surface and knock out the air. Use as required.
Note: To make the dough by hand sift the flour and salt into a bowl. Add the sugar then make a well in the center and add the frothed yeast, water and oil. Using your hands, gradually work the ingredients together to form a soft dough. Turn out the dough on to a lightly floured surface and knead for 8 - 10 minutes until it is smooth and elastic. Continue as above.
Wednesday, January 13, 2010
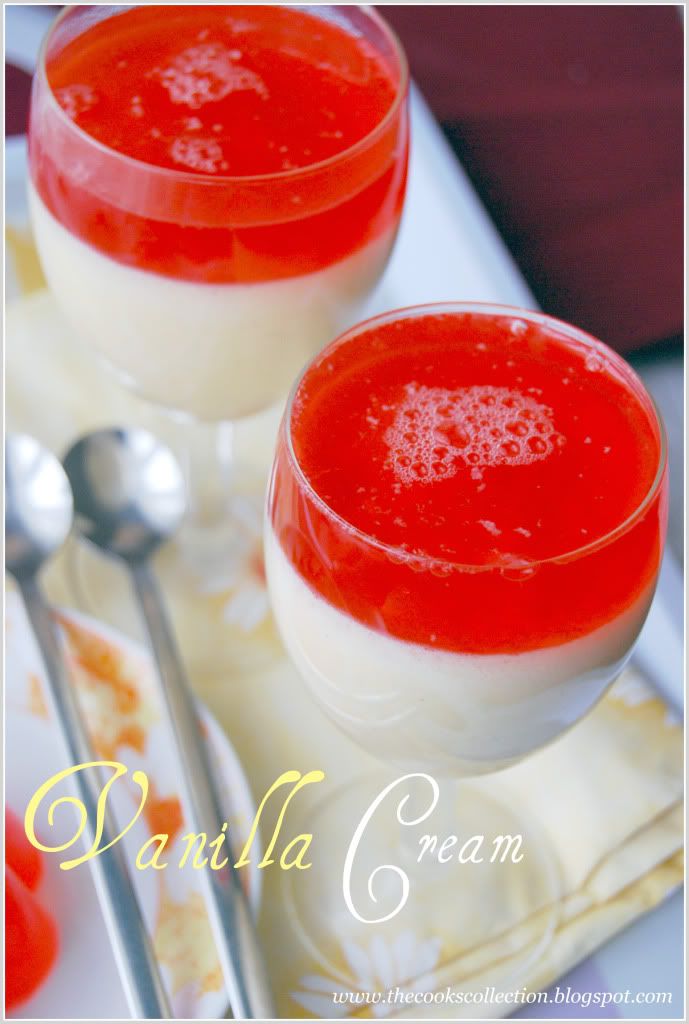
Bayerische Creme ( Bavarian cream with Raspberry jelly )
Bayerische Creme is a classic rich and creamy German dessert. It is basically vanilla cream, thickened with gelatine, whipped cream, and egg yolks. It is similar to flour or cornstarch thickened crème pâtissière but thickened with gelatin instead. It is lightened with whipped cream when on the edge of setting up, before being molded, for a true Bavarian cream is usually filled into a fluted mold chilled until firm, then turned out onto a serving plate.
Little about Vanilla : The name vanilla derives from the Spanish word "vainilla", little pod. Vanilla is an Evergreen annual creeper plant from genus of orchid plants which flourish in tropical and subtropical climate. Vanilla is the only type of Orchid which contributes to the human diet. The plant originally comes from Mexico and Central America. Today's areas of vanilla are situated in the tropical Island Madagascar, the Comoros, Reunion and other tropical areas along the Indian Ocean. From over one hundred Types of vanilla, only fifteen are interestingly aromatic and only three are suitable for the manufacture of vanilla. The special aroma of vanilla is formed from 35 other substances along with vanillin and glucose. This aroma is achieved only after a very intensive working process where a fermentation is achieved by drying and sweating. And finally, the pods contain a maximum of just 3 % of vanillin.
Vanilla is the second most expensive spice after saffron, due to the extensive labor required to grow the vanilla seed pods. Despite the expense, it is highly valued for its flavor, which author Frederic Rosengarten, Jr. described in The Book of Spices as "pure, spicy, and delicate" and its complex floral aroma depicted as a "peculiar bouquet." Despite its high cost, vanilla is widely used in both commercial and domestic baking, perfume manufacture and aromatherapy.
Now with the recipe..
Recipe Serves : 6
Ingredients Required:
500 ml milk
100 g sugar
6 egg yolks
1 vanilla pod
200 g whipping cream
4 gelatin sheets
1 packet raspberry jelly (optional)
Directions:
Soak the gelatin sheets in a bowl of cold water for 5 minutes and let it soften.
Cut the vanilla pod lengthwise and scrap the seeds using the sharp end of the knife. In a saucepan, combine milk and the pod along with the seeds and simmer them together over low-to-medium heat for about ten minutes. Don't allow to scald or boil!. Take the pan off the heat and let the vanilla get infused into the milk for a while.
Meanwhile, beat the yolks and sugar together using a hand mixer till pale and fluffy.
Slowly add warm vanilla-milk into the yolk mixture and combine using a whisk. Add this vanilla milk-yolk mixture back into the saucepan and simmer on low heat till the mixture thickens, and cook until the mixture is thick enough to coat the back of a spoon. Take it off the heat.
Now take the gelatin out of the cold water, squeeze and add it to the hot vanilla custard, whisking well to combine. And let this custard cool completely.
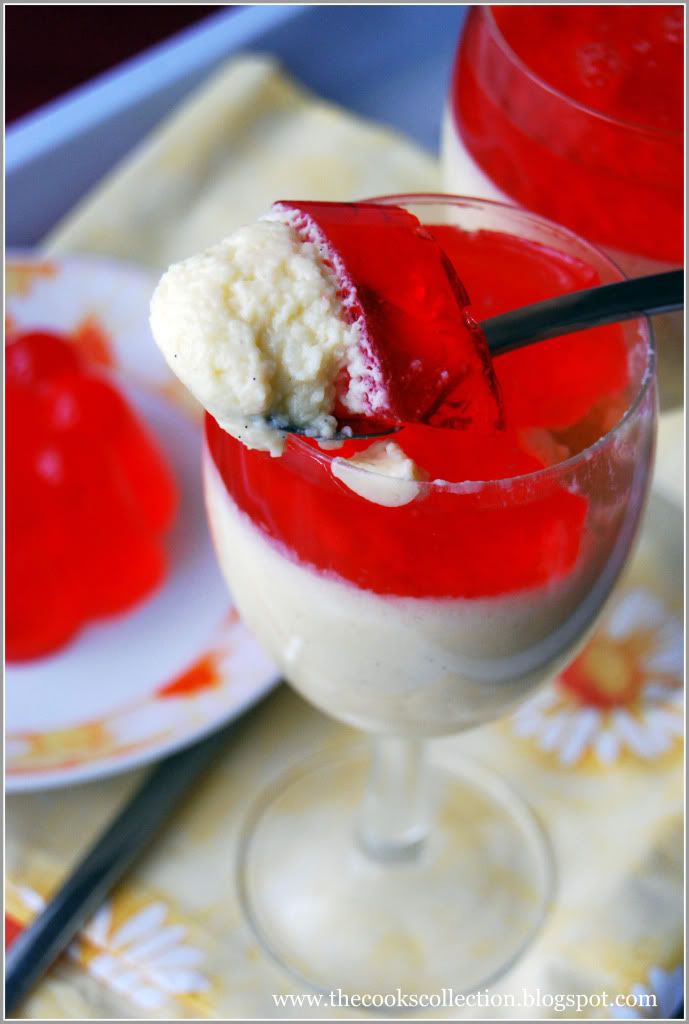
Beat the cream along with 3 tablespoons of sugar until stiff and fold this into the cooled custard. Pour this mixture into individual wine glasses and refrigerate until to set.
Use raspberry jelly according to the instructions on the packet and pour it on to the fully set vanilla cream. Or you can simply use any fruit purees on top of the cream.
The cream even tastes delicious with or without any fruits.
So enjoy this awesome dessert.
Tuesday, January 5, 2010
Black Forest Brownies
First and foremost, i wish all my readers a very happy and a prosperous new year 2010!! Hope you all had a great time spending long holidays with family and friends with loads of good food.. I hope to bring you all good food and some good photography this year..
My first post this year are one of my favorites "Brownies".
I remember i had a good large black forest cake last year in Black forest. It was filled with cherries and cream.. It was simply delicious. The black forest brownies here use the same ingredients that are used in the famous "black forest cake" , except that they turn fudgy and gooey instead of cakey and creamy. Sour cherries, kirsch and chocolate are a known tested and tried combination. But for this recipe they all combine together to give a wonderful tasting brownie, which serves as a great dessert for all the brownie lovers out there. To make this brownie alcohol free, you can add the canned cherry syrup instead of kirsch. This brownie tastes extra special with some sweetened whipped cream. So do try this yummy treat!!
Recipe adapted from Brownies, einfach schokoladig. This is a great book with wonderful Brownie and Blondie recipes. Simple, yet delicious recipes.
I got this book on my hubby's birthday. I know, i should be presenting him with something on his birthday but in turn i got this book from him that day. I'm so lucky.. ain't i?? I recommend this book for people who are crazy about trying different kinds of brownies and blondies.. Till now, i've tried 4 recipes from that book and not one have disappointed me. All were a hit! Its the best book of brownies i've got. And yes, fyi, its a German book.
Recipe gives 12 big or 24 small brownies.
Ingredients:
225 g milk chocolate, chopped (Use dark chocolate, if you like more intense chocolate flavor)
125 g butter, cut into cubes
3 tbsp cream
3 eggs, large
225 g fine sugar
2 tbsp kirsch or syrup from the canned cherries
160 g all purpose flour
100 g dark chocolate, chopped, or 100 g chocolate chips
465 g canned or glass sour cherries, (drained weight 175 g)[Can add more, as per your taste]
powdered sugar to sprinkle
1 Brownie form (20 x 25 cm) greased and lined with a baking paper
Directions:
Preheat the oven to 180 deg C.
Combine milk chocolate, butter and cream in a small bowl and melt using a double boiler (place the bowl over another bowl with a simmering water). See that the bowl with the chocolate doesn't touch the water. Once everything melts together, take it out and let cool.
Beat the eggs in another bowl using a wooden spoon or a hand mixer until combined. Add in the sugar and kirsch and beat together until the mixture thickens a little bit.
Add in the melted chocolate-butter mixture.
Add flour in small batches and combine with a wooden spoon. Add the chocolate chips or chopped chocolate. Combine well.
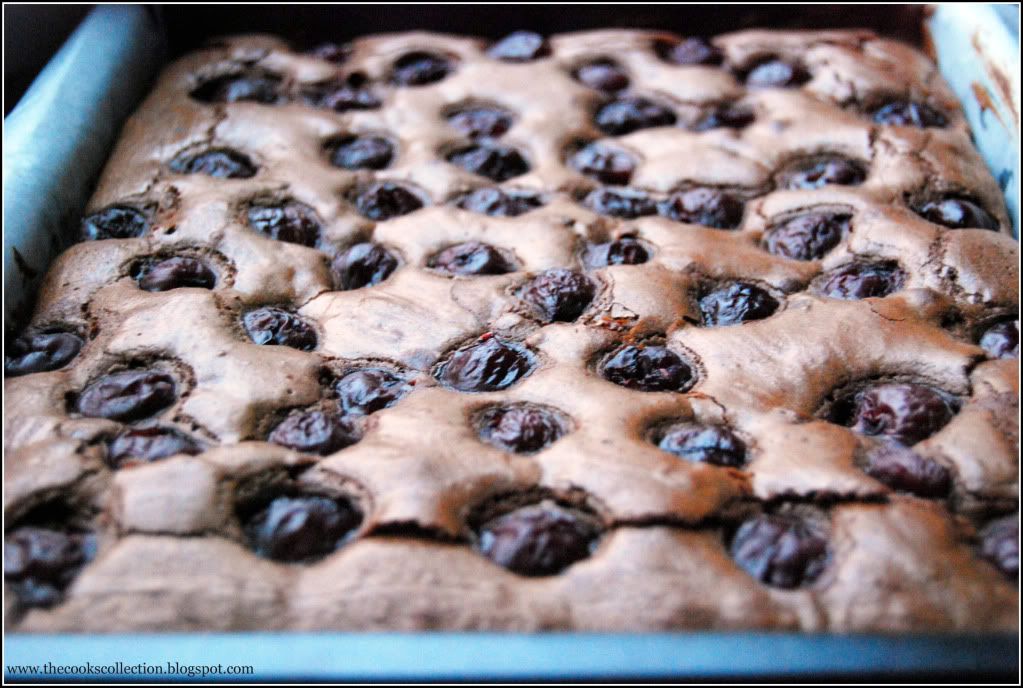
Spread the batter evenly into the prepared pan and place the cherries on the batter evenly.
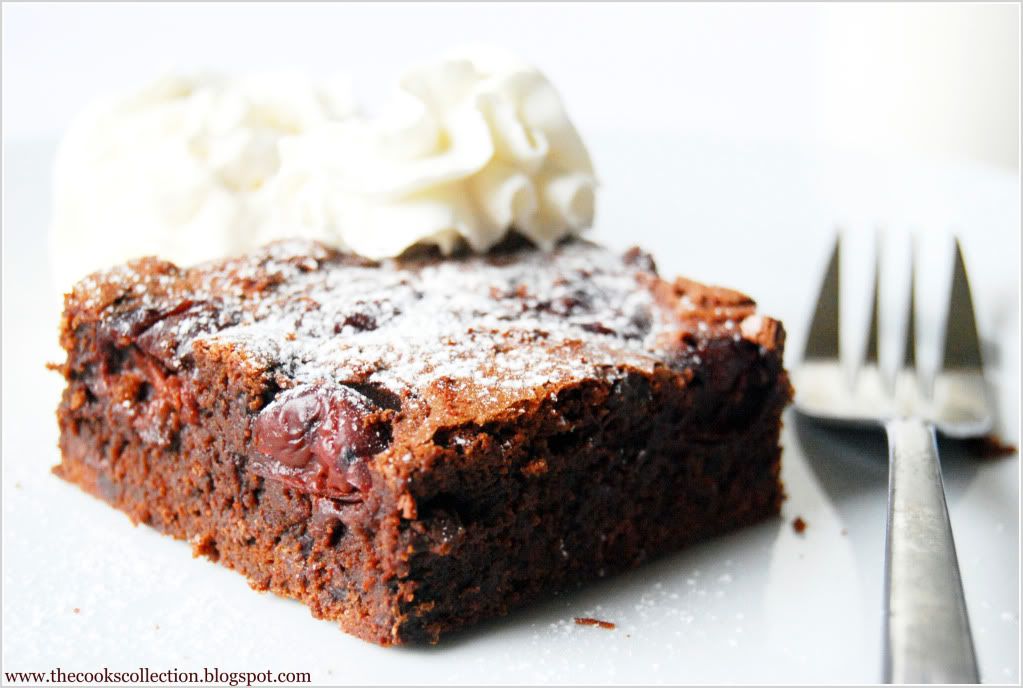
Cut the brownie into 12 equal portions.
Serve the brownies with some powdered sugar sprinkled on it.
Storage: The brownie stays well in an air tight container at room temperature for up to 4 days.


Sunday, December 27, 2009
Gingerbread House
Daring Bakers December Challenge 2009
The December 2009 Daring Bakers’ challenge was brought to you by Anna of Very Small Anna and Y of Lemonpi. They chose to challenge Daring Bakers’ everywhere to bake and assemble a gingerbread house from scratch. They chose recipes from Good Housekeeping and from The Great Scandinavian Baking Book as the challenge recipes.
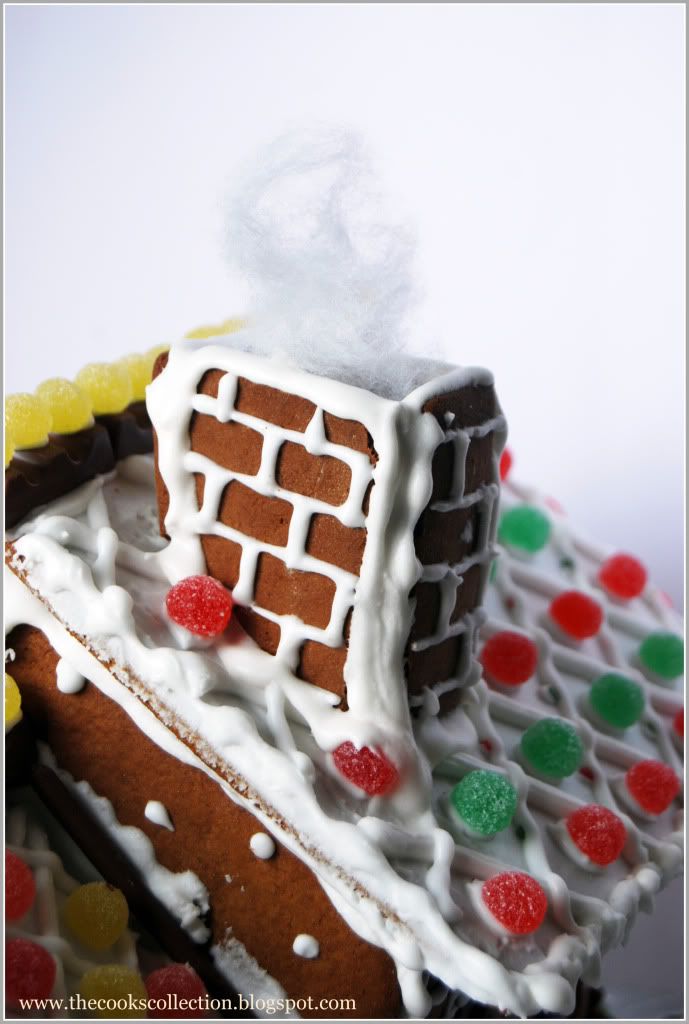
I choose Anna's recipe from Good housekeeping. I had never baked a gingerbread house before. I thank Anna and Y for giving us such a great challenge. It took three days for me to finish the gingerbread house. Decorating was the fun part in the entire challenge. Its been 10 days since i made the house and it still looks and smells great.


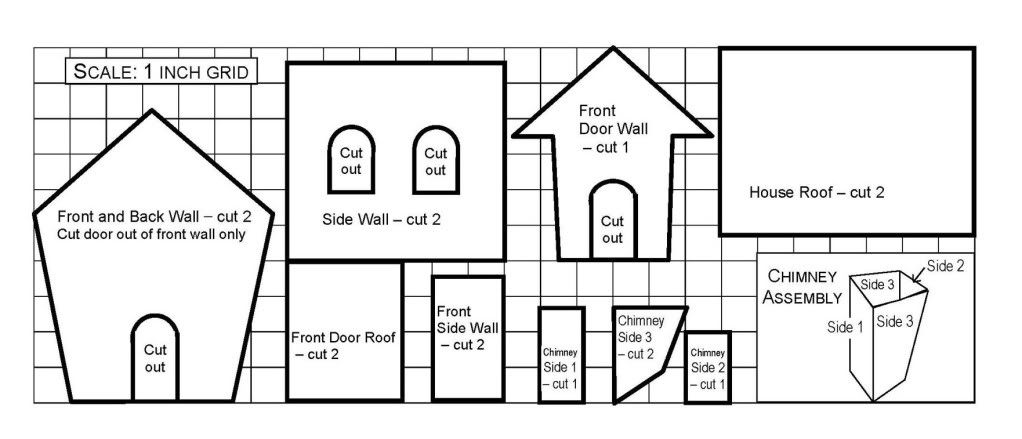
This is the template i used.


Here is the recipe..
Ingredients:
2 1/2 cup(s), 450 g packed dark brown sugar
1 1/2 cup(s), 360 ml heavy cream or whipping cream
1 1/4 cup(s), 425 g light (mild) molasses
9 1/2 cup(s), 1200 g all-purpose flour
2 tablespoon(s), 30 g baking soda
1 tablespoon(s), 15 g ground ginger
Directions:
In very large bowl, with wire whisk, beat brown sugar, cream, and molasses until sugar lumps dissolve and mixture is smooth. In medium bowl, combine flour, baking soda, and ginger. With spoon, stir flour mixture into cream mixture in 3 additions until dough is too stiff to stir, then knead with hands until flour is incorporated and dough is smooth.
Divide dough into 4 equal portions; flatten each into a disk to speed chilling. Wrap each disk well with plastic wrap and refrigerate at least 4 hours or overnight, until dough is firm enough to roll.
Grease and flour large cookie sheets (17-inch by 14-inch). Roll out dough, 1 disk at a time on each cookie sheet to about 3/16-inch thickness. (Placing 3/16-inch dowels or rulers on either side of dough to use as a guide will help roll dough to uniform thickness.)
Trim excess dough from cookie sheet; wrap and reserve in refrigerator. Chill rolled dough on cookie sheet in refrigerator or freezer at least 10 minutes or until firm enough to cut easily.
Preheat oven to 300 degrees F. Use chilled rolled dough, floured poster board patterns, and sharp paring knife to cut all house pieces on cookie sheet, making sure to leave at least 1 1/4 inches between pieces because dough will expand slightly during baking. Wrap and reserve trimmings in refrigerator. Combine and use trimmings as necessary to complete house and other decorative pieces. Cut and bake large pieces and small pieces separately.
Brush house pieces lightly with water before baking. Bake 25 to 30 minutes, until pieces are firm to the touch. Do not overbake; pieces will be too crisp to trim to proper size.
Remove cookie sheet from oven. While house pieces are still warm, place poster-board patterns on top and use them as guides to trim shapes to match if necessary. Cool pieces completely on cookie sheets before removing.
Royal Icing:
1 large egg white
3 cups (330g) powdered sugar
1 teaspoon white vinegar ( i used 1/4 tsp cream of tarter)
1 teaspoon almond extract
Directions:


Wednesday, December 23, 2009
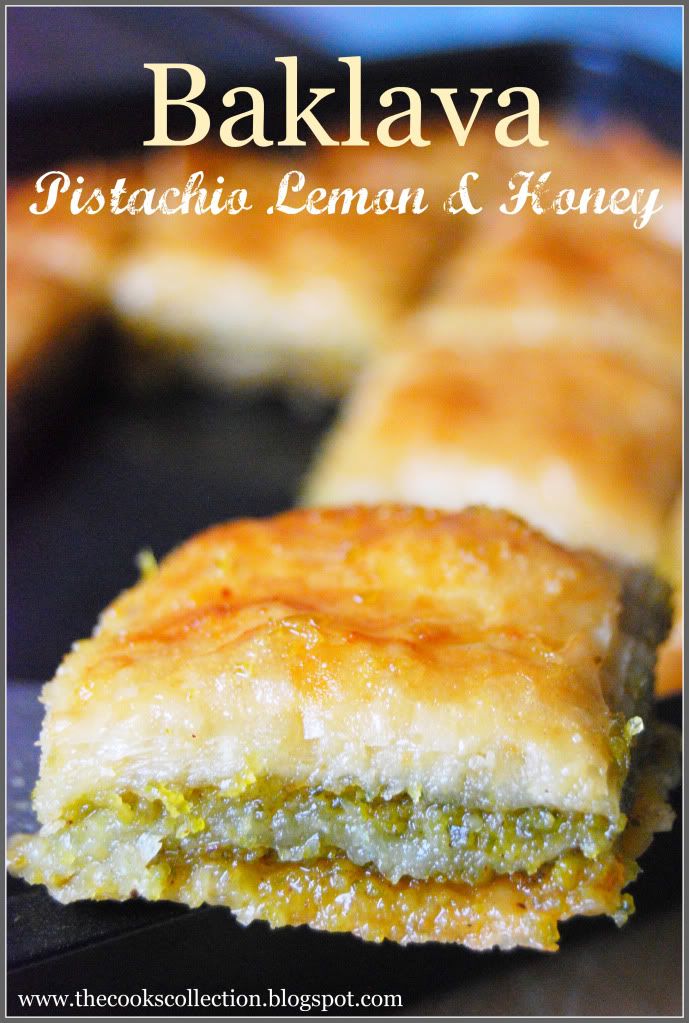
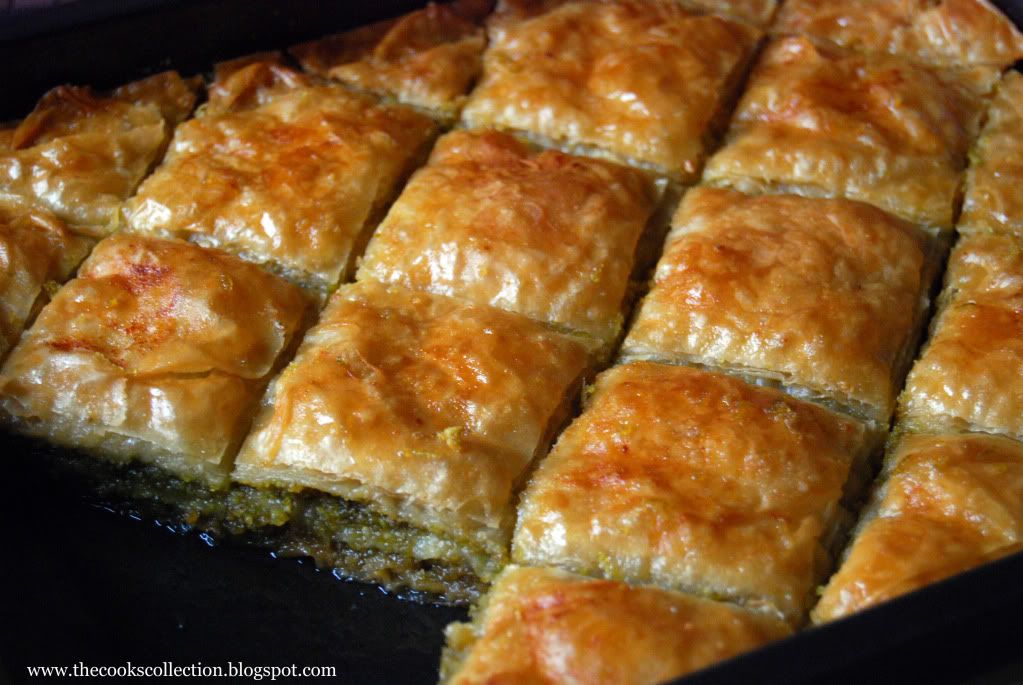
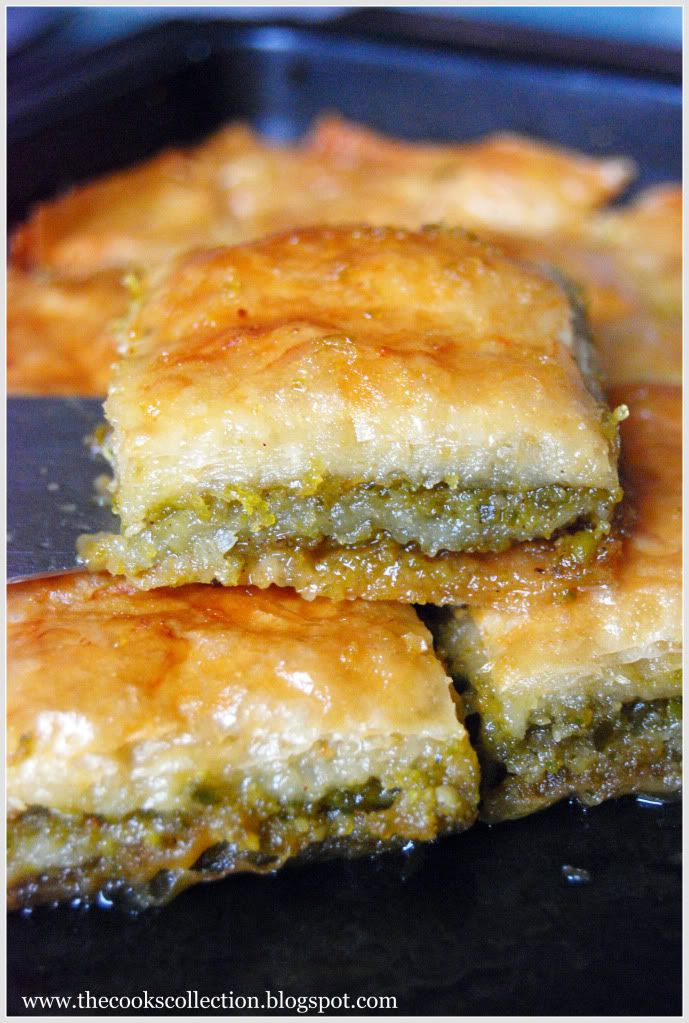
Pistachio, Lemon and Honey Baklava
Baklava is a Turkish delight made from layers of filo pastry, nuts, sugar and spices, drizzled with syrup. The resulting sweetmeat is wonderfully sticky and sweet.
Serves 6-8
Ingredients:
175 g (6 oz) shelled pistachio nuts
125 g (4 oz) blanched almonds,
1 teaspoon ground cinnamon
1/2 teaspoon ground mixed spice (1/8 teaspoon each of nutmeg, clove, allspice, and ginger)
2 tablespoons caster sugar
12 Sheets Store bought filo pastry
125 g(4 oz) unsalted butter, melted
For the lemon and honey syrup,
grated rind and juice of 2 lemons (can reduce according to your taste)
250 g (8 oz) clear honey
150 ml(1/4 pint) water
Method:
Put the pistachio nuts, almonds and spices in a food processor and pulse briefly until the nuts are coarsely ground. Stir in the sugar.
Lightly oil a 20 x 30 cm (8 x 12 inch) cake tin. Cut the sheets of filo pastry in half crossway's so that they are about the same size as the tin (OR if the sheets are small, just keep the tin over the sheets and keeping the correct measurement of the tin, trim off the extra sides using a sharp serrated knife. the extra pieces could be used in the recipe for layering.)
Brush 1 sheet with melted butter and press it into the tin. Continue to brush and layer the sheets until half remain(about 5 sheets). Scatter over half of the nut mixture and then top with another 2 sheets brushing each with melted butter. Then scatter the other half of the nut mixture and the remaining pastry, brushing each sheet with melted butter as you go. (The original recipe says 6 sheets for the base, topped with the entire nut mixture which is again topped with the remaining 6 sheets of filo pastry.) This was the one slight change in the recipe which i made. You can make anyways you like. The result wont be just the same.
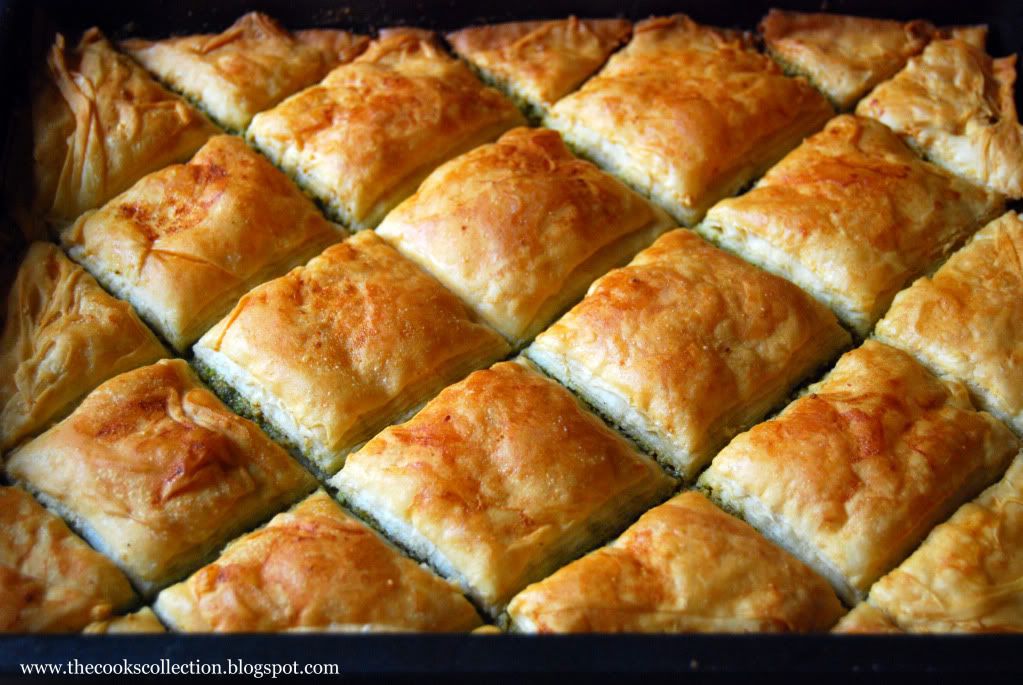
Use a sharp knife(serrated would do good) to score a diamond pattern into the pastry, cutting down to the base. Drizzle over any remaining butter and bake in a preheated oven, 180 deg C (350 deg F), Gas Mark 4, for 20 minutes. Reduce the temperature to 160 deg C( 325 deg F), Gas Mark 3, and bake for further 20-25 minutes until the pastry is crisp and golden.
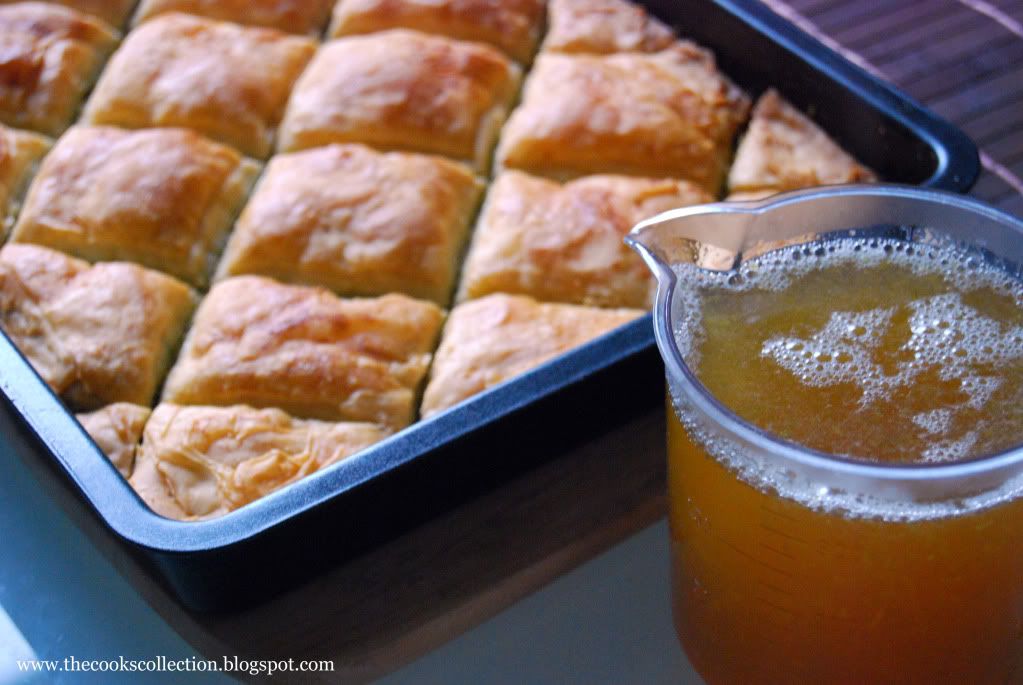
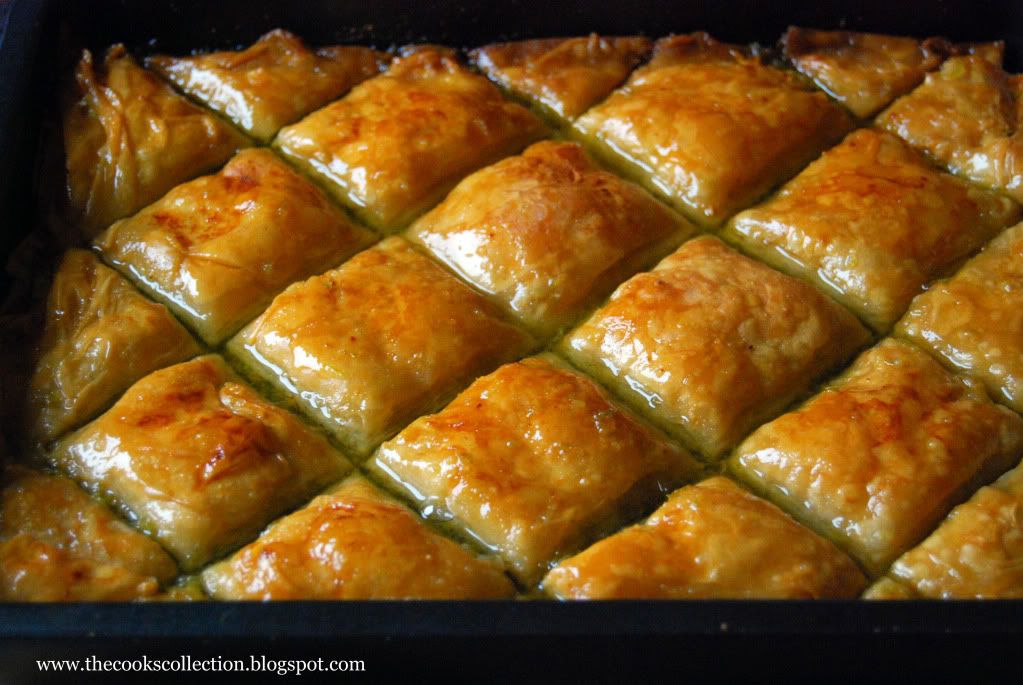
Meanwhile make the syrup: Put the lemon rind, juice, honey and water in a saucepan and heat gently until boiling. Simmer for 5 minutes and remove from heat. Pour the hot syrup over the baklava and leave to cool.
After it has cooled and has absorbed all the syrup, it'll look like this.
Enjoy the lovely dessert!
Tuesday, December 15, 2009
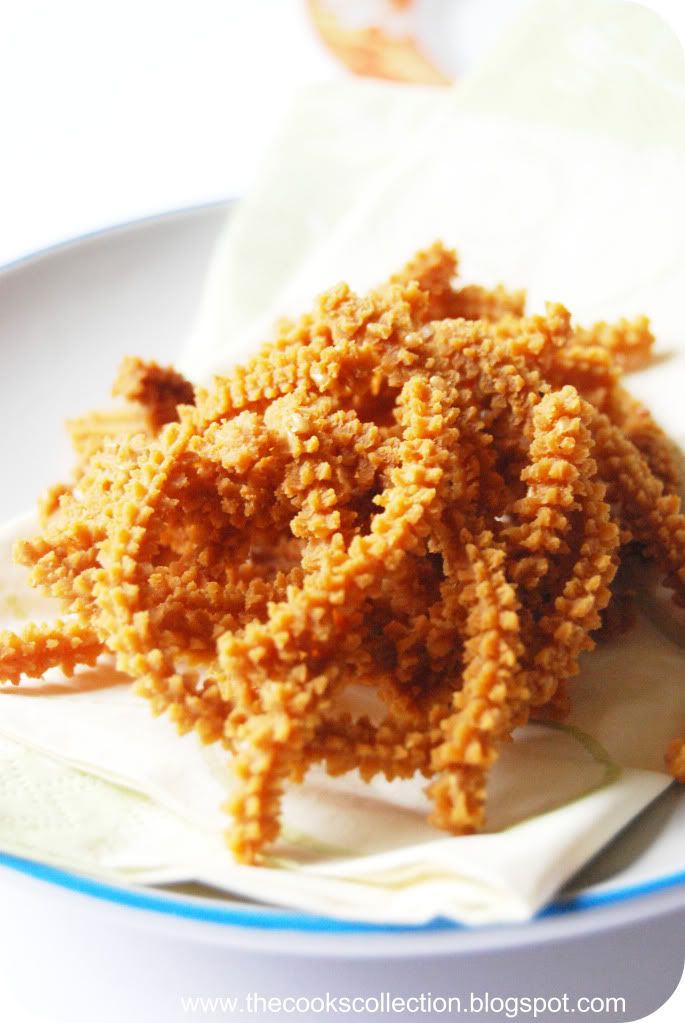
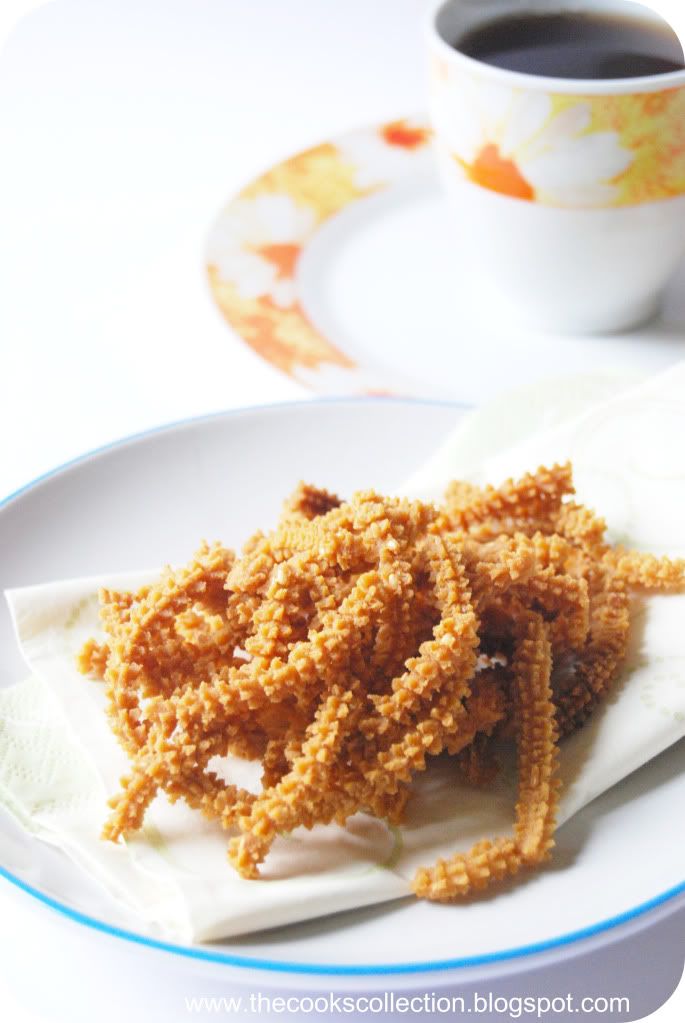
Murukka ( Crispy spicy savory crackers )
Murukku is one savory snack popular in south India. A special gadget called "chakli varalu" is used to make this snack but you can simply use a Patisserie Cream Syringe like here and here with a ribbon tip or any other small thin tip. Or you can just fill the dough into a plastic seal bag, make a small cut in the edge and pipe it directly into the hot oil. Shape doesn't matter at all. Its the ingredients for the dough thats matters and the end result would definitely be tasty and crispy no matter in what shape it is. I got this recipe from one of my friends mom who cooks real tasty south Indian food. I thank her for this wonderful recipe. Its become one of my husbands new favorite. You should try it to know it.
Ingredients required:
2 cups rice flour
1/4 cup Split roasted gram /Dalia /Hurigadale, ground into powder
1/2 tsp asafoetida
1 1/2 tbsp red chilli powder
2 tbsps sesame seeds
1/4th cup hot oil
1/2 tbsp salt or as per taste
enough water to form a soft stiff dough
enough oil to deep fry
Directions:
combine rice flour, ground roasted gram, asafoetida and salt, mix well. Add hot oil and combine well. Now add the chilli powder and sesame seeds, mix well. Add enough water to form a soft dough.
Heat oil a deep pan on medium high. Grease your hands and take some of the dough and fill it into the chakli mold or icing bag (with a small nozzle). Pipe out spirals directly into the hot oil. Fry them in batches.
Deep fry the chaklis till golden. Drain on paper towels, cool and store in an air-tight container.
Enjoy with a cup of hot coffee.
Tuesday, December 8, 2009
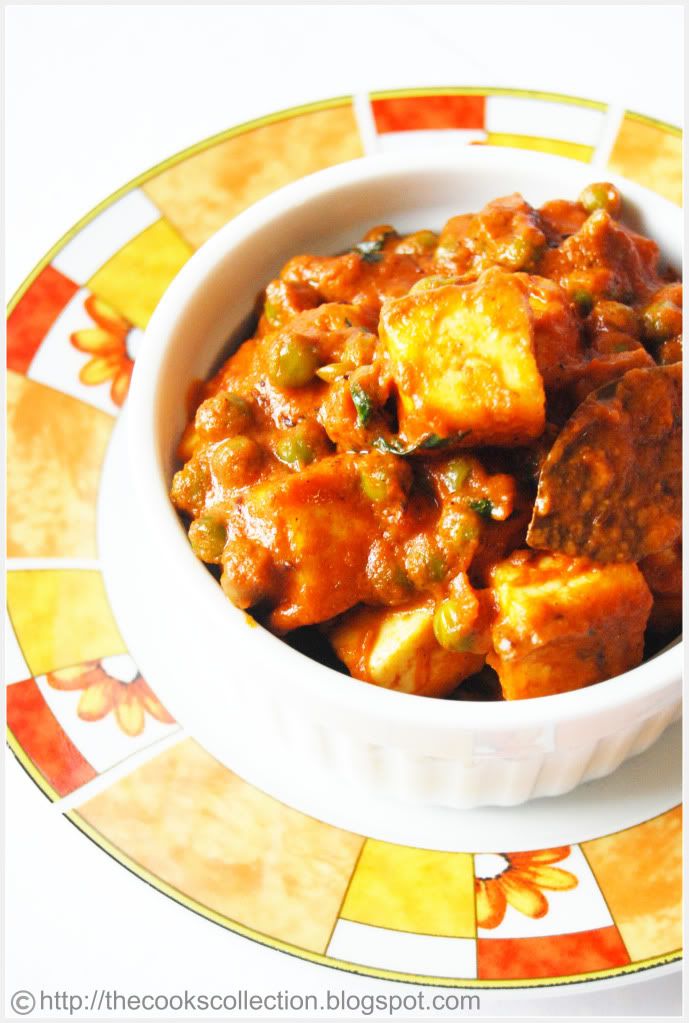
Mutter Paneer
Pan-Fried Cheese with Green Peas
There is no one north Indian restaurant menu, or any special occasion meal from that region, that does not include mutter paneer. This dish is rich, creamy and with some homemade freshly ground perfumed spices, they taste delicious. You can have this along with any store bought or homemade naan, and the meal is complete. The garam masala in this recipe is added in the beginning itself to let the lovely spices blend together with the creamy sauce.
If you don't find paneer or you don't have it handy, then you can easily substitute it with boiled and cubed potatoes and you can rename the dish as "Aloo matar". Even potatoes go very well with this sauce.
Recipe adapted from 660 curries
Ingredients:
1 small red onion, coarsely chopped
3 lengthwise slices fresh ginger (each 1 1/2 inches long, 1 inch wide, and 1/2 inch thick)
3 large cloves garlic
1 or 2 fresh green chillies
2 tablespoons canola oil (or vegetable/ sunflower)
1 teaspoon cumin seeds
1 fresh or dried bay leaf
1 cup tomato sauce , canned or homemade
2 teaspoons bin bhuna hua garam masala
1 teaspoon salt
1 1/2 cups frozen peas (no need to thaw)
1/4 cup heavy (whipping) cream
8 ounces Paneer, cut into 1-inch cubes and pan-fried with few teaspoons of oil till golden brown
2 tablespoons fresh cilantro leaves, chopped
Directions:
Combine the onion, ginger, garlic, and green chiles in a food processor and pulse until they are minced.
Heat the oil in a medium-size saucepan over medium-high heat. Sprinkle in the cumin seeds and bay leaf, and cook until cumin seeds sizzles, turns reddish brown, and smells nutty, 5 to 10 seconds. Immediately add the minced onion blend and stir fry until it is light reddish brown, 5 to 7 minutes.
Stir in tomato sauce, bin bhuna hua garam masala and salt. The sauce will quickly start to bubble up and splatter, so lower the heat to medium. Simmer the sauce partially covered, stirring occasionally, until some oil starts to appear on the surface and around the edges, providing a glistening sheen , 5 to 10 minutes.
Pour in 1/4 cup water and the peas. Cover the pan and simmer, stirring occasionally, until the peas are tender and olive green in color, 8 to 10 minutes.
Fold in the cream, paneer and cilantro. Cover the pan and simmer, occasionally stirring gently, until the cream and cheese have warmed through, about 5 minutes.
Remove the bay leaf and serve.
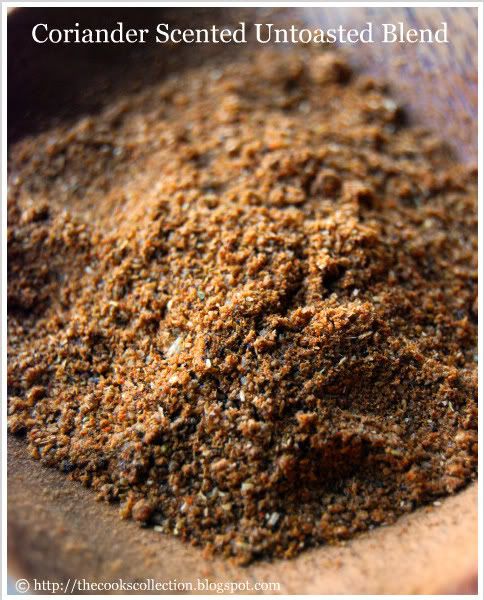
Bin Bhuna Hua Garam Masala
Coriander Scented Untoasted Blend
The heady aromas emanating from the release oils of just pulverized spices give you a hint of fresh and complex flavors that are sorely missing from store- purchased pre-ground spices. This version of garam masala does not involve toasting of whole spices. It is added to a dish, early on in the cooking, allowing time to add their subtle flavors.
According to Raghavan Iyer, the author of the book 660 Curries, this blend is perfectly acceptable in any recipe that calls for a commercial curry powder.
Makes: 3 tablespoons
2 tablespoons coriander seeds
1 teaspoon cumin seeds
1 teaspoon black peppercorns
1/2 teaspoon whole cloves
1/2 teaspoon cardamom seeds from green or white pods (or can substiture 1/4 teaspoon cardamom powder)
2 dried bay leaves
3 or 4 dried red chillies; or 1 teaspoon cayenne (ground red pepper)
Method:
Place all the ingredients in a small blender and grind until the texture resembles that of finely ground black pepper.
Store the mixture in a tightly sealed container, away from excess light, heat, and humidity, for up to 2 months (Do not refrigerate, as it adversely affects its flavors).
This blend is used in the recipe Mutter Paneer.
Tuesday, December 1, 2009
Heerekai Chutney ( Ridge Gourd Chutney )
This dish has been one of my childhood favorite. I used to love it when my mom used to make this for me. This chutney goes very well with just plain steamed rice or as an accompaniment with Indian flat bread, chapathi. You can add more or less green chillies according to your taste.
Serves : 4
Ingredients:
2 big ridge gourds, peeled and cut into cubes
2 tablespoons chana dal (bengal gram)
2 green chillies
1/4 teaspoon fenugreek seeds
1/4 cup coconut, fresh or desiccated
2 teaspoons tamarind juice
1 teaspoon jaggery or sugar
Salt to taste
1 tablespoon vegetable oil
1 teaspoon mustard seeds
pinch of asafoetida , optional
few curry leaves
1/4 teaspoon turmeric
Directions:
Take the ridge gourd cubes in a deep vessel and add about a cup of water. On a medium high heat, bring this to a boil and cook until tender. Add a little more water if needed (do not add too much).
In another small pan, fry chana dal, green chilli and fenugreek seeds with little oil till chanal dal starts imparting a nice smell, till you see blisters appearing on the surface of green chillies and the fenugreek seeds start to turn brown. Take the pan off the heat and let cool a little bit.
Tranfer the contents of the pan into a blender. Add coconut, salt, tamarind, jaggery and the boiled ridge gourd (keep the water separate). Blend until smooth. Add the reserved water if necessary to get the right thickness.
Take oil in a pan, add mustard and let it splutter. Now add asafoetida, turmeric and curry leaves and fry for few seconds. Now add the mixture from the blender and stir well.
Serve this wonderful tasting chutney with rice or chapati. Enjoy!


