
Creme caramel is a great make ahead dessert option. Its a beatiful, rich and delicate custard dessert with a layer of soft caramel on top. This dessert would just melt in your mouth.
Its baked in hot water bath so as to avoid the direct contact of heat with the cream. It lets the cream to stay soft and supple.
So here is the recipe for the cream caramel
Ingredients:
Condensed milk [Milkmaid] : 1 tin
Milk : 500ml
Eggs : 4
Lemon (grated rind only) : 1 tsp
Sugar : 2 tbsp (to coat the mould with caramelised sugar)
Method:
Preheat thr oven to 180 deg C. Place a shallow pan of water in the oven.
Heat sugar in the ring mould till it melts and caramelises. Turn the mould so as to coat its base and sides with caramel. Keep aside. [ You can even caramelise sugar in a small pan and transfer it immediately into the ramkins. Just turn a little so that it coats the base. It need not have to coat the base completely as it hardens very soon.]
Combine milk and milkmaid together.
Beat the eggs lightly. Add lemon rind. Gradually add milk and keep stirring till all the ingredients combine.
Pour into the caramelised ring mould or ramkins. Place the mould in the pan of water in the oven and bake for 30 to 40 minutes.
Cool, chill in the refrigerator for 5 to 6 hours before unmoulding to serve. 
Serve chilled.
Saturday, February 14, 2009
Cream Caramel
Tuesday, February 10, 2009
5 Spice Mushroom Rice
This dish is a delicate blend of flavours and textures that may not appeal to all, but its a "must" for those who like to experiment beyond the conventional Chinese fried rice. Mushrooms and Chinese 5 spice powder together make this rice a very traditional fare.
Ingredients
2 cups Chinese rice
1/3 cup mushrooms, sliced
1/2 cup dried black mushrooms (shitake), soaked in hot water for 15 minutes and sliced, discard the stalk
1 tsp Chinese 5 spice powder
a pinch sugar
2 tbsps Oil
Salt to taste
Method
Heat the oil, add the mushrooms and saute till they are tender.
Add the dried black muhrooms and saute for 2 to 3 more minutes.
Add the Chinese 5 spice powder and saute for 1/2 minutes.
Add the rice, sugar and salt and mix well.
Serve hot.
Chinese 5 Spice Powder
An authentic home-made version of the original blend of spices. Just lke our very own garam masala,every Chinesehousehold has its own delicate balnce of ingredients to make this fragnant powder.
Preparation time : 10 Minutes
Cooking time: 15 Minutes
Makes 1/4 Cup
Ingredients:
4 tsps Peppercorns
16 whole Star anise
12 Cloves
10 Stiks Cinnamon
2 tbsps Fennel seeds
Method
In a dry pan, roast the peppercorns over lo heat until the aroma is released. Keep aside.
Roast togeter the other ingredients for about 3 minutes on low heat till the aroma is released.
Grind together all he ingredients in a blender. Sieve the miture.
A coarse powder of the spices will be left behind. Grind it again to make a fine powder and sieve again. Discard the coarse powder left behind or grind it aain.
Store the sieved powder in a air-tight jar and use as required.
Chinese Rice
To the Chinese, rice is a symbol of life. When you are a dinner guest, it is considered bad manners not to consume every grain of rice in your bowl.
The Chinese generally use long grained rice for various rice preparations. You need to be very careful with the way the rice is cooked because that is what determines the end product..
The Chinese also use another variety of rice called sticky rice which has a very high starch content. This rice is not boiled in water, like the ordinary rice but has to be steamed to get the perfect texture. This symbol represents the Chinese/Japanese character for a rice grain. Clockwise from the top English, French, Hindi, Spanish/Portuguese, Tagalog and Greek.
The Chinese have developed the simple technique of rice making into an art. Each grain of the cooked rice is seperate and it is this method of cooking the rice that yields the perfect fried rice.
Preparation time; 5 minutes
Cooking time; 15 minutes
Makes 4 Cups
To prepare rice, you'll need.
1 cup Basmati rice or any other white rice
2 Tbsp oil
1 tsp Salt
Directions:
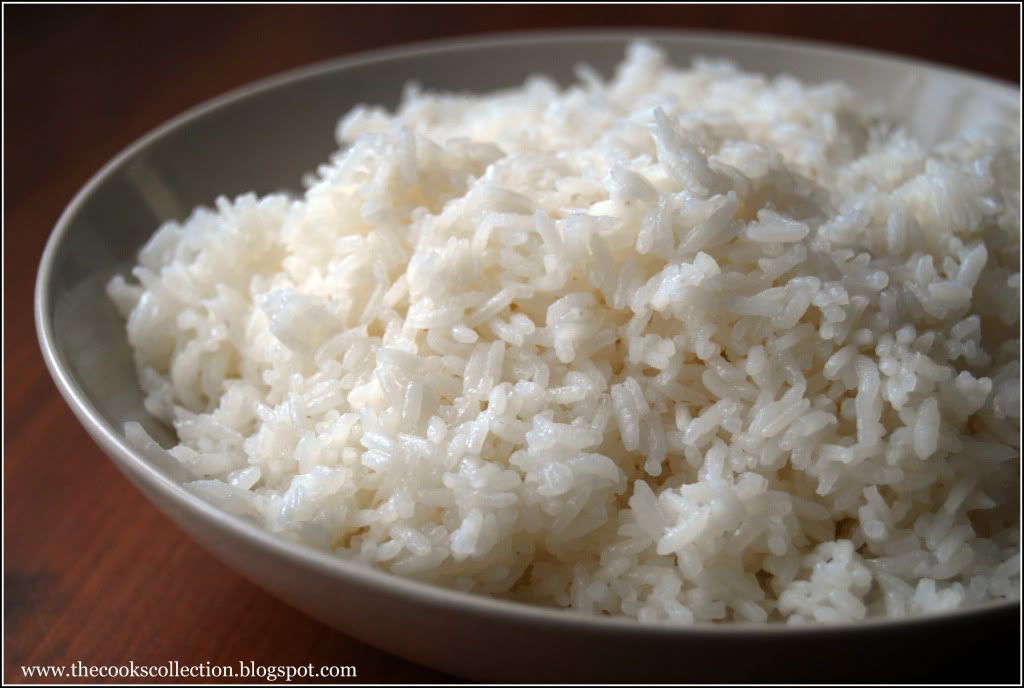
First wash the rice thoroughly and soak in 3 cups of water for 30 minutes. Drain and keep aside.
Boil 6 to 8 cups of water, add salt and a tbsp of oil.
Add the rice to the boiling water. Cook till the rice is 85% cooked.
Pour into a colander and let the water drain out. Pour some cold water on the rice to arrest further cooking.
Let all the water from the rice drain out ensuring that the rice does not contain any moisture.
Add the remaining 1 tbsp of oil and toss the rice in it.
Spread the cooked rice on a flat surface till it is cool.
Use as required
Tuesday, February 3, 2009
Very Very Chocolatey Mousse - 3 Layered !!
This is a delicious light and creamy dessert. Its got the airy and sandy texture, the richness and the taste. This sneakily delicious version combines cornstarch-and-egg yolk thickened custard folded with whipped cream and beaten egg whites to produce a light and fluffy yet extremely rich confection, Plus, a triple-dose of white, bittersweet and milk chocolate. Because this dessert needs time to chill to maintain its aeration, it is a terrific make-ahead option. A lot of patience and time is required in this preparation but this dessert is worth all your patience and time. Just go for it. Remember to keep all your mixing and beating bowls ready before you start ;)(you'll need lots..)
.jpg) I present this recipe to all the chocolate lovers out there..!!
I present this recipe to all the chocolate lovers out there..!! So here is the recipe..
Ingredients:
3 Eggs
1 tbsp Cornstarch
75g Sugar
300 ml Milk
1 Pkt Gelatin
3 tbsps Water
300g Whipped cream
75g Bittersweet Chocolate
75g White Chocolate
75g Milk Chocolate
Chocolate shavings for decorating
How to..
Line a loaf pan (850 ml) or any other pan with baking paper.
Break the eggs. Seperate egg whites in 3 different glass bowls and mix in all the egg yolks together in another bowl. Stir in the cornstarch and sugar with the egg yolks and keep aside.
Boil the milk stirring gently. Place another bowl filled with water on high heat and let it come to a boil. Meanwhile gradually pour the egg yolk mixture into the milk and keep stirring with a whisk. When the milk and yolks has combined well, remove the bowl from the heat and place it in the hot water bowl such that the base of the bowl touches the boiling water. Keep stirring until the mixture thickens. Remove and let cool.
Mix in the Gelatin with 3 tbsps of water in a small bowl and leave to swell. Place the bowl in hot water and keep stirring till it dissolves completely (You can also use a microwave, just microwave for 4 to 5 seconds on low). Mix the dissolved gelatin into the milk-yolk custard and keep aside.
Whip the cream until stiff and fold it gently into the milk-yolk custard. Now divide this custard-cream mixture into 3 portions.
Melt all the 3 types of chocolates seperately using a double boiler (You can use a large bowl with water which can accomidate all the 3 chocolate bowls or cups and melt them simultaneously, remember to use 3 different spoons to stir).
First stir in the melted dark chocolate into one portion of the custard-cream mixture. Beat 1 egg white until stiff and fold it into the dark chocolate-custard-cream mixture. Pour the mixture into the prepared pan and smoothen on top. Place the pan in the refrigerator.
 Meanwhile, mix the melted white chocolate with the second portion of custard-cream mixture. Beat the second egg white until stiff and fold it into the white chocolate-custard-cream mixture. Pour this on the first layer of mousse and smoothen on top. Transfer it back to the refrigerator.
Repeat the same steps with the milk chocolate and layer it on top of the white chocolate. Let it stay in the refrigerator for 5 to 6 hours or overnight or until you serve.
Before serving, Carefully place the prepared serving plate on top of the loaf pan and turn the pan upside down. Lift the pan up and remove the parchment paper. Decorate with chocolate shavings before you serve.


Hmm..... yummy!!! :)
Thursday, January 29, 2009
Daring Bakers Creative Challenge.. Tuiles!
This month's challenge is brought to us by Karen of Bake My Day and Zorra of 1x umruehren bitte aka Kochtopf. They have chosen Tuiles from The Chocolate Book by Angélique Schmeink and Nougatine and Chocolate Tuiles from Michel Roux.
Traditionally, Tuiles, Known in French for 'tiles' are thin, crisp almond cookies with lacy texture that are gently molded over a rolling pin or arched form while they are still warm. Once set, their shape resembles the curved French roofing tiles for which they're named.
The Dutch angle: traditionally this batter was used to bake flat round cookies on 31st December, representing the year unfold. On New Years day however, the same batter was used but this day they were presented to well-wishers shaped as cigars and filled with whipped cream, symbolizing the New Year that's about to roll on. And of course the batter is sometimes called tulip-paste....
Other than the traditional curved shape, there are various other shapes that can be adapted. Here are few.. The stencil which you'll be using needs to be very thin. This helps the cookie to stay thin and crisp.
And for me it took just 6 minutes of baking time. Its quick and any number of batches can be baked in no time. And luckily, the batter can be stored in the refrigerator for up to a week so the cookies can easily be made on demand.


So here is the recipe..
Preparation time: Batter 10 minutes, waiting time 30 minutes
Baking time: 5-10 minutes per batch
Ingredients:
1/4 cup Softened butter (not melted but soft)
1/2 cup Sifted confectioner’s sugar
1 sachet vanilla sugar (7 grams or substitute with a dash of vanilla extract)
2 large egg whites (slightly whisked with a fork)
1/2 cup Sifted all purpose flour
1 table spoon cocoa powder/or food coloring of choice
Butter/spray to grease baking sheet
Oven: 180C / 350F
Method:
Using a hand whisk or a stand mixer fitted with the paddle (low speed) , cream butter, sugar and vanilla to a paste.
Keep stirring while you gradually add the egg whites. Continue to add the flour in small batches and stir to achieve a homogeneous and smooth batter/paste. Be careful to not over mix.
Cover the bowl with plastic wrap and chill in the fridge for at least 30 minutes to firm up. (This batter will keep in the fridge for up to a week, take it out 30 minutes before you plan to use it).
Line a baking sheet with parchment paper or grease with either butter/spray and chill in the fridge for at least 15 minutes. This will help spread the batter more easily if using a stencil/cardboard template.
Press the stencil on the baking sheet and use an off sided spatula to spread batter. Leave some room in between your shapes.


Mix a small part of the batter with the cocoa and a few drops of warm water until evenly colored. Use this colored batter in a paper piping bag and proceed to pipe decorations. Bake the shapes in a preheated oven (180C/350F) for about 5-10 minutes or until the edges turn golden brown.
Immediately release from baking sheet and proceed to shape/bend the cookies in the desired shape. These cookies have to be shaped when still warm, you might want to bake a small amount at a time. If you don’t want to do stencil shapes, you might want to transfer the batter into a piping bag fitted with a small plain tip. Pipe the desired shapes and bake. Shape immediately after baking.


Storage: Best served the day its made, especially in humid climates. Storage of them should be airtight, and if not used the same day, should be used within a couple of days.
Hope you enjoyed :)
Tuesday, January 27, 2009
Onion-Tomato-Cheese Galette
This rustic tart has the look of a mediteranean pizza. The crust is a wonderful cornmeal-crunchy dough, rolled into a thin circle and drawn up in pleats and rufles over the filling, caramalised onions and a blend of cheeses topped with sliced garden tomatoes, red and juicy. Because of the cornmeal in the dough, the crust will stay crisp enough for this galette to be served either warm or at room temperature. It will travel, so think of it when you're headed off on a picnic or want to bring friends a lovely something to have with drinks.

For this recipe you'll need..
1/4 recipe Galette Dough, chilled
1/2 cup Ementaler Cheese, shredded
1/2 cup Mozzarella, shredded
Few basil leaves, fresh or frozen
1 or 2 firm but ripe plum tomatoes, cut into 1/4-inch-thick slices
1 Onion, medium sized, cut into slices, lengthwise
1 tbsp Olive oil
1 Egg
1 tbsp Milk
Here you start Position a rack in the lower third of the ovan and preheat the oven to 200 deg C. Line a baking sheet with parchment paper.
Put the dough on a lightly floured surface and roll in into an 9-inch circle. Since the dough is soft,you'll need to lift it now and then and toss some flour under it and over the top. Roll the dough up around your rolling pin and unroll onto the prepared baking sheet.
Making the filling Put the onions and olive oil in a skillet over medium heat. Add a pinch of salt and keep stirring till the onions turn translucent and soft. Set aside and let cool.
Toss the cheeses and basil together in a small bowl and set aside.
Spread the onions on the rolled-out dough, leaving an inch order. Place the tomatoes in concentric circles, one slice slightly overlapping the last, on top of the onions.
Scatter the cheeses and basil mixture over the tomatoes.
Fold the uncovered border of dough up over the filling, allowing the dough to pleat as you lift it up and work your way around the galette. (Because you're folding a wide edge of dough over a smaller part of the circle, it will pleat naturally- just go with it.) Combine the egg and a tbsp of milk together. Brush on top of the pleated galette.
Baking the galette Bake the galette for 35 to 40 minutes, or until the pastry is golden and crisp and the cheese is bubbly. Transfer the baking sheet to a cooling rack and let the galette rest on the sheet for 10 miutes. Servve warm or at room temperature, garnish with fresh basil leaves.

Storing The galette can be kept at room temperatute for several hours, but it is best served the day it is made.
Tuesday, January 20, 2009
Masala Paratha
Aloo paratha is a flat Indian bread with spicy potato stuffing. But what i'll be showing you is a slightly different version of this paratha. Some people find it difficult when rolling a dough which is stuffed with the potato filling. The stuffing comes out of the dough when rolling them. But making the paratha which i'll be showing will rule out this problem. These parathas come out really soft, tasty and easy too.
The end result of this recipe is simply superb. Its a great breakfast and a lunch box recipe..
You'll need the following ingredients..
3 large potatos, peeled, cut into chunks and boiled in water till soft
1 Onion, Finely chopped
1 1/2 cup Whole wheat flour
1 tsp Ginger Garlic paste
1/4 tsp turmaric powder
1/2 tsp Chilli powder
1/2 tsp Garam masala powder
1/4 tsp Amchur powder (or 1/2 tsp Lemon juice)
1/2 cup Coriander leaves, chopped
Salt to taste
1 tsp sugar
2 Tbsp oil
Water to knead
Method..
Take 1 tbsp oil in a pan and fry chopped onion with a pinch of salt till golden brown and soft. Add ginger garlic paste and fry for another minute.
Add the boiled potatoes, turmaric powder, chilli powder, garam masala powder, amchur powder, salt to taste and a tsp of sugar. Mix them well.
(Keep the salt content of the potato masala a little more because we'll be combining this masala with the flour)
Add coriander leaves and lemon juice(if you're not using the amchur powder). Fry for a minute till the mixture looks dried and mash this entire mixture using a potato masher. Keep it aside and let cool.

 Now mix the potato mixture with the flour. Add a tbsp of oil. Add sufficient water and knead well to form a soft pliable dough.

Now take about a handful of this dough and make small balls using your hands.
Keep a small plate with some flour to dust the dough when rolling.
 Now flatten the dough balls with both your hands and place them on the plate with the flour. Coat the dough with the flour on both the sides. Place it on a clean surface and start rolling them. Do not put too much pressure while rolling. Use extra flour if it starts sticking to the surface when rolling. Roll them into thin circles.
 place the rolled dough on a hot griddle. When small bubbles start appearing on the surface, flip it and brush a tsp of oil on the surface. Flip it again and brush another tsp of oil on the other side. Fry them well on both the sides. Take it off the griddle when they turn golden brown.
 Soft Aloo parathas are ready. They taste great when served with curd and pickle.
Enjoy!!
Tuesday, January 13, 2009
Ratatouille
I was inspired to make this dish by the movie "Ratatouille". I loved the movie and just had a curiosity in mind about what this dish could be.. Being in India, i had never heard about this dish before. So i finally found a reason to try out this recipe..
A little info about this dish from Wikipedia, "Ratatouille" is a traditional French Provençal stewed vegetable dish, originating in Nice. The full name of the dish is ratatouille niçoise. It was originally an everyday dish prepared in the summer with fresh summer vegetables. The original Ratatolha de Niça or Ratatouia Nizzarda used only zucchini (courgettes), tomatoes, green and red peppers (bell peppers), onion, and garlic. The dish known today as ratatouille adds eggplant (aubergine) to that mixture.
The original "What do we have in hand?" recipe: You combine vegtables, herbs and olive oil in various proportions and cook them on the stove or in the oven until very soft. Since its widely considered a dish from Provence, zucchini ( and/or eggplant) and tomatoes are frequently present, but there are really very few rules here, except longis, slow cooking and lots of good olive oil; herbs help too.
Recipe goes like this..
Ingredients
1 Eggplant, sliced 1/2 inch thick
1 Large Onion, sliced
1 Zucchini, trimed and cut into large chunks
3 Tomatoes, chopped
1 red or yellow bell pepper, cored, seeded and sliced
5 tbsp Extra virgin Olive oil
1 tsp Dry Rosemary
1 tsp Thyme
Salt and freshly ground black pepper
6 Cloves Garlic, peeled and chopped
Few fresh Basil leaves
Method
In a large heavy non stick skillet over medium heat add the oil, the onions and garlic, cook for 5 minutes.
Add the rest of the ingredients (except basil), cook covered and stirring occasionally, over medium heat, adjusting the heat so that the mixture simmers in its own juices without browning. Cooking time will be just a litle shorter, perhaps 45 minutes or so and then uncovered until it's nice and thick.

Add basil leaves, mix well and serve. Ratatouille is usually served as a side dish accompanied by rice or bread or can be used as a filling for savory crepes or to fill an omelette, but also may be served as a meal on its own.
Enjoy!!
Tuesday, January 6, 2009
White Loaf
This is a basic, have-it-on-hand-at-all-times white bread with a difference--its got full, rounded flavor and a substantial texture; not your average sandwich loaf. And it makes great toast-the little bit of butter browns nicely under heat. Its got a crunchy crust and very softy inside.

Makes 1 Loaf
Ingredients:
1 1/4 cups warm water
1/2 tbsp Active dry yeast
1/2 tbsp sugar
3 1/2 cups bread flour or all purpose flour
1/2 tbsp Salt
1/4 stick butter(1 ounce) unsalted butter, at room temperature
Method:
Mixing and kneading; Pour 1/4 cup of water into a large bowl. Sprinkle in the yeast and sugar, and whisk to blend. Allow the mixture to rest until the yeast is creamy, about 5 minutes.
Sift the flour and salt together. Add the remaining 1 cup of water and half of the flour to the yeast and start mixing it with a wooden spatula. Add the remaining flour and start working with your hands till the dough comes together(if the dough does not come together, add a bit more flour, a tablespoon at a time). Work until the dough is smooth and elastic. Knead it with your hands on a lightly floured surface for 8 to 10 minutes.
When the dough is thoroughly mixed, add the butter, a tablespoon at a time and knead until incorporated. Dont be disconcerted if the beautiful dough comes apart with the addition of butter-kneading will bring it back together.
First rise; Turn the dough onto a lightly floured surface and shape it into a ball. Place it in a large buttered or oiled bowl and turn the dough around to cover its entire surface with butter or oil. Cover and let the dough rest at room temperature until it doubles in bulk, about 45 minutes to 1 hour.
During winter switch the oven to max for 2 minutes and swich it off. Place a bowl of boiling water in the bottom of the oven and place the bowl with the dough in the center rack. Close the oven and let it rise.
Shaping the dough; Butter a loaf pan and set aside.
Deflate the dough and turn it onto a lightly floured work surface. Roll the dough into a rectangle. With the short side facing you, start rolling the dough and seal the seam by pinching it. Drop the loaf into the pan, seam side down.
Second Rise; Place the loaf in a warm place covered with a loose oiled plastic wrap until they double in size again growing over the tops of the pan about 45 minutes.
Baking the bread; Center a rack in the oven and preheat the oven to 375 deg F. When the loaf has fully risen, bake for 35 to 45 minutes or until they are honey brown. Cool completely before cutting.

Storing; Once completely cool, the bread can be kept in a brown paper bag for a day or two. Once the loaf is sliced,turn it cut side down on a cutting board and cover with a kitchen towel. For longer storage, wrap the bread airtight and freeze for upto a month. Thaw still wrapped at room temperature.


