
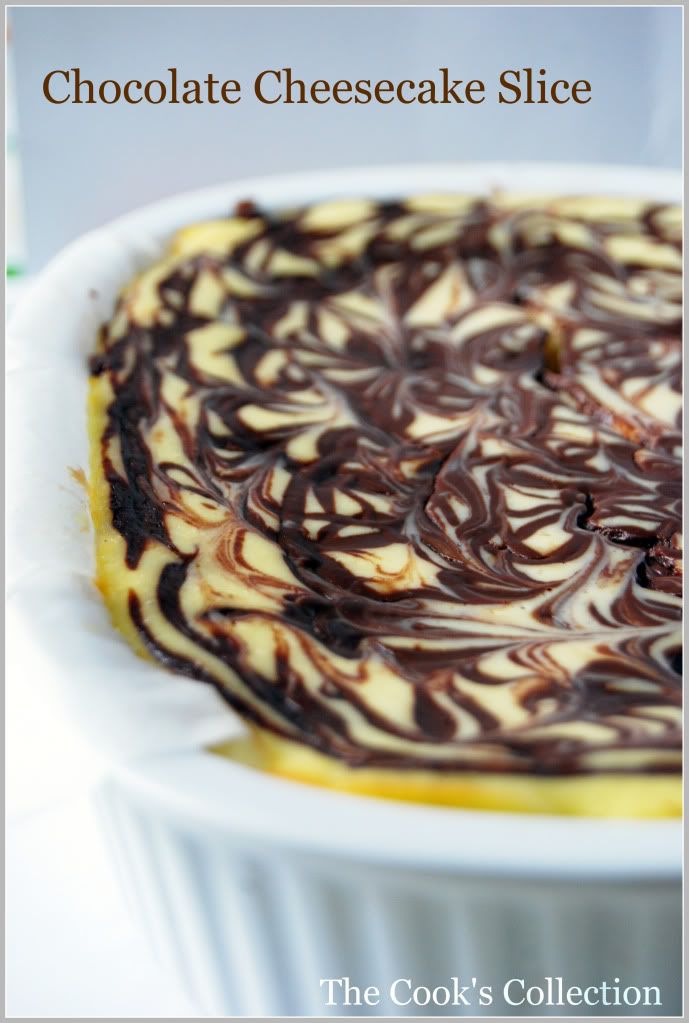
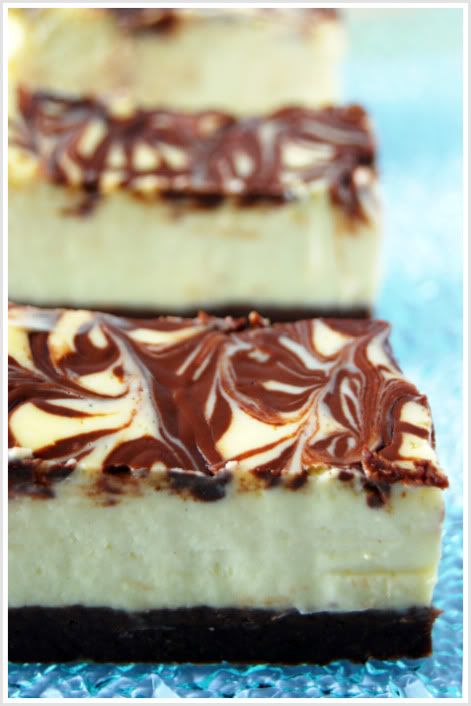
This is another delicious and wickedly indulgent treat that is best cut into fingers. I decided to bake this cake as soon as i saw this recipe in the book "Fresh Baked" with a lovely picture. This recipe is very quick with very easy to follow instructions and the result is in front of you. Its got a nice chocolate base topped with a lovely satiny cheesecake layer which is again decorated with a lacy melted chocolate. Any favorite chocolate biscuits can be used for the base. I used butter biscuits coated with dark chocolate which went very well with the cheesecake layer.
Use the exact sized baking pan for the recipe mentioned as this effects the thickness of the cheesecake. I also used a weighing machine to weigh the ingredients which gave me the perfect result.
Chocolate Cheesecake Slice
from Fresh Baked
preparation time: 20 minutes
cooking time 50-60 minutes
serves: 12-16
Ingredients:
250 gm (8 oz) Chocolate biscuits (any of your favorite)
100 gm (3 1/2 oz) unsalted butter, melted
50 gm (2 oz) dark chocolate
500 gm (1 lb) cream cheese
150 ml (1/4 pint) sour cream
3 eggs (i used large)
125 gm (4 oz) caster sugar (powdered sugar)
1 teaspoon vanilla extract
Method:
Put the chocolate biscuits in a food processor and process until smooth, then stir into the melted butter until evenly combined. Lightly oil and line a 18 x 25 cm (7 x 10 inch) cake tin with baking paper, allowing the paper to overhang the edges. Spoon the mixture into the prepared tin and spread flat. Chill while preparing the topping.
Put the chocolate in a bowl set over a pan of gently simmering water (do not let the bowl touch the water) and stir until it has melted. Keep warm. [If the chocolate turns too thick, add few teaspoons of sour cream to slightly liquidity it so that it would be easy to drizzle over the cheesecake layer. I filled this chocolate - sour cream mixture into a small zip lock cover. Made a small hole in the corner and this ended up with a very clean , hazel free drizzle.]
Put the cream cheese, sour cream, eggs, sugar and vanilla extract in a clean bowl and, using an electric beaters, beat together until smooth. Pour into the tin and drizzle over the melted chocolate, using a skewer to create a swirling pattern over the creamed mixture.
Bake in a preheated oven 150 deg C (300 deg F), Gas Mark 2, FOR 50 - 60 minutes until the mixture is firm, remove from the oven and leave to cool. Chill for 1 hour, then carefully remove the cheesecake from the tin and cut it into fingers.
Enjoy with a cup of hot coffee!
Tuesday, October 27, 2009
Chocolate Cheesecake Slice
Saturday, October 17, 2009
Puran Poli
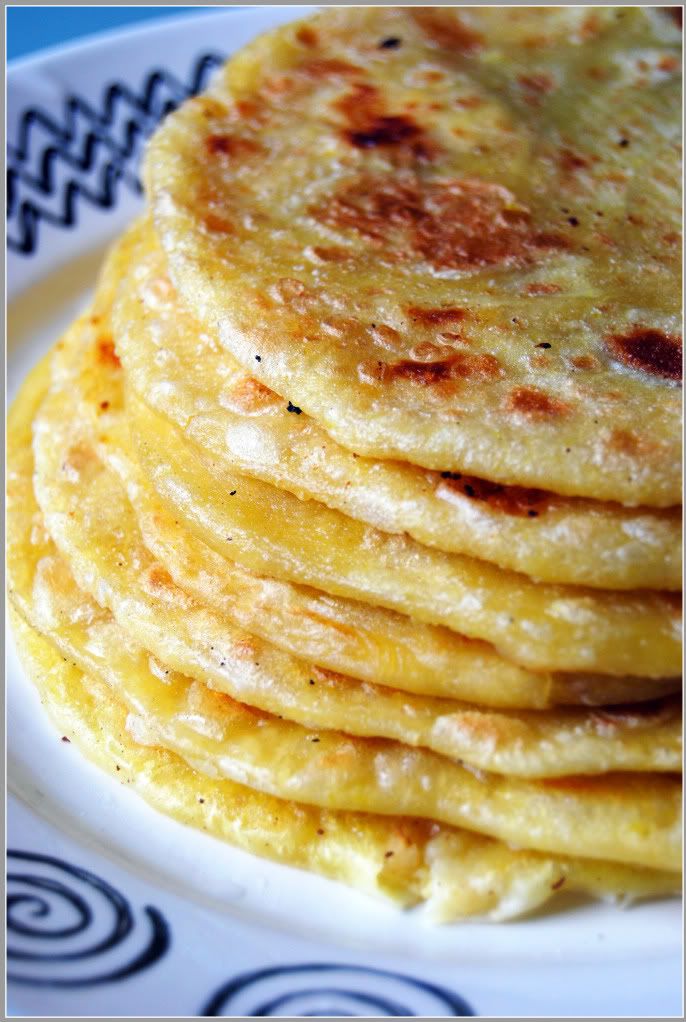
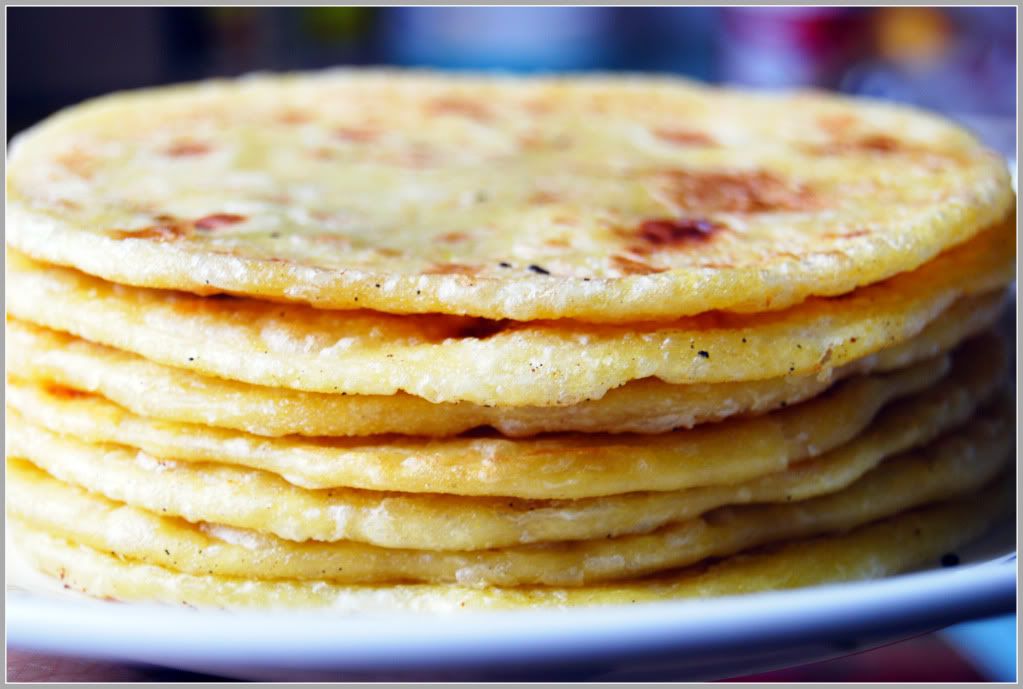
Puran poli is one very popular Indian festival sweet dish. Its basically a soft dough filled with a sweet lentil mixture , rolled and fried. Puran poli usually uses jaggery as the sweetner but here i've used sweetened condensed milk which gives a lovely milky sweetness.
I made this dish for the diwali festival, a festival of lights. I also wish all my Indian readers a very happy and safe diwali.
Now for the recipe you'll need..

200 gms All purpose flour (maida)
3 tbsps fine semolina
1 tbsp rice flour
pinch of turmeric
pinch of salt
200gms (2 cups) raw chana dal
1 tin (400gms) Sweetened condensed milk (milkmaid)
water for dough
Directions:
For the puran mixture:
Wash and cook chana dal in a pressure cooker with 4 cups of water. Give 4 whistles and let the steam escape before you take off the lid. Let it cool. Drain the water completely.
Grind the chana cal to make a thick paste. Transfer the paste to a non-stick pan. Add the sweetened condensed milk and cardamom powder and cook till the mixture starts leaving the sides of the pan. Keep aside. This is the puran mixture.
To make the dough:
Combine all purpose flour, semolina, rice flour, turmeric, a pinch of salt with enough water to form a soft pliable dough.
Divide the dough into 10 equal parts. Also divide the puran mixture into 10 equal parts.
Using a rolling pin, roll the dough into a small disc, stuff each rolled disc with the puran mixture, enclose the stuffing with the dough from all the sides and flatten it lightly with both your palm. Now place this stuffed dough on a lightly floured work surface and roll it again to form a little larger discs. Use as much little extra flour required for rolling. This helps the dough to move easily on the counter.
Preheat a non stick pan or tawa. Place each rolled disc one at a time and fry each side by brushing little ghee or oil on both the sides till golden brown spots are formed on the surface. Follow the same with all the remaining dough and puran stuffing.
Serve hot or warm with a spoonful of ghee on top.
Tuesday, October 13, 2009
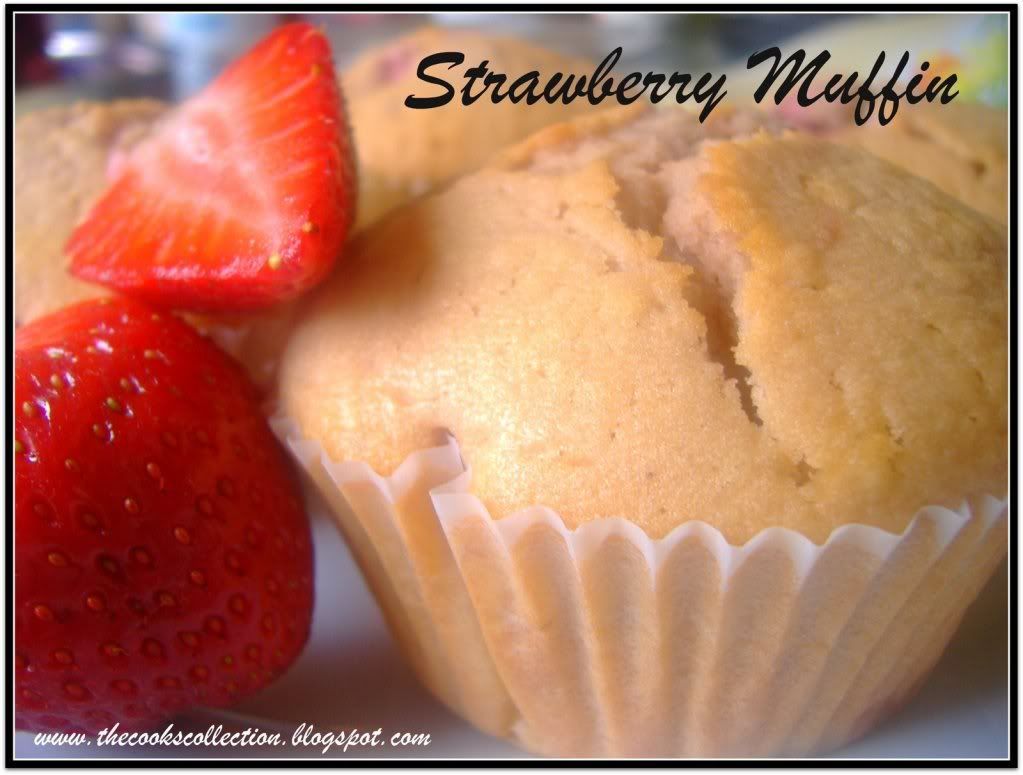
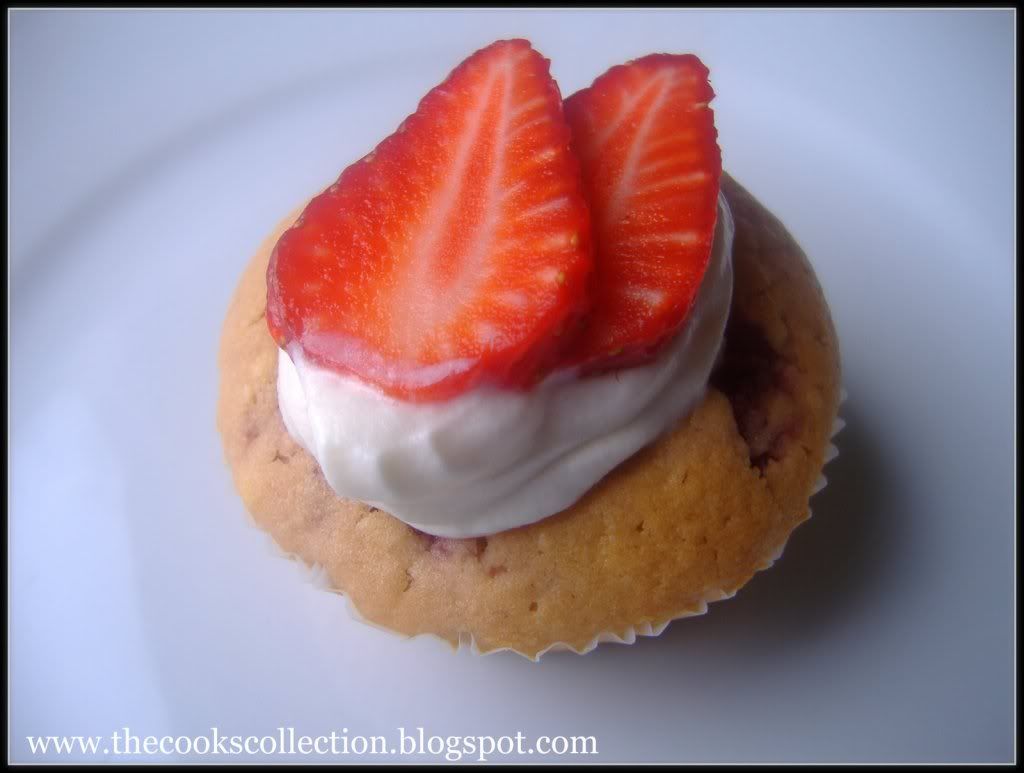
Strawberry Muffins With Cream
Muffins belongs to the 'quick bread' family as indeed it takes hardly few minutes to prepare and bake and the results are yummy and tasty. Strawberry muffins are the ultimate thing to bake when you have strawberry's left out in the kitchen. These muffins are moist, not too much of sweet and can serve as a great treat for your guests or for yourself. Any berry, be it, blueberry or raspberry can be substituted for strawberry's. These studded berry's with every bite give a lovely tangy taste with the cake like crumble. Hmm.. it tastes yummy!
Ingredients:
Oil or melted butter to grease the muffin pans or use muffin papers
150 gm Strawberry's (around 6 medium sized), finely chopped
280 gm All purpose Flour
3 tsp Baking Powder
1/8 tsp Salt
120 gm Sugar
2 large Eggs
250 gm Whipping Cream
6 Tbsp Sunflower oil OR 90 gm Butter, melted and cooled
5 drops Vanilla Aroma
To decorate:
125 gms Creme double
12 small strawberry's
Procedure:
Preheat the oven to 200 deg C. Position rack in center of oven. Line the muffin pan with paper liners or grease with butter or a vegetable spray. Set aside.
In another large bowl, sieve the flour, baking powder, salt and set aside. Stir in the strawberry's and sugar.
Lightly beat the eggs in another bowl. Add in the whipping cream, sunflower oil and vanilla aroma.
Make a well in the center of the dry ingredients. Add the wet ingredients to the dry ingredients and stir only until the ingredients are just combined. Do not over mix the batter or the muffins might turn tough.
Fill each muffin cup about two thirds full of batter, using two spoons or an ice cream scoop.
Bake for 20 minutes or until the muffins have turned golden brown and spring back with a touch.
Let the muffins stay in the pan for 5 minutes. Remove and cool completely on a wire rack.
Whip creme double until stiff with a little confectioners sugar if desired and spread it on the cooled muffins and decorate with the whole or sliced strawberry's.
Refrigerate until u serve. Serve chilled or at room temperature without the cream.
Wednesday, October 7, 2009
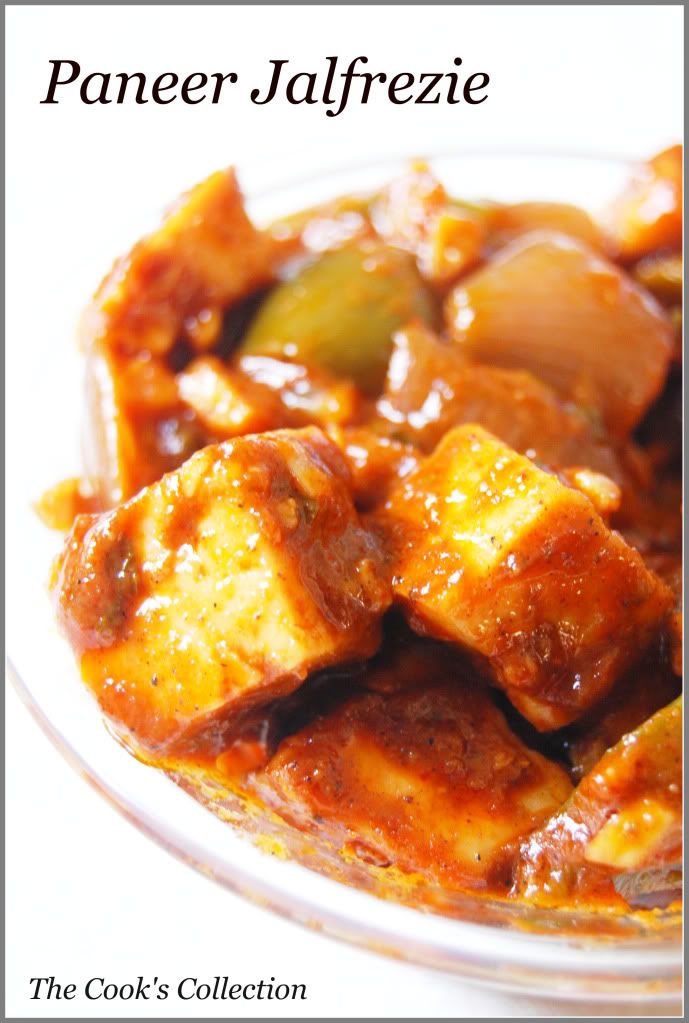
Paneer Jalfrezie (Creamy Cheese with Red Onion and Bell Peppers)
The word Jalfrezie, a coined term that originated in Indian restaurents catering to the English, has come to mean many things. Some associate it with "chiles-hot," while to others it indicates the inclusion of bell peppers and onions as key ingredient that contribute to the curry's gusto. So this recipe is an old English favorite curry.
Serves 6
Ingredients:
2 tbsps oil
1 large red onion, cut into 1-inch cubes
1 medium-size green bell pepper, stemmed, seeded, and cut into 1-inch pieces
6 large cloves garlic, finely chopped
2 tbsps finely chopped fresh ginger
1/2 cup tomato sauce, canned or homemade
1 tbsp Balti Masala
1 tsp salt
2 tbsps finely chopped fresh cilantro leaves and tender stems
8 ounce Paneer, cut into 1-inch cubes
Directions:
Heat the oil in a wok, or a large skillet over medium-high heat. Add the onion, bell pepper, garlic, and ginger, and stir fry until the onion is light brown around the edges, 3 to 5 minutes.
Stir in the tomato sauce, balti masala, and salt. Reduce the heat to medium and simmer, uncovered, stirring occasionally, until a bit of oil starts to form on the surface and sround the edges, 5 to 8 minutes.
Stir in 1 cup of water and the cilantro. (The water thins the curry to accommodate the cheese.)
Gently fold in the paneer, raise the heat to medium-high, and simmer, uncovered, stirring every so often, until the sauce starts to thicken, 10-12 minutes. Then serve.
Balti Masala (Fennel-Flavored Toasted Spice Blend)
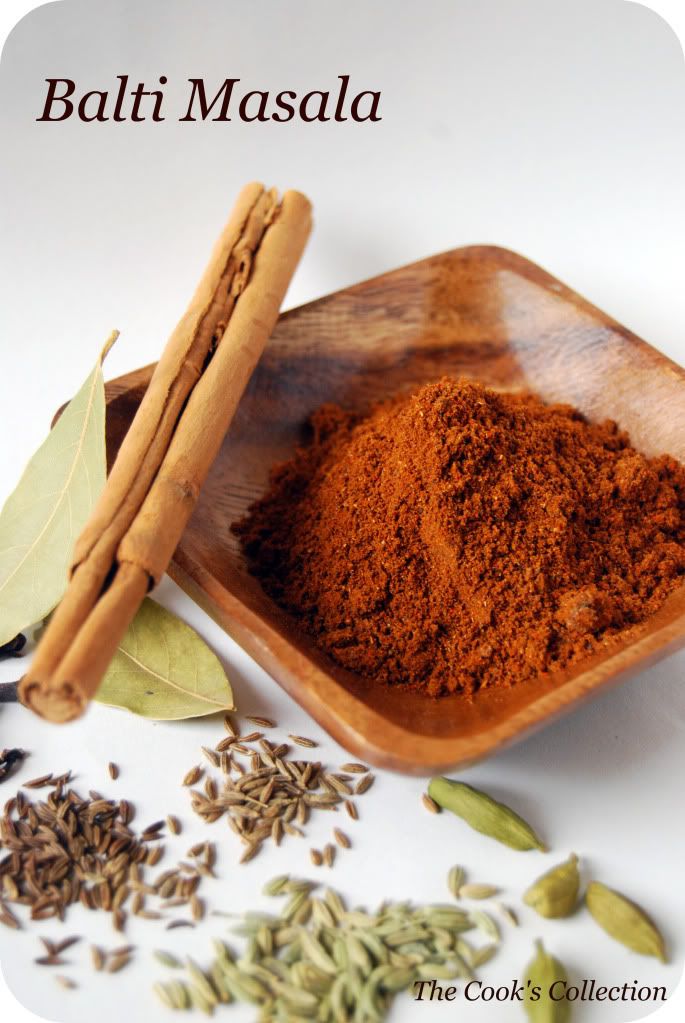
A Hindi/Urdu word for "bucket" is balti and here it's not a vessel for cooking. This is a coined terminology that originated with an enterprising Pakistani restaurant owner in Birmingham, England, and ended up back in restaurants in India. The food is actually cooked and served in a karhai, not a bucket: a karhai is the Indian version of the wok. Wherever it came from, some of the spices used in this blend are typical in Pakistani cooking. This blend can also be substituted for Kashmiri garam masala for equally satisfying results.
Makes 1/3 cup
Ingredients:
2 tsps fennel seeds
2 tsps coriander seeds
1 tsp cumin seeds
1 tsp mustard seeds
1/2 tsp whole cloves
1/2 tsp nigella seeds
3 fresh or dried bay leaves
2 cinnamon sticks (each 30inches long), broken into small pieces
2 tsp cayenne (ground red pepper) or can substitute red chilli powder
1/2 tsp ground nutmeg
Directions:
Preheat a small skillet over medium-high heat. Add all the whole spices (reserving the cayenne and nutmeg), and toast, shaking the skillet every few seconds, until the fennel, coriander, and cumin turn reddish brown, the mustard, cloves and bay leaves appear brittle and crinkly, and the mixture is highly fragrant, 1 to2 minutes. (The nigella will not change color.)
Immediately transfer the nutty smelling spices to a plate to cool. (The longer they sit in the hot skillet, the more likely it is that they will burn, making them bitter and unpalatable.) Once they are cool to the touch, place them in a spice grinder or coffee grinder, and grind until the texture resembles ground black pepper. (If you don't allow the spice to cool, the ground blend will acquire unwanted moisture from the heat making the final blend slightly "Cakey".) The ground blend will be a deep reddish brown and the aroma will be sweet and complex, very different from those of the pre-toasted or post-toasted whole spices. Stir in the cayenne and nutmeg.
Store the mix in a tightly sealed container, away from excess light, heat and humidity, for up to 2 months. (Also refrigerating the blend adversely affects its flavors.)
Wednesday, September 30, 2009
Cantuccini
All Italian cookies are called biscotti, but these are what we think of as classic biscotti. Twice baked cookies, they are first baked in a log shape, then sliced and baked again until they are very dry and crunchy. (Because they contain no butter or other fat, except that contained in the eggs, they can bake to a formidable state of crunchiness.) The techniques used to make can't-stop-eating-them biscotti are, like the cookies themselves, classic.
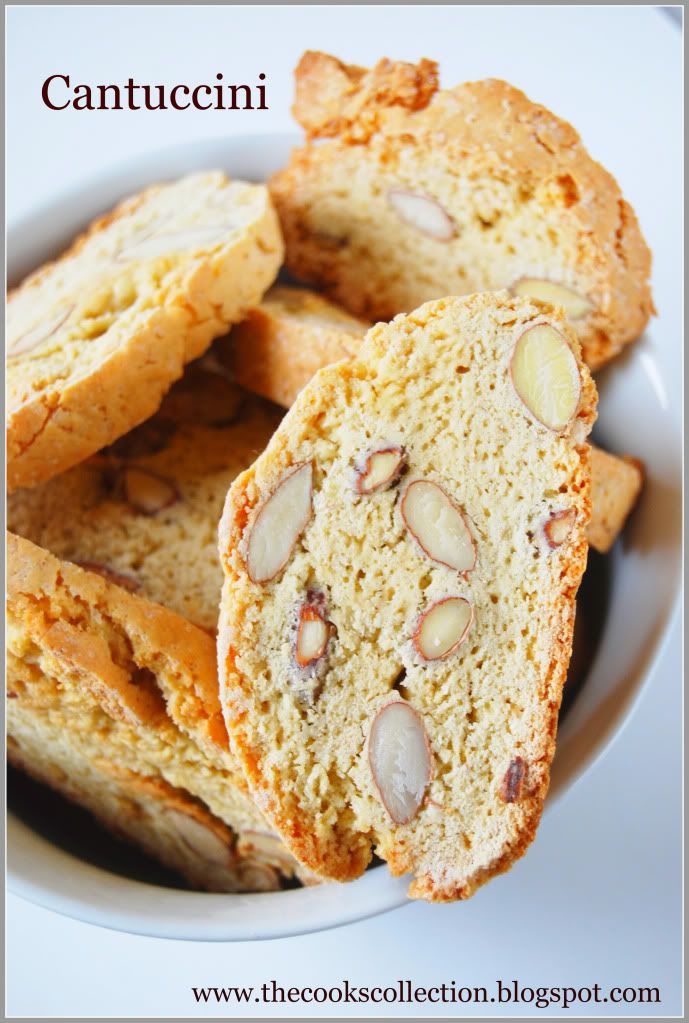
Recipe from Nick Malgiri. Adapted from the book "Baking with Julia".
Ingredients:
2 cups all-purpose flour
3/4 cup sugar
2 tsps baking powder
1/2 tsp cinnamon
1/4 tsp salt
1 1/2 cups unblanched whole almonds
3 large eggs
2 tsps pure vanilla extract
Directions:
Position a rack in the center of the oven and preheat the oven to 350 deg F(180 deg C). Line a baking sheet with parchment and keep aside.
Put the sugar, flour, baking powder, cinnamon and salt in a large bowl and stir with a rubber spatula to mix. Stir in the almonds.
Whisk the eggs and vanilla together in a small bowl, then stir them into the flour mixture. The dough may seem dry at this point but it will come together as it is kneaded.
Turn the dough out onto a lightly floured work surface and knead, folding it over onto itself until it is smooth, 1 to 2 minutes. Divide the dough in half and shape each half into 12-inch-long log. Gently press down on the logs to flatten them until they are about 2 inches wide and 1 inch high. Transfer them to the prepared pan.
First baking
Bake the logs for about 30 minutes, or until they are slightly risen and firm to touch. Slide the logs, parchment paper and all, off the baking sheet and onto a cooling rack. The logs must be completely cool before you continue with the recipe. Since they will take about 30 minutes to cool, you can either turn the oven off or leave it on for the next step. You can bake the biscotti up to this point several days ahead. Wrap the logs well in plastic and continue when its convenient.
Second baking
When the logs have cooled completely, preheat the oven to 350 deg F(180 deg C), if necessary. Line 2 baking sheets with parchment paper.
Working with a sharp serrated knife, cut the cooked logs diagonally into 1/4-inch-thick slices. Place the sliced cookies cut side down on the pans and bake for 10 -15 minutes, or until the biscotti are crisp and golden. Cool on the pans.
Storing
These biscotti will keep for up to a month in an airtight tin or plastic container.
Sunday, September 27, 2009
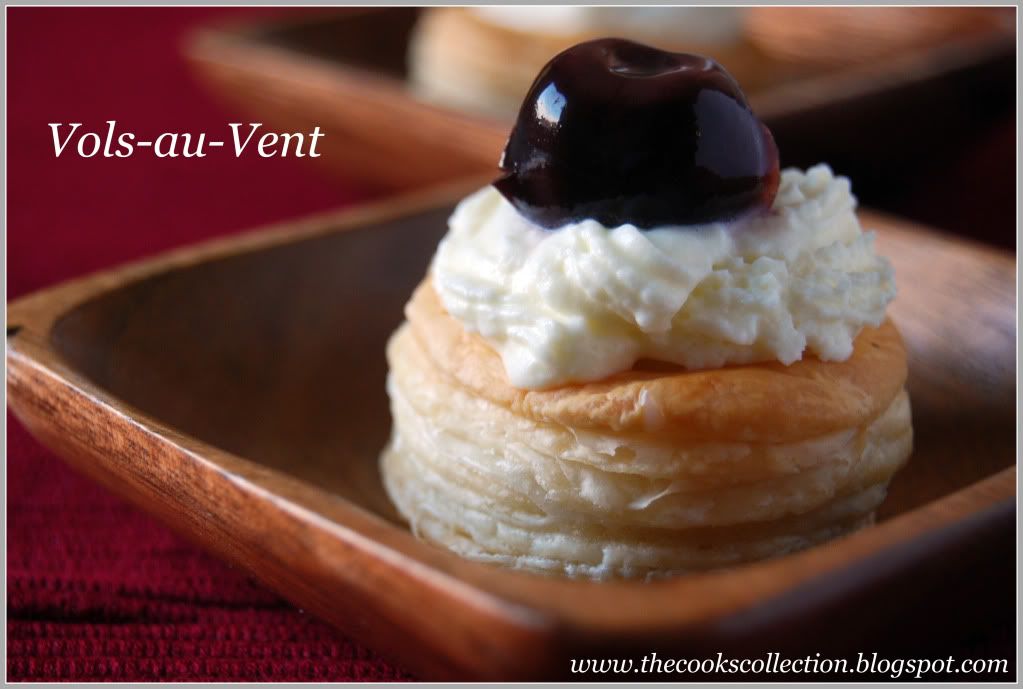
Homemade Puff Pastry and Vol-au-Vent
Daring Bakers September 2009 Challenge
The September 2009 Daring Bakers' challenge was hosted by Steph of A Whisk and a Spoon. She chose the French treat, Vols-au-Vent based on the Puff Pastry recipe by Michel Richard from the cookbook Baking With Julia by Dorie Greenspan.
Vol-au-vent filled with pastry cream and topped with sweet whipped cream and sweet cherry. Hmm.. Yummy!!
Michel Richard’s Puff Pastry Dough
From: Baking with Julia by Dorie Greenspan
Yield: 2-1/2 pounds dough
Puff pastry is a quintessential laminated dough. A simple dough is wrapped around a block of butter, then rolled, folded and turned six times, so that when the final dough is baked, it puffs mightily and forms almost one thousand seemingly laminated layers. Puff pastry is called mille feuilles, or "a thousand leaves" in French, but thats an exaggeration. In fact, there are only 944 layers of pastry, seperated by 963 layers of butter, but no matter. This is still the queen of all pastries, the one that, once mastered, entitles you to whatever bragging rights you wish to claim.
Steph’s note:

-Chill early and often - keep the pastry cold and you'll keep the layers.
-Be neat - fold the dough evenly.
-Stay away from the ends - Don't roll over the ends of the pastry or you'll glue the layers together.
-Take your time - don't skimp on the number of turns or the chilling periods.
Ingredients:
2-1/2 cups (12.2 oz/ 354 g) unbleached all-purpose flour
1-1/4 cups (5.0 oz/ 142 g) cake flour (i used 1 cup APF + 1/4 cup cornstarch)
1 tbsp. salt (you can cut this by half for a less salty dough or for sweet preparations)
1-1/4 cups (10 fl oz/ 300 ml) ice water
1 pound (4 sticks/ 16 oz/ 454 g) very cold unsalted butter
plus extra flour for dusting work surface
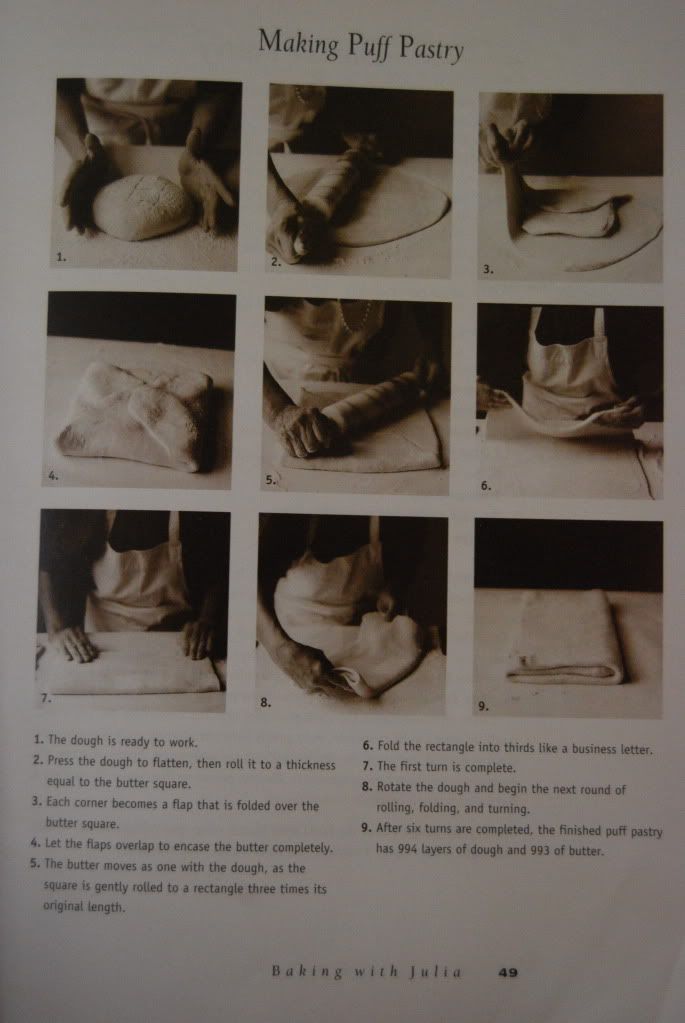 Extracted From the book "Baking With Julia".
Mixing the Dough:
Check the capacity of your food processor before you start. If it cannot hold the full quantity of ingredients, make the dough into two batches and combine them.
Put the all-purpose flour, cake flour, and salt in the work bowl of a food processor fitted with a metal blade and pulse a couple of times just to mix. Add the water all at once, pulsing until the dough forms a ball on the blade. The dough will be very moist and pliable and will hold together when squeezed between your fingers. (Actually, it will feel like Play-Doh.)
Remove the dough from the machine, form it into a ball, with a small sharp knife, slash the top in a tic-tac-toe pattern. Wrap the dough in a damp towel and refrigerate for about 5 minutes.
Meanwhile, place the butter between 2 sheets of plastic wrap and beat it with a rolling pin until it flattens into a square that's about 1" thick. Take care that the butter remains cool and firm: if it has softened or become oily, chill it before continuing.
Incorporating the Butter:
Unwrap the dough and place it on a work surface dusted with all-purpose flour (A cool piece of marble is the ideal surface for puff pastry) with your rolling pin (preferably a French rolling pin without handles), press on the dough to flatten it and then roll it into a 10" square. Keep the top and bottom of the dough well floured to prevent sticking and lift the dough and move it around frequently. Starting from the center of the square, roll out over each corner to create a thick center pad with "ears," or flaps.
Place the cold butter in the middle of the dough and fold the ears over the butter, stretching them as needed so that they overlap slightly and encase the butter completely. (If you have to stretch the dough, stretch it from all over; don't just pull the ends) you should now have a package that is 8" square.
To make great puff pastry, it is important to keep the dough cold at all times. There are specified times for chilling the dough, but if your room is warm, or you work slowly, or you find that for no particular reason the butter starts to ooze out of the pastry, cover the dough with plastic wrap and refrigerate it . You can stop at any point in the process and continue at your convenience or when the dough is properly chilled.
Making the Turns:
Gently but firmly press the rolling pin against the top and bottom edges of the square (this will help keep it square). Then, keeping the work surface and the top of the dough well floured to prevent sticking, roll the dough into a rectangle that is three times as long as the square you started with, about 24" (don't worry about the width of the rectangle: if you get the 24", everything else will work itself out.) With this first roll, it is particularly important that the butter be rolled evenly along the length and width of the rectangle; check when you start rolling that the butter is moving along well, and roll a bit harder or more evenly, if necessary, to get a smooth, even dough-butter sandwich (use your arm-strength!).
With a pastry brush, brush off the excess flour from the top of the dough, and fold the rectangle up from the bottom and down from the top in thirds, like a business letter, brushing off the excess flour. You have completed one turn.
Rotate the dough so that the closed fold is to your left, like the spine of a book. Repeat the rolling and folding process, rolling the dough to a length of 24" and then folding it in thirds. This is the second turn.
Chilling the Dough:
If the dough is still cool and no butter is oozing out, you can give the dough another two turns now. If the condition of the dough is iffy, wrap it in plastic wrap and refrigerate it for at least 30 minutes. Each time you refrigerate the dough, mark the number of turns you've completed by indenting the dough with your fingertips. It is best to refrigerate the dough for 30 to 60 minutes between each set of two turns.
The total number of turns needed is six. If you prefer, you can give the dough just four turns now, chill it overnight, and do the last two turns the next day. Puff pastry is extremely flexible in this regard. However, no matter how you arrange your schedule, you should plan to chill the dough for at least an hour before cutting or shaping it.
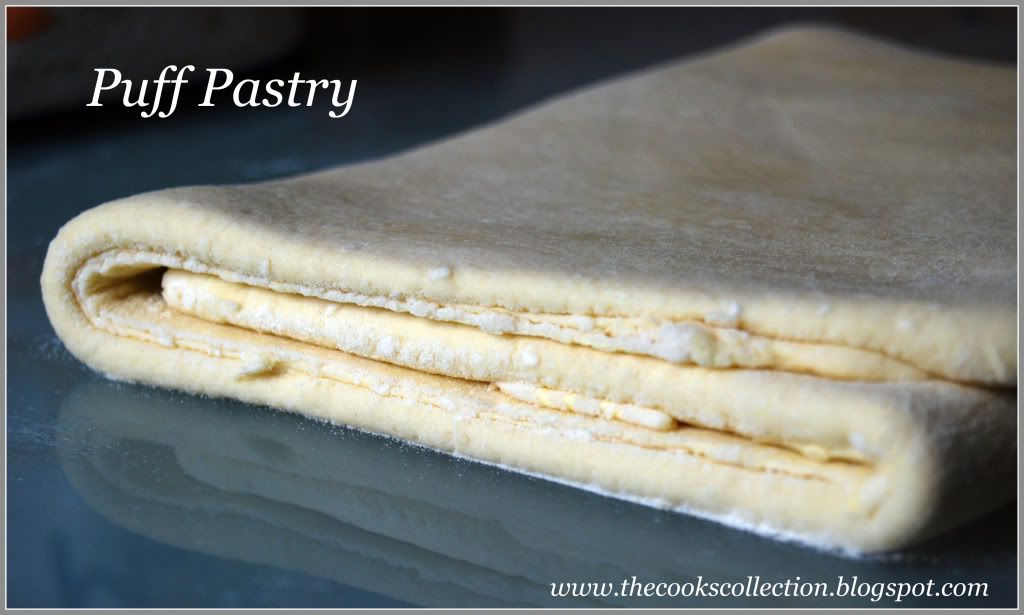
Note on Freezing Puff Pastry
Although puff pastry can be chilled or frozen at any stage, it is really most convenient to give the puff pastry a full six turns, roll it out into a flat sheet, chill it on a parchment-lined baking sheet, and then, when it is cold, wrap it for the freezer. Rolling the dough into a sheet means it will defrost quickly and won't have to be rolled much before you cut and bake it. Thaw the dough, still wrapped, in the refrigerator.
Steph’s extra tips:
-While this is not included in the original recipe we are using (and I did not do this in my own trials), many puff pastry recipes use a teaspoon or two of white vinegar or lemon juice, added to the ice water, in the détrempe dough. This adds acidity, which relaxes the gluten in the dough by breaking down the proteins, making rolling easier. You are welcome to try this if you wish.
-Keep things cool by using the refrigerator as your friend! If you see any butter starting to leak through the dough during the turning process, rub a little flour on the exposed dough and chill straight away. Although you should certainly chill the dough for 30 to 60 minutes between each set of two turns, if you feel the dough getting to soft or hard to work with at any point, pop in the fridge for a rest.
-Not to sound contradictory, but if you chill your paton longer than the recommended time between turns, the butter can firm up too much. If this seems to be the case, I advise letting it sit at room temperature for 5-10 minutes to give it a chance to soften before proceeding to roll. You don't want the hard butter to separate into chuncks or break through the dough...you want it to roll evenly, in a continuous layer.
-Roll the puff pastry gently but firmly, and don’t roll your pin over the edges, which will prevent them from rising properly. Don't roll your puff thinner than about about 1/8 to 1/4-inch (3-6 mm) thick, or you will not get the rise you are looking for.
-Try to keep “neat” edges and corners during the rolling and turning process, so the layers are properly aligned. Give the edges of the paton a scooch with your rolling pin or a bench scraper to keep straight edges and 90-degree corners.
-Brush off excess flour before turning dough and after rolling.
-Make clean cuts. Don’t drag your knife through the puff or twist your cutters too much, which can inhibit rise.
-When egg washing puff pastry, try not to let extra egg wash drip down the cut edges, which can also inhibit rise.
-Extra puff pastry dough freezes beautifully. It’s best to roll it into a sheet about 1/8 to 1/4-inch thick (similar to store-bought puff) and freeze firm on a lined baking sheet. Then you can easily wrap the sheet in plastic, then foil (and if you have a sealable plastic bag big enough, place the wrapped dough inside) and return to the freezer for up to a few months. Defrost in the refrigerator when ready to use.
-You can also freeze well-wrapped, unbaked cut and shaped puff pastry (i.e., unbaked vols-au-vent shells). Bake from frozen, without thawing first.
-Homemade puff pastry is precious stuff, so save any clean scraps. Stack or overlap them, rather than balling them up, to help keep the integrity of the layers. Then give them a singe “turn” and gently re-roll. Scrap puff can be used for applications where a super-high rise is not necessary (such as palmiers, cheese straws, napoleons, or even the bottom bases for your vols-au-vent)
Forming and Baking the Vols-au-Vent
Yield: 1/3 of the puff pastry recipe below will yield about 8-10 1.5” vols-au-vent or 4 4” vols-au-vent
-egg wash (1 egg or yolk beaten with a small amount of water)
-your filling of choice
Line a baking sheet with parchment and set aside.
Using a knife or metal bench scraper, divided your chilled puff pastry dough into three equal pieces. Work with one piece of the dough, and leave the rest wrapped and chilled. (If you are looking to make more vols-au-vent than the yield stated above, you can roll and cut the remaining two pieces of dough as well…if not, then leave refrigerated for the time being or prepare it for longer-term freezer storage. See the “Tips” section below for more storage info.)
On a lightly floured surface, roll the piece of dough into a rectangle about 1/8 to 1/4-inch (3-6 mm) thick. Transfer it to the baking sheet and refrigerate for about 10 minutes before proceeding with the cutting.
(This assumes you will be using round cutters, but if you do not have them, it is possible to cut square vols-au-vents using a sharp chef’s knife.) For smaller, hors d'oeuvre sized vols-au-vent, use a 1.5” round cutter to cut out 8-10 circles. For larger sized vols-au-vent, fit for a main course or dessert, use a 4” cutter to cut out about 4 circles. Make clean, sharp cuts and try not to twist your cutters back and forth or drag your knife through the dough. Half of these rounds will be for the bases, and the other half will be for the sides. (Save any scrap by stacking—not wadding up—the pieces…they can be re-rolled and used if you need extra dough. If you do need to re-roll scrap to get enough disks, be sure to use any rounds cut from it for the bases, not the ring-shaped sides.)
Using a ¾-inch cutter for small vols-au-vent, or a 2- to 2.5-inch round cutter for large, cut centers from half of the rounds to make rings. These rings will become the sides of the vols-au-vent, while the solid disks will be the bottoms. You can either save the center cut-outs to bake off as little “caps” for you vols-au-vent, or put them in the scrap pile.
Dock the solid bottom rounds with a fork (prick them lightly, making sure not to go all the way through the pastry) and lightly brush them with egg wash. Place the rings directly on top of the bottom rounds and very lightly press them to adhere. Brush the top rings lightly with egg wash, trying not to drip any down the sides (which may inhibit rise). If you are using the little “caps,” dock and egg wash them as well.
Refrigerate the assembled vols-au-vent on the lined baking sheet while you pre-heat the oven to 400ºF (200ºC). (You could also cover and refrigerate them for a few hours at this point.)
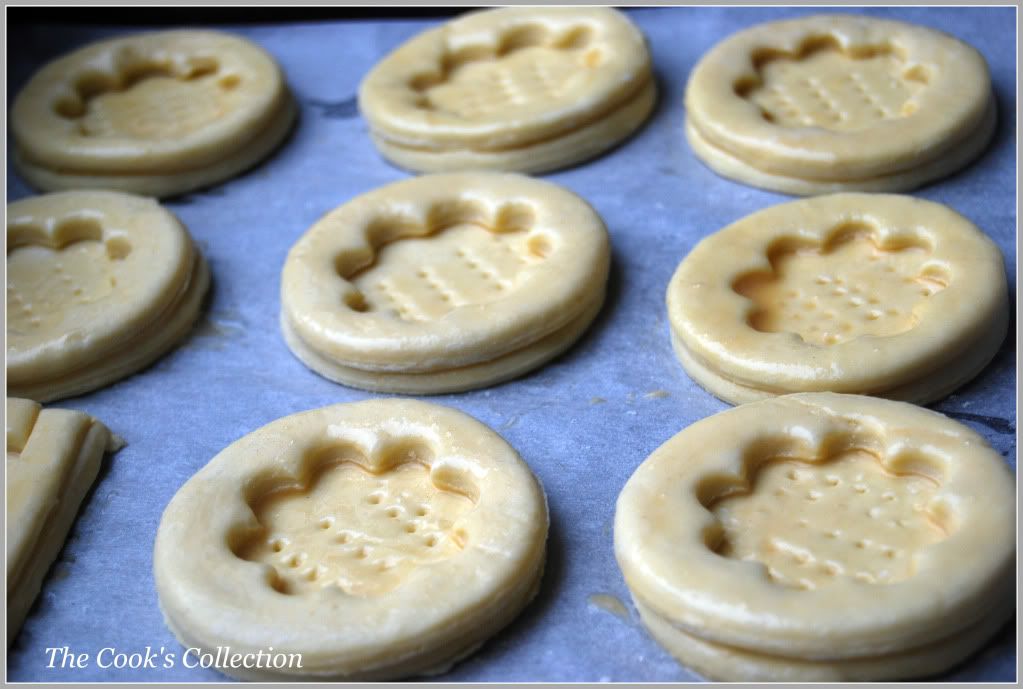
Once the oven is heated, remove the sheet from the refrigerator and place a silicon baking mat (preferred because of its weight) or another sheet of parchment over top of the shells. This will help them rise evenly. Bake the shells until they have risen and begin to brown, about 10-15 minutes depending on their size. Reduce the oven temperature to 350ºF (180ºC), and remove the silicon mat or parchment sheet from the top of the vols-au-vent. If the centers have risen up inside the vols-au-vent, you can gently press them down. Continue baking (with no sheet on top) until the layers are golden, about 15-20 minutes more. (If you are baking the center “caps” they will likely be finished well ahead of the shells, so keep an eye on them and remove them from the oven when browned.)
Remove to a rack to cool. Cool to room temperature for cold fillings or to warm for hot fillings.

Fill and serve.
*For additional rise on the larger-sized vols-au-vents, you can stack one or two additional ring layers on top of each other (using egg wash to "glue"). This will give higher sides to larger vols-au-vents, but is not advisable for the smaller ones, whose bases may not be large enough to support the extra weight.
*Although they are at their best filled and eaten soon after baking, baked vols-au-vent shells can be stored airtight for a day.
*Shaped, unbaked vols-au-vent can be wrapped and frozen for up to a month (bake from frozen, egg-washing them first).
Pastry Cream
Pastry cream is also known as Crème Pâtissière, pastry cream is a thickened custard used to fill sweet pastry cases and choux buns.
Source: Fresh Baked
Ingredients:
300ml milk
1 vanilla pod, split
3 egg yolks
50 gm caster sugar
2 tbsps cornflour
2 tbsps plain flour
15 gm unsalted butter
Method:
Put the milk in a saucepan and scrap in the seeds from the vanilla pod. Bring the milk slowly to the boil and remove from the heat.
In a bowl, whisk together the egg yolks, and sugar and then whisk in the cornflour and flour until the mixture is smooth.
Whisk in the hot milk and then return the mixture to the pan. Heat gently, stirring constantly until the mixture just starts to boil. Simmer for 1 minute, remove from the heat and whisk in the butter. Cover the surface with clingfilm and set aside to cool completely. Use as required.
Note:
It is really important to stir the mixture constantly as it cooks so that it thickens but doesn't become lumpy. If this does happen, put the pastry cream in a food processor and process until it is smooth. Always cover the surface of the cream with clingfilm as it cools to prevent a skin forming.
Tuesday, September 22, 2009
Creamy Apple Pumpkin Soup
This is one of the wonderful soup I've ever tasted. It is mild, nutritious and has the perfect blend of flavors. The addition of apple gives a nice sweetness. And the texture is so soft and creamy. This is perfect before any meal.
Source: Myrecipes
Ingredients:
2 tsps Butter or Margarine or any unflavored oil
1 cup chopped onion
3/4 tsp dried rubbed sage
1/2 tsp curry powder
1/4 tsp ground nutmeg
3 tbsps all-purpose flour
500 ml vegetable stock or water
1 tbsp tomato paste
1 tsp salt
3 cups deseeded, peeled & cubed fresh pumpkin (1 pound)
1 cup sweet cooking apple, chopped
1/4 cup milk
Preparation:
Melt butter in a big vessel over medium heat. Add onion; sauté 3 minutes. Add sage, curry powder, and nutmeg; cook 30 seconds. Stir in flour; cook 30 seconds. Add broth, tomato paste, and salt, stirring well with a whisk. Stir in pumpkin and apple; bring to a boil. Cover, reduce heat, and simmer 25 minutes or until pumpkin is tender, stirring occasionally. Remove from heat; cool slightly.
Place mixture in a blender or food processor; process until smooth. Return mixture to to the vessel; add milk. Cook until thoroughly heated. Garnish with sage sprigs, if desired.

Tuesday, September 15, 2009
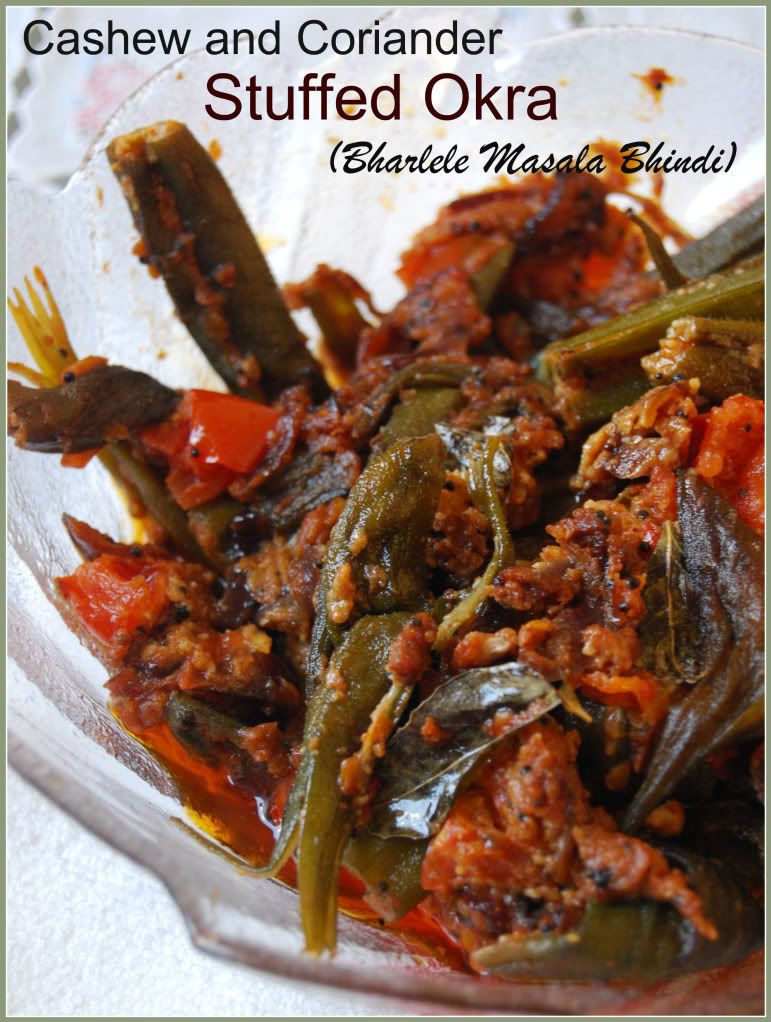
Bharlele Masala Bhindi (Cashew and Coriander Stuffed Okra)
This one has to be the best Okra recipe i have ever had. I used to avoid using this vegetable as i could not get rid of the sticky thing in it while cooking. But then i found this recipe in the book 660 curries written by Raghavan Iyer. I got this book as a gift from my hubby on my birthday and i've never looked back. I've been trying out all the recipes one by one and not one recipe has disappointed me. So look forward for more curry recipes from this book on this blog. The curries are finger licking and i'm glad i'm able to cook such wonderful curries for my family. I recommend all the Indian curries lovers to buy this book.
This curry Bharlele masala bhindi has got the perfect blend of spices and goes wonderfully with Indian flat breads as its little dry. Its got a little more amount of oil but this is what gives the curry a wonderful texture. But you can try reducing the amount of oil a little bit. The red onions give a lovely sweetness and the tomato which is added at the end of the process gives a tiny tang to the curry. So here goes the recipe..
Serves 4
Ingredients:
1 pound (454 gms) Fresh Okra, rinsed and thoroughly dried
1/2 cup raw (unroasted) Cashew nuts , ground (powdered)
2 tsps Degi mirch red chilli powder
2 tsps coriander powder
1 tsp salt
1 tsp cumin powder
1/4 cup canola oil (or vegetable/ sunflower will do)
1 tsp mustard seeds
1 small red onion, cut in half lengthwise and thinly sliced
12-15 curry leaves
1 large tomato, cut into 1-inch cubes
Directions:
Trim the caps off the Okra without cutting into the pods. Then form a small cavity in each okra by cutting a slit down three quarters of the length, making the slit about 1/4 inch deep. Be careful not to cut all the way through the pod. This cavity will hold the stuffing.
Combine the cashews, chilli powder, coriander powder, cumin powder and salt in a small bowl, and mix well.
Using your fingers, stuff each okra pod with approximately 1/2 teaspoon of this spice blend. (You can safely stuff the okra a day ahead. Cover with plastic wrap and refrigerate.) There shouldn't be any blend left over, but if there is, either sprinkle it over the stuffed okra or save it, stored in a jar or a self-seal plastic bag, on a cool pantry shelf for future use; it will keep for up to 2 months.
Heat the oil in a large skillet over medium-high heat. Add the mustard seeds, cover the skillet, and cook until the seeds have stopped popping (not unlike popcorn), about 30 seconds. Stir in the onion, and add the okra along with the curry leaves. Lower the heat to medium, and roast the mixture, uncovered, occasionally stirring gently, until the onion softens and the now olive-green okra is partially tender, 15 to 20 minutes.
Stir in the tomato, cover the skillet, and simmer, stirring occasionally, until the okra is tender, 10 to 15 minutes. Then serve.
Tips:
* To grind the cashews powder-fine, use a spice grinder or a blender. If some kernels refuse to pulverize, empty some of the ground nuts into a bowl, freeing up space for the blades to do their thing.
* When you rely on the juiciness of a tomato to provide essential moisture to a curry, it had better be perfectly ripe, bursting with sweet succulence- none of those waxy, pale pink specimens that remain firm even after squatting on the kitchen counter for days. If you cant find that just-right tomato, use 1 can(14.5 ounces) diced tomatoes, juice and all, instead.


